Soulful Collard Greens: The Secret to Silky, Flavorful Tenderness
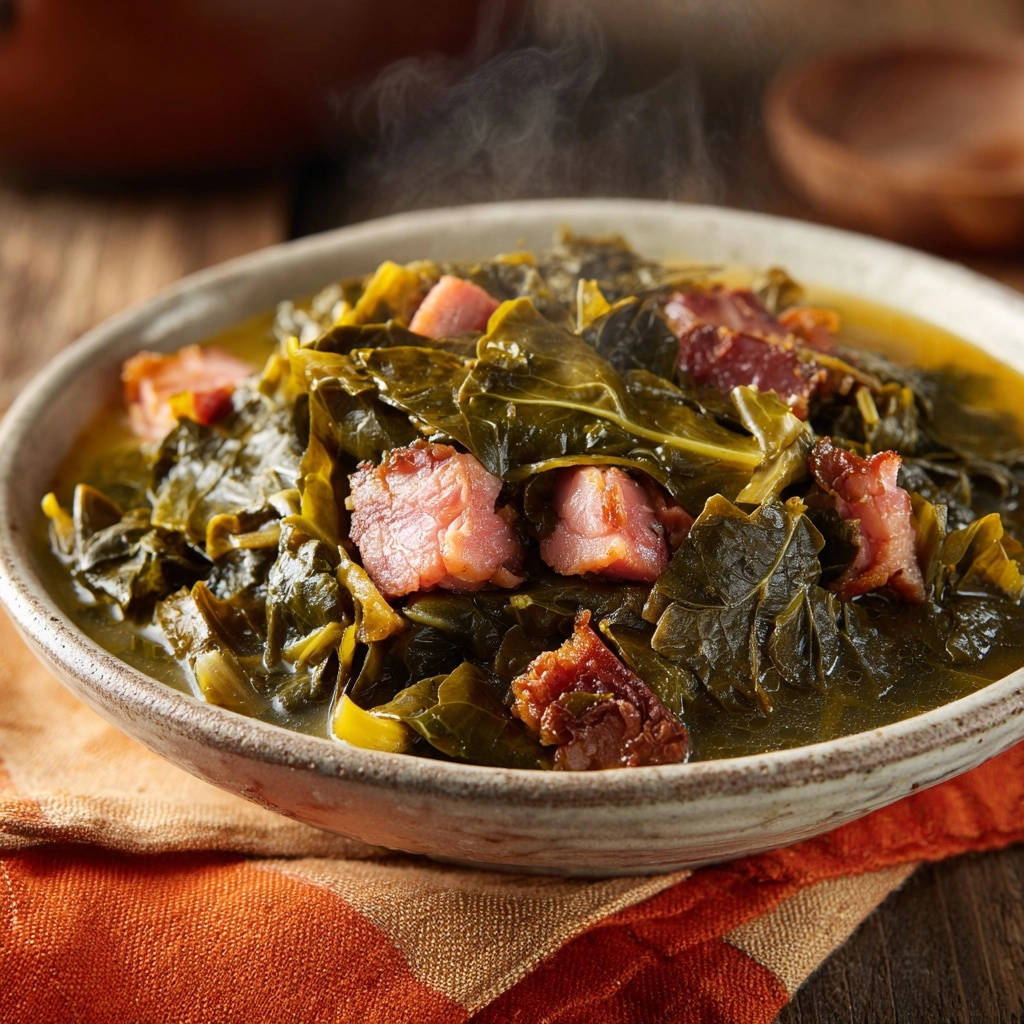
For years, I sought that elusive perfect pot of collard greens – tender, deeply flavored, and utterly free from bitterness. It’s a common culinary quest to achieve truly Soulful Collard Greens, a dish that embodies comfort and tradition without the tough texture or harsh bite.
This recipe isn’t just another set of instructions; it’s the culmination of countless trials to deliver greens that are consistently silky smooth, bursting with savory goodness, and delightful in every spoonful.
Why This Soulful Collard Greens Recipe Stands Apart
Mastering Tenderness: No More Tough Greens
Our method focuses on extended, gentle simmering, which systematically breaks down the fibrous collard leaves.
This long, slow cook time ensures your greens are never tough, but instead melt in your mouth with an irresistible silky texture.
The Secret to Bitterness-Free Flavor
Thorough cleaning, combined with a crucial balancing act of acidity and a hint of sweetness, neutralizes any inherent bitterness in the collard greens.
The apple cider vinegar brightens the flavor profile, while a touch of sugar mellows the natural earthiness, creating a harmonious taste.
Rich Pot Liquor: The Soul of the Dish
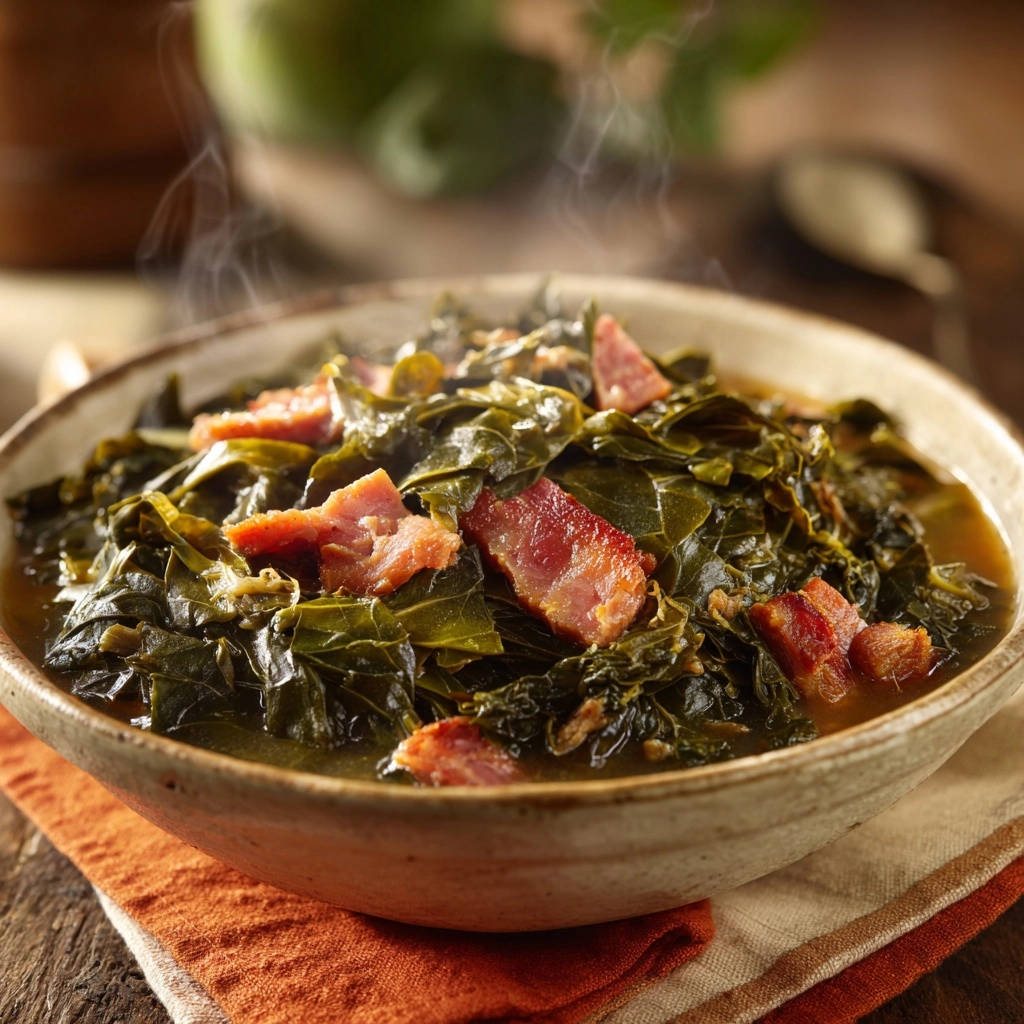
The savory liquid, or “pot liquor,” is the heart of any great collard greens recipe.
Here, the smoked turkey and aromatics infuse the broth with an unparalleled depth, making every sip as rich and satisfying as the greens themselves.
The Building Blocks of Flavor: Essential Ingredients
The Star of the Show: Fresh Collard Greens
Select firm, vibrant green leaves without yellowing or blemishes.
Thorough cleaning is paramount; it removes grit and minimizes bitterness, setting the foundation for truly Soulful Collard Greens.
Smoky Foundation: Turkey Wings or Legs
Smoked turkey imparts a deep, rich, and umami-packed flavor that permeates the entire dish.
It’s a healthier alternative to traditional ham hocks, offering equally profound smokiness without the pork.
Aromatic Anchors: Yellow Onion & Garlic
These humble ingredients are sautéed to create the foundational aromatic base, releasing sweet and pungent notes.
They contribute significantly to the overall savory depth of the pot liquor.
The Balancing Act: Broth, Vinegar & Sugar
Chicken broth provides the essential cooking liquid and adds another layer of savory richness.
Apple cider vinegar introduces a bright acidity that cuts through richness and neutralizes bitterness.
A touch of sugar is optional but often recommended to subtly balance the vinegar and collards’ natural flavors.
Seasoning Staples: Salt, Pepper & Red Pepper Flakes
Salt and black pepper are fundamental for enhancing all the other flavors.
Red pepper flakes offer an optional, gentle warmth, adding a nuanced kick to the finished dish.
Essential Tools for Perfect Collard Greens
Your Go-To Pot: A Heavy-Bottomed Dutch Oven
A Dutch oven or other heavy-bottomed pot ensures even heat distribution, which is crucial for slow simmering.
This prevents scorching and allows the greens to cook down consistently, developing maximum tenderness.
Prep Essentials: Cutting Board & Sharp Knife
A sturdy cutting board and a sharp knife are indispensable for efficiently de-stemming and slicing the collard greens.
Proper tools make prep work safer and more precise, ensuring uniform pieces that cook evenly.
The Cleaning Basin: Large Sink or Bowl
A spacious basin or a clean sink is vital for the meticulous washing process.
Adequate space allows you to vigorously swish and rinse the greens multiple times, effectively removing all grit.
Your Path to Perfection: A Step-by-Step Cooking Guide
- Clean the Greens Thoroughly:
This initial step is paramount for avoiding bitterness and ensuring a pleasant eating experience.
Submerge and swish your collard greens in cold water, repeating until the water runs completely clear, indicating all grit and dirt have been removed.
- Prepare the Greens for Cooking:
Stack a few leaves, fold them, and carefully remove the tough center stem before discarding it.
Roll the de-stemmed leaves tightly and slice them into 1-inch ribbons, preparing them for the pot.
- Brown the Smoked Turkey:
In a large, heavy-bottomed pot, sear the smoked turkey wings or legs until nicely browned on all sides.
This browning process is vital; it builds a deep, rich flavor foundation for your collard greens.
- Build the Flavor Base with Aromatics:
Reduce heat and add the chopped onion to the pot, cooking until it becomes soft and translucent.
Introduce the minced garlic and optional red pepper flakes, cooking briefly until fragrant, being careful not to burn the garlic.
- Combine and Begin Simmering:
Return the seared turkey to the pot, then add chicken broth, salt, and black pepper, bringing the mixture to a gentle simmer.
Add the prepared collard greens; they will initially appear voluminous but will quickly cook down into the broth.
- The Long Simmer & Final Flavor Balance:
Reduce heat to low, cover, and allow the greens to simmer for 1.5 to 3 hours, stirring occasionally.
This extended cooking time is critical for breaking down the collard leaves to an incredibly tender state and significantly mellowing any bitterness.
About 30 minutes before serving, stir in the apple cider vinegar and optional sugar to brighten and neutralize any remaining bitter notes, creating a perfectly balanced flavor profile.
- Finish, Shred, and Serve Warm:
Taste the greens and adjust seasonings as needed; the turkey should be falling off the bone and the greens should be silky smooth.
Remove the turkey, shred the meat from the bones, and stir the tender meat back into the greens.
Serve hot, ensuring each portion gets plenty of that flavorful “pot liquor.”
Mastering Your Greens: Expert Tips & Tricks
The Art of Impeccable Cleaning
Never underestimate the cleaning step. Washing your greens thoroughly multiple times is the single most effective way to eliminate grit and reduce bitterness.
Consider adding a splash of vinegar to your rinse water for an extra boost in drawing out impurities.
Don’t Rush the Simmer: Patience Pays Off
The long, slow simmer is non-negotiable for achieving tender, bitterness-free Soulful Collard Greens.
Resist the urge to rush this process; the magic happens over time as the flavors meld and the greens soften.
Understanding the Vinegar-Sugar Harmony
Apple cider vinegar’s acidity chemically balances the natural compounds that cause bitterness in collard greens, while also brightening the overall flavor.
The optional sugar subtly complements the vinegar, rounding out the profile without making the dish sweet, ensuring a balanced, complex taste.
Enhancing Your “Pot Liquor”
For an even richer pot liquor, consider adding a parmesan rind during the simmering process, removing it before serving.
You can also serve the pot liquor separately as a savory broth alongside your greens, or even use it as a base for other soups.
Smoked Meat Alternatives & Vegetarian Options
If smoked turkey isn’t available, smoked ham hocks are a traditional choice for adding depth.
For a vegetarian version, omit the meat and instead use vegetable broth, adding a generous pinch of smoked paprika and a dash of liquid smoke for that essential smoky flavor.
Freezing Fresh Collard Greens
To save prep time later, blanch cleaned and sliced collard greens in boiling water for 3 minutes, then immediately transfer to an ice bath.
Drain well, squeeze out excess water, and freeze in airtight bags for up to 6 months.
Common Collard Greens Challenges (and How to Fix Them!)
My Greens Are Still Bitter! What Can I Do?
Ensure your greens were cleaned thoroughly; grit can taste bitter. Try adding another splash of apple cider vinegar, or a pinch more sugar to balance the bitterness.
If they’re still too bitter, sometimes an extra 30-60 minutes of low simmering can help mellow the flavor further.
Why Are My Collard Greens Too Tough?
Tough greens almost always indicate insufficient cooking time. Continue to simmer them on low heat, checking periodically, until they reach your desired tenderness.
Always ensure there’s enough liquid in the pot to prevent them from drying out during the long cook.
My Pot Liquor Lacks Depth – Any Fixes?
If the pot liquor is bland, it might need more seasoning. Adjust salt and pepper to taste.
Adding a smoked turkey stock cube or a concentrated broth paste can also boost flavor, or let it simmer uncovered for a bit to reduce and concentrate.
The Greens Taste Too Salty or Bland.
If too salty, add a few chunks of raw potato to the pot while simmering; they will absorb some excess salt. Remove before serving.
If bland, taste and incrementally add more salt, pepper, and perhaps a dash more vinegar until the flavors pop.
Beyond the Plate: Serving Suggestions for Your Soulful Creation
Classic Southern Companions
Serve your Soulful Collard Greens with warm, buttery cornbread to soak up every last drop of the delicious pot liquor.
For a perfect pairing, try our Hearty Turkey Sausage Sweet Potato Soup.
They pair perfectly with staples like crispy fried chicken, creamy macaroni and cheese, or tender slow-cooked beef chuck roast.
For a perfect pairing, try our Creamy Savory Pot Pie: Golden, Flaky Crust Every Time.
Unexpected Delights & Modern Twists
For a contemporary twist, spoon these greens over fluffy grits for a hearty breakfast or brunch.
What to Serve with Collard Greens
Collard greens have a rich, savory broth that pairs well with something hearty and a cool, crunchy side.
- Soak up the pot liquor with a Cheesy Ground Beef and Rice Skillet, which adds a meaty, cheesy contrast to the greens.
- Balance the silky greens with a tangy, crisp Crunchy Creamy Southern Style Coleslaw for a refreshing bite between forkfuls.
They can also be a fantastic side for seared salmon or baked chicken, adding a robust, comforting element to any meal.
The Perfect Sides for a Holiday Feast
Collard greens are an indispensable part of many holiday tables, especially Thanksgiving and Christmas.
They complement roasted turkey, ham, and all your favorite holiday fixings, bringing a taste of tradition and warmth.
Plan Ahead: Storage & Make-Ahead Strategies
Make-Ahead Tips for Easy Entertaining
Collard greens often taste even better the next day as flavors continue to meld and deepen.
You can prepare the entire dish a day or two in advance, refrigerate, and gently reheat before serving, making it perfect for entertaining.
Proper Storage for Freshness and Flavor
Store leftover cooked collard greens in an airtight container in the refrigerator for up to 3-4 days.
Ensure they are fully cooled before sealing to maintain freshness and prevent bacterial growth.
Freezing for Future Feasts
Cooked collard greens freeze exceptionally well, extending their shelf life for up to 3 months.
Portion them into freezer-safe containers or bags, ensuring plenty of pot liquor is included to keep them moist.
Thaw in the refrigerator overnight and reheat gently on the stovetop or in the microwave, adding a splash of broth if needed.
Frequently Asked Questions About Soulful Collard Greens
Can I Use Fresh Ham Hocks Instead of Turkey Wings?
Absolutely! Fresh ham hocks are a traditional choice and will impart a deep, savory, and smoky flavor similar to turkey wings.
Brown them thoroughly as instructed for the turkey to build a rich base.
Is There a Vegetarian or Vegan Version of This Recipe?
Yes, you can easily adapt this recipe. Omit the smoked turkey and use a high-quality vegetable broth.
For smoky flavor, add smoked paprika, a dash of liquid smoke, or even a smoked portobello mushroom to the pot.
What Exactly is “Pot Liquor” and Why is it Important?
“Pot liquor” is the flavorful, nutrient-rich broth left over after cooking collard greens (or other leafy greens).
It’s revered in Southern cuisine for its incredible depth of flavor and is often enjoyed by dipping cornbread into it.
How Do I Choose the Best Collard Greens at the Market?
Look for collard greens with firm, dark green leaves that are free from yellowing, wilting, or blemishes.
Smaller leaves tend to be more tender and slightly less bitter than very large ones.
Can I Cook Collard Greens in a Slow Cooker?
Yes, you can! After browning the turkey and aromatics on the stovetop, transfer everything to a slow cooker.
Cook on low for 6-8 hours, or on high for 3-4 hours, until the greens are incredibly tender and the turkey is falling off the bone.
Your Soulful Journey Continues: Share & Enjoy!
You’ve now mastered the art of creating genuinely Soulful Collard Greens-a dish that’s rich in flavor, tender in texture, and free from any unwanted bitterness. This recipe is more than just food; it’s a culinary hug, a taste of tradition, and a celebration of comfort.
We encourage you to bring this game-changing dish to your table and share its magic with loved ones. Don’t forget to tell us about your experience in the comments below, or tag us on social media. Happy cooking!
Collard Greens
Course: Main CourseCuisine: AmericanDifficulty: medium6
servings30
minutes2
hours240
kcal150
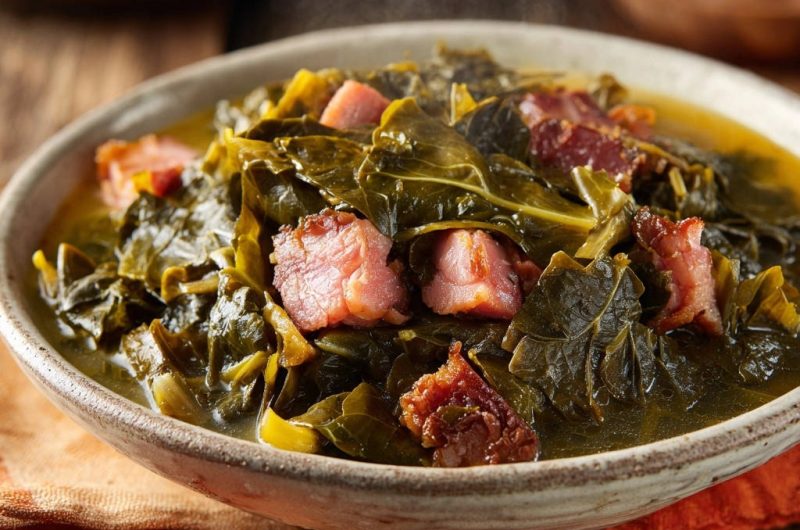
minutesMaster tender, flavorful Soulful Collard Greens with this easy recipe. Smoked turkey ensures a rich, savory dish without bitterness.
Ingredients
2 pounds fresh collard greens
1.5 pounds smoked turkey wings or legs
1 tablespoon olive oil
1 large yellow onion, chopped
4 cloves garlic, minced
6 cups chicken broth
1/4 cup apple cider vinegar
1 teaspoon sugar (optional, for balancing flavor)
1 teaspoon salt, or to taste
1/2 teaspoon black pepper, or to taste
1/4 teaspoon red pepper flakes (optional, for a hint of heat)
Directions
- Clean the Greens Thoroughly: This is crucial for avoiding bitterness and grit. Fill a large basin or sink with cold water. Submerge the collard greens and swish them around vigorously to dislodge any dirt or sand. Lift the greens out of the water, drain the dirty water, and repeat this process at least 2 or 3 more times until no grit remains in the water.
- Prepare the Greens: Stack a few leaves on top of each other. Fold the stack in half lengthwise and carefully cut out the tough center stem. Discard the stems. Roll the de-stemmed leaves tightly and slice them into 1-inch ribbons. Set aside.
- Brown the Smoked Turkey: In a large, heavy-bottomed pot or Dutch oven, heat the olive oil over medium-high heat. Add the smoked turkey wings or legs and sear them for about 5-7 minutes on each side until nicely browned. This step develops a deeper, richer flavor base for your greens. Remove the turkey from the pot and set aside.
- Build the Flavor Base: Reduce the heat to medium. Add the chopped onion to the pot and cook, stirring occasionally, until softened and translucent, about 5-7 minutes. Add the minced garlic and red pepper flakes (if using) and cook for another minute until fragrant, being careful not to burn the garlic.
- Simmer for Tenderness and Bitterness Reduction: Return the seared smoked turkey to the pot. Add the chicken broth, salt, and black pepper. Bring the mixture to a simmer. Add the prepared collard greens to the pot, they will look like a lot, but they will cook down. Stir to combine.
- The Secret Balance: Reduce the heat to low, cover the pot, and let the greens simmer for at least 1.5 to 2 hours, or even longer (up to 3 hours), stirring occasionally. The long, slow cook time is essential for breaking down the collard leaves, making them incredibly tender, and crucially, mellowing out any inherent bitterness. About 30 minutes before serving, stir in the apple cider vinegar and the optional sugar. The acidity from the vinegar helps to cut through and brighten the rich flavors, effectively neutralizing any remaining bitter notes, while the sugar provides a subtle balance.
- Finish and Serve: Taste the greens and adjust seasoning if needed. The smoked turkey should be falling off the bone and the greens should be silky smooth. Remove the turkey from the pot, shred the meat from the bones, and stir the meat back into the greens. Serve hot, with plenty of that delicious “pot liquor.”
Notes
- Thorough cleaning and long simmering are key to tender, non-bitter greens.