Chicken & Veggie Quesadillas: Perfectly Crispy, Never Soggy
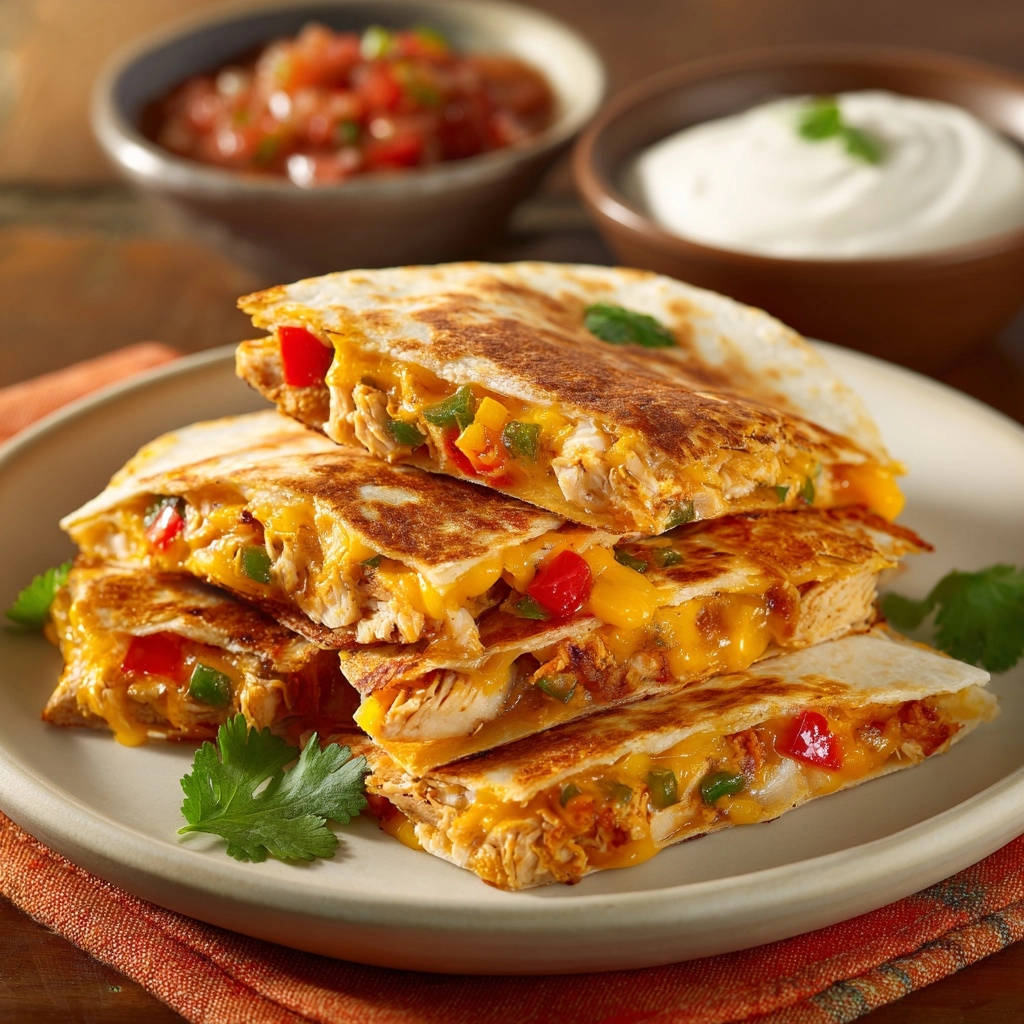
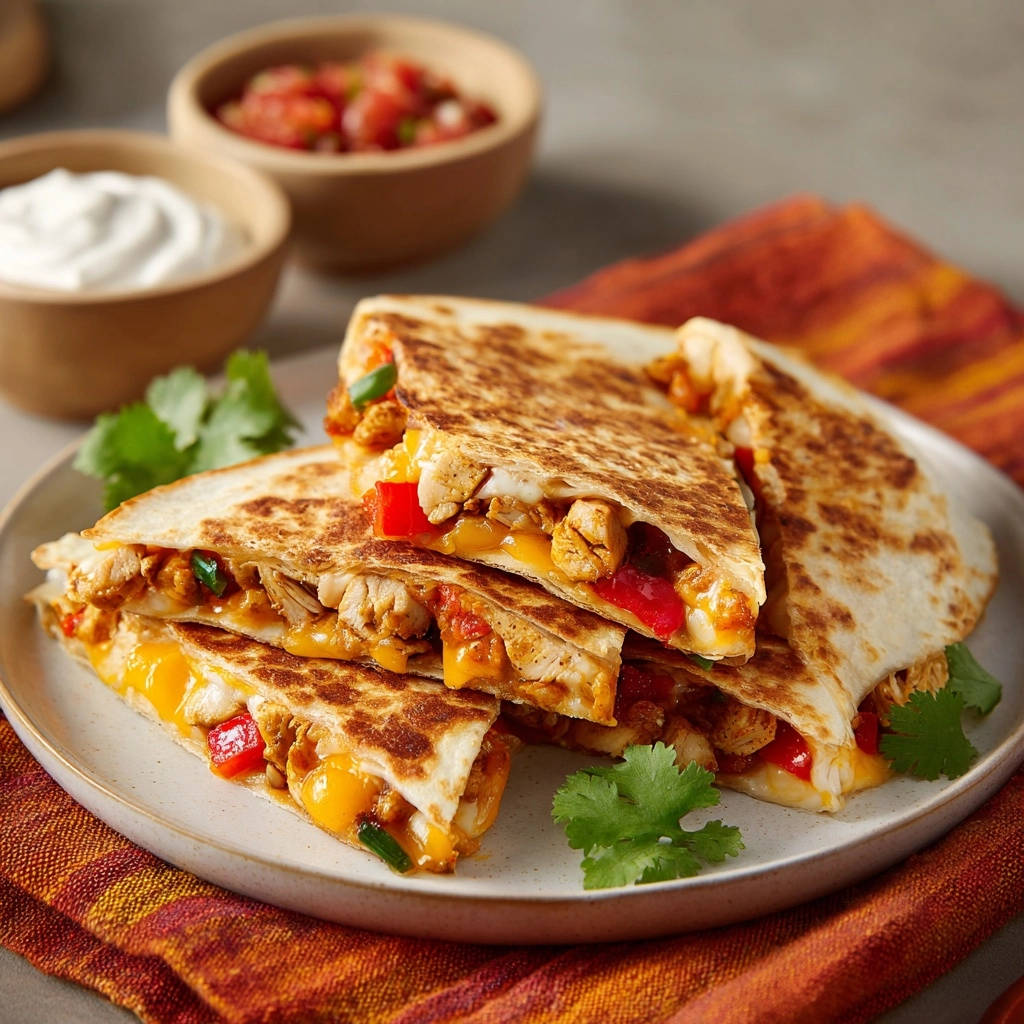
I remember countless attempts at homemade quesadillas, always falling short of that elusive restaurant-quality crispness, often ending up with a sad, soggy mess. But after much experimentation, I finally cracked the code to achieve consistently perfect, incredibly crispy Chicken & Veggie Quesadillas that are never soggy, and always bursting with flavor.
This recipe transforms a simple meal into a delightful culinary experience, ensuring every bite delivers that satisfying crunch coupled with gooey, savory goodness.
Say Goodbye to Soggy: Why THIS Quesadilla Recipe Wins
The Golden Ratio of Crunch and Gooey Goodness
This recipe directly tackles the common issue of soggy quesadillas by employing a specific pan-heating technique. It perfectly balances a golden, crispy exterior with a gloriously melted, cheesy interior, creating a truly irresistible texture.
Quick Weeknight Fix with Restaurant-Quality Flair
Despite its elevated taste and perfect texture, these Chicken & Veggie Quesadillas are incredibly fast and simple to prepare. They are an ideal solution for busy weeknights when you crave something special without spending hours in the kitchen.
Packed with Flavor & Hidden Veggie Power
The delicious combination of tender shredded chicken and fresh, finely diced vegetables ensures a flavorful bite every time. This recipe is also fantastic for incorporating extra veggies into your family’s diet in a way everyone will love.
Your Kitchen Arsenal for Perfect Quesadillas
The Non-Stick or Cast Iron Pan: Your Crisping Catalyst
A good quality, heavy-bottomed pan, whether non-stick or well-seasoned cast iron, is absolutely crucial for this recipe. Its ability to retain and distribute heat evenly is the secret behind achieving that uniform, golden crispness without burning.
Spatulas, Bowls, and Boards: The Supporting Cast
Beyond your pan, you’ll need a sturdy, heat-resistant spatula for easy flipping and folding. A medium mixing bowl for combining the filling and a clean cutting board for slicing your finished quesadillas are also essential.
Building Blocks of Flavor: What You’ll Need
The Tortilla Base: Flour vs. Alternatives
Small (8-inch) flour tortillas are ideal for these Chicken & Veggie Quesadillas due to their pliability and ability to crisp up beautifully. Their size is perfect for single servings and easy handling.
While gluten-free or whole wheat alternatives can be used, be aware they might alter the final texture and require slight adjustments in cooking time to achieve similar crispness.
Shredded Chicken: The Heart of the Filling
Using cooked, shredded chicken is key for convenience and flavor. Rotisserie chicken is a fantastic shortcut, or you can quickly boil and shred chicken breasts.
Ensure your chicken is seasoned well; plain chicken can lead to a bland filling, so don’t hesitate to add a pinch of salt or other spices if it’s unseasoned.
Cheese, Please! Selecting Your Meltiest Blend
For optimal melt and rich flavor, choose a good quality shredded cheddar cheese or a Mexican blend. These cheeses melt smoothly, creating that desirable gooey interior.
For a superior result, consider shredding your own block cheese; pre-shredded varieties often contain anti-caking agents that can slightly hinder melting.
Fresh Veggies: A Pop of Color and Crunch
Finely diced red and green bell peppers are chosen for their vibrant color, fresh flavor, and subtle crunch that holds up well. A finely diced jalapeño can be added for a pleasant kick.
Feel free to experiment with other finely diced vegetables like sweet onion, corn kernels, or zucchini, always ensuring they are cut small to cook evenly within the quesadilla.
The Fat Factor: Oil or Butter for Golden Perfection
A minimal amount of vegetable oil or unsalted butter is critical for achieving a beautifully golden and crispy exterior. It helps create a perfect crust without making the quesadilla greasy.
Using unsalted butter offers a richer flavor profile, while vegetable oil provides a neutral taste and excellent crisping qualities.
Seasoning & Garnish: Elevating Every Bite
A simple pinch of salt in the filling enhances all the other flavors, bringing the entire dish to life. Fresh cilantro adds a bright, herbaceous note when used as a garnish.
Don’t forget your favorite salsa and a generous dollop of sour cream or crema for serving; these traditional accompaniments truly complete the experience.
If you enjoy the creamy, cheesy texture of these quesadillas, try this creamy jalapeño chicken skillet for another tender chicken dinner.
Crafting Your Crispy Chicken & Veggie Quesadillas: A Detailed Guide
Mixing the Vibrant Filling
In a medium bowl, combine the shredded cooked chicken, shredded cheese, finely diced red bell pepper, finely diced green bell pepper (or jalapeño), and a pinch of salt. Mix all ingredients thoroughly to ensure even distribution and flavor in every bite.
The ‘Crispness Secret’ Pan Prep
Heat a large non-stick or well-seasoned cast-iron skillet over medium heat for 2-3 minutes. This initial dry heat is crucial; test by dropping a tiny bit of water – it should sizzle and evaporate quickly.
Add just 1/2 teaspoon of vegetable oil or a small pat of unsalted butter to the hot pan, swirling to coat the bottom evenly. This minimal fat, combined with the hot pan, is the key to preventing sogginess and promoting a beautiful crust.
First Side Golden: Tortilla & Filling Placement
Place one flour tortilla into the hot pan. Immediately spread about 1/2 cup of your chicken and cheese mixture evenly over one half of the tortilla.
Let it cook, completely undisturbed, for 2 to 3 minutes. You should observe the cheese near the pan melting and the tortilla developing beautiful golden-brown spots on the bottom; patience during this stage is vital for crispness.
The Perfect Fold: Sealing in the Goodness
Once the bottom half of the tortilla is visibly golden brown and noticeably crispy, use a spatula to carefully fold the empty half of the tortilla over the filling.
Gently press down with the spatula to help the cheese melt further and bond the halves together, ensuring the filling stays securely in place.
Second Side Perfection: Even Browning
Continue cooking for another 1 to 2 minutes, occasionally pressing down, until the second side is also golden brown and crisp.
Ensure all the cheese inside is completely melted and wonderfully gooey, indicating it’s ready.
Repeat & Refresh: Batch Cooking for a Crowd
Remove the finished quesadilla from the pan and place it on a cutting board. Repeat the entire process with the remaining tortillas and filling.
Crucially, add another 1/2 teaspoon of oil or butter before each new quesadilla. If any burnt bits accumulate in the pan between batches, quickly wipe them out with a paper towel to maintain clean cooking.
Slice, Garnish, and Serve with Zest
Cut each quesadilla into wedges immediately after cooking. Garnish with fresh cilantro if desired, and serve right away with your favorite salsa and a generous dollop of sour cream on the side.
Enjoy that perfect, satisfying crunch!
Beyond the Recipe: Elevating Your Quesadilla Game
Mastering the Heat: The Difference Between Golden & Burnt
Maintaining a consistent medium heat is paramount for golden-brown perfection without burning. Constantly observe your quesadillas and adjust the heat slightly if you notice them browning too quickly or too slowly.
Trust your instincts and don’t be afraid to dial the heat down a notch if the pan feels excessively hot.
Don’t Overfill: The Key to Structure & Even Cooking
Resist the urge to overfill your tortillas, as this is a common pitfall leading to messy, hard-to-fold, and often soggy quesadillas. The recommended 1/2 cup of filling per tortilla allows for proper folding and ensures even melting.
An overstuffed quesadilla will struggle to crisp up properly and may burst open during cooking.
The Right Ratio of Cheese to Filling for Max Gooeyness
While this is a chicken and veggie dish, the cheese acts as a crucial binder and provides that irresistible gooey texture. Ensure you have enough cheese to hold the filling together without overwhelming the other flavors.
For that same smoky flavor, try these charred BBQ chicken quesadillas from the grill.
A good amount of cheese guarantees a satisfying, melty interior that complements the crispy exterior perfectly.
Pre-Cooking Veggies for a Softer Texture (Optional)
If you prefer your bell peppers or other added vegetables to be softer and more integrated into the filling, consider sautéing them briefly before mixing. This can also help reduce moisture, preventing a soggy result.
However, for a slight bite and fresh crunch, raw finely diced vegetables work wonderfully as written in the recipe.
Common Quesadilla Quandaries & Quick Fixes
Problem: My Quesadilla is Soggy, Not Crispy!
Solution: The most common culprit is either not heating the pan sufficiently before adding the fat, or using too much oil/butter. Ensure your pan is screaming hot (water sizzles) and use only a minimal amount of fat (1/2 tsp per quesadilla) for that initial dry crisp.
Problem: The Cheese Isn’t Fully Melted
Solution: If your tortilla is browning but the cheese isn’t gooey, your heat might be too high (cooking too fast) or too low (not generating enough internal warmth). Adjust to a consistent medium heat, allowing enough undisturbed time for the cheese to melt fully.
Problem: The Filling Keeps Falling Out
Solution: You’re likely overfilling the tortilla. Reduce the amount of filling per quesadilla to about 1/2 cup, ensuring it’s spread only on one half. Press down gently after folding to help the melting cheese bind the filling together.
Unleash Your Inner Chef: Creative Quesadilla Twists
Spice It Up: Adding a Kick to Your Filling
Elevate the flavor of your Chicken & Veggie Quesadillas by incorporating a pinch of chili powder, cumin, or smoked paprika into the chicken mixture. For a fiery kick, add finely diced fresh jalapeños, removing the seeds for controlled heat.
A dash of cayenne pepper can also provide a delightful warmth that complements the savory chicken and cheese beautifully.
Veggie Extravaganza: More Greens, More Goodness
Expand your vegetable horizons by adding sautéed spinach, corn kernels, or finely chopped mushrooms to the filling. Black beans are also a fantastic addition for extra fiber and flavor.
Remember to pre-cook any watery vegetables, like spinach, to remove excess moisture before mixing them in, preventing your quesadillas from becoming damp.
Protein Swaps: Beyond Chicken
These quesadillas are incredibly versatile! Consider using seasoned ground beef, tender shredded lamb carnitas, or even sautéed shrimp as alternatives to chicken. Ensure any protein is fully cooked and well-seasoned.
For vegetarian options, seasoned black beans, refried beans, or crumbled, seasoned tofu make excellent and satisfying substitutes.
Cheese Combinations: Exploring New Flavors
Don’t be afraid to experiment with your cheese choices to discover new flavor profiles. Monterey Jack offers a mild, creamy melt, while pepper jack adds a pleasant hint of spice.
Oaxaca or cotija cheese can bring an authentic Mexican touch, or simply blend several types for a complex and gooey interior.
The Perfect Companions: What to Serve Alongside
Classic Dips & Toppings: Salsa, Sour Cream & Guacamole
No Chicken & Veggie Quesadilla is complete without its classic accompaniments. A vibrant salsa, whether mild or spicy, adds a burst of freshness and acidity.
A dollop of cool sour cream or creamy guacamole provides a rich, balancing contrast to the savory, crispy quesadilla, enhancing every bite.
Fresh Sides: Salads and Slaws
To balance the richness of the quesadillas, consider serving them with a light and refreshing side. A crisp green salad with a zesty vinaigrette is an excellent choice.
Alternatively, a vibrant coleslaw or a corn and black bean salsa adds color, texture, and a burst of complementary flavors.
Build a Full Spread
These quesadillas are great on their own, but if you want to pile up the table with more crunchy, cheesy options, these two recipes fit right in.
- Stack up a plate of Ultimate Loaded Beef Nachos for a shareable starter that hits the same crispy-and-melted notes.
- For a second platter of crunchy, no-soggy-chip satisfaction, the Loaded Beef Nachos use a similar approach to keeping toppings firm and chips crisp.
Beverage Pairings: Cool Drinks to Complement the Spice
For a truly satisfying meal, pair your quesadillas with a refreshing beverage. Homemade aguas frescas, such as horchata or jamaica, offer a sweet and cooling counterpoint.
A light Mexican lager or even a crisp iced tea would also beautifully complement the savory flavors and potential spice of your quesadillas.
Smart Prep & Storage: Enjoying Quesadillas Later
Make-Ahead Filling: Your Weeknight Time-Saver
To streamline weeknight cooking, prepare the chicken and veggie filling mixture up to two days in advance. Store it in an airtight container in the refrigerator.
This simple step allows for quick assembly when you’re ready to cook, making dinner even faster and more convenient.
Storing Leftover Cooked Quesadillas
If you have any leftover cooked quesadillas, allow them to cool completely before storing. Wrap them individually in parchment paper or foil, then place them in an airtight container in the refrigerator.
This method helps prevent them from becoming soggy and can keep them fresh for up to 2-3 days.
Reheating for Retained Crispness
To bring your leftover quesadillas back to their crispy glory, reheat them in a dry non-stick skillet over medium heat or in a toaster oven. Cook for a few minutes per side until heated through and crisp again.
Avoid reheating quesadillas in the microwave, as this will inevitably result in a rubbery, soggy texture that lacks any of that desirable crunch.
Freezing Quesadillas: Is It Recommended?
While you can freeze cooked quesadillas, the texture may change slightly upon reheating, with the tortilla becoming less crispy. For best results, it’s generally recommended to freeze the filling separately.
If freezing cooked quesadillas, wrap them tightly and reheat them directly from frozen in a hot oven or skillet to maximize crispness.
Your Quesadilla Questions, Answered!
Can I use corn tortillas instead of flour?
While you certainly can, corn tortillas will yield a different texture. They tend to be a bit firmer and less pliable, making folding slightly trickier. If you choose corn tortillas, consider warming them briefly in a dry pan before filling to make them more flexible and less prone to cracking.
What kind of cooked chicken works best?
Any cooked, shredded chicken works wonderfully for this recipe. Leftover roasted or rotisserie chicken is perfect for convenience. You can also quickly boil and shred chicken breasts or thighs. Ensure the chicken is seasoned well for the best flavor outcome.
How do I prevent my quesadilla from burning while cooking?
The key is to maintain a consistent medium heat on your stovetop. If you notice the tortilla browning too quickly, gently reduce the heat. Also, ensure you’re using just the recommended small amount of oil or butter; too much fat can also lead to uneven cooking and burning. Stay attentive and adjust as needed.
Can I make these vegetarian?
Absolutely! To make these quesadillas vegetarian, simply omit the chicken. Replace it with seasoned black beans, refried beans, sautéed mushrooms, corn, or a mix of roasted vegetables like zucchini and bell peppers. Ensure your vegetarian filling is flavorful and not too wet.
What’s the best way to get extra crispy edges?
The “crispness secret” in the recipe (initial dry pan heat + minimal fat) is paramount. Beyond that, ensure you’re not overfilling, which can steam the tortilla. Also, don’t rush the cooking process; allow each side sufficient undisturbed time to develop that golden crust before folding or flipping.
Your Quesadilla Adventure Awaits!
Now that you hold the secrets to crafting the ultimate, perfectly crispy, never-soggy Chicken & Veggie Quesadillas, your weeknight meals are about to get a major upgrade. This recipe guarantees that satisfying crunch and gooey cheese in every single bite.
Go ahead, gather your ingredients, fire up your skillet, and prepare to delight your taste buds. Don’t forget to get creative with your favorite additions and share your delicious creations!
Chicken Veggie Quesadillas
Course: Main CourseCuisine: MexicanDifficulty: easy8
servings15
minutes35
minutes350
kcal50
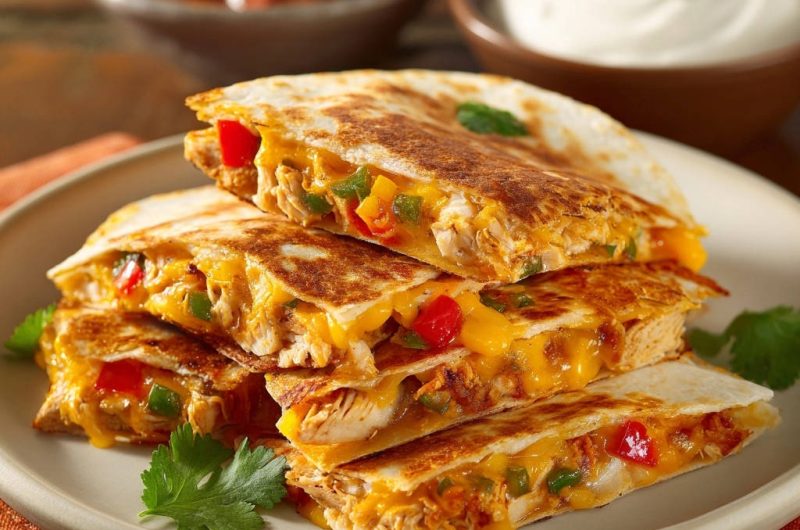
minutesAchieve restaurant-quality crispy quesadillas at home with this simple technique. Filled with shredded chicken, two types of bell peppers, and melted cheese, these quesadillas are golden on the outside and wonderfully gooey inside. Say goodbye to soggy quesadillas and hello to perfect crunch!
Ingredients
8 small (8-inch) flour tortillas
2 cups cooked chicken, shredded
2 cups shredded cheddar cheese (or a Mexican blend)
1/2 red bell pepper, finely diced
1/2 green bell pepper or jalapeño, finely diced
2 tablespoons vegetable oil or unsalted butter, divided
Salt to taste
Fresh cilantro, for garnish (optional)
Salsa, for serving (optional)
Sour cream, for serving (optional)
Directions
- Prepare your filling: In a medium bowl, combine the shredded cooked chicken, shredded cheese, diced red bell pepper, diced green bell pepper, and a pinch of salt if desired. Mix all the ingredients well to ensure even distribution.
- The Crispness Secret Setup: Heat a large non-stick skillet or a well-seasoned cast-iron pan over medium heat. Let the pan heat up for about 2-3 minutes without any oil. You’ll know it’s hot enough when a drop of water sizzles and evaporates quickly. Then, add 1/2 teaspoon of vegetable oil or a small pat of butter to the hot pan. Swirl the pan to coat the bottom evenly. This initial dry heat and then adding just enough fat is key to preventing sogginess and promoting a beautiful crust.
- Place one flour tortilla into the hot pan. Immediately spread about 1/2 cup of your chicken and cheese mixture evenly over one half of the tortilla. Let it cook, completely undisturbed, for 2 to 3 minutes. You should start to see the cheese near the pan melting and the tortilla developing golden-brown spots on the bottom. This undisturbed cooking time is crucial for developing that desired crispness.
- Once the bottom half of the tortilla is beautifully golden brown and noticeably crispy, use a spatula to carefully fold the empty half of the tortilla over the filling. Press down gently with the spatula to help the cheese melt further and bond the halves together, ensuring the filling stays in place.
- Continue cooking for another 1 to 2 minutes, occasionally pressing down, until the second side is also golden brown and crisp, and all the cheese inside is completely melted and wonderfully gooey.
- Remove the finished quesadilla from the pan and place it on a cutting board. Repeat the process with the remaining tortillas and filling, adding 1/2 teaspoon of oil or butter before each new quesadilla. If any burnt bits accumulate in the pan between batches, quickly wipe them out with a paper towel.
- Cut each quesadilla into wedges. Garnish with fresh cilantro if you like, and serve immediately with your favorite salsa and a dollop of sour cream on the side. Enjoy that perfect crunch!
Notes
- The key to extra crispy quesadillas is starting with a hot, dry pan before adding a small amount of oil for each one.