Chocolate Pistachio Biscotti: Perfectly Crisp, Never Hard
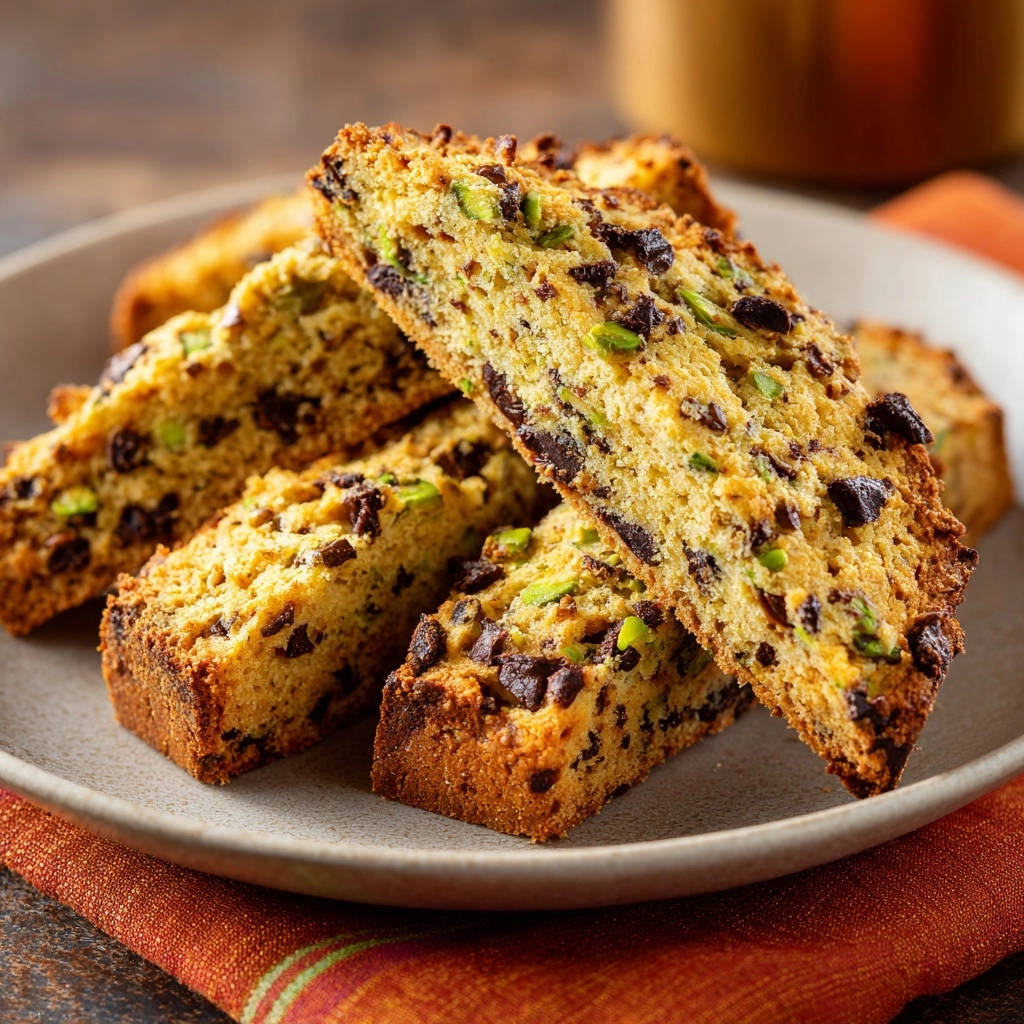
Who else loves biscotti but sometimes finds them either too soft or so hard they’re impossible to enjoy? I used to struggle with getting that just-right texture, but a simple tweak in my baking method completely changed the game.
Now, my Chocolate Pistachio Biscotti always come out perfectly crisp for dipping, without ever being tooth-shatteringly tough! This recipe delivers that ideal crunch and flavor every single time.
Beyond Basic: What Makes Our Chocolate Pistachio Biscotti So Special?
The “Never Hard” Secret: Our Signature Double Bake
The secret to our superior Chocolate Pistachio Biscotti lies in a precise two-stage baking process. The initial bake sets the shape, while a lower-temperature second bake gently dehydrates them.
This “low and slow” approach creates that coveted crisp texture without ever making them rock-hard, solving a common biscotti challenge.
For those who enjoy pairing biscotti with coffee, the same crisp choux technique elevates these spiced apple cream puffs beautifully.
Why Chocolate & Pistachio? A Timeless Flavor Harmony
The combination of rich, slightly bitter chocolate and sweet, earthy pistachios is a culinary dream. These flavors are perfectly balanced in every bite, offering a sophisticated taste profile.
Each ingredient complements the other beautifully, making these treats incredibly satisfying.
Achieving That “Just-Right” Texture for Perfect Dipping
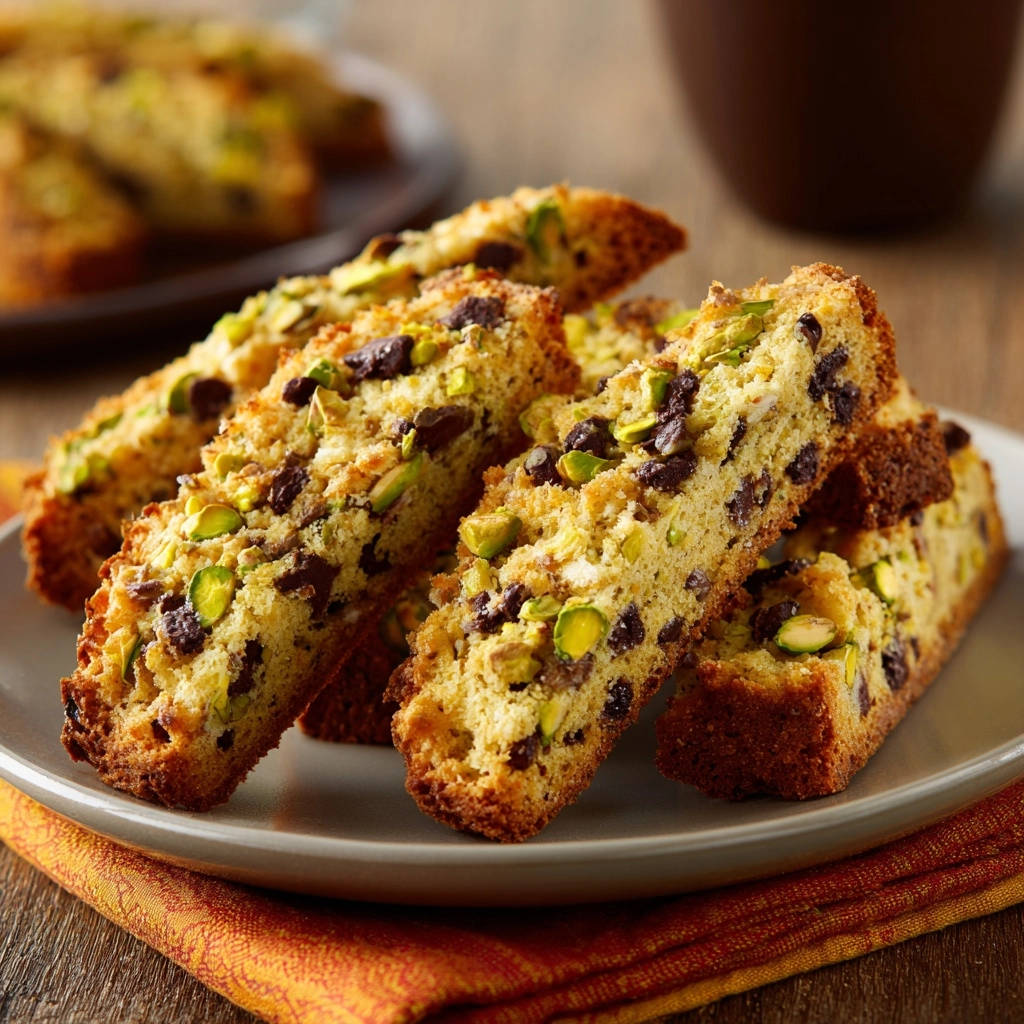
Our method ensures these Chocolate Pistachio Biscotti are sturdy enough for dipping into your morning coffee or evening tea, yet tender enough to bite into without a struggle.
They maintain their integrity in liquid, providing a delightful experience for any beverage pairing.
Gather Your Essentials: Key Ingredients for Success
Building the Base: Flour, Sugar, and Leavening
All-purpose flour provides the essential structure for our biscotti, ensuring they hold their shape during baking. Granulated sugar not only sweetens but also contributes to the crisp texture once baked.
Baking powder acts as our leavening agent, giving the biscotti a slight lift and tender crumb. A pinch of salt enhances all the other flavors, bringing balance to the sweetness.
The Wet Binders: Eggs and Vanilla
Large eggs are crucial for binding the dry ingredients, providing richness and moisture to the dough. They contribute to the biscotti’s structure and overall texture.
Pure vanilla extract infuses the dough with a warm, aromatic depth that complements both the chocolate and pistachios beautifully.
The Flavor Stars: Chocolate Chips and Pistachios
Mini chocolate chips are ideal for biscotti as they distribute evenly and melt subtly without overwhelming the dough or creating large voids. Their size ensures chocolate in every slice.
Finely chopped pistachios add a delightful crunch, vibrant color, and distinct nutty flavor. Their vibrant green contrasts beautifully with the chocolate.
If you enjoy the nutty crunch of pistachios in these biscotti, you will love the rich chocolate chunks in these triple chocolate chunk brownie cookies.
Here are the exact quantities needed:
2 cups all-purpose flour
1 cup granulated sugar
2 large eggs
1 teaspoon vanilla extract
1/2 teaspoon baking powder
1/4 teaspoon salt
1/2 cup mini chocolate chips
1/2 cup chopped pistachios
Gear Up: Essential Tools for Your Biscotti Baking Journey
Standard Kitchen Staples
You’ll need a large mixing bowl for the dry ingredients and a separate medium bowl for the wet. A whisk ensures dry ingredients are well combined, while a sturdy wooden spoon or rubber spatula helps form the stiff dough.
Standard measuring cups and spoons are, of course, essential for accurate ingredient quantities, guaranteeing recipe consistency.
Baking Sheet & Parchment Paper
A reliable baking sheet provides the surface for baking your biscotti logs and slices. Lining it with parchment paper is non-negotiable.
Parchment paper prevents sticking, ensures even browning, and makes cleanup incredibly easy, especially with the twice-baked method.
The Slicing Secret: A Serrated Knife
A sharp serrated knife is absolutely crucial for cleanly slicing your partially baked biscotti logs. Its saw-like edge glides through the firm dough without crushing or creating excessive crumbs.
This tool is key to achieving those perfectly uniform, clean-cut biscotti pieces.
Your Journey to Perfect Chocolate Pistachio Biscotti: A Detailed Baking Guide
Prepping Your Space and Oven
Preheating the oven to 350°F (175°C) is the crucial first step. It ensures your biscotti begin baking immediately and evenly when they enter the oven.
Lining a baking sheet with parchment paper prevents sticking and makes transferring the delicate biscotti much easier throughout the process.
Combining Dry Ingredients: The Foundation
In a large bowl, whisk together the all-purpose flour, granulated sugar, baking powder, and salt. This thorough mixing ensures the leavening and seasoning are uniformly distributed.
This foundational step is critical for consistent texture and flavor in every Chocolate Pistachio Biscotti.
Mixing Wet Ingredients: Aromatic Blend
In a separate medium bowl, lightly beat the large eggs with the vanilla extract. This creates a cohesive liquid mixture that will hydrate your dry ingredients.
The vanilla infuses the wet ingredients with its warm aroma, ensuring it’s well integrated into the dough.
Bringing it All Together: Forming the Dough
Pour the egg mixture into the dry ingredients. Mix with a wooden spoon or your hands until a stiff, shaggy dough forms.
Avoid overmixing; overworking the dough can lead to tough biscotti. Stop mixing once just combined.
Gently fold in the mini chocolate chips and chopped pistachios until they are evenly distributed. Take care not to crush the pistachios or melt the chocolate excessively.
Shaping the Logs: Uniformity is Key
Divide the dough in half. On your prepared baking sheet, shape each half into a log approximately 10-12 inches long and 2 inches wide.
Ensure the logs are relatively uniform in thickness from end to end. This consistency is vital for even baking and easy slicing later.
The First Bake: Setting the Structure
Bake the logs in the preheated 350°F (175°C) oven for 20-25 minutes. They should appear golden brown and feel firm to the touch when gently pressed.
This initial bake sets the shape, cooks the dough through, and prepares the biscotti for their critical second bake.
Cooling and Slicing: The Critical Transition
Remove the baking sheet from the oven and immediately reduce the oven temperature to 275°F (135°C). This temperature adjustment is essential for the second bake.
Allow the baked logs to cool on the baking sheet for about 10-15 minutes. This cooling period is absolutely essential to prevent crumbling when you slice them.
While still warm but firm enough to handle, carefully transfer one log to a cutting board. Using a sharp serrated knife, slice the log diagonally into 1/2-inch thick pieces. Repeat with the second log.
The Second Bake: Achieving Perfect Crispness
This is the secret to perfectly crisp Chocolate Pistachio Biscotti without them turning into rocks! Place the sliced biscotti cut-side down back onto the baking sheet.
Return them to the preheated 275°F (135°C) oven. Bake for another 20 minutes, then carefully flip each biscotti over to the other cut side and bake for an additional 20 minutes.
Continue baking until they are completely dry to the touch and lightly golden. The low and slow second bake gently dehydrates them, creating that ideal crisp texture.
The Final Dry: Oven Cool Down Magic
Turn off the oven after the second bake, but leave the biscotti inside with the oven door slightly ajar for another 15-20 minutes as the oven cools.
This gentle cool-down period allows them to finish drying out without browning too much, maximizing their crispness and preventing moisture reabsorption.
Cooling Completely: The Finishing Touch
Remove the biscotti from the oven and let them cool completely on a wire rack. As they reach room temperature, they will continue to firm up and become even crisper.
Patience here ensures the ultimate snap in your homemade Chocolate Pistachio Biscotti.
Mastering the Art: Expert Tips for Flawless Biscotti
Don’t Overmix the Dough: Overmixing develops gluten in the flour, which can lead to tough, chewy biscotti. Mix just until the ingredients are combined and a stiff dough forms, then stop.
Achieve Uniform Logs: Spending a little extra time shaping your dough logs evenly ensures that all your biscotti slices bake consistently. This prevents some pieces from being underdone and others overdone.
The Serrated Knife Advantage: A sharp serrated knife is your best friend for slicing. It saws through the partially baked logs cleanly, minimizing crumbs and preventing breakage, which is common with straight-edge knives.
Master the “Low and Slow” Second Bake: This is the most crucial step for the perfect crisp-but-not-hard texture. Don’t rush it; gentle, prolonged dehydration is key to achieving that signature snap.
The “Oven Door Ajar” Trick: Allowing the biscotti to cool slowly in the oven helps to fully dry them out without overbrowning. This extra step maximizes their crispness and enhances shelf life.
Embrace the Cool-Down: Biscotti continue to firm up and crisp as they cool completely on a wire rack. Resist the urge to sample them warm; patience is a virtue here for optimal texture.
Oops! Troubleshooting Your Chocolate Pistachio Biscotti
My Biscotti Are Too Crumbly When Slicing!
This often happens if you try to slice the logs too soon after the first bake. Ensure you allow them to cool for the recommended 10-15 minutes so they firm up enough to handle without crumbling.
Using a sharp serrated knife is also critical; a dull knife will tear rather than cut cleanly, leading to more crumbs and uneven slices.
Why Are My Biscotti Too Hard or Rock-Like?
Biscotti can become excessively hard if overbaked during the second “drying” stage. Keep a close eye on them and remove them once they are completely dry and lightly golden, even if the full time hasn’t passed.
Making your dough logs too thin can also lead to an overly crunchy, hard texture. Aim for the recommended 2-inch width to retain some internal structure.
My Biscotti Spread Too Much While Baking!
Dough that is too soft or warm can cause spreading. Ensure your ingredients, especially the eggs, are at the correct temperature.
If your kitchen is particularly warm, consider chilling the dough logs briefly (15-20 minutes) before the first bake to firm them up.
An oven that’s running too cool can also contribute to spreading as the dough doesn’t set quickly enough. Verify your oven temperature with an oven thermometer if you suspect inaccuracy.
Enjoying and Storing Your Homemade Delight
Creative Ways to Serve Your Chocolate Pistachio Biscotti
These crisp Chocolate Pistachio Biscotti are truly exceptional with a warm cup of coffee, espresso, or your favorite herbal tea. Their sturdy texture is perfect for a satisfying dip without falling apart.
For an extra special treat, drizzle them with melted white or dark chocolate, or serve alongside a scoop of vanilla bean ice cream for an elegant, textural dessert. They also make a beautiful edible gift.
What to Serve with Your Biscotti
These chocolate pistachio biscotti are crisp enough for dunking but still have a tender bite. Here are two recipes that share similar flavors or textures.
- For a savory crunch that balances the sweet biscotti, make these Crispy Sweet Potato Latkes using the same technique for getting that perfect edge-to-edge crispness.
- If you want another baked treat with chocolate and fruit, the Cranberry Chocolate Chip Loaf uses a similar no-sink method to keep add-ins evenly distributed throughout the batter.
Storing for Lasting Freshness
Once completely cooled, store your Chocolate Pistachio Biscotti in an airtight container at room temperature. This is crucial to prevent them from absorbing moisture and becoming soft or stale.
Properly stored, they will maintain their delicious crispness and flavor for up to 2-3 weeks, making them perfect for enjoying over time or sharing with guests.
Make-Ahead Magic: Can You Prep Ahead?
While the entire process is best done in one go for optimal freshness and texture, you do have some make-ahead options. You can prepare the dough and shape the logs ahead of time.
Wrap the dough logs tightly in plastic wrap and refrigerate for up to 2 days before the first bake. The baked and cooled biscotti also freeze beautifully.
Wrap them tightly in plastic wrap, then place them in an airtight freezer-safe container for up to 3 months. Thaw at room temperature before serving to regain their crispness.
Your Biscotti Questions, Answered!
Can I Use Different Nuts or Chocolate in This Recipe?
Absolutely! This Chocolate Pistachio Biscotti recipe is wonderfully adaptable to your preferences. Feel free to swap pistachios for an equal amount of toasted almonds, hazelnuts, or walnuts for a different nutty flavor.
For the chocolate, you can use dark, milk, or white chocolate chips, or even finely chopped chocolate bars. Just ensure they are mini-sized or finely chopped for even distribution.
Is This Recipe Gluten-Free Friendly?
While this specific recipe uses all-purpose flour, many readers have had success substituting a 1:1 gluten-free baking flour blend. Ensure your chosen blend contains xanthan gum for proper structure.
Results may vary slightly in texture and density compared to the original, but it’s a great option for those with dietary needs or sensitivities to gluten.
How Long Do These Chocolate Pistachio Biscotti Last?
When stored correctly in an airtight container at room temperature, your homemade Chocolate Pistachio Biscotti will stay wonderfully fresh and crisp for 2 to 3 weeks.
For longer storage, they can be frozen for up to 3 months. Always ensure they are completely cooled before storing to prevent condensation and softening.
What’s the Best Way to Slice Biscotti Without Crushing Them?
The key to clean, uncrushed slices is to let the logs cool for about 10-15 minutes after the first bake. They should be firm but still warm and slightly pliable.
Then, use a sharp serrated knife and a gentle sawing motion, slicing diagonally at about 1/2-inch thickness. Avoid pressing down too hard; let the knife do the work.
Can I Add Zest or Spices to the Dough?
Yes, absolutely! Adding citrus zest (such as orange or lemon) or a pinch of warm spices like cinnamon, cardamom, or even a touch of ginger can introduce another delightful layer of flavor to your Chocolate Pistachio Biscotti.
Incorporate dry spices with the flour mixture, and citrus zest can be added with the wet ingredients to infuse the dough evenly.
Ready to Bake? Share Your Chocolate Pistachio Biscotti Journey!
With this detailed guide and expert tips, you’re now equipped to create truly spectacular Chocolate Pistachio Biscotti that are perfectly crisp for dipping, yet never hard or crumbly.
Say goodbye to biscotti woes and hello to your new favorite go-to recipe for these delightful, nutty chocolate treats!
We’d love to hear about your baking adventures! Share your creations, tell us your favorite dipping beverage, or leave any questions you might have in the comments below. Happy baking!
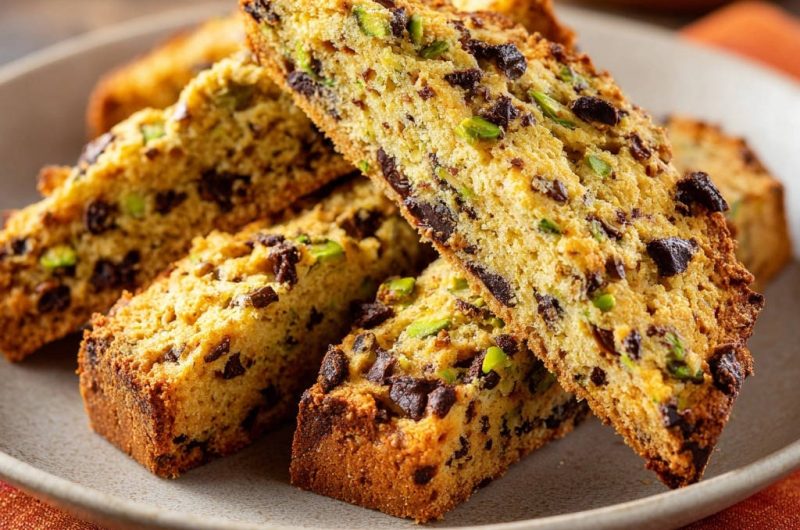
Chocolate Pistachio Biscotti
Course: DessertCuisine: ItalianDifficulty: medium40
biscotti25
minutes1
hour20
kcal120
minutesAchieve perfectly crisp chocolate pistachio biscotti every time, ideal for dipping without being too hard. This recipe reveals the secret to that just-right texture through a simple two-bake method. Enjoy a delightful balance of chocolate and pistachio in every bite.
Ingredients
2 cups all-purpose flour
1 cup granulated sugar
2 large eggs
1 teaspoon vanilla extract
1/2 teaspoon baking powder
1/4 teaspoon salt
1/2 cup mini chocolate chips
1/2 cup chopped pistachios
Directions
- Preheat your oven to 350 degrees F (175 degrees C). Line a baking sheet with parchment paper.
- In a large bowl, whisk together the flour, granulated sugar, baking powder, and salt.
- In a separate medium bowl, lightly beat the eggs with the vanilla extract.
- Pour the egg mixture into the dry ingredients and mix with a wooden spoon or your hands until a stiff dough forms. Fold in the mini chocolate chips and chopped pistachios until evenly distributed.
- Divide the dough in half. On the prepared baking sheet, shape each half into a log, about 10-12 inches long and 2 inches wide. Ensure the logs are relatively uniform in thickness.
- Bake for 20-25 minutes, or until the logs are golden brown and firm to the touch.
- Remove the baking sheet from the oven and reduce the oven temperature to 275 degrees F (135 degrees C).
- Allow the baked logs to cool on the baking sheet for about 10-15 minutes. This cooling period is essential to prevent crumbling when slicing. While still warm but firm enough to handle, carefully transfer one log to a cutting board. Using a serrated knife, slice the log diagonally into 1/2-inch thick pieces. Repeat with the second log.
- This is the secret to perfectly crisp biscotti without them turning into rocks! Place the sliced biscotti cut-side down back onto the baking sheet. Return them to the preheated 275 degrees F (135 degrees C) oven. Bake for another 20 minutes, then flip each biscotti over to the other cut side and bake for an additional 20 minutes, or until they are completely dry and lightly golden. The low and slow second bake gently dehydrates them, creating that ideal crisp texture.
- Turn off the oven, but leave the biscotti inside with the oven door slightly ajar for another 15-20 minutes as the oven cools. This allows them to finish drying out without browning too much.
- Remove the biscotti from the oven and let them cool completely on a wire rack. They will become even crisper as they cool. Store in an airtight container at room temperature.
Notes
- The key to perfectly crisp biscotti is the low-temperature second bake and gradual cooling in the oven.