Classic Baked Mac & Cheese: Never Dry, Always Gooey
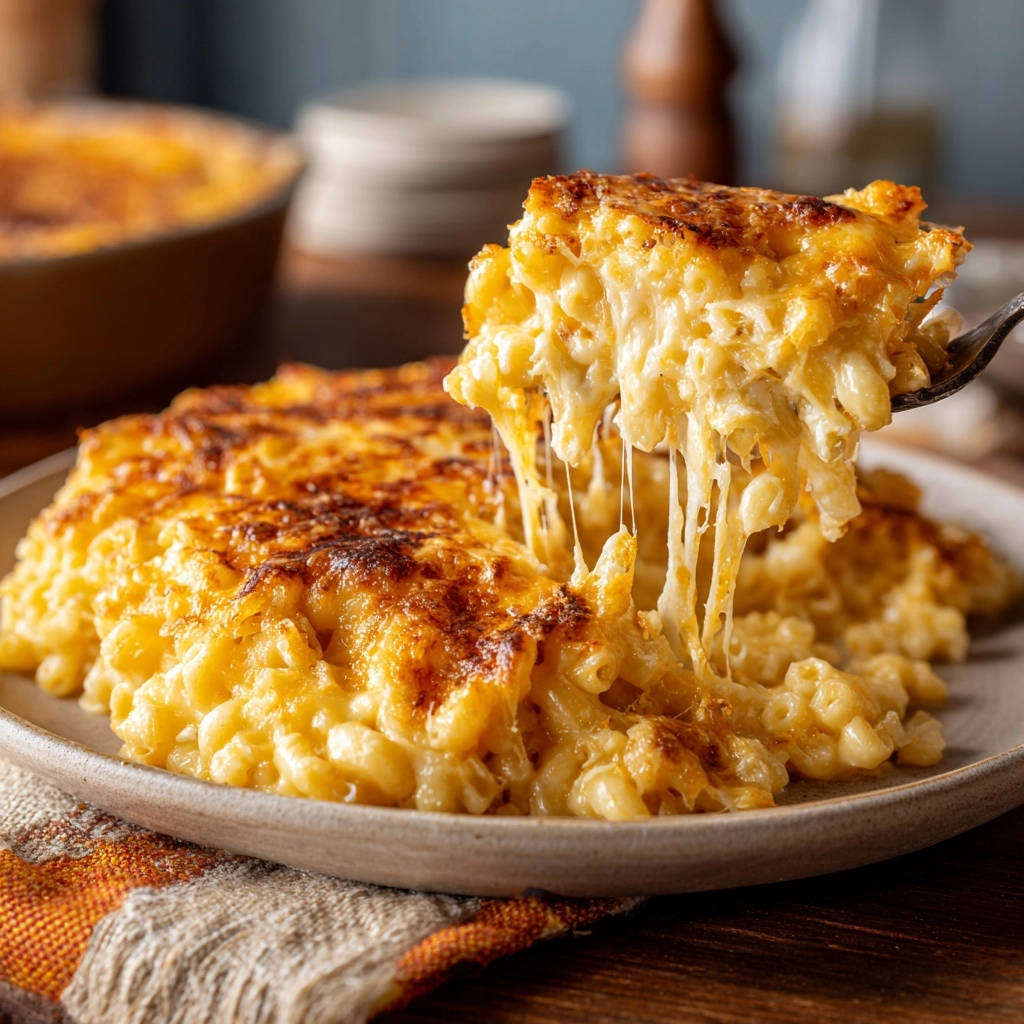
I remember countless attempts at achieving that perfect, creamy baked mac and cheese, only to be met with a dry, crumbly disappointment. It was a quest, a culinary challenge I was determined to conquer. This Classic Baked Mac & Cheese recipe is the culmination of that journey, meticulously crafted to guarantee an impossibly gooey, rich, and utterly delicious result every single time.
It’s the ultimate comfort food, transformed into a foolproof masterpiece that will have everyone asking for seconds. Get ready to experience the creamy, cheesy bliss you’ve always dreamed of!
Why This Recipe Delivers Unbeatable Creaminess
Say Goodbye to Dry, Chalky Mac & Cheese
Many baked macaroni and cheese recipes fall short, resulting in a texture that’s either too dry or disappointingly chalky. This often happens from overcooking the pasta or an unbalanced sauce. Our method directly addresses these common pitfalls.
We ensure your pasta remains perfectly tender and the sauce stays luscious throughout the baking process. No more sad, crumbly bites; just pure, unadulterated gooey goodness.
Our Secret for a Velvety, Stretchable Sauce
The foundation of any exceptional baked mac and cheese is its sauce. This recipe employs a classic béchamel base, carefully constructed to be incredibly velvety and stable.
Starting with a properly cooked roux, slowly incorporating warmed milk, and crucially adding the cheeses off the heat prevents graininess and promotes that irresistible stretch.
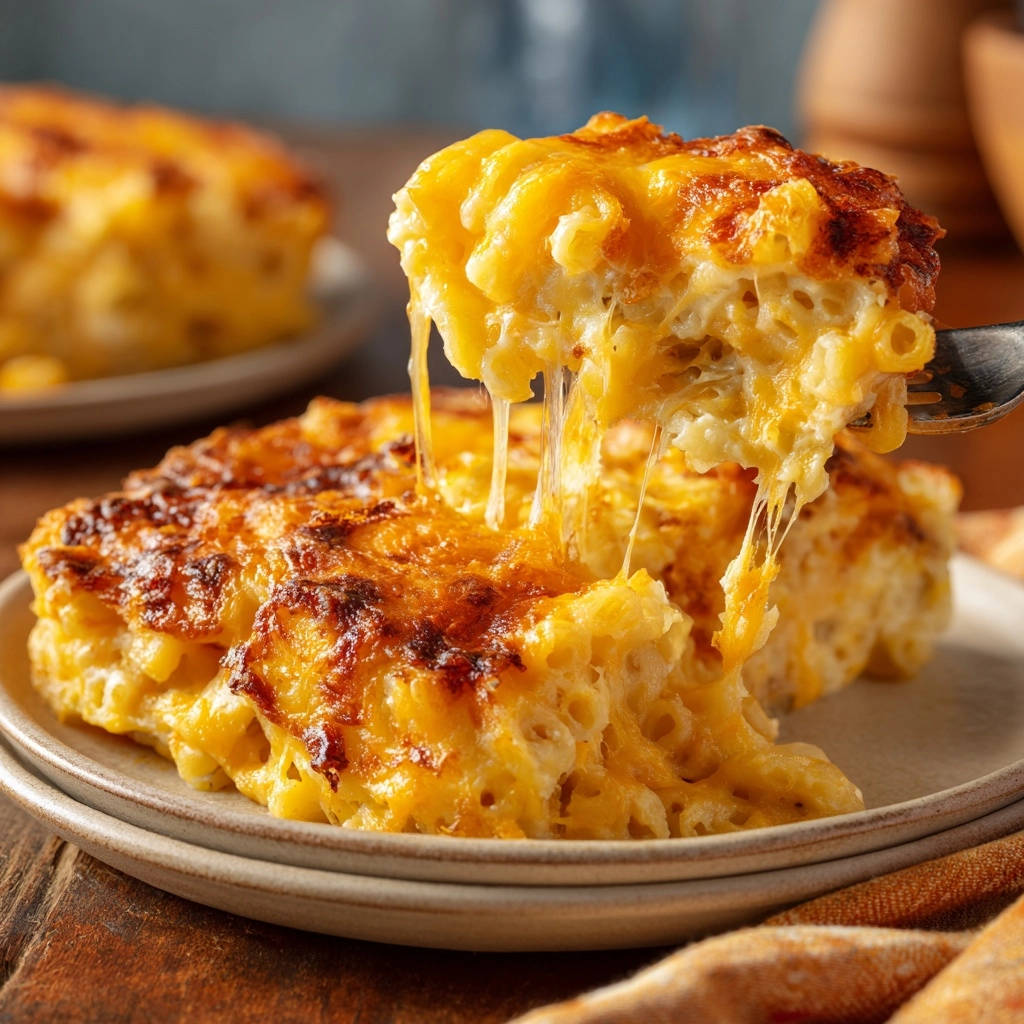
Achieving That Irresistible Crispy Top & Gooey Inside
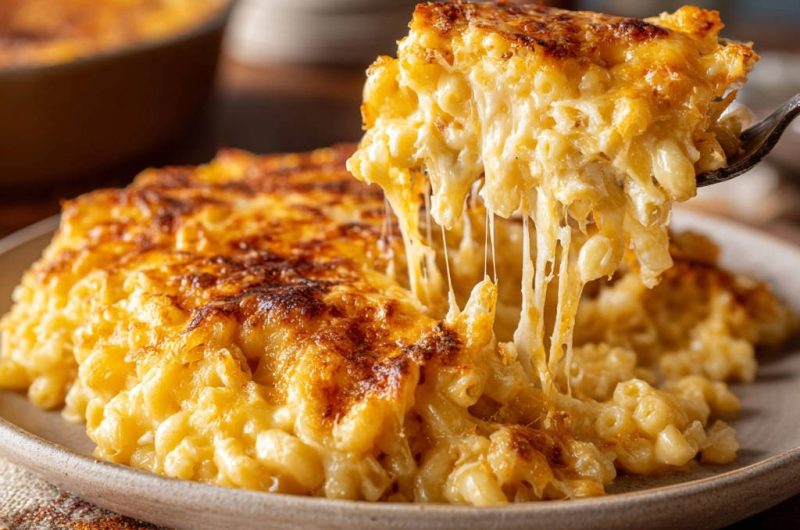
The perfect homemade mac and cheese offers a delightful contrast: a golden, slightly crispy top with an incredibly gooey interior. We achieve this with a two-stage baking process.
Initial covered baking traps moisture, keeping the pasta tender and the sauce fluid. Uncovering it then allows the top to brown beautifully, creating that coveted golden crust.
Gather Your Gooey Essentials: Ingredients List
Every ingredient in this recipe plays a vital role in creating the ultimate creamy mac and cheese recipe. Quality matters here, especially for the cheeses.
The Pasta Powerhouse: Elbow Macaroni
Elbow macaroni is the traditional choice, its small curves perfectly cradling the rich cheese sauce. Its shape ensures every bite is loaded with flavor.
Cooking the macaroni to an al dente stage is paramount. This slight firmness prevents mushiness during baking and allows the pasta to absorb more of the delectable sauce without drying out.
Building the Béchamel: Butter, Flour, and Milk
Unsalted butter provides richness and serves as the fat for our roux. All-purpose flour is whisked in to create the roux, the essential thickening agent for a stable and smooth sauce.
Whole milk is specified for its high-fat content, contributing immensely to the sauce’s creaminess and luxurious mouthfeel. Warming the milk beforehand helps prevent lumps when combined with the roux.
The Cheese Factor: Sharp Cheddar & Melting Varieties
A blend of cheeses is key to achieving both deep flavor and a perfect melt. Sharp cheddar cheese brings a robust, tangy character that defines classic mac and cheese.
Complementing this, a good melting cheese like Monterey Jack or mild cheddar ensures that beautiful, stringy, gooey texture. This combination offers both exceptional taste and an unbeatable consistency.
Flavor Fundamentals: Salt and Pepper
Salt is critical for enhancing all the other flavors, bringing the cheeses and sauce to life. Freshly ground black pepper adds a subtle warmth and aromatic depth.
These simple seasonings are essential for balancing the richness and preventing the dish from tasting flat.
Essential Tools for Your Mac & Cheese Masterpiece
Having the right tools on hand makes the process smooth and enjoyable. You likely have most of these in your kitchen already.
Basic Equipment for Success
Large Pot: For cooking the macaroni efficiently and evenly.
Large Saucepan or Dutch Oven: Ideal for making the béchamel sauce, providing ample space for whisking.
Whisk: Essential for preventing lumps in the roux and sauce, ensuring a perfectly smooth result.
The same creamy cheese sauce that keeps this mac and cheese moist also works wonders in a batch of cheesy beef stuffed peppers.
9×13 Inch Baking Dish: The standard size for this recipe, allowing for even baking and a good pasta-to-sauce ratio.
Aluminum Foil: Used for the initial covered bake to trap moisture and ensure tenderness.
Step-by-Step Perfection: Crafting Your Classic Baked Mac & Cheese
Prep Your Stage: Oven and Baking Dish
Preheat your oven to 375 degrees Fahrenheit. This ensures the oven is at the correct temperature for immediate and even baking.
Lightly grease a 9×13 inch baking dish. Greasing prevents sticking and helps with easy serving of your delicious baked macaroni and cheese.
Al Dente is Key: Perfecting Your Pasta
Cook the elbow macaroni in a large pot of salted boiling water according to package directions, but remove it from the heat when it’s still slightly firm or “al dente” (about 1 minute less than recommended).
This is crucial! It prevents mushy pasta, allowing it to absorb the creamy sauce without becoming overly soft or drying out during the baking process. Drain well and set aside.
The Roux Revelation: Building Your Velvety Base
In a large saucepan or Dutch oven, melt the butter over medium heat. Once melted, gradually whisk in the flour.
Cook for 1 to 2 minutes, constantly stirring, until a smooth paste (roux) forms. This roux is essential for thickening the sauce and preventing it from separating, guaranteeing a consistently creamy texture for your gooey cheese sauce.
Whisking Wonders: Creating a Stable Sauce
Slowly pour the warmed milk into the roux, whisking continuously to prevent lumps. The warmed milk helps create a smoother emulsion with the roux.
Continue to whisk as the sauce gently simmers and thickens, about 5 to 7 minutes, until it’s smooth and coats the back of a spoon. This careful whisking and slow addition creates a stable, velvety base that won’t dry out.
The Melted Magic: Incorporating Your Cheeses
Remove the saucepan from the heat. Add the salt and pepper, then gradually add the shredded cheeses, stirring until completely melted and smooth.
Adding the cheese off the heat and stirring patiently is crucial for a perfectly gooey, non-grainy sauce that stretches beautifully. High heat can cause the cheese proteins to seize, leading to a grainy texture.
Assembly Time: Bringing It All Together
Add the cooked, drained macaroni to the cheese sauce and stir until everything is evenly coated. Ensure every piece of pasta is enveloped in the rich, velvety sauce.
Transfer the macaroni mixture to your prepared baking dish, spreading it out evenly.
Covered Bake: Trapping the Tenderness
Cover the baking dish tightly with aluminum foil. Bake for 20 minutes.
Baking it covered initially traps steam and moisture, ensuring the pasta remains tender and the sauce stays wonderfully gooey throughout this phase of the baking process.
Uncovered Glory: The Golden Crust Finish
Remove the foil and bake for an additional 15-20 minutes, or until the top is golden brown and bubbly.
This final uncovered bake creates that irresistible crispy crust while the interior remains incredibly creamy and gooey. Watch for that perfect golden hue.
The Crucial Rest: Enhancing Lusciousness
Let the mac and cheese rest for 5-10 minutes before serving. This step is often overlooked but is vital.
Resting allows the sauce to set slightly, making it even more luscious and preventing it from being runny. This patience is rewarded with perfect consistency.
For a perfect pairing, try our Mastering the Jalapeno Popper Stuffed Meatloaf.
Unlock Next-Level Flavor: Expert Tips & Tricks
Don’t Overcook the Pasta: Why Al Dente Matters
Cooking your pasta slightly undercooked, or al dente, is the single most important tip for baked mac and cheese. The pasta will continue to cook and absorb sauce in the oven.
If you start with fully cooked or overcooked pasta, it will become mushy and compromise the entire dish’s texture. Aim for a firm bite before draining.
The Power of a Perfect Roux: Preventing Sauce Separation
A well-cooked roux (butter and flour paste) is the backbone of a stable cheese sauce. Cook it long enough for the flour taste to disappear, but not so long it browns excessively for a white sauce.
This properly formed roux creates a strong emulsion that prevents the cheese and fat from separating, ensuring your sauce remains cohesive and smooth.
The Warm Milk Advantage: Smoothness Guaranteed
Always warm your milk before adding it to the roux. Pouring cold milk into a hot roux can shock it, causing it to seize and form lumps.
Warmed milk incorporates smoothly, creating a silky, lump-free béchamel sauce with minimal effort. This small step makes a huge difference in the final texture.
Cheese Wisdom: Adding Off-Heat for Gooey Goodness
Remove the béchamel from the heat before stirring in the cheeses. High heat can cause cheese proteins to tighten and expel fat, leading to a grainy, oily, or separated sauce.
The residual heat from the sauce is sufficient to melt the cheese gently, resulting in a beautifully smooth, stretchy, and consistently gooey texture.
The Cover/Uncover Bake Strategy: Best of Both Worlds
The initial covered bake is crucial for keeping the pasta tender and the sauce moist. It prevents the top from drying out or burning prematurely.
Removing the foil later allows for direct heat exposure, creating that irresistible golden-brown, bubbly, and slightly crispy crust we all love on our Classic Baked Mac & Cheese.
Resting is Non-Negotiable: Patience for Perfection
Allowing the mac and cheese to rest for 5-10 minutes after baking allows the sauce to thicken and “set.” This process helps the dish hold its shape better.
It also prevents the sauce from immediately running when served, ensuring a perfectly luscious and integrated dish. Resist the urge to dive in right away!
Classic Pairings & Creative Twists
What to Serve Alongside Your Creamy Creation
A rich baked macaroni and cheese pairs wonderfully with lighter, fresher sides that cut through its richness. A simple, crisp green salad with a vinaigrette is a perfect complement.
Roasted vegetables like broccoli, asparagus, or Brussels sprouts also add a lovely contrast in texture and flavor. For a more substantial meal, consider grilled chicken or a lean steak.
Spice It Up: Flavorful Additions & Swaps
While delicious as is, this Classic Baked Mac & Cheese is a fantastic canvas for customization. A pinch of freshly grated nutmeg stirred into the béchamel adds traditional depth and warmth.
For a subtle kick, a dash of hot sauce or smoked paprika can elevate the flavor profile. Consider adding a layer of buttered panko breadcrumbs for an extra crispy topping.
Experiment with different cheese blends; try Gruyere for nuttiness, a touch of smoked Gouda, or even some pepper jack for a spicy twist. Cooked crispy bacon bits are another delightful addition.
Storing & Reheating Your Masterpiece
Make-Ahead Magic: Preparing for Later
You can assemble the entire Classic Baked Mac & Cheese dish up to two days in advance. Cover it tightly with plastic wrap and refrigerate.
When ready to bake, let it sit at room temperature for 30 minutes while the oven preheats, then bake as directed, potentially adding 5-10 minutes to the covered baking time.
Keeping It Fresh: Proper Storage Guidelines
Store any leftover mac and cheese in an airtight container in the refrigerator for up to 3-4 days. Ensure it cools completely before covering and refrigerating to prevent condensation.
What to Serve with Mac & Cheese
If you’re already deep into a creamy, cheesy mac & cheese session, these two dishes lean into the same indulgent comfort without repeating the same texture.
- A bowl of Cheesy Sausage Soup brings the same velvety richness but with a savory broth and hearty chunks that contrast the pasta’s softness.
- For a lighter vegetable counterpart, try Cheesy Baked Cauliflower – the
Reheating Without Sacrificing Creaminess
For best results, reheat individual portions in the microwave with a splash of milk or cream, stirring occasionally until heated through. This helps restore its creamy texture.
Alternatively, reheat a larger portion in an oven-safe dish covered with foil at 300°F (150°C) until warm, adding a little milk if it seems dry. Uncover for the last few minutes if you desire a crispier top.
Troubleshooting Common Mac & Cheese Mishaps
“My Mac & Cheese is Dry and Crumbly!”
This usually indicates overbaking or pasta that was overcooked initially. Ensure your pasta is truly al dente before combining with the sauce.
Also, stick to the recommended baking times and cover for the initial phase to retain moisture. Using whole milk also contributes significantly to a creamier, less dry result.
“My Sauce is Grainy or Separated!”
A grainy or separated sauce often occurs from adding cheese to sauce that is too hot or from overcooking the cheese itself. Always remove the béchamel from the heat before stirring in the cheeses.
Whisk continuously as you add the cheese, allowing the residual heat to melt it gently. Avoid bringing the cheese sauce to a boil once the cheese is incorporated.
“My Pasta is Mushy!”
Mushy pasta is a direct result of overcooking before baking. The pasta continues to absorb liquid and cook in the oven.
To avoid this, cook your elbow macaroni at least one minute less than the package directions suggest, leaving it quite firm to the bite. This ensures it finishes perfectly tender, not soft.
FAQs About Our Ultimate Baked Mac & Cheese
Can I use different types of cheese?
Absolutely! The key is to use a blend of flavorful, sharp cheeses and good melting cheeses. Gruyere, fontina, smoked Gouda, or even a touch of cream cheese can add wonderful complexity and creaminess.
Just ensure at least half of your cheese blend consists of cheeses known for melting well, like Monterey Jack or mild cheddar, to maintain that gooey texture.
Why is it important to use warmed milk?
Using warmed milk prevents lumps from forming when it’s added to the hot roux. Cold milk can shock the roux, making it seize and become clumpy.
Warmed milk blends seamlessly, ensuring a silky-smooth béchamel sauce, which is the foundation of a perfect Classic Baked Mac & Cheese.
Can I make this gluten-free?
Yes, you can! Simply substitute gluten-free elbow macaroni and use an all-purpose gluten-free flour blend (ensure it’s a 1:1 baking blend) for the roux.
Follow package directions for gluten-free pasta, as cooking times can vary. The rest of the recipe remains the same, delivering a delicious gluten-free option.
How do I get an extra crispy topping?
For an extra crispy topping, lightly butter about 1/2 cup of panko breadcrumbs and sprinkle them evenly over the mac and cheese before the uncovered baking phase.
A sprinkle of extra shredded Parmesan cheese on top during the last 10-15 minutes of baking also contributes to a lovely golden and crispy crust.
Is it okay to substitute skim milk?
While you can substitute skim milk, it will significantly impact the richness and creaminess of your baked macaroni and cheese. Whole milk is highly recommended for its fat content, which provides superior flavor and texture.
If you must use lower-fat milk, be aware the sauce might be less luxurious and could potentially be thinner or less stable.
Ready to Delight? Share Your Culinary Creation!
There’s truly nothing quite like a perfectly crafted Classic Baked Mac & Cheese to bring joy to any table. This recipe, developed with expertise and attention to detail, promises a consistently gooey, never-dry, and utterly delicious experience.
I am confident you’ll achieve spectacular results. Go ahead, gather your ingredients, and create this ultimate comfort food masterpiece. Don’t forget to share your amazing creation and let us know how much you loved your perfectly creamy and gooey mac and cheese!
Baked Mac and Cheese
Course: Main CourseCuisine: AmericanDifficulty: mediumServings8
servingsPrep time20
minutesCooking time40
minutesCalories650
kcalTotal time60
minutesThere’s nothing more disappointing than digging into a big batch of mac and cheese only to find it dry or lacking. This recipe cracks the code on making baked mac and cheese that stays incredibly creamy, gooey, and utterly delicious, guaranteeing perfect texture every single time.
Ingredients
1 pound elbow macaroni
1/2 cup (1 stick) unsalted butter
1/2 cup all-purpose flour
4 cups whole milk, warmed
4 cups shredded sharp cheddar cheese
2 cups shredded good melting cheese (like Monterey Jack or mild cheddar)
1 teaspoon salt
1/2 teaspoon black pepper
Directions
- Preheat your oven to 375 degrees Fahrenheit. Lightly grease a 9×13 inch baking dish.
- Cook the elbow macaroni in a large pot of salted boiling water according to package directions, but remove it from the heat when it’s still slightly firm or “al dente” (about 1 minute less than recommended). This is key to preventing mushy pasta and allowing it to absorb the creamy sauce without drying out. Drain well and set aside.
- In a large saucepan or Dutch oven, melt the butter over medium heat. Once melted, gradually whisk in the flour and cook for 1 to 2 minutes, constantly stirring, until a smooth paste (roux) forms. This roux is essential for thickening the sauce and preventing it from separating, ensuring a consistently creamy texture.
- Slowly pour the warmed milk into the roux, whisking continuously to prevent lumps. Continue to whisk as the sauce gently simmers and thickens, about 5 to 7 minutes, until it’s smooth and coats the back of a spoon. This careful whisking and slow addition helps create a stable, velvety base that won’t dry out.
- Remove the saucepan from the heat. Add the salt and pepper, then gradually add the shredded cheeses, stirring until completely melted and smooth. Adding the cheese off the heat and stirring patiently is crucial for a perfectly gooey, non-grainy sauce that stretches beautifully.
- Add the cooked, drained macaroni to the cheese sauce and stir until everything is evenly coated. Transfer the macaroni mixture to your prepared baking dish.
- Cover the baking dish tightly with aluminum foil. Bake for 20 minutes. Baking it covered initially traps steam and moisture, ensuring the pasta remains tender and the sauce stays wonderfully gooey throughout the baking process.
- Remove the foil and bake for an additional 15-20 minutes, or until the top is golden brown and bubbly. This final uncovered bake creates that irresistible crispy crust while the interior remains incredibly creamy and gooey.
- Let the mac and cheese rest for 5-10 minutes before serving. This allows the sauce to set slightly, making it even more luscious.
Notes
- Cook macaroni al dente to prevent mushiness. Add cheese off the heat for a perfectly gooey, non-grainy sauce. Resting the dish for 5-10 minutes before serving enhances creaminess.