Mastering Cheesy Beef Stuffed Peppers Without the Soggy Bottom
Nothing ruins a comforting dinner faster than a stuffed pepper that has collapsed into a watery, mushy mess. You’ve likely experienced it before: a bland pepper shell swimming in a pool of vegetable juice, with a filling that feels more like soup than a hearty meal. It’s a common frustration that turns a classic dish into a disappointing kitchen fail.
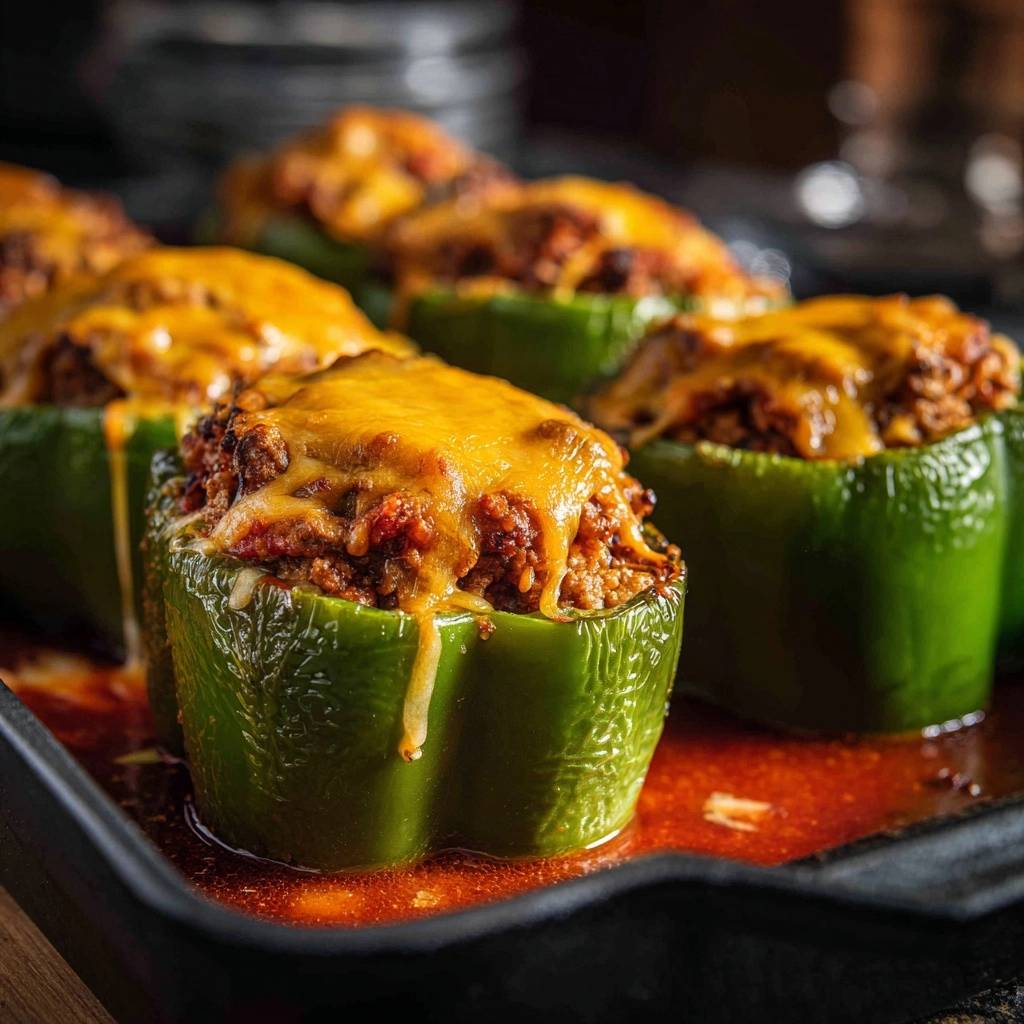
The secret to achieving the perfect Cheesy Beef Stuffed Peppers lies in a simple but transformative “Anti-Soggy” philosophy. By focusing on moisture control and structural integrity, you can create a dish where the pepper remains tender-crisp and the beef filling stays rich and concentrated. The contrast between the sharp, bubbly cheddar crust and the savory interior is exactly what makes this recipe a standout.
A similar trick for keeping the bottom crisp is used in this cheesy beef cornbread bake.
I’ve found that the definitive way to fix the texture issue is the pre-roast method. Instead of stuffing raw peppers, you must roast the empty shells first to evaporate their internal water content. This single step ensures your peppers hold their shape and provide a sturdy, flavorful vessel for the beef and rice. It’s a total game-changer for your weeknight rotation.
The Science of the Pre-Roast Technique
Bell peppers are roughly 92% water, which is why they often turn into a puddle in the oven. When you stuff a raw pepper and bake it, that moisture has nowhere to go but into your filling or the bottom of the dish. This creates a steaming effect that breaks down the pepper’s cell walls too quickly, leading to that dreaded structural collapse.
By using a “dry roast” method at 375°F for 15 minutes before adding any filling, you allow the heat to penetrate the pepper walls and draw out excess moisture. This process softens the cellular structure just enough to make it palatable while keeping it firm enough to stand upright. You’ll actually see steam escaping the oven, which is exactly what you want.
Traditional methods often suggest boiling the peppers or filling them raw, but both are flawed. Boiling adds even more water to the vegetable, while raw-filling traps the steam inside the meat mixture. The dry roast creates a thirsty, par-cooked vessel that is ready to soak up the savory juices from the beef without becoming a soggy disaster.
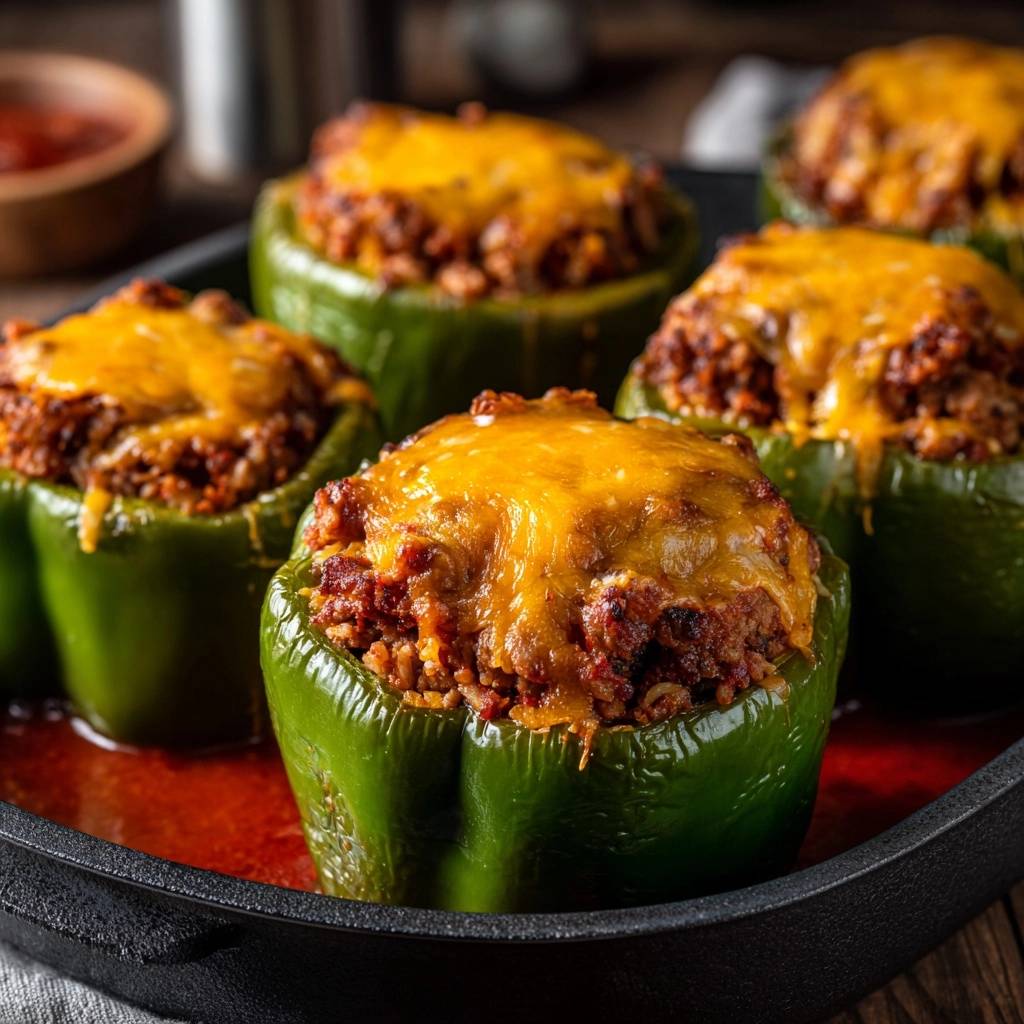
Essential Components for Cheesy Beef Stuffed Peppers
Quality ingredients are the backbone of this dish, and choosing the right beef is the first step toward success. I always recommend a 90/10 lean ground beef because it provides plenty of flavor without leaving a layer of grease at the bottom of your pepper. If you use a higher fat content, the grease will mix with the tomato sauce and make the filling feel heavy and oily.
For the starch, long-grain white rice is the gold standard here. Unlike jasmine or basmati, which can become a bit too soft or floral, long-grain rice maintains its individual grains and provides the structural integrity needed to bulk up the meat. It acts like a sponge for the tomato sauce and Worcestershire, holding the flavors together without turning into mush.
Tomato paste is another non-negotiable “secret” ingredient. While many recipes rely solely on tomato sauce, adding a tablespoon of concentrated paste provides a thick, jammy consistency. It acts as a binder, ensuring the filling is hearty and mounded rather than runny. Combined with the “umami backbone” of smoked paprika and Worcestershire sauce, you get a deep, savory profile that tastes like it simmered for hours.
Selecting the Right Bell Peppers
When you’re at the grocery store, look for peppers with four distinct lobes on the bottom. These are often called “female” peppers, and they have a flatter base that allows them to sit perfectly upright in your skillet. Stability is key when you’re trying to get that perfect cheese melt on top without the peppers tipping over.
Green bell peppers are the classic choice because their slightly bitter, grassy notes balance the richness of the beef and cheddar. However, if you prefer a sweeter profile, red or orange peppers work beautifully. Just keep in mind that colored peppers are riper and may soften slightly faster than the sturdy green ones during the roasting process.
The Importance of Sharp Cheddar
Aged sharp cheddar is the only way to go for that iconic golden crust. It has a lower moisture content than mild cheddar, which means it melts into a thick, flavorful blanket rather than a greasy puddle. The sharpness provides a necessary punch that cuts through the savory beef and sweet tomato sauce.
If you can, grate your own cheese from a block. Pre-shredded bags are coated in potato starch or cellulose to prevent clumping, which interferes with the melting process. Freshly grated cheese gives you that perfect “cheese pull” and develops those beautiful toasted brown spots that make the dish look professional.
Phase One: Preparing the Pepper Vessels
Start by slicing the tops off your peppers and removing the seeds and white membranes. You want a clean, hollow cavity to maximize the amount of filling you can fit inside. Once they’re prepped, stand them upright in a cast-iron skillet or a deep baking dish, making sure they’re snug so they support each other.
It is vital that you do not add any water or oil to the pan during this initial 15-minute roast. This is a dry heat phase designed to “sweat” the peppers. When you pull them out, you might see a little liquid pooled at the bottom of the shells; just carefully tip it out before you start the stuffing process.
Phase Two: Building the Savory Beef Filling
While the peppers are in the oven, get your skillet screaming hot for the beef. Brown the meat thoroughly until you see those crispy, dark bits—that’s where the flavor lives. Once it’s browned, drain the fat completely. This is a critical “anti-soggy” step that prevents the rice from becoming greasy and heavy.
Add your diced onions and garlic next, sautéing them until they are translucent and fragrant. You’ll smell the sweetness of the onions starting to release. Stir in the tomato paste, rice, and half of the tomato sauce, along with your spices. The mixture should look thick and cohesive, almost like a stiff chili, rather than a soup.
Phase Three: The Two-Stage Baking Process
Now it’s time to assemble. Pack the beef mixture into the pre-roasted peppers tightly. Don’t be afraid to use a spoon to press it down; you want to avoid air pockets so the peppers stay juicy and the filling doesn’t crumble when you cut into it. Mound the filling slightly over the top for a generous look.
For the second bake, pour the remaining tomato sauce and the beef broth into the bottom of the pan, not over the peppers. This creates a savory braising liquid that steams the pepper skin from the outside, making it tender without diluting the seasoned meat inside. Cover the dish tightly with foil to trap that steam for about 20 minutes.
This two-stage approach ensures the meat stays moist while the pepper finishes cooking. The foil prevents the top of the filling from drying out before the pepper walls are fully softened. It’s the perfect balance of textures that most recipes miss by trying to do everything in one go.
Achieving the Perfect Golden Cheese Crust
The final 10 to 12 minutes are all about the cheese. Remove the foil and pile a generous amount of shredded cheddar on each pepper. You want a thick layer that will melt down the sides slightly. Bake it uncovered so the dry heat can work its magic on the dairy.
Keep a close eye on the oven during this stage. You’re looking for “leopard spotting”—those gorgeous golden-brown patches that indicate the proteins in the cheese have caramelized. If you like an extra-crispy top, flip the broiler on for the last 2 minutes, but don’t walk away! It can go from perfect to burnt in seconds.
Troubleshooting Common Stuffed Pepper Issues
If you find your filling is falling apart when you take a bite, it usually means it wasn’t packed tightly enough or needs a bit more binder. Next time, add an extra tablespoon of tomato paste or a splash more sauce to the beef mixture to help it stick together. Tightly packed peppers always hold their shape better on the plate.
If the peppers are still too crunchy for your liking after the foil bake, simply leave the foil on for an extra 5 to 10 minutes before adding the cheese. Every oven is different, and thicker-walled peppers sometimes need a little more time in the “steam sauna” to reach that buttery, tender consistency.
Should you end up with too much liquid in the pan at the end, don’t toss it! Carefully remove the peppers to a serving platter and place the skillet on the stovetop over medium-high heat. Simmer the liquid for a few minutes until it reduces into a thick, savory glaze that you can spoon right back over the top.
Optimal Side Dish Pairings
Since these peppers are quite rich and hearty, I love pairing them with something high in acid to cleanse the palate. A simple arugula salad tossed with a sharp lemon vinaigrette is the perfect companion. The peppery bite of the greens cuts right through the heavy beef and melted cheddar.
If you want to lean into the comfort food vibes, garlic-rubbed crostini are essential. They provide a much-needed crunch and are the perfect tool for mopping up every last drop of that savory tomato and beef broth reduction from the bottom of the pan. It’s a shame to let that flavor go to waste!
For a lighter option, a quick vegetable medley of roasted zucchini or steamed green beans works well. Since the peppers already contain protein, starch, and vegetables, you don’t need anything too complex. Keep the sides simple so the Cheesy Beef Stuffed Peppers remain the star of the show.
Storage, Reheating, and Meal Prep Strategy
These peppers are fantastic for meal prep because the flavors actually deepen overnight. You can store them in an airtight container in the fridge for up to 4 days. They stay remarkably sturdy, thanks to that pre-roasting technique we used earlier, so they won’t turn into mush while sitting in the refrigerator.
When it comes to reheating, step away from the microwave if you can. The microwave tends to make the pepper skin rubbery and the cheese oily. Instead, pop them back into a 350°F oven or an air fryer for about 10 minutes. This helps recrisp the cheese and maintains the integrity of the pepper vessel.
If you want to freeze this meal, I recommend freezing the beef filling separately in a freezer bag. While you can freeze fully assembled peppers, the freezing and thawing process can make the vegetable walls a bit softer than fresh. If you do freeze the whole pepper, thaw it in the fridge overnight before reheating in the oven.
Expert Tips for Flavor Customization
Once you’ve mastered the base recipe, you can easily tweak the flavors. For a “Heat” variation, swap the cheddar for pepper jack and add a finely diced jalapeño to the beef while it browns. It gives the dish a spicy kick that pairs beautifully with the smoky paprika.
If you want to sneak in more vegetables, try the “Garden” variation by swapping half of the ground beef for finely chopped mushrooms. Sauté the mushrooms until they’ve released all their water and turned golden; they provide a similar meaty texture and a wonderful earthy flavor that complements the bell peppers perfectly.
How do I prevent the peppers from falling over in the pan?
The best trick is to use a baking dish or skillet that fits the peppers snugly. If there is too much extra space, the peppers will tilt as they soften. You can also use small crumpled balls of aluminum foil to fill the gaps between peppers, creating a custom “rack” that keeps them standing perfectly upright throughout the entire baking process.
Can I use a different grain instead of white rice?
Yes, you can substitute the white rice with quinoa, farro, or even cauliflower rice. If using quinoa or farro, make sure they are fully cooked before adding them to the beef. For cauliflower rice, sauté it briefly with the beef to cook off excess moisture. Keep in mind that heartier grains like farro will give the filling a nuttier, chewier texture compared to the classic soft feel of white rice.
Why is my cheese greasy instead of bubbly and brown?
Greasy cheese usually happens if you use a low-quality “mild” cheddar or pre-shredded cheese with added oils. It can also happen if the oven temperature is too low, causing the fat to separate before the proteins can brown. Ensure your oven is fully preheated to 375°F and use a sharp, block-grated cheddar for the best results. If it’s still greasy, a quick 60-second broil can help crisp up those oils.
Can I make this recipe ahead of time?
Absolutely. You can prepare the beef filling and pre-roast the peppers up to 24 hours in advance. Store them separately in the fridge. When you’re ready to eat, simply stuff the cold peppers, add the broth to the pan, and increase the foil-covered baking time by about 10 minutes to ensure the cold filling is heated all the way through before adding the cheese.
What is the best way to store leftovers so they don’t get soggy?
To keep leftovers in prime condition, store them in a container that isn’t much larger than the peppers themselves to minimize air exposure. If there is a lot of sauce left in the pan, store it in a separate small jar rather than letting the peppers sit in it. This prevents the bottom of the pepper from absorbing extra liquid and becoming mushy while it sits in the fridge.
Can I substitute the ground beef with something else?
Ground turkey or ground chicken are excellent lean substitutes. However, because these meats have less fat and a milder flavor than beef, you should add an extra teaspoon of Worcestershire sauce or a pinch more salt to ensure the filling isn’t bland. You can also use a plant-based meat crumble, following the same browning instructions to develop a good crust before adding the aromatics.
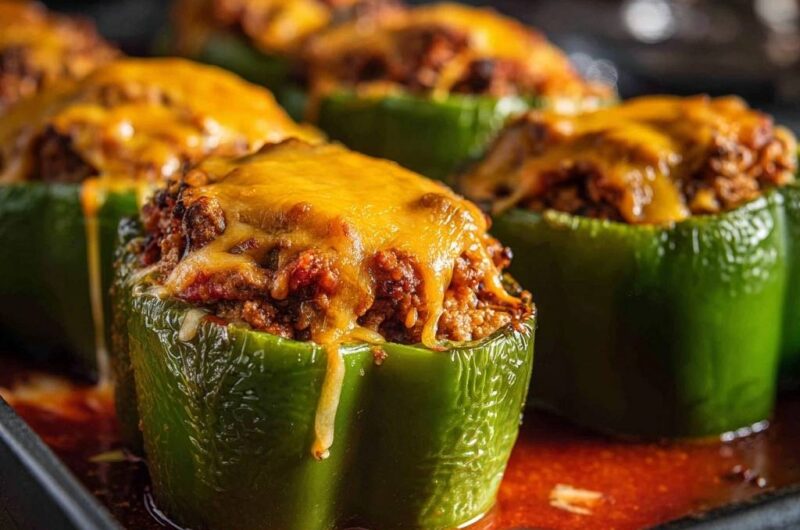
Cheesy Beef Stuffed Peppers
Course: Main CourseCuisine: AmericanDifficulty: medium6
servings15
minutes45
minutes410
kcal60
MinutesA hearty and savory dish featuring lean ground beef, rice, and aromatic spices stuffed into bell peppers and topped with a thick layer of melted sharp cheddar cheese. The recipe uses a dry-roast technique to ensure the peppers stay firm and flavorful.
Ingredients
6 large green bell peppers, tops removed and seeded
1.5 lbs lean ground beef
1 cup cooked white rice (reduced for a meatier texture)
1 small onion, finely diced
2 cloves garlic, minced
1 can (15 oz) tomato sauce
1 tablespoon tomato paste (for thickness and color)
1 tablespoon Worcestershire sauce
1 teaspoon dried oregano
1 teaspoon smoked paprika
1 teaspoon salt
1/2 teaspoon black pepper
2.5 cups shredded sharp cheddar cheese
1/2 cup beef broth (for the pan base)
Directions
- Preheat your oven to 375°F (190°C). Place the empty, hollowed-out peppers upright in a cast-iron skillet or deep baking dish. Do not add water to the dish yet. Roast the empty peppers for 15 minutes. This “dry roast” evaporates the internal moisture of the pepper walls to prevent sogginess.
- While the peppers pre-cook, brown the ground beef in a large skillet over medium-high heat. Drain the excess fat thoroughly.
- Add the diced onion and garlic to the beef and sauté for 3 to 4 minutes until softened.
- Stir in the tomato paste, cooked rice, half of the tomato sauce, Worcestershire sauce, oregano, smoked paprika, salt, and pepper. Simmer for 5 minutes until the mixture is thick and the sauce has bound the ingredients together.
- Remove the peppers from the oven. Carefully drain any liquid that has pooled inside the shells.
- Fill each pepper generously, packing the beef mixture tightly so it mounds slightly over the top.
- Pour the remaining tomato sauce and the 1/2 cup of beef broth into the bottom of the skillet (around the peppers, not over them). This creates the savory red reduction shown in the image without watering down the filling.
- Cover the dish with foil and bake for 20 minutes.
- Remove the foil. Top each pepper with a very generous mound of shredded cheddar cheese.
- Bake uncovered for an additional 10-12 minutes, or broil for 2 minutes, until the cheese is deeply melted, bubbly, and shows the golden-brown patches seen in the visual. Serve immediately, spooning the pan sauce over the peppers if desired.
Notes
- The secret to avoiding a watery result is roasting the empty pepper shells for 15 minutes before filling. Ensure you drain the beef fat thoroughly for the best texture.