Classic Banana Upside-Down Cake: Foolproof & Fluffy
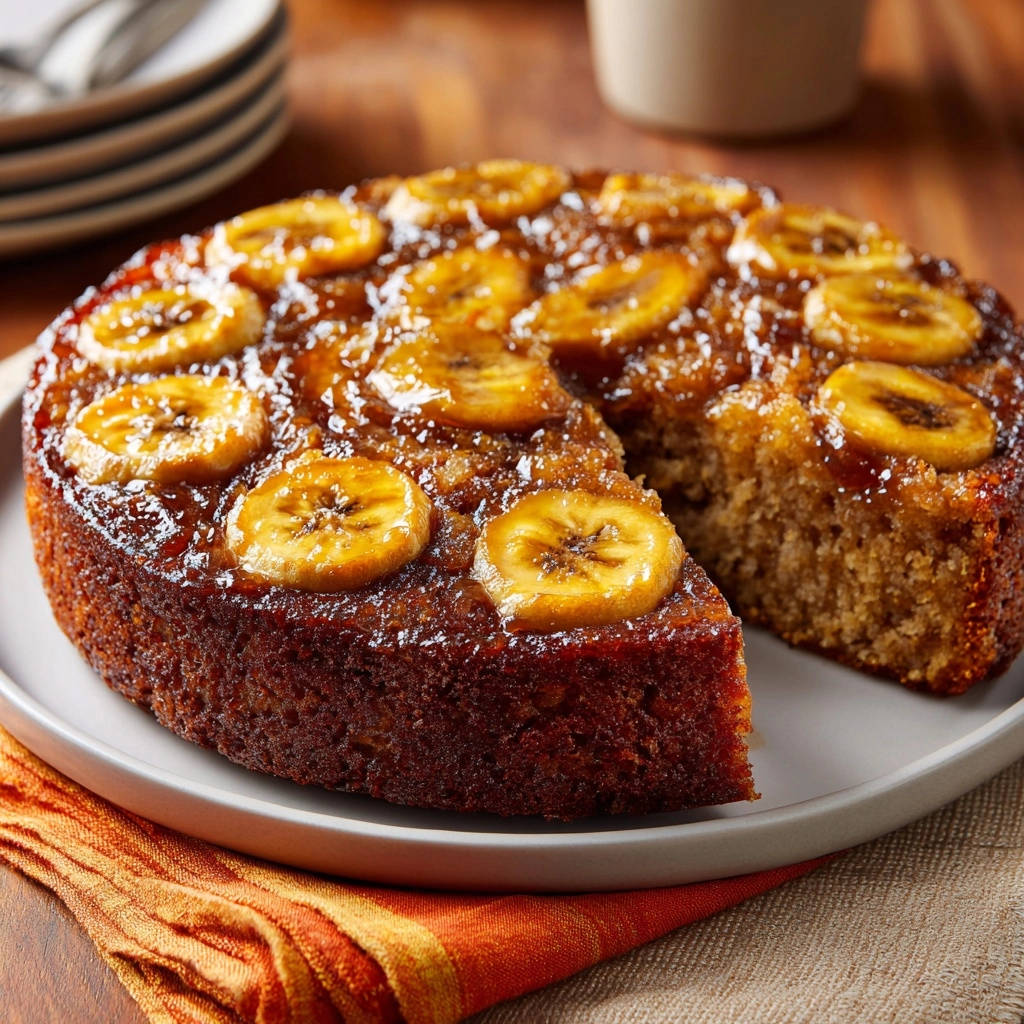
There’s nothing quite like baking a Classic Banana Upside-Down Cake, yet getting that beautiful caramel top to release perfectly can feel like a high-stakes challenge! I’ve certainly had my share of sticky situations and less-than-perfect flips over the years. But through countless test batches, I’ve finally cracked the code to ensure that stunning, caramelized banana layer comes out flawlessly every single time.
This recipe isn’t just about a delicious dessert; it’s about mastering the technique to achieve a picture-perfect finish that truly impresses. Get ready to bake a moist, tender cake crowned with sweet, golden bananas that will have everyone asking for your secret.
If you love the caramelized fruit topping here, you will also enjoy the bright citrus finish of this glazed blueberry lemon bundt cake.
The Secret to a Picture-Perfect Classic Banana Upside-Down Cake, Every Time
What Makes Our Recipe Stand Out?
This Classic Banana Upside-Down Cake recipe ensures consistently beautiful presentation, making it a showstopper for any occasion. Our unique method guarantees an effortless release from the pan, preventing frustrating sticking issues.
You’ll enjoy a remarkably moist and tender cake crumb, perfectly balancing the sweetness of the caramelized bananas. The harmonious blend of flavors makes this an irresistible treat.
Beyond the Basics: Unlocking Foolproof Release
The foundation of a successful upside-down cake lies in meticulous pan preparation. We utilize a precisely cut parchment paper circle for the pan bottom, creating a reliable non-stick barrier.
Timing the cooling process before the crucial flip is paramount. A brief 5-minute cool in the pan allows the cake to set slightly while the caramel remains fluid enough to release cleanly.
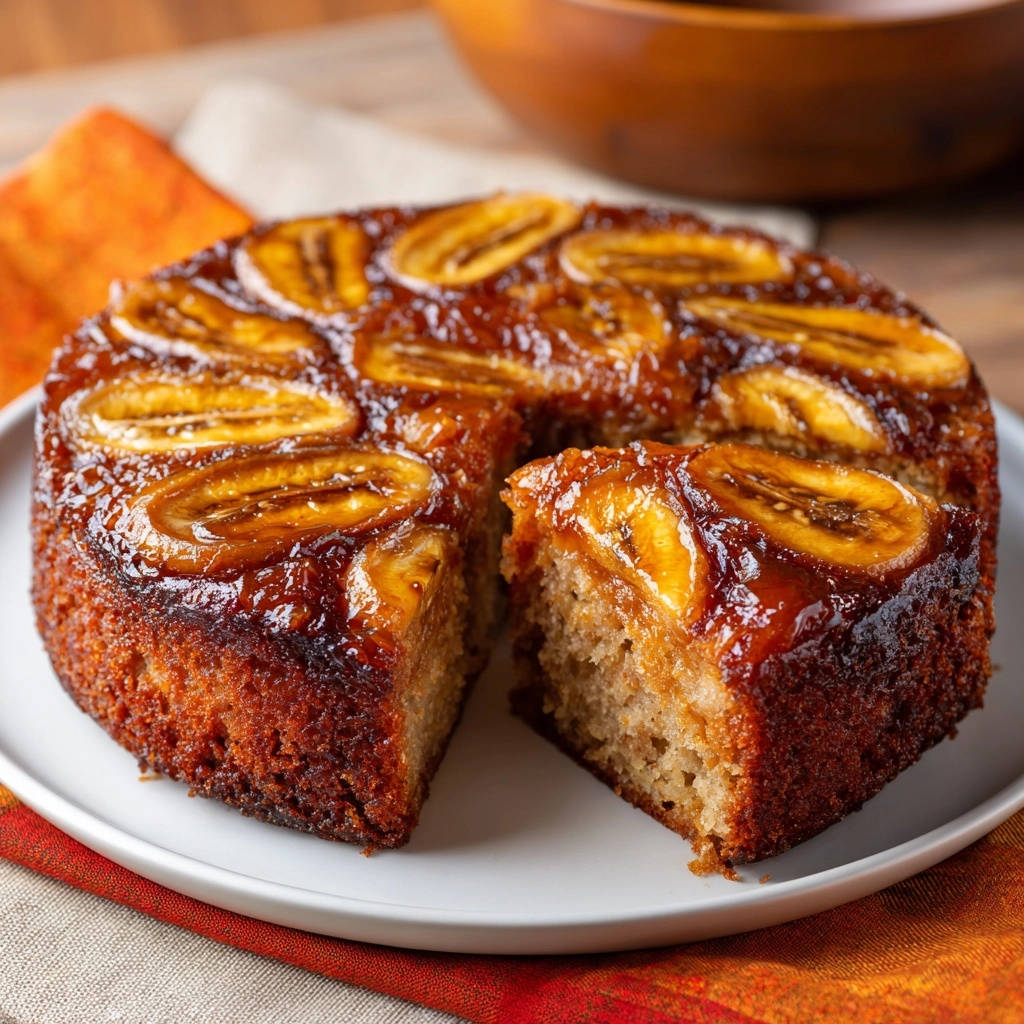
The second 5-minute rest after inverting the cake allows the warm caramel to fully cascade over and seep into the cake, creating that signature luscious glaze.
Gathering Your Baking Brigade: Essential Ingredients Breakdown
The Caramel Base: Butter, Sugar, and Those Bananas
Unsalted butter is essential for the caramel layer, as it allows you to control the overall saltiness of the dish. It creates a rich, fluid base for the brown sugar to melt into.
Light brown sugar adds a deep, molasses-rich sweetness and creates a gorgeous, glossy caramel when melted. Its packed nature ensures the right density for the topping.
Using ripe, but not overly soft, bananas is key. They provide the perfect balance of sweetness and firmness to hold their shape during baking, contributing essential moisture and flavor to the caramelized topping.
Creating the Perfect Crumb: Flour, Leavening & Spice
All-purpose flour forms the structural backbone of your cake, providing the necessary gluten development for a tender yet stable crumb. Proper measurement is crucial for the ideal texture.
Baking soda acts as our primary leavening agent, reacting with the acidic components in the buttermilk (or milk) and brown sugar to create carbon dioxide gas. This gas produces the airy pockets that give the cake its light, fluffy texture.
Salt isn’t just for savory dishes; in baking, it sharpens and balances the sweetness, enhancing all the other flavors. Ground cinnamon and nutmeg add a warm, comforting aroma and subtle spice, beautifully complementing the banana’s natural sweetness.
Moisture & Richness: Eggs, Milk & Vanilla
A large egg provides essential structure, richness, and emulsification, binding the ingredients together for a cohesive batter. It also contributes to the cake’s tender crumb and golden hue.
Milk or buttermilk adds crucial moisture, contributing significantly to the cake’s tenderness and rich mouthfeel. Buttermilk, in particular, reacts with baking soda to create a beautifully soft crumb.
Vanilla extract elevates the entire flavor profile, adding a sweet, aromatic depth that marries perfectly with the bananas and caramel. Always use pure vanilla for the best results.
Essential Tools for Your Classic Banana Upside-Down Cake Journey
9-inch Round Cake Pan: This standard size ensures even baking and the perfect surface area for your banana and caramel topping.
Parchment Paper: A game-changer for foolproof release, creating a non-stick barrier between your cake and the pan bottom.
Small Saucepan: Ideal for melting butter for the caramel layer, ensuring it’s evenly distributed.
Wire Rack: Essential for proper cooling, allowing air circulation around the cake for even temperature reduction after baking.
Mixing Bowls (Medium & Large): You’ll need separate bowls for whisking dry ingredients and creaming wet ingredients, streamlining your prep.
Electric Mixer (Handheld or Stand): For creaming butter and sugar until light and fluffy, and for efficiently combining the batter ingredients.
Whisk: Perfect for blending dry ingredients and ensuring they are lump-free before incorporating into the wet mixture.
Rubber Spatula: Indispensable for scraping down bowls, gently folding ingredients, and spreading the batter evenly.
Baking Brilliance: Step-by-Step Guide to Classic Banana Upside-Down Cake
Prepping for Perfection: Pan & Caramel Base
Preheat & Prepare Pan: Preheat your oven to 350°F (175°C). This ensures the oven is at the correct temperature from the start, promoting even baking. Generously grease a 9-inch round cake pan with butter, covering all sides and the bottom. For a truly foolproof release, cut a circle of parchment paper to fit the bottom of the pan precisely and place it in. Grease the parchment paper as well; this double layer of protection is key to a clean flip.
Melt Butter for Caramel: Melt 1/4 cup of the unsalted butter. You can do this in a small saucepan over medium heat, or directly in your prepared cake pan if it’s oven-safe and you plan to build the caramel directly in it. Ensure the butter is fully melted and golden.
Add Brown Sugar: Pour the melted butter evenly into the bottom of your prepared cake pan, ensuring it coats the parchment. Then, sprinkle the packed light brown sugar evenly over the melted butter. This creates the sweet, sticky base that will become your gorgeous caramel topping.
Arrange Bananas: Carefully arrange the 1/4-inch sliced banana rounds over the brown sugar in a decorative pattern. Overlapping them slightly can create a beautiful mosaic effect. The bananas will soften and meld into the caramel during baking.
Crafting the Batter: Mixing for Mellow Texture
Combine Dry Ingredients: In a medium bowl, whisk together the all-purpose flour, baking soda, salt, ground cinnamon, and ground nutmeg until well combined. Whisking ensures these ingredients are evenly distributed, so you don’t end up with pockets of leavener or spice.
Cream Wet Ingredients: In a large bowl, using an electric mixer, cream together the remaining 1/4 cup softened butter and the granulated sugar until the mixture is light and fluffy. This process incorporates air, contributing to the cake’s tender texture. Beat in the large egg until it is fully incorporated and the mixture is smooth, then stir in the pure vanilla extract and the mashed banana. The mashed banana adds moisture and intense banana flavor to the cake itself.
Combine Wet and Dry: Gradually add the dry ingredient mixture to the wet ingredients in the large bowl, alternating with the milk (or buttermilk). Begin and end with the dry ingredients. Mix on low speed or by hand until just combined. The most crucial tip here is to be careful not to overmix, as overmixing can develop too much gluten, resulting in a tough, dense cake.
The Big Bake: Oven Time & Doneness
Pour Batter & Bake: Gently pour the cake batter over the bananas and brown sugar in the prepared pan. Use a rubber spatula to spread it evenly to the edges, being careful not to disturb the banana arrangement too much. Bake for 35 to 40 minutes in your preheated oven. The baking time can vary slightly depending on your oven, so keep an eye on it.
Check for Doneness: The cake is ready when a wooden skewer or toothpick inserted into the center comes out clean, with no wet batter attached. The top should be golden brown and spring back lightly when touched.
The Critical Flip: Mastering the Upside-Down Reveal
Cool Briefly in Pan: Once baked, immediately remove the cake from the oven. This is a critical step: let it cool in the pan on a wire rack for only 5 minutes. This brief cooling period allows the cake to set slightly, making it more stable for the flip, while the caramel remains warm and fluid.
The Flip: After 5 minutes, place your serving plate (the one you intend to present the cake on) upside down directly over the cake pan. Using oven mitts, firmly grasp both the plate and the pan together. With confidence, quickly but carefully flip the cake over onto the plate. This swift motion helps the cake release cleanly.
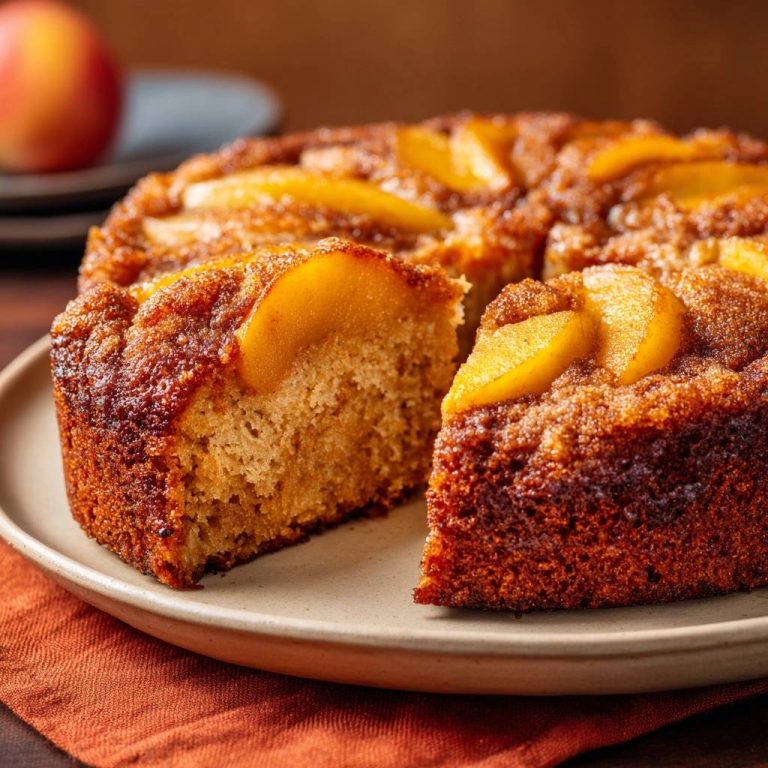
Second Rest & Reveal: Let the cake sit inverted on the serving plate for another 5 minutes. This crucial waiting period allows any remaining caramel to fully release from the pan and drip down, generously coating the cake. Then, carefully lift the cake pan straight up, peel off the parchment paper, and marvel at your perfectly released, gorgeous Classic Banana Upside-Down Cake. Serve warm for the best experience.
Chef’s Secrets & Pro Tips for Classic Banana Upside-Down Cake Success
The Parchment Paper Advantage: A Release Revelation
Parchment paper is your ultimate ally for any upside-down cake. It creates a non-stick barrier that guarantees a clean release, eliminating the guesswork and potential sticking that often comes with these types of cakes. Don’t skip this simple but transformative step!
Don’t Overmix: The Key to a Tender Crumb
Overmixing cake batter is a common pitfall that leads to a tough, dense cake. When flour is over-agitated, gluten develops excessively, making the cake chewy rather than tender. Mix just until the ingredients are combined and no dry streaks remain.
Timing is Everything: The Golden Rule of Flipping
The 5-minute cooling rule before and after flipping is non-negotiable for optimal caramel flow and cake release. Too short, and the cake may fall apart; too long, and the caramel might harden and stick. Adhere closely to these timings.
Banana Best Practices: Ripeness and Arrangement
Choose ripe bananas with some brown spots, but avoid those that are completely mushy. They offer the best flavor and sweetness for the caramel layer. For a visually appealing cake, arrange your banana slices in a concentric pattern; consistency makes for a beautiful presentation.
Troubleshooting Your Classic Banana Upside-Down Cake: Common Issues Solved
Why Did My Cake Stick to the Pan?
If your cake stuck, it’s likely due to insufficient greasing, not using parchment paper, or flipping too late. Ensure the pan is thoroughly buttered, and always use greased parchment on the bottom.
Flipping the cake too long after it comes out of the oven can cause the caramel to cool and harden, bonding to the pan. Stick to the 5-minute pre-flip cooling time.
My Cake is Dry/Dense – What Went Wrong?
A dry or dense cake is often a sign of overmixing the batter. Overmixing develops too much gluten, leading to a tough texture. Mix only until the flour streaks disappear.
Another cause could be over-baking. Ensure you remove the cake from the oven as soon as a skewer comes out clean, usually around 35-40 minutes.
The Caramel Didn’t Set Right or Is Too Hard
If your caramel is too runny, it might be due to using under-ripe bananas that release less moisture, or not enough brown sugar. Ensure your bananas have good ripeness.
If the caramel is too hard, you likely let the cake cool too long in the pan before flipping. The caramel hardens quickly once it cools, so the 5-minute rule is critical for a pourable, luscious topping.
Serving, Storing & Savoring Your Banana Upside-Down Cake
Best Ways to Serve This Delight
This Classic Banana Upside-Down Cake is truly at its best served warm, allowing the caramel to remain gooey and the bananas tender. A simple dusting of powdered sugar adds an elegant touch and balances the richness.
For a perfect pairing, try our Mastering the Glazed Lemon Blueberry Loaf.
For an indulgent treat, pair a slice with a scoop of creamy vanilla ice cream, which melts beautifully into the warm cake. A dollop of freshly whipped cream also makes for a delightful complement.
How to Store Leftovers for Freshness
Store any leftover Classic Banana Upside-Down Cake covered loosely with plastic wrap or foil at room temperature for up to 2 days. The cake’s moisture helps it stay fresh.
For longer storage, refrigerate the cake, tightly covered, for up to 4-5 days. While refrigeration can slightly alter the texture, it will still be delicious.
You can also freeze individual slices, well-wrapped in plastic wrap and then foil, for up to 2-3 months. Thaw at room temperature or gently warm in the microwave before serving.
Can You Make This Cake Ahead of Time?
Yes, you can absolutely make this Classic Banana Upside-Down Cake ahead of time! It holds up beautifully and the flavors deepen overnight. Prepare it up to one day in advance for best results.
If serving the next day, simply cover it loosely at room temperature. For a fresh-from-the-oven feel, you can gently warm individual slices in the microwave for 20-30 seconds or in a low oven.
Your Classic Banana Upside-Down Cake Questions Answered
What kind of bananas are best for upside-down cake?
Use ripe bananas with plenty of brown spots, but not overly soft or mushy. This ripeness level ensures maximum sweetness and flavor for the caramel topping, while still holding their shape well.
Can I use a different size pan?
While a 9-inch round cake pan is recommended, you can use an 8-inch round pan, but you may need to increase the baking time by 5-10 minutes and the cake will be taller. For a 9×13 inch rectangular pan, you would likely need to double the recipe, and baking time would vary.
Is buttermilk essential, or can I use regular milk?
Buttermilk creates a slightly more tender and moist crumb due to its acidity reacting with the baking soda. However, regular milk works perfectly fine. If using regular milk and you want the tang of buttermilk, add 1 tablespoon of lemon juice or white vinegar to 1/2 cup of milk and let it sit for 5 minutes before using.
Can I add nuts or other fruits?
Absolutely! Chopped pecans or walnuts can be sprinkled over the brown sugar layer for added crunch and flavor. For other fruits, thin slices of pineapple or peaches can be used in place of, or in addition to, the bananas, though banana is classic for a reason!
Ready to Impress? Share Your Classic Banana Upside-Down Cake Masterpiece!
Now that you’re armed with the secrets to a truly foolproof and utterly delicious Classic Banana Upside-Down Cake, it’s time to get baking! Don’t be surprised if this becomes your most requested dessert.
What’s Next?
Banana cake has a natural affinity for warm, sweet flavors. Here are two pairings that match its tender crumb and caramelized topping.
- The soft cake contrasts nicely with firm candied sweet potatoes and their glossy glaze for a textural change.
- For a cool, creamy counterpoint, serve slices alongside thick caramel apple dip that won’t run off the plate.
I encourage you to try this recipe, savor every warm, caramel-drenched bite, and then share your stunning results! Tag us on social media and let us know how your masterpiece turned out. Happy baking!
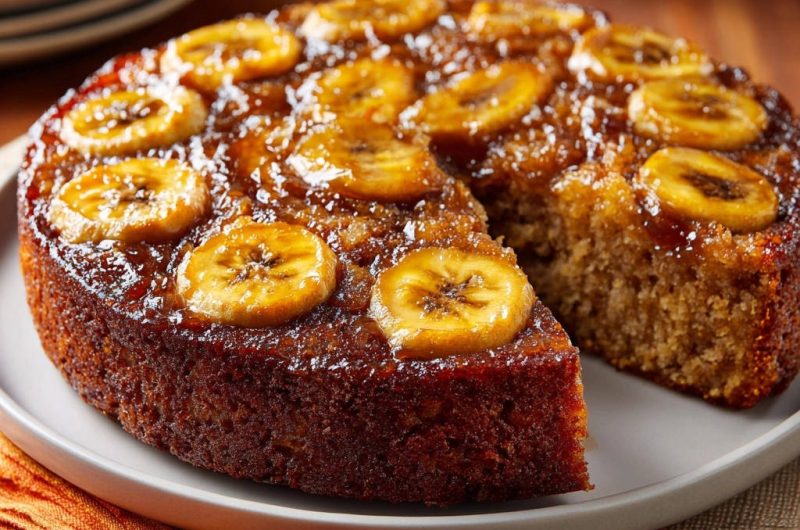
Banana Upside-Down Cake
Course: DessertCuisine: AmericanDifficulty: easy8
servings20
minutes40
minutes350
kcal60
minutesThere’s nothing quite like a warm slice of banana upside-down cake. This recipe shares the secret to a perfectly released caramel and banana topping every single time, turning a high-stakes challenge into an easy, impressive bake. Achieve that picture-perfect finish with minimal effort.
Ingredients
1/2 cup unsalted butter, divided
1 cup packed light brown sugar
3 ripe medium bananas, 2 sliced into 1/4-inch rounds, 1 mashed
1 1/2 cups all-purpose flour
1 teaspoon baking soda
1/2 teaspoon salt
1/2 teaspoon ground cinnamon
1/4 teaspoon ground nutmeg
1/2 cup granulated sugar
1 large egg
1 teaspoon vanilla extract
1/2 cup milk or buttermilk
Directions
- Preheat your oven to 350°F (175°C). Grease a 9-inch round cake pan thoroughly with butter. For the foolproof release, cut a circle of parchment paper to fit the bottom of the pan precisely, and place it in. Grease the parchment paper as well.
- Melt 1/4 cup of the butter in a small saucepan over medium heat, or in the prepared cake pan if it’s oven-safe and you’re making the caramel directly in it. Pour the melted butter evenly into the bottom of the prepared cake pan.
- Sprinkle the brown sugar evenly over the melted butter in the pan.
- Arrange the sliced banana rounds over the brown sugar in a decorative pattern.
- In a medium bowl, whisk together the flour, baking soda, salt, cinnamon, and nutmeg. Set aside.
- In a large bowl, cream together the remaining 1/4 cup softened butter and the granulated sugar until light and fluffy. Beat in the egg until well combined, then stir in the vanilla extract and the mashed banana.
- Gradually add the dry ingredient mixture to the wet ingredients, alternating with the milk, beginning and ending with the dry ingredients. Mix until just combined, being careful not to overmix.
- Pour the cake batter gently over the bananas and brown sugar in the prepared pan, spreading it evenly.
- Bake for 35 to 40 minutes, or until a wooden skewer inserted into the center of the cake comes out clean.
- Once baked, remove the cake from the oven and let it cool in the pan on a wire rack for only 5 minutes. This is a critical step for easy release.
- After 5 minutes, place a serving plate upside down over the cake pan. Using oven mitts, firmly grasp both the plate and the pan together and quickly but carefully flip the cake over onto the plate.
- Let the cake sit inverted for another 5 minutes, allowing the caramel to fully release and drip down over the cake. Then, carefully lift the cake pan straight up, peel off the parchment paper, and reveal your perfectly released, gorgeous banana upside-down cake. Serve warm.
Notes
- Critical steps for easy release include precise cooling times and parchment paper.