Classic Cream Filled Doughnuts: Perfectly Light & Non-Greasy!
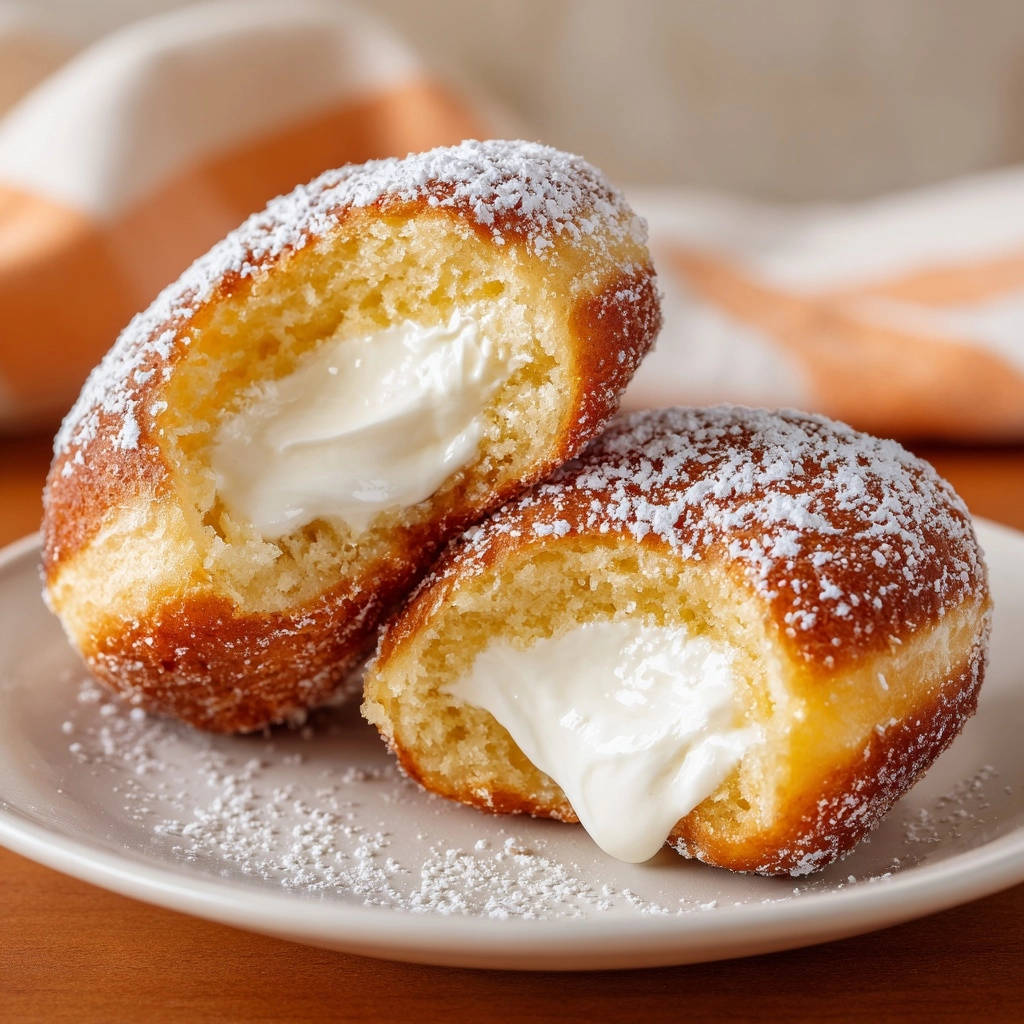
There’s nothing quite like the dream of biting into a perfectly light, fluffy, and tender doughnut, but making homemade Classic Cream Filled Doughnuts often comes with the dread of a greasy, heavy result. I’ve been there, too, struggling with oil-soaked dough that deflates all the joy. Thankfully, I’ve perfected a game-changing method that guarantees perfectly airy, non-greasy Classic Cream Filled Doughnuts every single time.
The Secret to Non-Greasy, Fluffy Doughnuts (Every Single Time!)
The magic behind these truly exceptional Classic Cream Filled Doughnuts lies in precise temperature control during frying and meticulous dough proofing. These two elements, often overlooked, are the keys to avoiding that dreaded oily texture and achieving an irresistibly soft crumb.
This recipe focuses on building an elastic, rich dough that’s light enough to float beautifully in the oil, rather than absorbing it. Coupled with a creamy, dreamy filling, these treats are truly a cut above any bakery offering.
Prepare to impress yourself and everyone lucky enough to try these homemade delights. You’ll find the process surprisingly straightforward with our expert guidance.
Gather Your Essentials: What You’ll Need for Classic Cream Filled Doughnuts
For the Dough: Achieving the Perfect Foundation
- 1 cup warm whole milk (105-115 degrees F):
The precise temperature of the milk is vital for activating the yeast without killing it, ensuring a lively dough rise and a light texture.
- 2 and 1/4 teaspoons active dry yeast (one packet):
This essential leavening agent creates the airy, fluffy texture characteristic of the best Classic Cream Filled Doughnuts.
- 1/4 cup granulated sugar, plus 1 teaspoon:
Sugar not only sweetens the dough but also feeds the yeast, aiding its activity and contributing to a beautiful golden crust during frying.
- 1 large egg:
Adds richness, moisture, and helps bind the dough, contributing to a wonderfully tender and moist crumb.
- 1 teaspoon vanilla extract:
A touch of vanilla enhances the overall flavor profile of the doughnut, adding warmth and a subtle, inviting aroma.
- 1/2 teaspoon salt:
Balances the sweetness and strengthens the gluten structure, which is crucial for proper dough development and elasticity.
- 3 cups all-purpose flour, plus more for dusting:
The structural backbone of the doughnut, providing the necessary gluten for chew and elasticity, while holding its shape.
- 1/4 cup unsalted butter, softened:
Incorporating softened butter creates a richer, more tender dough and contributes to a beautiful, even golden exterior during frying.
Crafting the Creamy, Dreamy Filling
- 8 ounces cream cheese, softened:
Softened cream cheese is the base, ensuring a smooth, lump-free, and tangy-sweet filling with a luxurious texture.
- 1/2 cup powdered sugar:
Sweetens the cream cheese filling, adding a delicate sweetness that balances the tang and creates a silky consistency.
- 1/4 cup whole milk or heavy cream:
Provides the necessary liquid to thin the filling to a pipeable consistency, making it smooth and irresistible.
- 1 teaspoon vanilla extract:
Enhances the rich, creamy flavor of the filling, adding a classic, aromatic touch.
Frying Oil & Finishing Touches: The Golden Glow
- 6-8 cups vegetable oil (or similar neutral oil):
A neutral oil with a high smoke point is crucial for frying, allowing the doughnuts to cook evenly to a golden brown without imparting unwanted flavors.
- 1/2 cup powdered sugar (for dusting):
A final dusting of powdered sugar adds a delicate sweetness and a beautiful, classic finish to your filled Classic Cream Filled Doughnuts.
Your Doughnut Workshop: Essential Tools for Success
For Dough Preparation & Rising
- Large mixing bowls:
Essential for combining ingredients and allowing the dough to rise comfortably.
- Measuring cups and spoons:
For accurate ingredient quantities, vital for baking success.
- Plastic wrap:
To cover the dough tightly during rising, preventing it from drying out.
For Shaping & Frying
- 2-3 inch round cutter:
For uniform doughnut shapes, ensuring even cooking. A glass rim can also work in a pinch!
- Parchment paper:
Prevents shaped doughnuts from sticking and makes transferring them to the hot oil much easier.
- Sturdy baking sheets:
To hold the shaped doughnuts during their second rise.
- Heavy-bottomed pot or Dutch oven:
Provides stable heat distribution for frying, minimizing temperature fluctuations.
- Candy or fry thermometer:
Absolutely crucial for maintaining the precise 350°F oil temperature, which is the secret to non-greasy doughnuts.
- Slotted spoon or spider:
For safely lowering doughnuts into the hot oil and easily removing them once golden.
For Filling & Finishing
- Piping bag with a round tip:
For neatly and generously filling the doughnuts with the creamy goodness.
- Small paring knife or skewer:
To create a discreet opening for the piping bag tip to inject the filling.
Your Path to Golden Perfection: Making Classic Cream Filled Doughnuts
Activate Yeast: The Foundation of Fluffiness
In a large bowl, combine 1 cup warm whole milk (105-115 degrees F), 1 teaspoon granulated sugar, and 2 and 1/4 teaspoons active dry yeast.
Let the mixture stand undisturbed for 5-10 minutes. It should become visibly foamy and bubbly on top, indicating your yeast is active and ready to work its magic. If no foam appears, your yeast may be old, or the milk temperature was incorrect; you’ll need to start again with fresh yeast.
Crafting the Dough: Mixing & Initial Kneading
Add the remaining 1/4 cup granulated sugar, 1 large egg, 1 teaspoon vanilla extract, and 1/2 teaspoon salt to the activated yeast mixture. Mix these wet ingredients thoroughly until well combined.
Gradually add 3 cups of all-purpose flour, mixing until a shaggy, somewhat sticky dough forms. Avoid adding all the flour at once; it’s always better to add a little less and adjust later if needed.
Turn the shaggy dough out onto a lightly floured surface. Begin kneading by hand for 5 minutes. This initial kneading helps to develop the essential gluten structure for a tender doughnut.
The Butter Infusion: Achieving Silky Elasticity
Add the 1/4 cup unsalted butter, which should be thoroughly softened to room temperature, to the dough. It will feel messy and slippery at first, but resist the urge to add more flour.
Continue kneading for another 5-7 minutes. The butter will gradually incorporate, and the dough will transform into a smooth, elastic, and slightly tacky (but not sticky) ball. This step is crucial for a rich, tender, and light crumb.
The All-Important First Rise
Lightly oil a clean large bowl. Place the dough in the bowl, turning it once to coat the entire surface with a thin layer of oil. This prevents the dough from drying out as it rises.
Cover the bowl tightly with plastic wrap or a clean kitchen towel. Let the dough rise in a warm, draft-free place for 1 to 1.5 hours, or until it has visibly doubled in size. Patience during this first rise directly contributes to a lighter, airier doughnut.
Shaping Your Doughnut Dreams
Once doubled, gently punch down the dough to release the air. Transfer it to a lightly floured surface.
Using a rolling pin, roll the dough evenly to about 1/2 inch thickness. Ensuring consistent thickness across the entire sheet of dough is vital for uniform frying and cooking.
Use a 2-3 inch round cutter to cut out individual doughnuts. Place the cut doughnuts on parchment-lined baking sheets, leaving ample space between them to allow for the second rise without sticking.
Gather the dough scraps, gently reroll them once, and cut out any remaining doughnuts. Over-working the scraps will result in tougher doughnuts, so only reroll once if possible.
The Critical Second Rise for Final Texture
Loosely cover the shaped doughnuts on the baking sheets with plastic wrap or a clean kitchen towel.
Let them rise again in a warm place for 30-45 minutes. They should visibly puff up, appear lighter, and feel tender to the touch. This second proofing is absolutely crucial for achieving that airy, soft, and melt-in-your-mouth texture in the final Classic Cream Filled Doughnuts.
Whipping Up the Luscious Cream Filling
While the doughnuts are undergoing their second rise, prepare the cream filling. In a medium bowl, beat together 8 ounces softened cream cheese, 1/2 cup powdered sugar, 1/4 cup whole milk or heavy cream, and 1 teaspoon vanilla extract.
Beat until the mixture is completely smooth, creamy, and free of any lumps. Transfer the finished cream filling to a piping bag fitted with a round tip, or a ziplock bag with the corner snipped off.
The 350°F Frying Secret: Say Goodbye to Greasy Doughnuts!
Heat 6-8 cups of vegetable oil (or similar neutral oil with a high smoke point) in a large, heavy-bottomed pot or Dutch oven over medium heat.
Attach a candy or fry thermometer to the side of the pot. Bring the oil to a precise 350 degrees F (175 degrees C). Maintaining this exact temperature is the absolute key to preventing your Classic Cream Filled Doughnuts from becoming greasy and oil-soaked.
Perfectly Golden Frying Technique
Carefully lower 2-3 doughnuts into the hot oil at a time. It is crucial not to overcrowd the pot, as this will drastically drop the oil temperature and inevitably lead to greasy doughnuts.
Fry for 1-2 minutes per side, or until the doughnuts are beautifully golden brown. Use the slotted spoon or spider to gently flip them halfway through the cooking process.
Proper Draining for a Flawless Finish
Using a slotted spoon or spider, carefully transfer the fried doughnuts to a wire rack set over a baking sheet. This setup allows excess oil to drip away efficiently, preventing the doughnuts from sitting in oil and becoming soggy.
Filling & Dusting: The Grand Finale
Once the doughnuts have cooled slightly but are still warm (they are easier to fill when warm), use a small paring knife or skewer to create a small hole in the side of each doughnut, going about halfway through.
Insert the piping bag tip into the hole and pipe in the cream filling until each doughnut feels generously filled and plump. You’ll feel the doughnut expand slightly as it fills.
Dust the filled Classic Cream Filled Doughnuts liberally with 1/2 cup powdered sugar before serving. For the best taste and texture, serve immediately and enjoy the warm, creamy goodness!
Mastering Your Doughnuts: Expert Tips & Tricks for Perfection
The Magic of Precise Temperature Control
As emphasized, maintaining the oil at a consistent 350°F (175°C) is paramount. Too cool, and your doughnuts absorb oil; too hot, and they burn before cooking through. Invest in a reliable thermometer and adjust heat as needed throughout the frying process.
Don’t Overcrowd the Pot
Frying only 2-3 Classic Cream Filled Doughnuts at a time is key. Overcrowding significantly drops the oil temperature, leading to a longer cooking time and, inevitably, greasy doughnuts. Patience here pays off immensely!
Proofing Power: The Second Rise is King!
Do not rush the second rise. The doughnuts should be visibly puffed up and feel light and airy. An under-proofed doughnut will be dense, while an over-proofed one might collapse. Look for that sweet spot of noticeable growth.
Softened Butter is Non-Negotiable
Ensure your butter is truly softened to room temperature, not melted or straight from the fridge. This allows it to incorporate smoothly into the dough, leading to a superior, tender texture and elasticity.
Check Your Yeast’s Freshness
If your yeast doesn’t foam during the activation step, it’s likely dead. Always test your yeast with warm milk and sugar, especially if it’s been sitting in your pantry for a while, to save yourself baking frustration and wasted ingredients.
Rolling for Evenness
When rolling out your dough, aim for a consistent 1/2-inch thickness across the entire sheet. Uneven thickness will result in doughnuts that cook inconsistently – some too done, others still doughy in the middle.
Common Doughnut Dilemmas: Troubleshooting Your Way to Success
Doughnuts Are Greasy or Oily
This is almost always due to incorrect oil temperature. If the oil is too cool, the doughnuts absorb it rather than frying quickly to a crisp exterior. Ensure your oil is consistently at 350°F (175°C) using a thermometer, and avoid overcrowding the pot, which lowers the temperature.
Doughnuts Are Dense or Heavy
Density can stem from several issues: under-proofing (especially the second rise), over-kneading the dough after butter is incorporated, or using expired yeast. Ensure your dough passes the “windowpane test” after kneading and gets adequate, but not excessive, rise time.

Doughnuts Don’t Rise Properly
The most common culprit is inactive or dead yeast. Always check yeast freshness. Other factors include milk that’s too hot (killing the yeast) or too cold (slowing it down), or a rising environment that’s too chilly or drafty for optimal proofing.
Cream Filling is Lumpy or Too Thin
Lumpy filling usually means your cream cheese wasn’t soft enough; ensure it’s at room temperature before beating. If too thin, you might have added too much milk or cream; try reducing the liquid next time or adding a touch more powdered sugar to thicken.
Doughnuts Are Burnt Outside, Raw Inside
Your frying oil is too hot! The outside is cooking much faster than the inside, leading to a burnt exterior and uncooked interior. Lower the heat and ensure your thermometer reads exactly 350°F (175°C) to allow for even cooking throughout the doughnut.
Serving Your Delicious Creation & Keeping Them Fresh
The Best Way to Serve Classic Cream Filled Doughnuts
For an unparalleled experience, serve your Classic Cream Filled Doughnuts while they are still slightly warm from frying and filling. The warmth enhances the dough’s incredible softness and the cream’s luscious, melt-in-your-mouth texture.
Pair them with a strong cup of coffee or a glass of cold milk for the ultimate treat, perfect for breakfast, brunch, or a special dessert. You might also enjoy these cheesy ham and spinach breakfast bites for a savory morning treat.
Storing Leftovers (If There Are Any!)
Cream-filled doughnuts are undeniably best enjoyed fresh. However, if you happen to have leftovers, store them in an airtight container in the refrigerator for up to 2-3 days. The dairy in the filling makes refrigeration essential for food safety.
For the best texture when enjoying leftovers, let them come to room temperature for 15-20 minutes before serving, or gently warm in the microwave for a few seconds (being careful not to melt the filling too much).
Make-Ahead Tips for Easy Entertaining
You can prepare the dough up to the first rise the day before serving. After the first rise, gently punch it down, cover tightly with plastic wrap, and refrigerate overnight. Allow it to come to room temperature for about an hour before rolling and shaping on the day of frying.
The luscious cream filling can also be made a day in advance and stored in the piping bag in the refrigerator. Let it sit at room temperature for 15-20 minutes before piping for easier flow and a smoother consistency.
Your Top Questions About Classic Cream Filled Doughnuts, Answered!
Can I make these Classic Cream Filled Doughnuts without a deep fryer?
Absolutely! A large, heavy-bottomed pot or Dutch oven is perfectly suitable for frying these doughnuts. The key is to have enough oil for the doughnuts to float without touching the bottom and to use a reliable thermometer to monitor the temperature precisely.
How do I know if my yeast is active?
You’ll know your yeast is active if, after combining it with warm milk and a teaspoon of sugar, it becomes foamy and bubbly within 5-10 minutes. If there’s no activity, your yeast is likely expired or your liquid temperature was off, and you’ll need new yeast to proceed successfully.
Can I use a different filling for these doughnuts?
Yes, while the cream cheese filling is divine, you can certainly experiment! You could use homemade jam, lemon curd, chocolate ganache, or even a simple vanilla custard. Just ensure your chosen filling isn’t too thin, or it will make the doughnuts soggy. For other sweet treat ideas, you might love our recipe for decadent pumpkin pie truffles.
What kind of oil is best for frying doughnuts?
A neutral-flavored oil with a high smoke point is best for frying. Vegetable oil, canola oil, sunflower oil, or peanut oil are all excellent choices, as they won’t impart unwanted flavors to your delicious Classic Cream Filled Doughnuts.
Why did my doughnuts turn out flat or irregularly shaped?
Flat doughnuts can be a sign of over-proofing (they rose too much and then deflated) or under-proofing. Irregular shapes often come from not rolling the dough to an even thickness or handling the shaped doughnuts too roughly before frying. Be gentle with your delicate dough!
Ready to Create Your Own Classic Cream Filled Doughnuts Masterpiece?
Now that you’re armed with all the secrets, tips, and a foolproof guide, there’s nothing stopping you from creating the most heavenly Classic Cream Filled Doughnuts right in your own kitchen. Forget those dense, greasy disappointments; prepare to impress yourself and everyone lucky enough to taste your light, fluffy, and perfectly filled creations.
Don’t be shy – dive in, embrace the process, and savor the reward. We’d love to see your Classic Cream Filled Doughnuts! Share your baking triumphs with us on social media and tag us in your glorious creations.
Craving more homemade treats? Explore our collection of delightful baking adventures for more inspiration and delicious recipes!
Doughnuts
Course: DessertCuisine: AmericanDifficulty: medium12
doughnuts45
minutes15
minutes150
kcal180
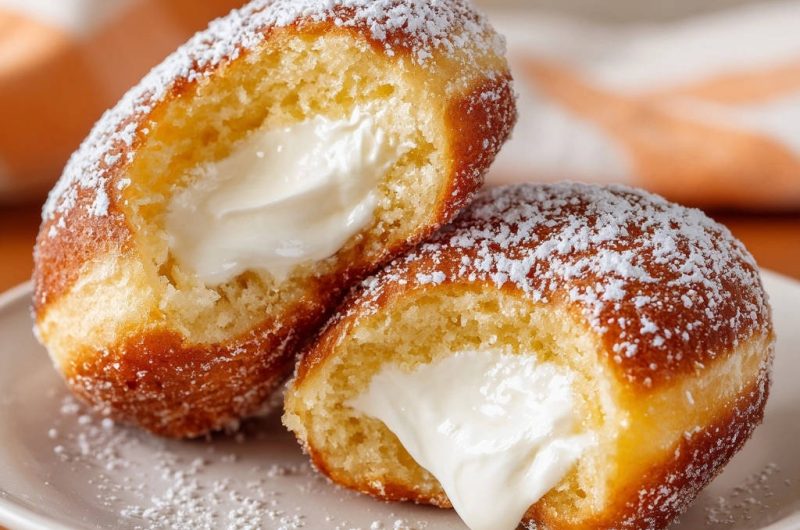
minutesDiscover the secret to perfectly light, fluffy, and non-greasy homemade doughnuts. This recipe guarantees a delicious classic cream-filled treat every time, making homemade doughnuts a joy to create.
Ingredients
For the Dough:
1 cup warm whole milk (105-115 degrees F)
2 and 1/4 teaspoons active dry yeast (one packet)
1/4 cup granulated sugar, plus 1 teaspoon
1 large egg
1 teaspoon vanilla extract
1/2 teaspoon salt
3 cups all-purpose flour, plus more for dusting
1/4 cup unsalted butter, softened
For Frying:
6-8 cups vegetable oil (or similar neutral oil)
For the Cream Filling:
8 ounces cream cheese, softened
1/2 cup powdered sugar
1/4 cup whole milk or heavy cream
1 teaspoon vanilla extract
For Dusting:
1/2 cup powdered sugar
Directions
- Activate Yeast: In a large bowl, combine warm milk, 1 teaspoon granulated sugar, and yeast. Let stand for 5-10 minutes until foamy.
- Make Dough: Add the remaining 1/4 cup granulated sugar, egg, vanilla extract, and salt to the yeast mixture. Mix well. Gradually add flour, mixing until a shaggy dough forms. Turn out onto a lightly floured surface and knead for 5 minutes.
- Add Butter: Add the softened butter and continue kneading for another 5-7 minutes until the dough is smooth and elastic.
- First Rise: Place dough in a lightly oiled bowl, turning once to coat. Cover with plastic wrap and let rise in a warm place for 1-1.5 hours, or until doubled in size.
- Shape Doughnuts: Gently punch down the dough. On a lightly floured surface, roll the dough to about 1/2 inch thickness. Use a 2-3 inch round cutter to cut out doughnuts. Reroll scraps once. Place cut doughnuts on parchment-lined baking sheets, leaving space between them.
- Second Rise: Cover the doughnuts loosely with plastic wrap or a clean kitchen towel and let rise again in a warm place for 30-45 minutes, or until visibly puffed up and lighter. This is crucial for their final texture.
- Prepare Filling: While doughnuts rise, beat softened cream cheese, 1/2 cup powdered sugar, milk or cream, and vanilla extract together until smooth and creamy. Transfer to a piping bag with a round tip.
- THE NO-GREASE FRYING SECRET: Heat vegetable oil in a large heavy-bottomed pot or Dutch oven over medium heat. Attach a candy or fry thermometer to the side and bring the oil to a precise 350 degrees F (175 degrees C). Maintaining this temperature is the key to preventing greasy doughnuts.
- Fry Doughnuts: Carefully lower 2-3 doughnuts into the hot oil at a time, being careful not to overcrowd the pot, as this drops the oil temperature. Fry for 1-2 minutes per side, until golden brown.
- Drain Properly: Using a slotted spoon or spider, transfer fried doughnuts to a wire rack set over a baking sheet to drain any excess oil.
- Fill and Dust: Once slightly cooled but still warm, use a small paring knife or skewer to create a small hole in the side of each doughnut. Insert the piping bag tip and pipe in the cream filling until generously filled. Dust liberally with powdered sugar. Serve immediately.
Notes
- The key to non-greasy doughnuts is maintaining the oil temperature precisely at 350°F (175°C) and ensuring a proper second rise for optimal texture.