Cream Cheese Crumb Bars: Flawless & Creamy Every Time
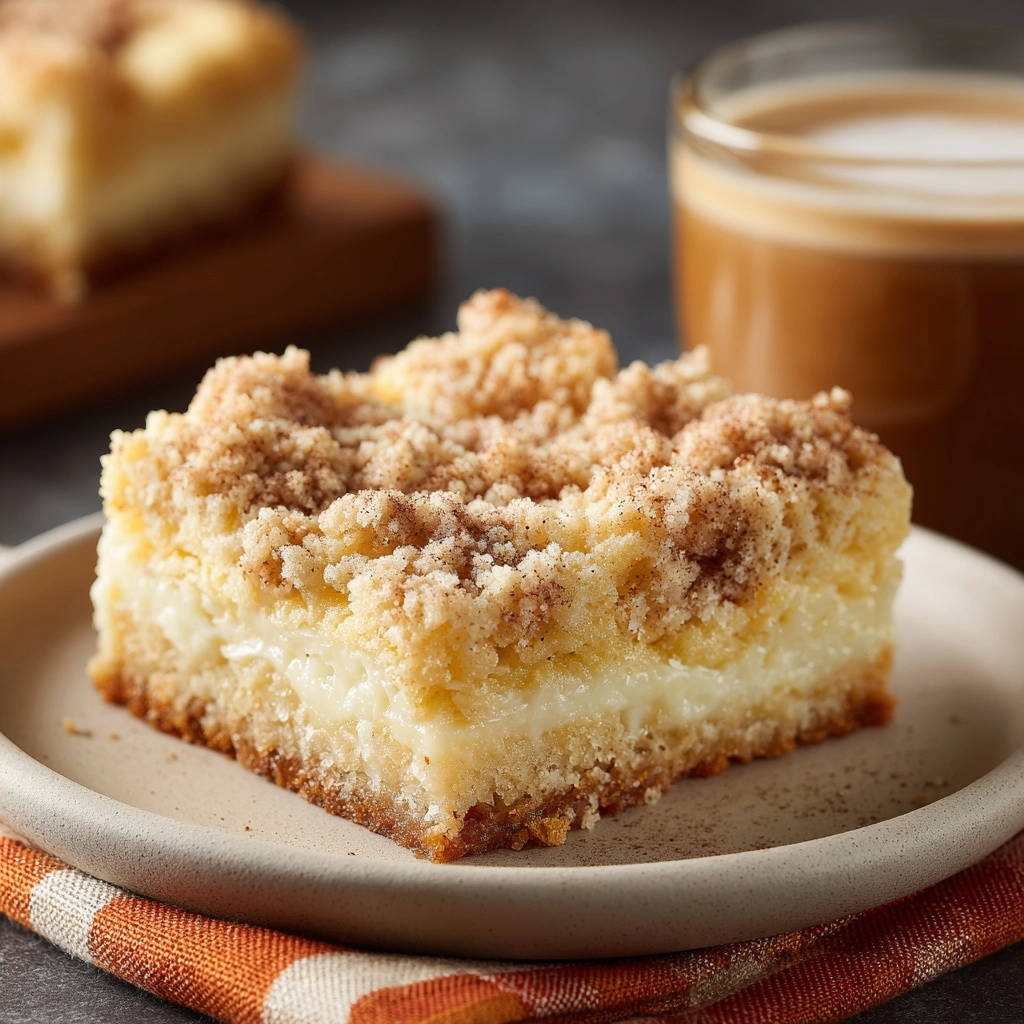
I remember countless attempts at baking the perfect Cream Cheese Crumb Bars, often ending with a filling that was either too runny or too dry. But through years of testing, I’ve finally perfected a recipe that guarantees a flawlessly creamy center and a wonderfully crumbly topping every single time. Get ready to bake a dessert that’s not just delicious, but reliably perfect, making you look like a baking wizard.
Why This Cream Cheese Crumb Bar Recipe Gets Rave Reviews
Discover the secrets behind these irresistible cream cheese crumb bars that promise a perfect texture with every bite.
The Secret to a Guaranteed Creamy, Never Runny Filling
This recipe’s success hinges on precise mixing and ample chilling. We carefully beat the cream cheese just enough to achieve smoothness, preventing excess air incorporation that can lead to a runny texture.
The extended refrigeration period is equally critical, allowing the filling to set beautifully, ensuring a dense, rich, and perfectly creamy consistency that holds its shape.
Achieving That Perfectly Crumbly Base & Topping
The key to our signature rich and crumbly texture lies in using very cold butter cut into the dry ingredients. This method prevents overworking the dough, creating tender pockets that melt into a flaky, irresistible crumb.
The balance of sugars also contributes to a delightful chewiness in the base, complemented by the crisp, golden topping.
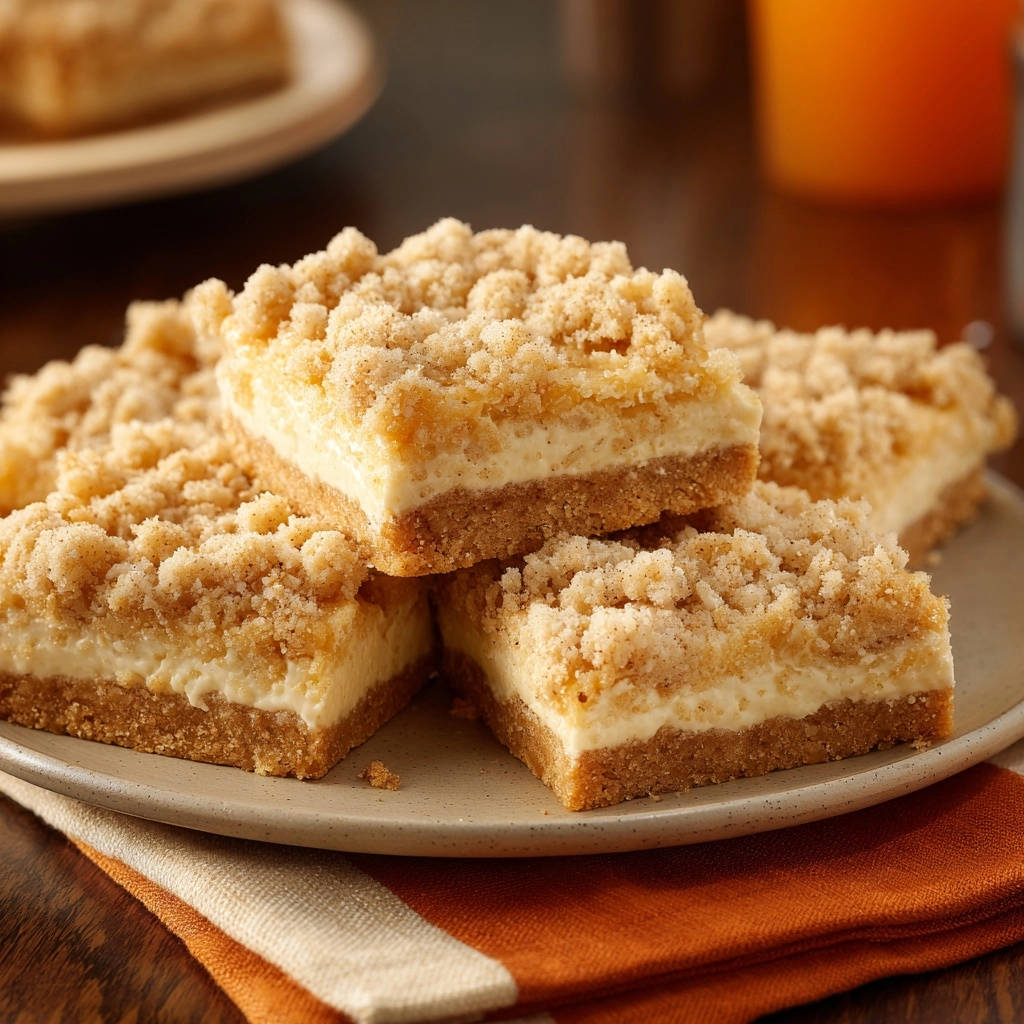
Effortless Elegance: Why This Recipe is a Keeper
This recipe offers an impressive dessert without the fuss, guiding you to a professional-looking result with straightforward steps. Its reliability makes it a go-to for any occasion, promising rave reviews and empty plates.
Enjoy the confidence of baking a treat that consistently delivers on taste, texture, and visual appeal, cementing its place as a cherished favorite.
Essential Tools for Your Crumb Bar Adventure
Baking Pan (8×8 or 9×9 inch)
The right size ensures proper baking and bar thickness, preventing overly thin or undercooked results.
Electric Mixer (Handheld or Stand)
Crucial for achieving that perfectly smooth cream cheese filling without overbeating, which can ruin the texture.
Pastry Blender or Food Processor
Makes incorporating the cold butter into the dry ingredients a breeze, vital for an ideal crumb texture that’s tender and flaky.
Parchment Paper
Your secret weapon for easy lifting and clean slicing of your cooled bars, ensuring a beautiful presentation.
Mixing Bowls & Whisk
Standard essentials for combining ingredients effectively and maintaining organized preparation.
The Building Blocks of Flavor: Inside Your Cream Cheese Crumb Bars
For the Tender Crumb & Base Dough
All-Purpose Flour: The foundation for structure and texture, giving the crumb its body and tenderness.
Granulated Sugar & Brown Sugar: A balance for sweetness and moisture, enhancing the crumb’s richness and providing a subtle chew.
Ground Cinnamon: Adds a warm, comforting aroma and subtle spice to the crumb, complementing the creamy filling beautifully.
Baking Powder & Salt: Essential for lift and balancing the flavors in the base, ensuring it’s not too dense and tastes vibrant.
Unsalted Butter (Very Cold & Cubed): The key to a flaky, tender crumb. Its cold state prevents overmixing and creates steam pockets during baking.
Large Egg & Vanilla Extract: Binds the dough and infuses it with classic dessert flavor, making the base rich and aromatic.
For the Velvety Cream Cheese Filling
Cream Cheese (Softened, Full-Fat): The star of the show, providing the signature tangy, rich, and creamy texture. Ensure it’s fully at room temperature for ultimate smoothness.
Granulated Sugar: Sweetens the tangy cream cheese to perfection, creating a balanced and irresistible flavor.
Large Egg: Crucial for binding and setting the filling. Proper, gentle mixing is vital for its smooth, non-runny texture.
Vanilla Extract: Enhances the overall sweet and creamy profile of the filling, adding a layer of comforting aroma.
Your Path to Cream Cheese Crumb Bars Perfection: A Step-by-Step Guide
Prepare Your Baking Sanctuary
Preheat your oven to 350°F (175°C) and ready your 8×8 or 9×9 inch baking pan. Lightly grease it and line with parchment paper, leaving an overhang to make lifting the bars out effortless.
Craft the Crumbly Foundation
In a large bowl, whisk together the dry ingredients for your crumb base: flour, granulated sugar, brown sugar, cinnamon, baking powder, and salt. Add the very cold, cubed butter.
Using a pastry blender, your fingertips, or a food processor, cut the butter into the flour mixture until it resembles coarse crumbs with some pea-sized pieces remaining. This creates pockets of butter that will melt and make the crumb extra tender.
Bind the Base Dough
In a separate small bowl, whisk the egg and vanilla extract together. Add this wet mixture to your crumb mixture and mix just until combined and a soft dough forms. Be careful not to overmix, as this develops gluten and can lead to a tough base.
Form the Perfect Base
Measure out and reserve 1 and 1/2 cups of this prepared dough for your topping. Press the remaining dough evenly into the bottom of your prepared baking pan, forming a solid, uniform base.
Whip Up the Creamy Filling (The Non-Runny Secret!)
In a medium bowl, beat the fully softened cream cheese and 1/2 cup granulated sugar with an electric mixer on medium speed. Beat just until it’s smooth and creamy. The key here is to avoid over-beating, which can incorporate too much air and affect the final texture. Scrape down the sides of the bowl to ensure even mixing.
Gently Fold in Wet Filling Ingredients
Add the large egg and vanilla extract to the cream cheese mixture. Beat on low speed only until just combined and no streaks of egg remain. This is a critical step: do not overmix after adding the egg, as excessive beating can result in a less smooth, potentially runny, or even cracked filling. This careful approach is vital for that guaranteed creamy texture.
Assemble the Layers
Carefully pour the smooth cream cheese filling evenly over the pressed dough base in your pan, spreading it gently to the edges.
Crown with Crumb
Evenly crumble the reserved 1 and 1/2 cups of dough over the top of the cream cheese filling. Aim for an even distribution for consistent texture and flavor in every bite.
Bake to Golden Perfection
Bake for 35 to 45 minutes, or until the crumb topping is beautifully golden brown and the filling is mostly set but still has a slight wobble in the very center when gently shaken. Overbaking is the enemy of a creamy filling, so watch it closely.
The Ultimate Chill: Lock in Creaminess
Once baked, remove the pan from the oven and let it cool completely on a wire rack at room temperature. This initial cooling is important. For the ultimate creamy, never runny texture, transfer the cooled bars to the refrigerator and chill for at least 2 hours, or preferably overnight, before slicing and serving. This extended chilling time is the final, crucial step to locking in that perfect set and making them easy to slice.
Chef’s Secrets: Elevate Your Cream Cheese Crumb Bar Game
Temperature Matters: Softened Cream Cheese is Key
Ensure your cream cheese is truly at room temperature. This prevents lumps and ensures a silky-smooth filling without the need for excessive beating, which can introduce too much air.
Don’t Overmix the Dough or Filling
For the base, overmixing creates a tough crumb by developing gluten. For the filling, especially after adding the egg, it can incorporate too much air, leading to a runny or cracked final product. Mix just until combined for optimal texture.
The Power of Cold Butter for Crumb
Using very cold, cubed butter in the crumb mixture is non-negotiable. It creates pockets of steam during baking, resulting in a wonderfully tender and flaky crumb texture that truly elevates these Cream Cheese Crumb Bars.
The “Wobble Test” for Perfect Baking
When baking, look for golden edges and a topping that’s set, but allow for a slight wobble in the very center of the filling. This indicates it’s cooked but won’t be dry once cooled, ensuring that sought-after creamy texture.
Patience Pays Off: Don’t Rush the Chill
The extended chilling time in the refrigerator (2 hours minimum, preferably overnight) is absolutely crucial. It allows the cream cheese filling to fully set, ensuring that “guaranteed creamy, never runny” texture and clean slices.
Troubleshooting Common Cream Cheese Crumb Bar Conundrums
Problem: My filling is runny or doesn’t set.
Solution: This often happens due to overmixing the cream cheese filling after adding the egg, which incorporates too much air. It can also be from not chilling the bars long enough. Ensure you beat only until just combined after the egg, and always chill for at least 2 hours, preferably overnight, for a perfectly set filling.
Problem: The crumb topping is too hard or dry.
Solution: Overbaking is a common culprit for a dry crumb. Make sure to monitor the baking time closely and remove from the oven when the topping is golden brown and the filling has a slight wobble. Using very cold butter and not overmixing the dough also contributes significantly to a tender crumb.
Problem: My base is tough.
Solution: A tough base typically results from overmixing the dough when adding the egg and vanilla extract. This develops too much gluten, which stiffens the crumb. Mix just until combined to maintain a tender and crumbly base for your delicious Cream Cheese Crumb Bars.
Problem: The cream cheese filling cracked on top.
Solution: Cracking can occur if the bars were overbaked, if the cream cheese wasn’t fully softened (leading to over-beating), or due to sudden temperature changes. Ensure cream cheese is at room temperature and avoid extreme shifts from a hot oven to a cold fridge without cooling at room temperature first.
Your Questions Answered: FAQs About Cream Cheese Crumb Bars
Can I make these Cream Cheese Crumb Bars ahead of time?
Absolutely! In fact, these bars are even better when made a day in advance. The extended chilling time allows the flavors to meld and the filling to achieve its perfect, firm, and creamy texture. Simply cover and refrigerate overnight.
How should I store leftover Cream Cheese Crumb Bars?
Due to the cream cheese filling, these bars must be stored in an airtight container in the refrigerator. They will stay fresh and delicious for up to 5-7 days, maintaining their delightful texture.
Can I freeze Cream Cheese Crumb Bars?
Yes, these bars freeze beautifully! Once completely chilled and sliced, place them in a single layer on a baking sheet to freeze solid, then transfer to a freezer-safe bag or container with parchment paper between layers. They can be frozen for up to 2-3 months. Thaw in the refrigerator before serving.
Can I add fruit to these crumb bars?
While this recipe focuses on the classic crumb bar, you could experiment with adding a thin layer of fruit jam (like raspberry or apricot) over the base before adding the cream cheese filling, or mixing in some finely diced fresh fruit (like berries) into the cream cheese filling. Be mindful that fruit adds moisture, which might slightly affect the setting time.
What’s the best way to slice these bars cleanly?
For the cleanest slices, ensure the bars are thoroughly chilled, ideally overnight. Use a sharp knife that has been warmed under hot water and wiped dry. Clean the knife between each cut for perfectly neat edges, showcasing your beautiful Cream Cheese Crumb Bars.
Serving Suggestions & Creative Twists
The Perfect Accompaniment: What to Serve With Crumb Bars
These rich Cream Cheese Crumb Bars are delightful on their own, but pairing them with a fresh cup of coffee or a cold glass of milk elevates the experience. For a special touch, a scoop of vanilla bean ice cream or a dollop of fresh whipped cream alongside adds extra indulgence.
If you enjoy working with a creamy fruit filling, the same technique helps prevent a soggy bottom in this golden cherry cobbler.
Unleash Your Creativity: Variations to Explore
Consider sprinkling a pinch of nutmeg or cardamom into the crumb mixture for an autumnal twist, adding depth of flavor. For a hint of citrus, add a teaspoon of lemon zest to the cream cheese filling, brightening the profile. You could also drizzle melted white chocolate over the cooled bars for an extra layer of sweetness and visual appeal.
coffee makes a great companion, and the same creamy base shines in these creamy lemon coconut bars.
Ready to Impress? Share Your Cream Cheese Crumb Bars Masterpiece!
Now that you’re equipped with all the knowledge and expert tips, it’s time to create your own batch of these truly flawless Cream Cheese Crumb Bars. Say goodbye to runny fillings and tough crumbs, and hello to a guaranteed creamy, crumbly delight that will have everyone asking for your secret recipe.
What to Serve with Cream Cheese Crumb Bars
These buttery, creamy bars pair well with a few extra treats on the table.
- For a savory contrast that balances the sweetness, try this skillet creamed corn with its thick, rich sauce.
- Start the morning before baking, or use leftover batter for a brunch spread with these fluffy blueberry pancakes.
We’d love to see your creations! Share your baking journey and the delicious results on social media, tagging us and using the hashtag #CreamCheeseCrumbBars. Happy baking!
Cream Cheese Bars
Course: DessertCuisine: AmericanDifficulty: medium9
bars25
minutes35
minutes240
kcal60
minutesAchieve the perfect rich, crumbly bar with a smooth, creamy center every single time. This recipe guarantees your cream cheese filling will be flawless, never runny. A truly satisfying dessert experience awaits!
Ingredients
For the Crumb & Base Dough:
2 cups all-purpose flour
1/2 cup granulated sugar
1/2 cup packed light brown sugar
1 teaspoon ground cinnamon
1/2 teaspoon baking powder
1/4 teaspoon salt
1 cup (2 sticks) unsalted butter, very cold and cubed
1 large egg
1 teaspoon vanilla extract
For the Cream Cheese Filling:
16 ounces cream cheese, softened to room temperature
1/2 cup granulated sugar
1 large egg
1 teaspoon vanilla extract
Directions
- Preheat your oven to 350°F (175°C). Lightly grease an 8×8 or 9×9 inch baking pan and line it with parchment paper, leaving an overhang on the sides for easy lifting.
- In a large bowl, whisk together the flour, granulated sugar, brown sugar, cinnamon, baking powder, and salt. Add the cold, cubed butter to the dry ingredients. Using your fingers, a pastry blender, or a food processor, cut the butter into the flour mixture until it resembles coarse crumbs with some pea-sized pieces of butter remaining.
- In a separate small bowl, whisk the egg and vanilla extract together. Add this to the crumb mixture and mix until just combined and a soft dough forms. This ensures your base is tender, not tough.
- Measure out and reserve 1 and 1/2 cups of this dough for the crumb topping. Press the remaining dough evenly into the bottom of the prepared baking pan. This forms your base.
- Now for the creamy filling: In a medium bowl, beat the fully softened cream cheese and 1/2 cup granulated sugar with an electric mixer on medium speed just until smooth and creamy. The key here is to avoid over-beating, which can incorporate too much air. Scrape down the sides of the bowl.
- Add the large egg and vanilla extract to the cream cheese mixture. Beat on low speed only until just combined and no streaks of egg remain. Do not overmix after adding the egg, as this can lead to a less smooth, potentially runny, or even cracked filling. This careful mixing is vital for that guaranteed creamy texture.
- Pour the smooth cream cheese filling evenly over the pressed dough base in the pan.
- Crumble the reserved 1 and 1/2 cups of dough evenly over the cream cheese filling.
- Bake for 35 to 45 minutes, or until the crumb topping is golden brown and the filling is set but still has a slight wobble in the very center when gently shaken. Overbaking can lead to a dry filling, so keep an eye on it.
- Once baked, remove the pan from the oven and let it cool completely on a wire rack at room temperature. For the ultimate creamy, never runny texture, transfer the cooled bars to the refrigerator and chill for at least 2 hours, or preferably overnight, before slicing and serving. This extended chilling time is the final, crucial step to locking in that perfect set.
Notes
- Chilling for at least 2 hours, or preferably overnight, is crucial for the perfect creamy, non-runny texture.