Mastering the Golden Cherry Cobbler: The Anti-Soggy Method
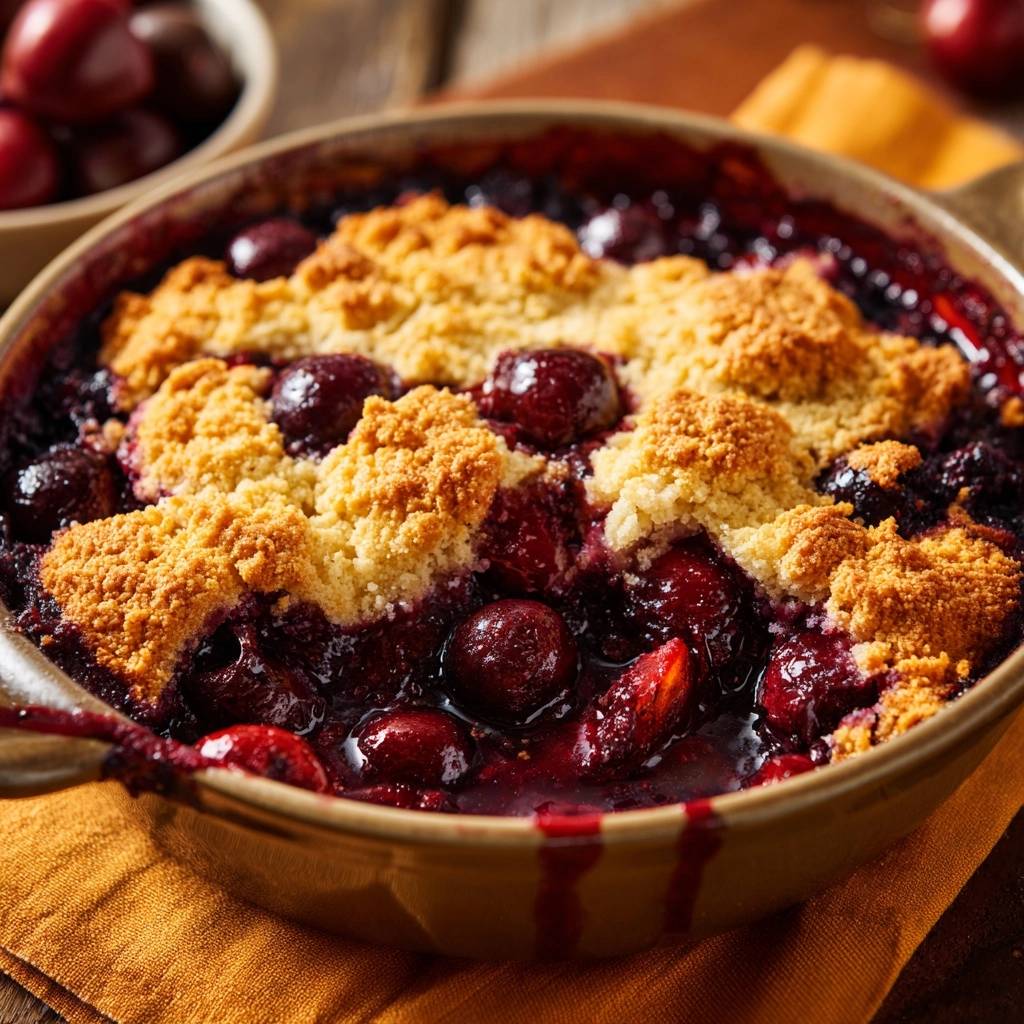
You’ve likely experienced the disappointment of a fruit cobbler that looks beautiful on top but hides a gummy, pale, and doughy underside. This happens because the fruit releases its juices too quickly, essentially boiling the bottom of the crust before it has a chance to bake. The Golden Cherry Cobbler solves this by creating a distinct barrier between the jammy fruit and the crisp, biscuit-like topping.
The secret to this recipe lies in the contrast of textures. You want a filling that is thick enough to coat a spoon and a crust that shatters slightly when your fork hits it. By pre-cooking the fruit and using a specific hydration method for the dough, we ensure the topping sits proudly on top of the cherries rather than sinking into a purple swamp.
I’ve found that the real trick to a professional finish is the temperature of your fruit when the dough hits it. Pouring the dough over a cold filling leads to a soggy interface. However, starting with a hot, bubbling fruit base creates an immediate sear on the bottom of the dough, which jumpstarts the leavening process and keeps the crust light and airy.
The Anatomy of a Perfect Fruit Filling
The foundation of a great cobbler is the balance between sweetness and acidity. While sugar draws out the natural juices of the cherries, lemon juice provides the necessary brightness to keep the flavor from becoming cloying. You’ll notice the cherries transform from firm, individual units into a cohesive, glossy sauce as they simmer on the stove.
Sweet cherries like Bing or Rainier offer a deep, honeyed flavor, while tart cherries like Montmorency provide a classic “pie” tang. If you use tart cherries, you might want to add an extra tablespoon of sugar, but don’t overdo it. The goal is to let the fruit’s natural character shine through the heat.
Almond extract is the “secret weapon” for any stone fruit dessert. Cherries and almonds are botanical cousins, and just a half-teaspoon of extract amplifies the cherry flavor in a way that vanilla simply can’t. It adds a subtle, floral depth that makes people ask, “What is that amazing flavor?”
Selecting and Pitting Your Cherries
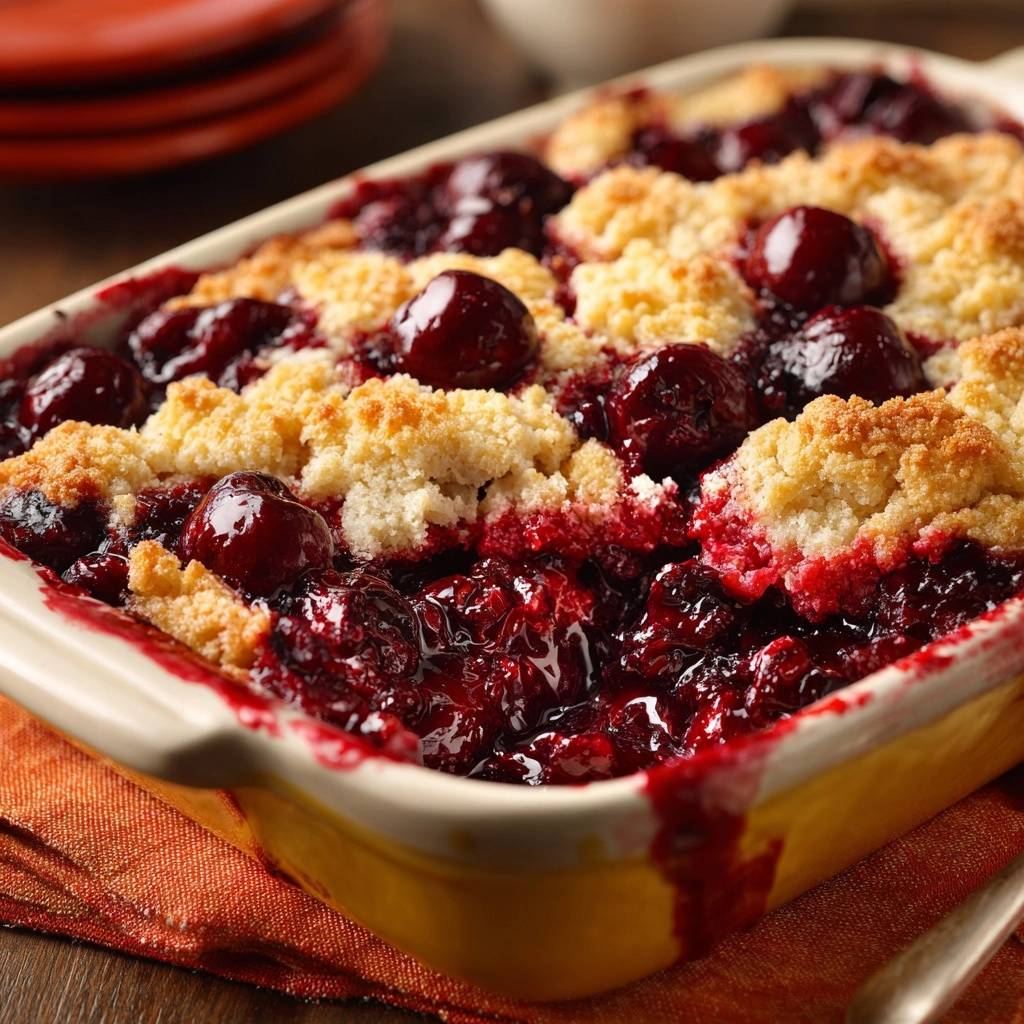
When shopping, look for cherries with green, flexible stems and firm, shiny skins. If the stems are brown and brittle, the fruit is likely past its prime and may turn to mush too quickly. Bing cherries are the most common US variety and work beautifully here due to their meaty texture.
Pitting five cups of cherries can feel like a chore, but it’s worth the effort for the final texture. A dedicated plunger-style pitter is the fastest way to go, but you can also use a sturdy straw or a pastry tip to push the pit through the center. Try to keep the cherries as whole as possible so they provide nice “pops” of fruit in every bite.
The Role of Cornstarch in Fruit Reductions
Cornstarch is a powerful thickener that requires heat to activate its thickening properties, a process called starch gelatinization. By whisking it into the sugar and fruit on the stovetop, you ensure the liquid reaches the necessary 203°F to fully thicken. This prevents the “soup” effect where the juice runs all over the plate.
As the mixture bubbles, the liquid will turn from cloudy to a clear, vibrant red. This visual change tells you the starch has done its job. Pre-thickening on the stove means the oven time is dedicated to baking the crust and concentrating the flavors, rather than hoping the juices thicken before the top burns.
The same simmering trick works for a golden peach crumble filling too.
Essential Components for the Golden Crust
The topping for this Golden Cherry Cobbler isn’t a standard pie crust or a cake batter; it’s a hybrid biscuit dough. We use all-purpose flour for structure and a generous amount of light brown sugar. The molasses in the brown sugar adds a hint of caramel flavor and keeps the interior of the crust moist.
Baking powder provides the lift, creating those craggy, irregular peaks that catch the light and turn golden brown. Salt is equally important here. It seasons the flour and balances the sugar, ensuring the crust doesn’t taste flat or bland against the intense fruit filling.
Why Cold Butter is Non-Negotiable
You must use cold, cubed butter to achieve a flaky texture. When you work cold butter into the flour, you’re creating tiny pockets of fat. In the hot oven, the water in that butter evaporates, creating steam that puffs up the dough and creates layers.
Aim for “pea-sized” chunks of butter. If you overwork the dough until it looks like fine sand, your crust will be crumbly and short rather than flaky and light. Those little visible bits of butter are exactly what you want for a textured, rustic finish.
The same cold butter method works beautifully for this almond coffee cake.
The Boiling Water Technique Explained
This is the “Skyscraper” technique that sets this recipe apart. Adding boiling water to the flour and butter mixture creates a “hot water crust” effect. The boiling water instantly hydrates the flour proteins and partially melts the outer layer of the butter chunks.
This creates a dough that is sturdy, thick, and almost elastic. Because the dough is partially “cooked” by the water, it becomes buoyant. When you drop it onto the hot cherries, it stays on the surface. This is the ultimate insurance policy against a soggy, sunken cobbler.
Step-by-Step: Constructing the Golden Cherry Cobbler
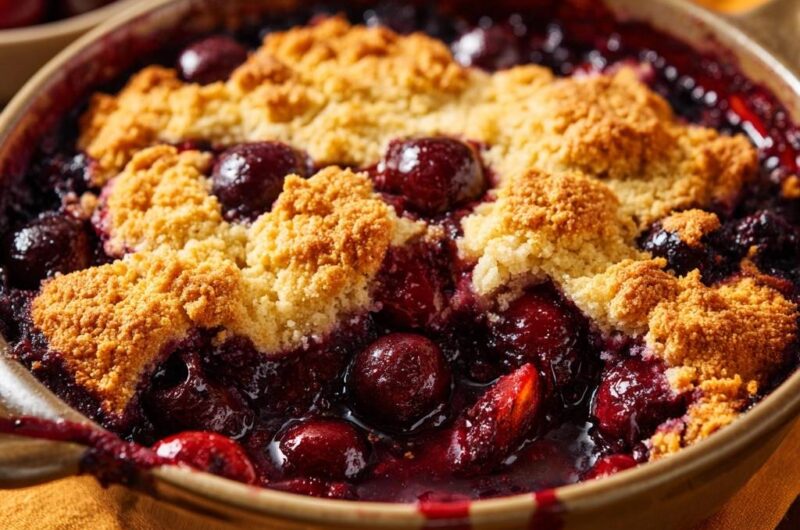
Once your cherry filling is thick and hot, pour it into your ceramic dish. Immediately start dropping spoonfuls of the dough over the top. Don’t try to make it look perfect or smooth it out. The irregular, “cobbled” look is where the dish gets its name.
Leave small gaps between the mounds of dough. These gaps act as chimneys, allowing steam from the fruit to escape. If you seal the top completely, the steam will get trapped underneath, making the bottom of your crust wet and the fruit filling too thin.
The final sprinkle of granulated sugar over the raw dough is a small step with a huge payoff. As the cobbler bakes, this sugar melts and recrystallizes, creating a shimmering, crunchy “lid” that contrasts beautifully with the soft fruit underneath.
Preheating and Rack Positioning
Set your oven to 400°F and make sure it’s fully preheated before the cobbler goes in. A high temperature is necessary to set the crust quickly. If the oven is too cool, the butter will melt out of the dough before the flour structure sets, leading to a greasy topping.
Place your baking dish on the middle rack. This allows the heat to circulate evenly around the dish. If you place it too high, the top will burn before the fruit bubbles; too low, and the bottom of the fruit might scorch before the crust is done.
Achieving the Textured Golden Finish
You are looking for two specific visual cues to know the cobbler is done. First, the topping should be a deep, burnished golden brown, not just pale tan. Second, the cherry juice should be bubbling vigorously around the edges and through the gaps in the crust.
Those bubbles should look thick and slow, like molten lava. If the juice looks thin and watery, it needs a few more minutes. Don’t be afraid of a little juice bubbling over the crust; those caramelized fruit spots are often the tastiest parts.
The Science of the 20-Minute Rest
I know it’s tempting to scoop into the cobbler the second it leaves the oven, but patience is a requirement here. When the cobbler is piping hot, the starches in the fruit are still in a fluid state. If you cut it now, the filling will run to the bottom of the dish.
During the 20-minute rest, the temperature drops slightly, allowing the pectin in the cherries and the cornstarch to fully set. This creates that jammy, spoonable consistency that clings to the crust. The crust also firms up during this time, reaching its maximum crispness.
Troubleshooting Common Cobbler Failures
If your topping is browned but the dough feels raw underneath, your oven might be running too hot. Next time, tent the dish with foil halfway through. This protects the top while allowing the heat to penetrate the center of the dough mounds.
If the filling is too thin, you likely didn’t simmer the cherries long enough on the stove. The mixture must reach a full boil to activate the cornstarch. If you’re using very juicy frozen cherries, you may need to add an extra teaspoon of cornstarch to the initial mix.
A tough crust usually comes from overmixing. When you add the boiling water, stir just until the flour is moistened. Over-stirring develops the gluten in the flour, which turns a light, tender biscuit into a rubbery, bread-like topping.
Flavor Variations and Ingredient Swaps
While cherries are the star here, you can easily adapt this recipe. Adding a teaspoon of freshly grated ginger to the fruit adds a wonderful warmth. Alternatively, a pinch of cinnamon in the flour mixture provides a classic “home-style” aroma that pairs perfectly with the almond extract.
If you can’t find fresh cherries, frozen ones work perfectly well. Do not thaw them first; just toss them directly into the saucepan with the sugar and starch. You may need to simmer them for an extra 2 or 3 minutes to account for the ice crystals and extra moisture.
For a gluten-free version, a high-quality 1-to-1 gluten-free flour blend works surprisingly well with the boiling water method. Since there is no gluten to toughen, you can stir the dough a bit more confidently, though the texture will be slightly more crumbly than the original.
Optimal Serving Pairings
The intense heat and tartness of the cherries cry out for a creamy, cold companion. A scoop of high-quality vanilla bean ice cream is the gold standard. As the ice cream melts, it mingles with the cherry syrup to create a creamy sauce that is hard to beat.
If you want something less sweet, try a dollop of cold crème fraîche or heavy cream poured directly over the warm cobbler. The slight tang of the crème fraîche cuts through the richness of the butter crust, highlighting the brightness of the lemon and fruit.
Storage and Reheating for Maximum Crispness
Store any leftovers in an airtight container in the refrigerator for up to three days. The crust will naturally soften as it absorbs moisture from the fruit, but you can easily revive it. Avoid the microwave, as it will make the dough rubbery and the fruit explosive.
To reheat, place the desired portion in a small oven-safe dish and pop it into a 350°F oven for 10 to 15 minutes. This dries out the crust and restores that essential crunch. If you’re in a rush, a toaster oven also works beautifully for single servings.
Expert Baking FAQ
Can I use canned cherry pie filling?
You can, but I don’t recommend it for this specific recipe. Canned fillings are often loaded with high-fructose corn syrup and artificial red dyes. More importantly, they use different thickeners that may become too gummy when subjected to the double-heat method of this “Anti-Soggy” recipe. Fresh or frozen cherries provide a much cleaner, more sophisticated flavor profile.
How do I prevent the edges from burning?
Because this cobbler bakes at 400°F for 45 minutes, the edges of the crust can sometimes brown faster than the center. If you notice the perimeter getting dark around the 30-minute mark, loosely drape a ring of aluminum foil over the edges. This reflects the heat away from the perimeter while allowing the center to continue browning and the fruit to keep bubbling.
Is a ceramic dish better than glass?
Ceramic is generally superior for cobblers because it heats up more slowly and retains heat more evenly than tempered glass. This deep, steady heat helps cook the fruit from the bottom up without scorching the sugars. If you only have a glass dish, keep a close eye on the bottom of the fruit during the last 10 minutes of baking to ensure it isn’t darkening too quickly.
Can this recipe be doubled for a crowd?
Yes, you can easily double this recipe. Use a 9×13 inch baking dish to ensure the layers remain the correct thickness. When doubling the fruit, you might need to simmer the cherry mixture on the stove for an extra 5 minutes, as the larger volume takes longer to reach the boiling point. The baking time in the oven will remain roughly the same, though you should check it at the 40-minute mark.
What’s Next?
For a brunch spread, these fluffy pancakes pair well with the cherry cobbler’s fruity sweetness.
- Try the Fluffy Blueberry Pancakes for a double dose of fruit flavor alongside the cobbler.
- The Fluffy Oatmeal Pancakes offer a heartier texture that contrasts nicely with the tender cherry topping.
Cherry Cobbler
Course: DessertCuisine: AmericanDifficulty: medium6
servings15
minutes45
minutes380
kcal60
MinutesThis recipe solves the common problem of mushy cobblers by reducing the fruit into a thick syrup before baking and using a unique boiling water dough method for a perfect biscuit-like topping.
Ingredients
5 cups fresh pitted cherries (sweet or tart)
3/4 cup granulated sugar (plus 1 tablespoon for sprinkling)
1 tablespoon lemon juice
2 tablespoons cornstarch
1/2 teaspoon almond extract
1 1/4 cups all-purpose flour
1/2 cup light brown sugar, packed
1 teaspoon baking powder
1/2 teaspoon salt
1/2 cup cold unsalted butter, cubed
1/4 cup boiling water
Directions
- Preheat your oven to 400 degrees F (200 degrees C).
- To prevent a soggy bottom, place the cherries, granulated sugar, lemon juice, and cornstarch in a large saucepan over medium heat. Stir constantly for 3 to 5 minutes until the juices release and the liquid begins to bubble and thicken into a glossy syrup. Remove from heat and stir in the almond extract.
- Pour the hot cherry mixture into a 2-quart round ceramic baking dish.
- In a separate bowl, whisk together the flour, brown sugar, baking powder, and salt.
- Use a pastry cutter or your fingers to work the cold cubed butter into the flour mixture until it resembles coarse crumbs with some pea-sized chunks remaining.
- Pour the boiling water over the flour and butter mixture. Stir quickly and briefly with a fork. The boiling water partially melts the butter and hydrates the flour instantly, creating a thick, biscuit-like dough that will sit on top of the fruit rather than sinking into it.
- Drop irregular spoonfuls of the dough over the hot cherry filling, leaving small gaps for steam to escape and for the cherries to peek through. Sprinkle the remaining tablespoon of granulated sugar over the dough for extra crunch.
- Bake for 40 to 45 minutes until the topping is a deep, textured golden brown and the cherry filling is bubbling vigorously around the edges.
- Let the cobbler rest for at least 20 minutes before serving. This final rest is crucial; it allows the fruit starches to fully set so the sauce is thick and jammy rather than watery.
Notes
- Letting the cobbler rest for 20 minutes after baking is essential for the filling to set into a jammy consistency.