Creamy Golden Crumb Bars: Bakery-Perfect Slices Every Time
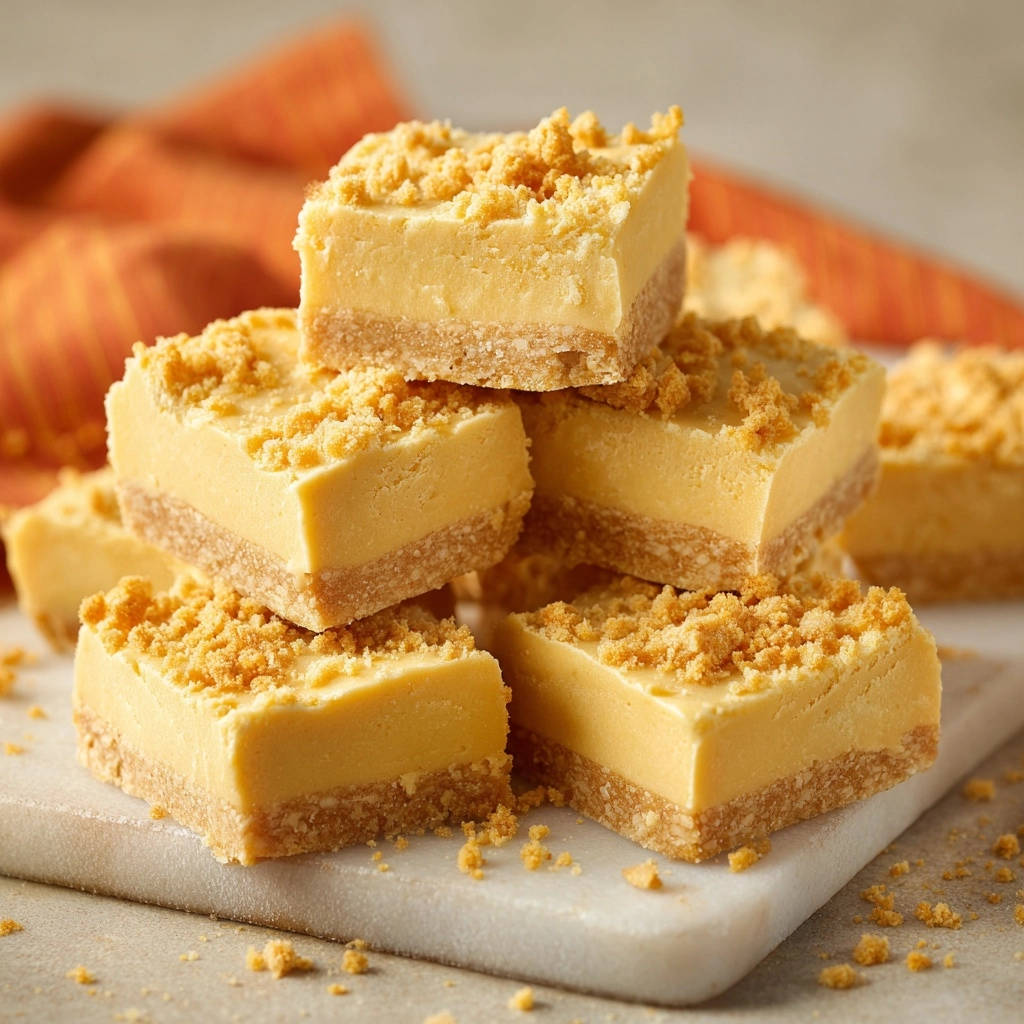
There’s nothing more satisfying than crafting a batch of beautiful dessert bars, yet I know the frustration of them falling apart when cut. Through years of baking, I’ve perfected the simple, game-changing trick to ensure your Creamy Golden Crumb Bars hold their shape flawlessly every single time. This recipe delivers reliable, neat squares that look as incredible as they taste, guaranteed to impress.
Beyond Basic: Why These Creamy Golden Crumb Bars Are Unbeatable
This isn’t just another crumb bar recipe; it’s a meticulously developed guide designed for success. We’ve tackled common baking challenges to ensure your experience is enjoyable and the results are spectacular.
The “Never Fail” Secret: Flawless Slices, Guaranteed
The true magic of these Creamy Golden Crumb Bars lies in a specific cooling and cutting technique. This method completely eliminates the common problem of crumbly edges or a wobbly filling, leaving you with perfectly structured, bakery-quality squares.
Say goodbye to uneven, messy slices. Our precise instructions guarantee professional-looking results that hold their elegant form from the first cut to the last.
A Symphony of Textures: Creamy Filling, Crispy Crumb
Prepare your palate for an exquisite dance of textures. Each bite offers the buttery crunch of the golden graham cracker crust, followed by a luxuriously smooth and tangy cream cheese filling.
The delightful experience is finished with a delicate, sweet crumb topping, providing a satisfying contrast that makes these easy dessert bars truly irresistible.
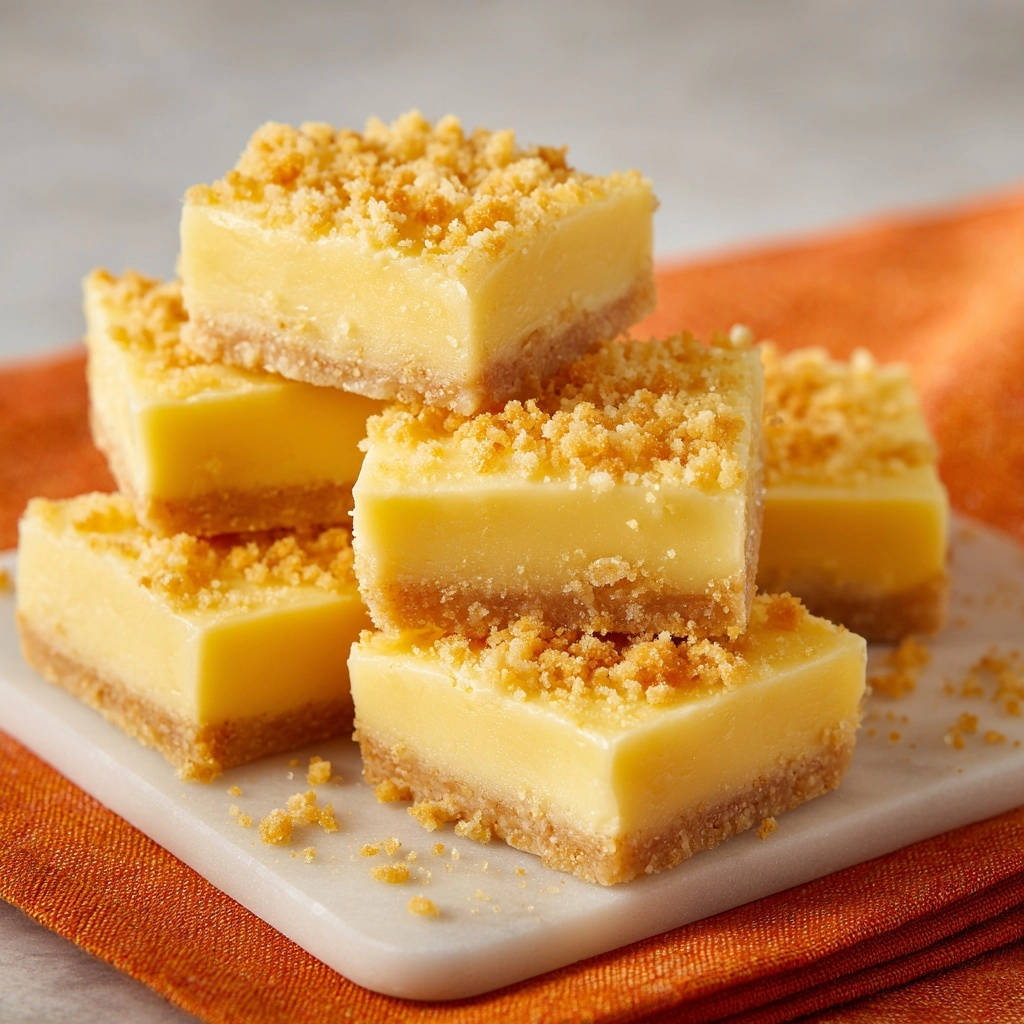
Simple Steps, Stunning Results for Creamy Golden Crumb Bars
Despite their sophisticated appearance and incredible flavor, these homemade treats are surprisingly straightforward to prepare. You don’t need advanced baking skills to achieve a dessert that looks like it came straight from a gourmet patisserie.
Our detailed, step-by-step guidance simplifies the process, making these Creamy Golden Crumb Bars accessible and enjoyable for every home baker.
Your Baking Toolkit: Essential Gear for Perfect Bars
Having the right tools on hand makes all the difference in achieving baking success. While these crumb bars don’t require specialized equipment, a few essentials are key.
The Right Pan & Parchment: No More Sticking
An 8×8 inch baking pan is ideal for the perfect thickness and proportion of these bars. Lining it with parchment paper is absolutely crucial, particularly by leaving an overhang on all sides.
This parchment sling allows you to lift the entire batch of baked crumb bars out of the pan effortlessly, ensuring easy removal and perfectly intact edges without any sticking.
Mixing Tools: From Handheld to Stand Mixer
For the crust and crumb topping, simple mixing bowls and a sturdy spoon or spatula are sufficient. However, for the creamy filling, an electric mixer-either handheld or a stand mixer-is highly recommended.
An electric mixer ensures your cream cheese filling is beautifully smooth and lump-free, creating that coveted velvety texture. For beating the cream cheese, it ensures optimal creaminess.
Gather Your Golden Essentials: Ingredients for Success
High-quality ingredients are the foundation of any exceptional dessert. Here’s a breakdown of what you’ll need and why each component is essential for your Creamy Golden Crumb Bars.
The Sturdy Foundation: Graham Cracker Crust
The crust provides a sweet, buttery base that perfectly complements the rich filling.
Graham Cracker Crumbs: Finely ground graham cracker crumbs form the signature texture. Ensure they are fresh for optimal flavor.
Granulated Sugar: Adds a touch of sweetness to the crust, enhancing the classic graham flavor.
Unsalted Butter, Melted: This acts as the binding agent, holding the crumbs together firmly. Using unsalted butter allows you to control the overall saltiness of the recipe.
Crafting the Dreamy Cream Cheese Filling
The heart of these delicious crumb bars is their smooth, tangy, and rich cream cheese layer.
Cream Cheese, Softened: Using full-fat, block cream cheese (not spreadable tub cream cheese) yields the best texture. It’s absolutely critical that it is fully softened to room temperature for a lump-free, silky smooth filling.
Granulated Sugar: Balances the tanginess of the cream cheese, creating a perfectly sweet profile.
Large Egg: Acts as a crucial binder, providing structure and helping the filling set beautifully during baking.
Vanilla Extract: Enhances the creamy flavor with a warm, aromatic depth that everyone loves.
All-Purpose Flour: A small amount helps stabilize the filling, preventing it from cracking and ensuring a wonderfully firm yet creamy texture after chilling.
Pinch of Salt: A tiny bit of salt is a flavor enhancer, bringing out the sweetness and richness of the other ingredients.
Finishing Touch: The Irresistible Crumb Topping
The crumb topping adds a delightful texture and a hint of sweetness, mirroring the base while creating a lovely contrast.
Graham Cracker Crumbs: These provide a familiar, comforting texture and flavor to the top layer.
Granulated Sugar: Sweetens the topping, ensuring it perfectly complements the filling.
Unsalted Butter, Melted: Binds the crumbs together, creating those irresistible golden clusters that make a classic crumb bar.
Enhancing the Hue: A Pop of Golden Color
While entirely optional, a tiny touch of yellow food coloring can elevate the visual appeal of your bars.
It helps achieve that beautiful, bright golden hue, making your homemade treats look even more inviting and appetizing.
From Oven to Adoration: Crafting Your Creamy Golden Crumb Bars
Step 1: Preparing Your Pan and Oven
Begin by preheating your oven to 350°F (175°C). Next, line an 8×8 inch baking pan with parchment paper, ensuring you leave a generous overhang on all sides.
This parchment overhang is your secret weapon for effortlessly lifting the entire batch of bars out of the pan later, guaranteeing clean edges and simple removal.
Step 2: Building the Golden Crust
In a medium bowl, combine the 1 and 1/2 cups graham cracker crumbs, 1/4 cup granulated sugar, and 1/2 cup melted unsalted butter until well mixed. Press this mixture firmly and evenly into the bottom of your prepared pan.
Bake the crust for 10 minutes; this crucial step sets the base, preventing it from becoming soggy once the filling is added. After baking, remove it from the oven and allow it to cool slightly.
Step 3: Whipping Up the Silky Cream Cheese Layer
In a large bowl, beat the softened cream cheese and 1/2 cup granulated sugar with an electric mixer until the mixture is smooth and creamy, which typically takes about 2 minutes. The softened cream cheese is key here for a lump-free texture.
Gently beat in the egg, vanilla extract, flour, and salt until they are just combined, being careful not to overmix. If you desire a vibrant golden hue, add a tiny drop of yellow food coloring at this stage. Overmixing introduces too much air, which can cause the filling to puff up and then crack during baking or cooling.
Step 4: Assembling the Layers
Once your crust has cooled slightly, carefully pour the prepared cream cheese filling over it. Use an offset spatula or the back of a spoon to spread the filling evenly across the crust, ensuring it reaches all edges.
For the crumb topping, combine the 1/2 cup graham cracker crumbs, 2 tablespoons sugar, and 2 tablespoons melted butter in a small bowl. Sprinkle this delightful mixture evenly over the cream cheese filling, creating a textured top layer.
Step 5: Baking to Perfection
Place your assembled bars in the preheated oven and bake for 25 to 30 minutes. You’ll know they’re perfectly done when the edges appear set and lightly golden, but the center still has a slight, gentle jiggle when the pan is lightly shaken.
This “slight jiggle” indicates that the filling is mostly set but still creamy, and it will firm up completely as the bars cool. Avoid overbaking, as this can lead to a dry or cracked filling.
If the slight jiggle trick appeals to you, the same visual cue helps when making these layered turtle cheesecake bars.
Step 6: The Game-Changer: Chilling for Flawless Slices
This step is the absolute most crucial for achieving those coveted bakery-perfect slices. Once baked, remove the pan from the oven and let the bars cool completely on a wire rack at room temperature.
After they’ve reached room temperature, transfer the entire pan to the refrigerator and chill for at least 4 hours, or preferably overnight. This extended chilling time is the secret to a fully firm, stable filling and a perfectly set crust, making these Creamy Golden Crumb Bars incredibly easy to cut without crumbling.
Step 7: The Art of the Perfect Cut
When you’re ready to serve, gently lift the chilled bars out of the pan using the parchment paper overhang. Carefully place the entire slab of bars onto a clean cutting board.
For the cleanest, most professional-looking slices, employ the “warm knife” technique: use a large, sharp knife, warming it under hot water and wiping it completely clean and dry between each cut. This precision ensures every single bar comes out looking impeccably neat and perfectly presented.
Unlock Your Inner Baker: Pro Tips for Crumb Bar Mastery
Elevate your baking with these expert tips, ensuring your Creamy Golden Crumb Bars are nothing short of perfection every time.
The Magic of Parchment Overhang
Always extend your parchment paper beyond the edges of the pan. This overhang creates convenient “handles” that allow you to lift the entire baked slab out effortlessly, preventing any sticking and preserving the perfect edges of your crumb bars.
Don’t Overmix! The Key to a Velvety Filling
When preparing the cream cheese filling, mix until just combined and smooth. Overmixing introduces too much air into the batter, which can cause the filling to puff up excessively during baking, leading to cracks or a less dense texture once cooled.
Decoding the “Jiggle”: When Your Bars Are Done
The “slight jiggle” in the center is your visual cue for perfectly baked bars. It means the edges are set, but the center retains enough moisture to become wonderfully creamy once chilled. Overbaking will result in a dry, potentially rubbery filling.
Temperature Matters: Mastering the Chilling Process
Thorough chilling is non-negotiable for these crumb bars. It not only sets the filling and crust firmly for clean slices but also allows the flavors to meld beautifully. Patience during this step is key for optimal texture and ease of cutting.
The Warm Knife Trick: Your Best Friend for Clean Slices
For bakery-perfect cuts, submerge a long, sharp knife in hot water for a few seconds, then wipe it completely dry. Slice through the chilled bars, then repeat the warming and wiping process for each subsequent cut. This prevents the filling from sticking to the knife and creates incredibly smooth, defined edges.
Get Creative: Flavor Variations and Add-ins
Personalize your Creamy Golden Crumb Bars! Consider adding a teaspoon of lemon or orange zest to the filling for a bright citrus note. A sprinkle of mini chocolate chips, a swirl of your favorite jam before adding the crumb topping, or a hint of almond extract can also add delightful twists.
For a similar bright, citrusy treat, try these creamy lemon coconut bars with a wonderfully crisp crust.
Crumb Bar Crisis Averted: Common Questions & Solutions
Even seasoned bakers encounter challenges. Here are solutions to common issues with crumb bars.
Why are my bars crumbly and hard to cut?
The most common culprit is insufficient chilling time. The cream cheese filling needs ample time in the refrigerator to firm up completely. Additionally, not using the “warm knife” technique can lead to a sticky, uneven cut that pulls the bars apart.
Ensure your bars are chilled for at least 4 hours, preferably overnight, and use a sharp, warm, and clean knife for each slice to achieve neat, defined edges.
My Creamy Golden Crumb Bars filling isn’t firming up.
Several factors can contribute to a soft filling. Overmixing the cream cheese batter can incorporate too much air, leading to a less dense set. Underbaking is another cause; ensure the edges are set and there’s only a slight jiggle in the center. Lastly, insufficient chilling time will prevent the filling from achieving its ideal firm texture.
Make sure your cream cheese is at room temperature but don’t overbeat. Trust the visual cues for doneness, and always allow for thorough chilling.
The crust seems too thin/thick.
The provided recipe is calibrated for an 8×8 inch pan to achieve the perfect crust-to-filling ratio. If your crust feels too thin, you might be using a larger pan or not pressing the crumbs firmly enough. Conversely, if it’s too thick, your pan might be smaller than 8×8 inches, or you might have slightly over-measured the crumbs.
For consistent results, ensure you’re using the specified pan size and measuring ingredients accurately. If you prefer a thicker crust, you can slightly increase the graham cracker crumbs and melted butter, but be mindful of the pan size.
Presentation & Preservation: Enjoying Your Crumb Bars
Once you’ve mastered these Creamy Golden Crumb Bars, serving and storing them properly ensures continued enjoyment.
What to Serve With These Crumb Bars
These creamy golden crumb bars work well as a sweet snack or light dessert. If you want to round out a brunch or breakfast spread, consider adding a stack of pancakes that share a similar fluffy, comforting feel.
- For a fruity twist that matches the bar’s buttery richness, try Fluffy Blueberry Pancakes — the tart blueberries cut through the sweetness nicely.
- If you prefer a heartier, oat-forward option, Fluffy Oatmeal Pancakes bring a similar cozy grain texture that complements the crumb topping.
Elegant Serving Suggestions
These beautiful homemade treats are wonderful on their own, but a few simple garnishes can elevate their presentation. Consider dusting them with a fine layer of powdered sugar just before serving.
Fresh berries like raspberries or blueberries add a pop of color and a delightful tart contrast. A dollop of lightly sweetened whipped cream or a spoonful of crème fraîche alongside each bar also makes for an elegant touch.
Keeping Them Fresh: Storage Tips
To maintain their optimal freshness and texture, store your Creamy Golden Crumb Bars in an airtight container in the refrigerator.
Proper storage prevents them from drying out and helps the filling remain perfectly set. You can arrange them in a single layer or separate layers with parchment paper to prevent sticking.
Can You Make Them Ahead?
Absolutely, these delicious crumb bars are an ideal make-ahead dessert! In fact, they taste even better after a full overnight chill, as it allows the flavors to deepen and the textures to fully meld.
Prepare them a day or two in advance of when you plan to serve them. This takes the pressure off on event day and ensures they are perfectly set for slicing.
Your Top Creamy Golden Crumb Bars Questions, Answered
Here are quick answers to some common inquiries about this delightful recipe.
Can I substitute graham cracker crumbs?
Yes, you can certainly substitute graham cracker crumbs with other finely crushed cookies. Excellent alternatives include digestive biscuits, vanilla wafers, or even shortbread cookies. Use the same quantity to ensure the crust’s consistency.
What if I don’t have an electric mixer?
While an electric mixer is recommended for the filling for ultimate smoothness, you can achieve a good result with a sturdy whisk and plenty of arm power. Ensure your cream cheese is exceptionally soft, almost spreadable, before you begin whisking vigorously until smooth and creamy.
How long do Creamy Golden Crumb Bars last in the refrigerator?
When stored properly in an airtight container in the refrigerator, these Creamy Golden Crumb Bars will remain fresh and delicious for up to 5 days. For the best flavor and texture, consume them within this timeframe.
Is yellow food coloring optional?
Yes, the yellow food coloring is entirely optional. Its sole purpose is to enhance the visual appeal of the cream cheese layer, giving it a vibrant golden hue that matches the name. It does not affect the flavor or texture of the bars in any way.
Your Kitchen’s Next Star: Share Your Creamy Golden Crumb Bars!
You now possess all the secrets to create truly exceptional Creamy Golden Crumb Bars-a dessert that combines irresistible flavor with stunning, effortless presentation. This recipe is more than just a sweet treat; it’s an opportunity to create memorable moments, share joy, and showcase your newfound baking confidence.
I encourage you to embrace the process, trust the chilling, and delight in the perfect slices you’ll achieve. Bake a batch today, share them with loved ones, and perhaps even inspire others to discover the magic of these golden dessert squares. Enjoy every single creamy, crumbly bite!
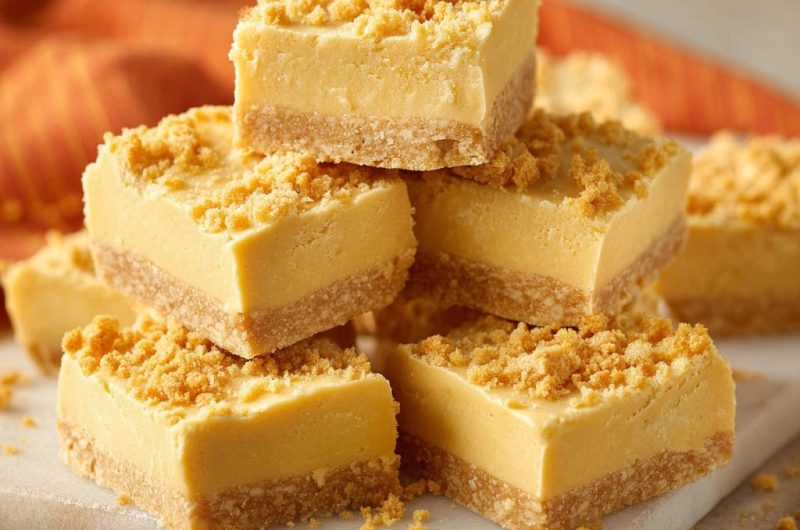
Golden Crumb Bars
Course: DessertCuisine: AmericanDifficulty: easy12
bars20
minutes40
minutes260
kcal300
minutesEnjoy bakery-perfect Creamy Golden Crumb Bars that hold their shape every time. This recipe offers a rich cream cheese filling topped with a sweet, buttery crumb.
Ingredients
For the Crust:
1 and 1/2 cups graham cracker crumbs
1/4 cup granulated sugar
1/2 cup unsalted butter, melted
For the Filling:
8 ounces cream cheese, softened
1/2 cup granulated sugar
1 large egg
1 teaspoon vanilla extract
1 tablespoon all purpose flour
Pinch of salt
Yellow food coloring, optional (for color matching the image)
For the Crumb Topping:
1/2 cup graham cracker crumbs
2 tablespoons granulated sugar
2 tablespoons unsalted butter, melted
Directions
- Preheat your oven to 350°F (175°C). Line an 8×8 inch baking pan with parchment paper, leaving an overhang on all sides. This is key for easy removal and guaranteed clean slices!
- For the crust: In a medium bowl, combine the 1 and 1/2 cups graham cracker crumbs, 1/4 cup sugar, and 1/2 cup melted butter until well mixed. Press firmly into the bottom of the prepared pan. Bake for 10 minutes, then remove from oven and let cool slightly.
- For the filling: In a large bowl, beat the softened cream cheese and 1/2 cup sugar with an electric mixer until smooth and creamy, about 2 minutes. Beat in the egg, vanilla extract, flour, and salt until just combined. If desired, add a tiny drop of yellow food coloring to achieve the golden hue seen in the image. Do not overmix.
- Pour the filling over the cooled crust and spread evenly.
- For the crumb topping: In a small bowl, combine the 1/2 cup graham cracker crumbs, 2 tablespoons sugar, and 2 tablespoons melted butter. Sprinkle this mixture evenly over the cream cheese filling.
- Bake for 25 to 30 minutes, or until the edges are set and the center has a slight jiggle.
- This is the most crucial step for perfect slices: Once baked, let the bars cool completely on a wire rack at room temperature. Then, transfer the pan to the refrigerator and chill for at least 4 hours, or preferably overnight. The extended chilling time is the secret to a firm, set filling and a stable crust, making them easy to cut.
- When ready to serve, lift the bars out of the pan using the parchment paper overhang. Place them on a cutting board. For the cleanest possible slices, use a large, sharp knife, warming it under hot water and wiping it clean between each cut. This technique ensures every bar comes out looking bakery-perfect, just like the picture!
Notes
- Extended chilling and a warm, clean knife are key for perfect, neat slices.