Mastering Layered Turtle Cheesecake Bars with a Crisp Crust
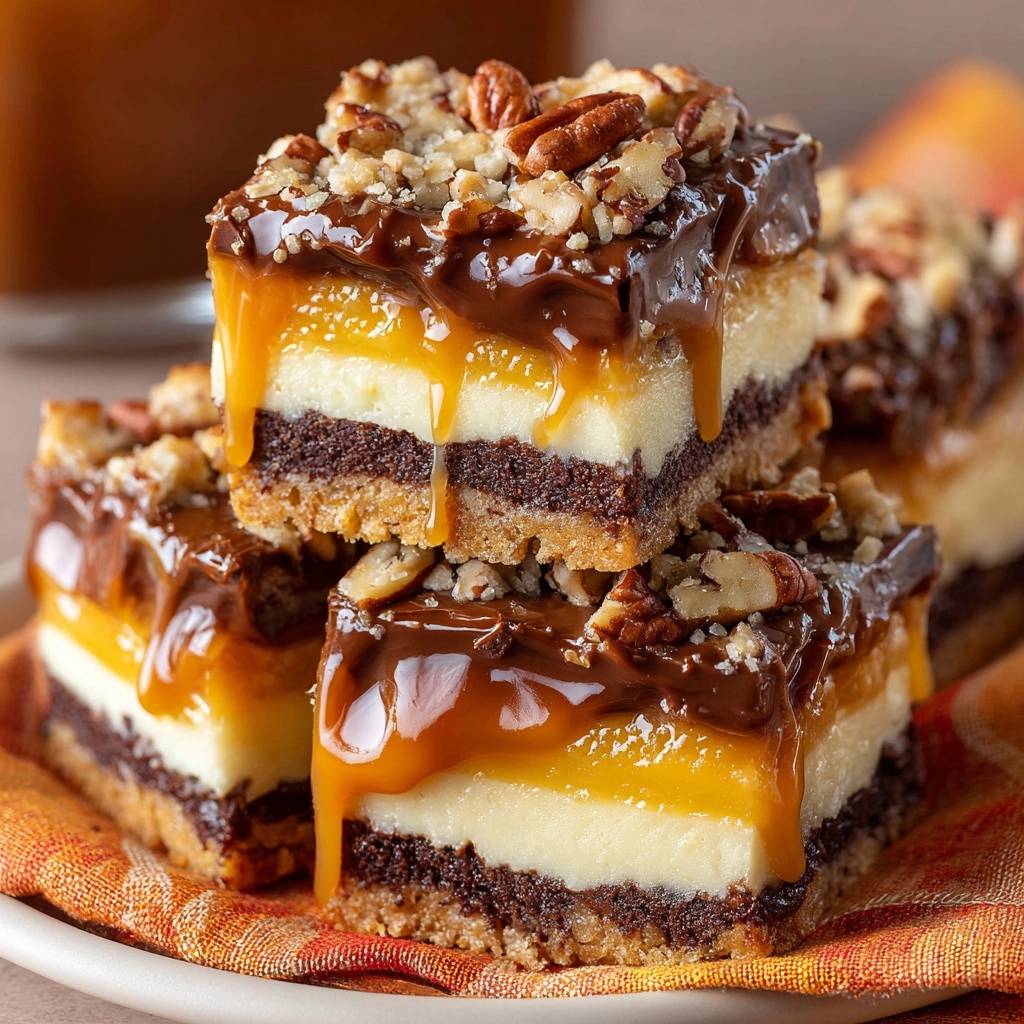
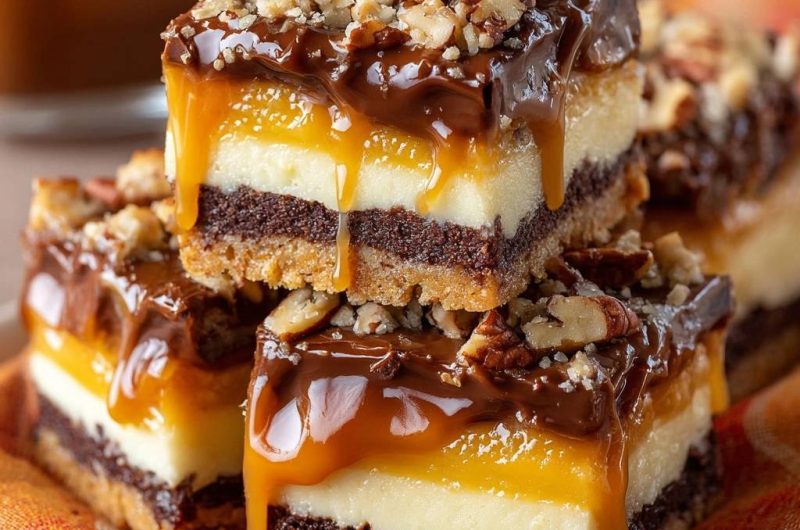
Imagine biting through a thick layer of snappy chocolate ganache and crunchy toasted pecans, only to hit a river of buttery caramel and silky cheesecake. Most people struggle with cheesecake bars because the crust turns into a soggy, sad mess under the weight of all those toppings. These Layered Turtle Cheesecake Bars solve that problem with a brilliant architectural secret that keeps the base crisp and the layers perfectly distinct.
The classic “Turtle” profile relies on the balance of salty pecans, rich caramel, and deep chocolate. However, achieving that professional look at home requires more than just stacking ingredients. We use a specific moisture-barrier technique that ensures every bite has a high-contrast texture, from the crunch of the graham cracker foundation to the velvet-smooth cream cheese center.
The real secret to success here is the chocolate seal. By melting a thin layer of semi-sweet chocolate directly onto the par-baked crust, you create a waterproof shield. This prevents the moisture from the cheesecake batter from migrating into the crumbs, keeping your bars sturdy enough to hold in your hand without falling apart. Oh man, once you try this method, you’ll never go back to basic crusts again!
The Architecture of a Perfect Cheesecake Bar
Building a great dessert bar is a lot like building a house; if the foundation is weak, the whole thing collapses. In this recipe, we focus on the physics of moisture migration. Standard cheesecake bars often fail because the water in the cream cheese seeps downward during the long bake, turning a buttery crust into a mushy paste.
By focusing on distinct layers, we create a visual and textural masterpiece. You want to see that sharp line where the dark chocolate meets the pale cheesecake and the golden caramel. This isn’t just about looks, though. Those defined layers allow your palate to experience each flavor individually before they meld together into one decadent mouthful.
Why the Double-Bake Method is Essential
Firstly, we bake the graham cracker base on its own before adding any filling. This initial ten-minute blast of heat is crucial because it allows the melted butter and sugar to caramelize and bind the crumbs together. Therefore, the crust becomes a solid, structural plank rather than a loose pile of sand.
If the salty-sweet balance of pecans and caramel appeals to you, try this caramel apple pecan upside-down cake for a similar treat.
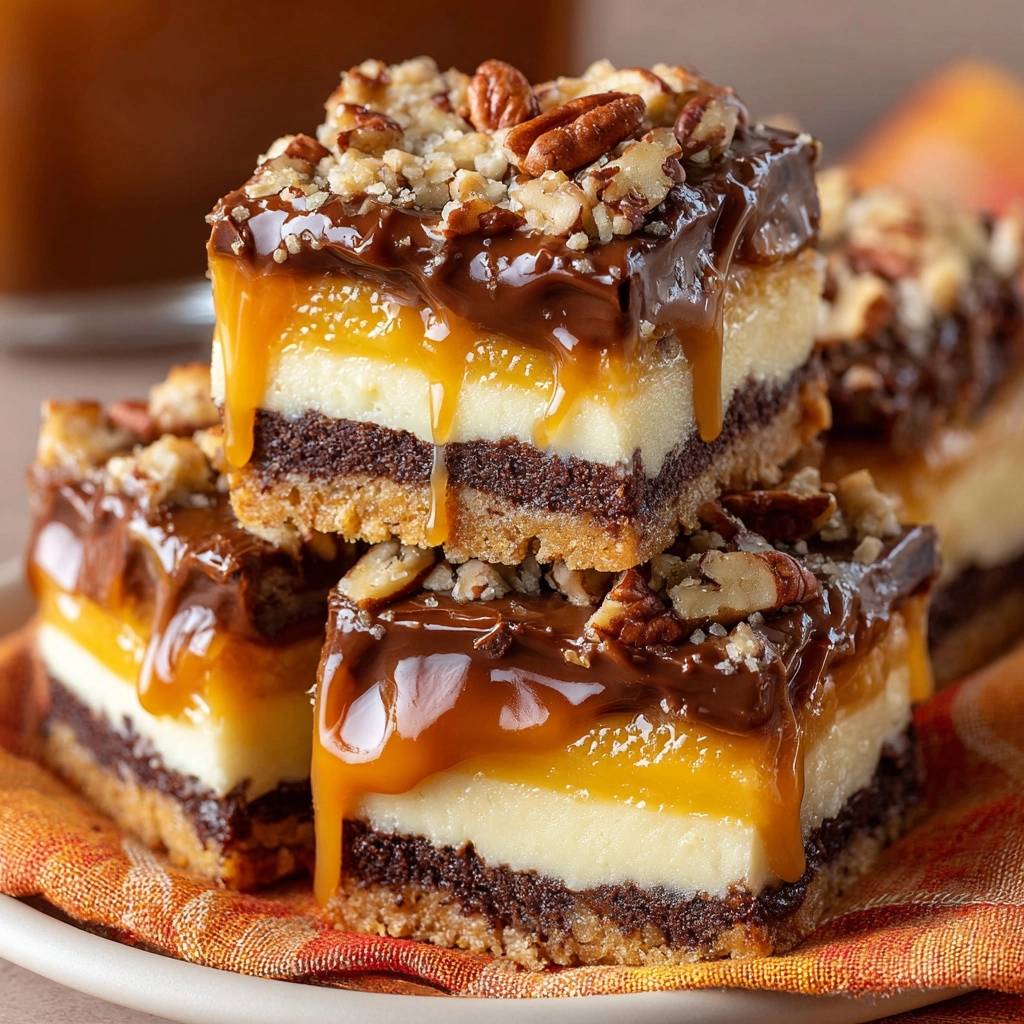
In addition, par-baking removes excess moisture from the crumbs themselves. If you skip this step, the crust stays soft and doughy. By the time the cheesecake layer finishes its second trip to the oven, the base has reached a perfect, golden-brown snap that provides the necessary contrast to the creamy toppings.
The Chocolate Ganache Moisture Barrier Explained
Professional pastry chefs often use fat-based barriers to protect delicate pastries, and we’re stealing that move here. As soon as the crust comes out of the oven, we sprinkle chocolate chips over it. Because the crust is piping hot, the chocolate melts instantly into a glossy liquid that fills every tiny crevice in the graham cracker surface.
Once this chocolate layer cools and hardens, it acts as a “waterproof” seal. When you pour the liquid cheesecake batter on top, the chocolate prevents the batter from soaking into the crust. This technique is the difference between a grocery-store bar and a high-end bakery dessert. It ensures that even after three days in the fridge, the bottom remains as crisp as the day you baked it.
Essential Components for Layered Turtle Cheesecake Bars
Quality ingredients make a massive difference when you’re working with such bold flavors. For the base, I highly recommend pulsing whole graham crackers in a food processor rather than buying pre-ground crumbs. The slightly irregular texture of home-crushed crackers creates a more interesting mouthfeel and a sturdier crust.
Furthermore, your cream cheese must be completely at room temperature before you start mixing. If it’s even slightly chilly, you’ll end up with tiny white lumps in your batter that won’t bake out. I usually pull my blocks out of the fridge at least two hours before I plan to bake. If you’re in a rush, you can submerge the sealed foil packages in warm water for about 15 minutes.
If you love the smooth, dense texture of these cheesecake bars, you’ll want to try this creamy New York cheesecake for a classic take on the filling.
When it comes to the caramel, look for a “thick” or “premium” jarred sauce. If the caramel is too thin or runny, it will squish out the sides when you try to cut the bars. You want something that holds its shape at room temperature. For the pecans, never skip the toasting! Tossing them in a dry pan for 5 minutes wakes up the natural oils and gives them a much deeper, woodsy flavor that cuts through the sweetness of the sugar.
Step-by-Step Sensory Walkthrough
Firstly, preheat your oven to 350°F and line your pan with parchment paper. Make sure you leave a couple of inches of paper hanging over the sides. These “handles” are vital because they allow you to lift the entire block of bars out once they’ve set, which is the only way to get those clean, straight edges when slicing.
Mix your crumbs, butter, and sugar until it looks like wet sand. When you press it into the pan, use the bottom of a flat measuring cup to really pack it down hard. You want a tight, even surface. After the 10-minute par-bake, drop your chocolate chips on top. Watch them turn from matte to shiny; that’s your cue to spread them into a thin, dark sheet with your spatula.
While the crust cools, beat your cream cheese and sugar. You’re looking for a smooth, aerated texture, but be careful! Once you add the eggs, switch to a low speed and stop as soon as they disappear. Overmixing at this stage incorporates too much air, which causes the cheesecake to puff up and then crack as it cools. We want a dense, creamy layer, not a souffle.
Bake the bars until the edges are slightly puffed and the center has a gentle jiggle, like Jell-O. Don’t wait for the middle to look solid, or you’ll overbake it. After cooling, pour on the caramel. Here’s a pro tip: pop the pan in the freezer for 15 minutes after adding the caramel. This “flash-freezes” the surface so that when you pour the warm chocolate ganache on top, the two layers don’t mix together.
Ways to Round Out Your Dessert Spread
These turtle cheesecake bars bring together chocolate, caramel, and pecans in a buttery crust. If you want to put out a few small nibbles alongside them, consider these two easy recipes that share similar flavors.
- The Creamy Cranberry Apricot Cheese Spread offers a tangy, fruity contrast to the rich cheesecake layer, and it can be scooped up with crackers for a lighter bite between sweeter pieces.
- A
Finally, whisk your heavy cream and chocolate chips until they’re glossy and pourable. Spread this over the chilled caramel and immediately shower the top with your toasted pecans. The ganache acts like glue, grabbing onto the nuts as it sets. Now comes the hardest part: you must let these chill for at least 4 hours. This time allows the fats in the cream cheese and chocolate to fully stabilize, ensuring those perfect, distinct layers.
Frequently Asked Questions
How should I store these bars and do they freeze well?
You should store these bars in an airtight container in the refrigerator for up to 5 days. Because of the high fat content in the cream cheese and chocolate, they actually stay quite fresh. You can also freeze them! Wrap individual slices tightly in plastic wrap and then place them in a freezer bag for up to 3 months. Just thaw them in the fridge overnight before serving so the caramel regains its soft texture.
Why did my caramel layer run out the sides when I cut the bars?
This usually happens for two reasons: either the caramel sauce was too thin to begin with, or the bars weren’t chilled long enough. Ensure you use a thick, spoonable caramel rather than a thin ice cream topping. Additionally, the 4-hour chill time is non-negotiable. If the caramel hasn’t reached a cold temperature, it won’t have the viscosity needed to stay put between the cheesecake and ganache layers.
Can I use a different type of nut or a gluten-free crust?
Absolutely. While pecans are traditional for “Turtle” flavors, toasted walnuts or even salted peanuts work beautifully. For a gluten-free version, simply swap the graham cracker crumbs for your favorite gluten-free graham cracker brand or a mixture of almond flour and a little extra sugar. The chocolate moisture barrier is especially helpful with gluten-free crusts, as they tend to be more fragile.
How do I get those perfectly clean slices I see in bakeries?
The secret is a hot, clean knife. Fill a tall glass with hot water and dip your knife in before every single cut. Wipe the blade completely dry with a paper towel, make one clean slice (don’t saw!), and then clean the blade again. The heat from the metal melts through the ganache and caramel smoothly, while the clean blade ensures you don’t drag dark chocolate into the white cheesecake layer.
What if I don’t have heavy cream for the ganache?
If you’re out of heavy cream, you can use a tablespoon of refined coconut oil melted with the chocolate chips instead. This will create a “magic shell” style topping that is very snappy. However, avoid using milk or half-and-half as a direct 1:1 replacement for the cream in ganache, as the lower fat content can cause the chocolate to seize or become grainy rather than smooth and glossy.
Turtle Cheesecake Bars
Course: DessertCuisine: AmericanDifficulty: mediumYields16
barsPrep Time30
minutesCook Time40
minutesCalories385
kcalTotal Time300
MinutesA decadent multi-layered dessert featuring a crisp graham cracker base, a chocolate seal, creamy cheesecake, thick caramel, and chocolate ganache topped with toasted pecans.
Ingredients
The Base & Seal:
2 cups graham cracker crumbs
1/2 cup unsalted butter, melted
1/4 cup granulated sugar
1/2 cup semi-sweet chocolate chips (for the moisture barrier)
The Cheesecake Layer:
16 ounces cream cheese, softened
1/2 cup granulated sugar
2 large eggs
1 teaspoon vanilla extract
The Toppings:
1 cup thick, high-quality caramel sauce (room temperature)
1 cup semi-sweet chocolate chips (for the top ganache)
1/4 cup heavy cream
1 cup chopped pecans, lightly toasted
Directions
- Preheat and Prep: Preheat your oven to 350°F (175°C). Line an 8×8 inch square baking pan with parchment paper, ensuring there is an overhang on at least two sides for easy removal.
- The Foundation: Combine graham cracker crumbs, melted butter, and 1/4 cup sugar in a bowl. Press the mixture very firmly into the bottom of the prepared pan. Bake for 10 minutes to set the structure.
- The Moisture Barrier: Immediately upon removing the crust from the oven, sprinkle 1/2 cup chocolate chips over the hot surface. Let them sit for 2 minutes to melt, then spread into an even, thin layer using an offset spatula. This “waterproofs” the crust. Let it cool for 10 minutes.
- The Cheesecake Layer: In a large bowl, beat the softened cream cheese and 1/2 cup sugar until completely smooth. Add eggs and vanilla, mixing on low speed just until combined (do not overbeat). Pour the batter over the chocolate-sealed crust.
- The Second Bake: Bake for 25-30 minutes, or until the edges are set but the center still has a slight jiggle. Remove from the oven and let cool completely on a wire rack.
- The Caramel Layer: Once the cheesecake is cool, pour the thick caramel sauce over the top, spreading it to the edges. Place the pan in the freezer for 15 minutes to set the caramel before adding the final layer.
- The Ganache Topping: While the caramel sets, heat the remaining 1 cup chocolate chips and 1/4 cup heavy cream in the microwave in 30-second intervals, stirring until glossy and smooth. Pour the ganache over the chilled caramel layer.
- The Finish: Immediately sprinkle the toasted pecans over the wet chocolate ganache. Chill the bars in the refrigerator for at least 4 hours (preferably overnight) to allow the layers to fully set. Use the parchment overhang to lift the block out of the pan and slice with a hot, clean knife for perfect, distinct layers.
Notes
- The chocolate moisture barrier is essential for keeping the crust crisp. For clean slices, use a hot knife wiped clean between every cut.