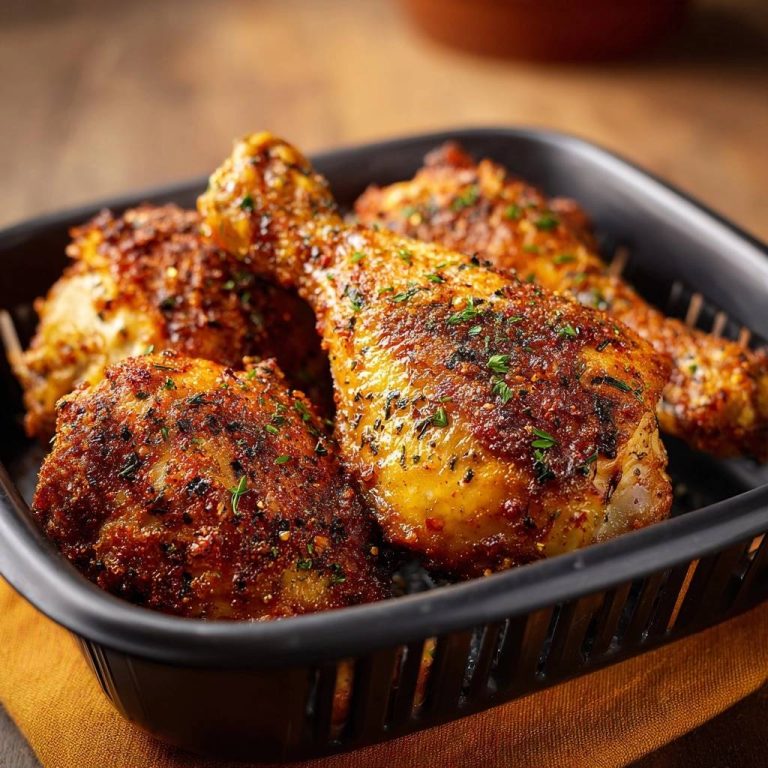
Crispy Glazed Chicken Bites: The Secret to Non-Soggy Crunch
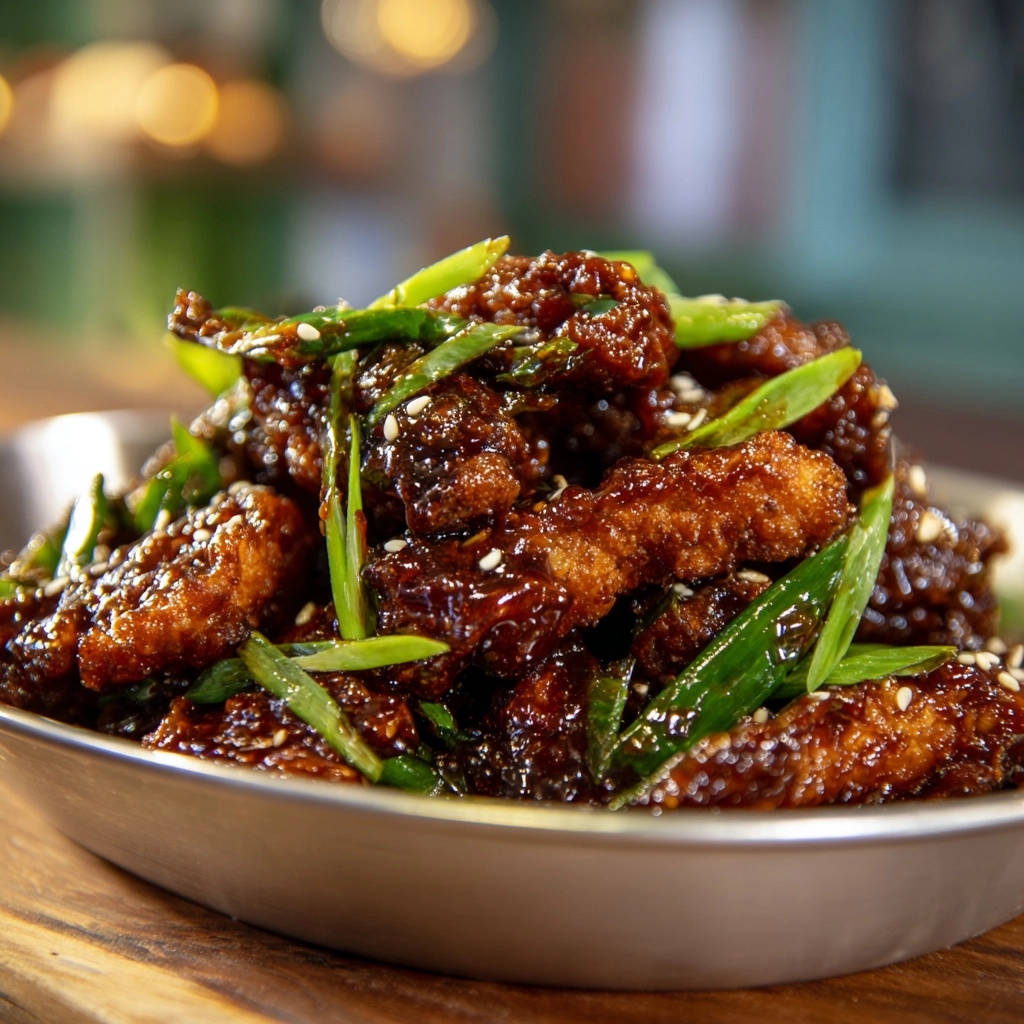
I remember the frustration of trying to recreate those perfectly crispy, glazed chicken bites at home, only for them to turn soggy the moment the sauce touched them. After countless kitchen experiments, I finally cracked the code to keeping every single bite incredibly crisp, even when coated in the most luscious, sticky glaze.
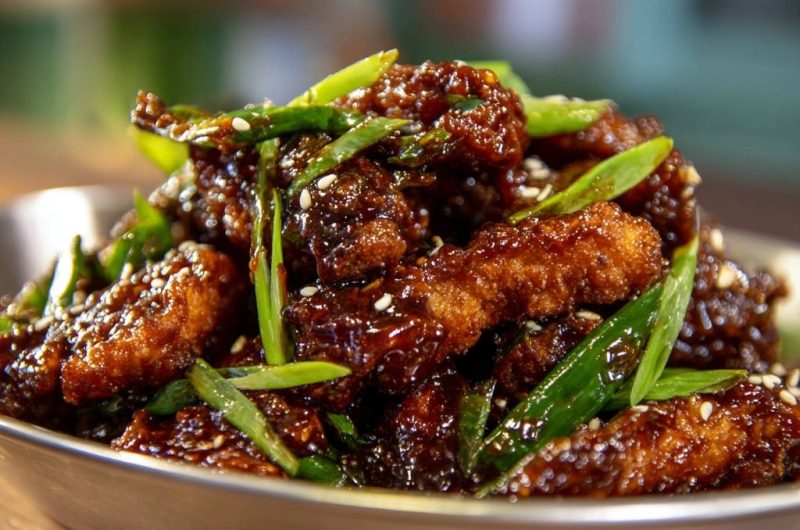
This recipe for Crispy Glazed Chicken Bites isn’t just delicious; it’s engineered for that satisfying, non-soggy crunch, making it a guaranteed crowd-pleaser for any occasion.
Why These Crispy Glazed Chicken Bites Will Become Your New Obsession
The Double-Fry Difference: Unlocking Ultimate Crispness
The secret weapon in achieving truly irresistible texture is the double-fry method. This two-stage process ensures the chicken cooks through perfectly and then develops an impenetrable, golden-brown crust that stands up to the sweet, savory sauce.
Sweet & Savory Glaze Perfection That Stays Put
Our carefully balanced glaze hits all the right notes: umami from soy, richness from brown sugar, a bright tang from rice vinegar, and aromatic depth from ginger and garlic. Crucially, it’s thickened just enough to cling beautifully without overwhelming the chicken’s crisp exterior.
Quick Prep, Impressive Results: Your Weeknight Winner Status
Despite its gourmet-level crunch and flavor, this recipe is surprisingly straightforward to execute. It’s designed to deliver professional-quality results with minimal fuss, making it ideal for busy weeknights or impromptu gatherings.
Gather Your Flavor Arsenal: Key Ingredients for Success
The Chicken Foundation: Thighs vs. Breasts (and Why It Matters)
Boneless, skinless chicken thighs are my top recommendation for their inherent juiciness and flavor, which holds up wonderfully to frying. If you prefer a leaner option, chicken breasts work well; just be mindful not to overcook them, as they can dry out faster.
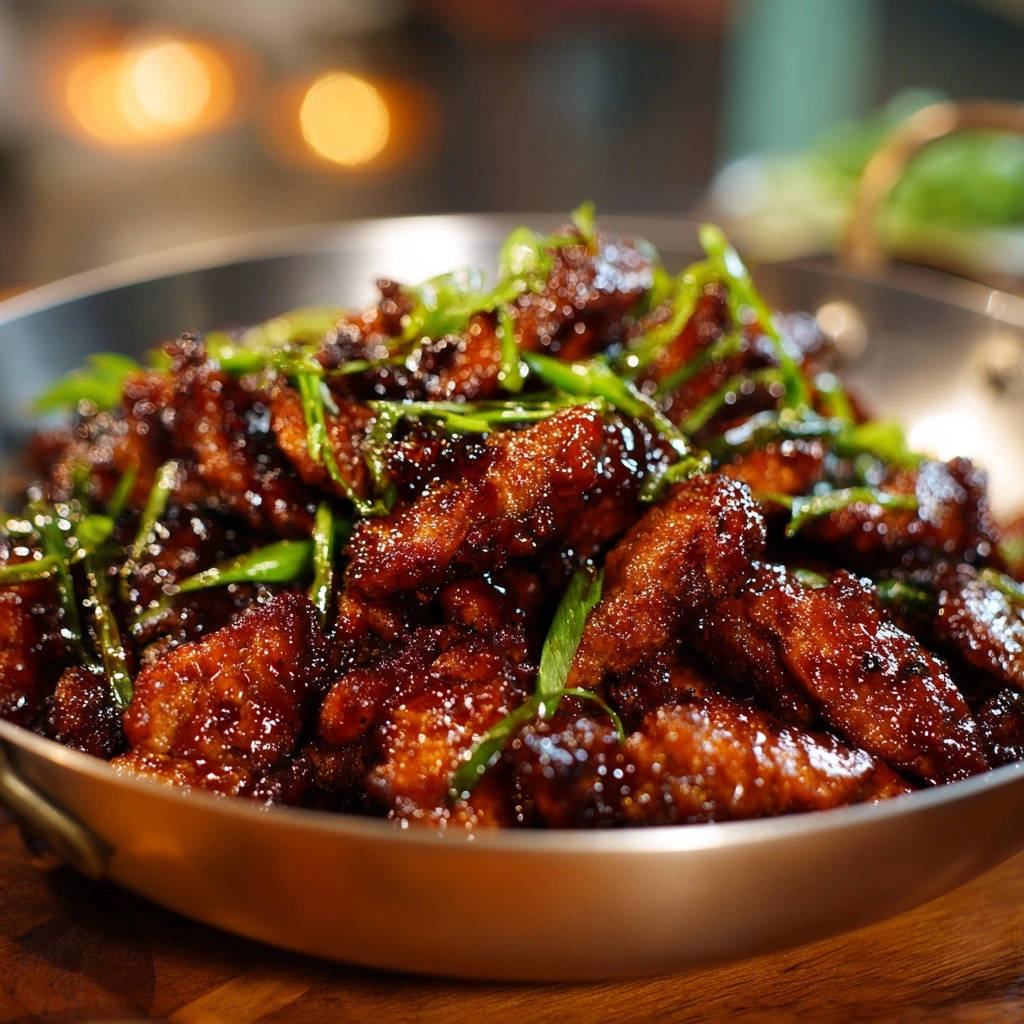
Cutting the chicken into uniform 1-inch pieces is essential for even cooking and consistent texture.
The Crispness Crusaders: Flour & Cornstarch Duo
This dynamic duo is pivotal for the signature crunch. All-purpose flour provides the initial coating and helps with browning, while cornstarch delivers an unparalleled crispness and helps lock in moisture. This combination forms a robust barrier against the glaze.
Building the Irresistible Glaze: Sweet, Savory, and Spicy Notes
The glaze is a symphony of complementary flavors.
Soy Sauce: The umami backbone and salty depth.
Brown Sugar: Adds a rich sweetness and aids in caramelization for that beautiful glossy finish.
Rice Vinegar: Provides a crucial tangy counterpoint, balancing the sweetness and richness.
Fresh Ginger & Garlic: Aromatic powerhouses that infuse the glaze with warmth and pungency.
Red Pepper Flakes (Optional): A hint of heat for those who like a little kick, without overpowering the other flavors.
The Frying Medium: Choosing the Right Oil
Select a neutral-flavored oil with a high smoke point, such as vegetable, canola, or peanut oil. This ensures your chicken fries beautifully without imparting unwanted flavors or burning.
Finishing Touches: Garnish for Pop and Appeal
Sliced green onions add a fresh, pungent bite and vibrant color, contrasting beautifully with the rich glaze. Sesame seeds offer a delicate nutty flavor and textural crunch, elevating the presentation and taste of your Crispy Glazed Chicken Bites.
Gearing Up for Greatness: Essential Kitchen Tools
Frying Essentials: Pot, Thermometer, and Slotted Spoon
A deep, heavy-bottomed pot or Dutch oven is crucial for safe and even frying. An accurate oil thermometer is non-negotiable for maintaining precise temperatures, which directly impacts the crispness of your chicken.
A sturdy slotted spoon or spider allows for safe retrieval of the chicken, effectively draining excess oil.
Mixing & Prepping: Bowls and Whisk
You’ll need several medium-sized bowls for preparing the coating station and mixing the glaze ingredients. A whisk is perfect for combining the egg wash and smoothing out the cornstarch slurry and sauce.
The Wire Rack Advantage: For Draining and Cooling
A wire rack set over a baking sheet is vital at multiple stages. It allows air to circulate around the fried chicken, preventing it from steaming and becoming soggy as it drains excess oil.
Mastering the Method: Your Step-by-Step Guide to Perfection
- Prep Your Chicken and Coating:
Start by thoroughly patting your chicken pieces very dry with paper towels. This removes surface moisture, which is key for a crispy coating to adhere properly.
Set up your dredging station: one bowl with the seasoned flour and cornstarch mix, and another with the whisked egg and water wash. Dip each chicken piece first into the egg wash, then coat fully in the dry mixture, ensuring an even, thick layer. Place coated chicken on a wire rack to rest momentarily.
- The First Fry for Internal Doneness:
Heat your chosen frying oil in a deep pot to precisely 350°F (175°C). Carefully add about half of the coated chicken pieces to the hot oil, ensuring you don’t overcrowd the pot.
Fry for 4-5 minutes until the chicken is light golden brown and fully cooked through internally. Remove the chicken with a slotted spoon to a clean wire rack set over a baking sheet, allowing excess oil to drain.
- Whip Up the Signature Glaze:
While the chicken is undergoing its first fry, whisk together the soy sauce, brown sugar, rice vinegar, grated ginger, minced garlic, and optional red pepper flakes in a small saucepan. In a separate small bowl, prepare your cornstarch slurry by mixing the remaining cornstarch with 2 tablespoons of water until smooth.
- Thicken the Sauce to Glossy Perfection:
Bring the glaze mixture in the saucepan to a gentle simmer over medium heat. Slowly whisk in the cornstarch slurry, stirring constantly.
Continue cooking for 1-2 minutes until the sauce visibly thickens to a glossy, syrupy consistency, able to beautifully coat the back of a spoon. Remove from heat immediately.
- The Crucial Second Fry for Ultimate Crunch:
This is the moment of truth for spectacular crispness! Increase your oil temperature to 375°F (190°C). Carefully return all of the partially fried chicken pieces to the hotter oil.
Fry for an additional 2-3 minutes, stirring occasionally, until the chicken reaches a deep golden brown and feels incredibly crispy. This final fry expels residual moisture and truly locks in that amazing crunch.
- Sauce and Serve Immediately for Optimal Crispness:
Once the chicken is perfectly crispy from the second fry, remove it from the oil with a slotted spoon, allowing any excess oil to drain briefly. Immediately transfer the hot chicken to a large mixing bowl.
Pour the warm, thickened glaze over the chicken and quickly toss to coat every piece evenly. Serve your Crispy Glazed Chicken Bites without delay, garnished generously with fresh sliced green onions and sesame seeds, to enjoy them at their absolute best.
Chef’s Secrets: Elevating Your Crispy Glazed Chicken Bites
The Power of Patting Dry: Why Moisture is the Enemy of Crisp
This seemingly simple step is incredibly impactful. Excess moisture on the chicken surface creates steam during frying, which prevents the coating from crisping properly and can make it soggy. Thoroughly patting dry ensures a superior, crunchy crust.
The Art of the Double Fry: A Non-Negotiable Step for Superior Texture
The first fry cooks the chicken through and sets the initial coating, creating a base. The second, hotter fry is specifically for developing that deep golden color and maximum crispness, making the coating incredibly durable against the sauce.
Don’t Overcrowd the Pot: Maintaining Oil Temperature for Consistent Results
Adding too much chicken at once drastically lowers the oil’s temperature. This causes the chicken to cook slowly, absorbing more oil and becoming greasy and soft, rather than light and crispy. Fry in small, manageable batches.
Achieving the Perfect Glaze Consistency: Slurry Savvy
The cornstarch slurry is key to a glossy, perfectly thickened glaze. Always mix cornstarch with cold water first to prevent lumps before stirring it into the simmering sauce. Cook until it coats a spoon; it will thicken a bit more as it cools.
Timing is Everything: Sauce, Toss, and Serve Immediately for Peak Crunch
Once the hot, crispy chicken is coated in the warm glaze, the clock starts ticking for optimal crispness. Serve your Crispy Glazed Chicken Bites immediately after tossing to enjoy that perfect textural contrast before the sauce has a chance to soften the crust.
Oil Temperature Monitoring: Your Best Friend for Frying Success
An accurate deep-fry thermometer is your most important tool. Maintaining the correct oil temperatures (350°F for the first fry, 375°F for the second) is essential for evenly cooked chicken and that signature non-soggy crunch. Fluctuating temperatures compromise the results.
Solved! Common Crispy Glazed Chicken Bites Challenges
Why isn’t my chicken crispy enough?
This is usually due to moisture. Ensure you pat the chicken very dry, do not overcrowd the pot during frying, and absolutely do not skip the crucial second, hotter fry. These steps are vital for maximum crunch.
My glaze is too thin/thick. How do I fix it?
If your glaze is too thin, create another small cornstarch slurry and whisk it into the simmering sauce, cooking for another minute until thickened. If it’s too thick, add a tablespoon or two of water or chicken broth, whisking until the desired consistency is reached.
The chicken tastes bland. What went wrong?
Ensure your chicken coating is well-seasoned with salt and pepper. For the glaze, use fresh ginger and garlic, and always taste and adjust the balance of soy, brown sugar, and vinegar to your preference before adding the slurry.
The chicken cooked unevenly. What can I do?
Uneven cooking often stems from inconsistent chicken piece sizes. Cut your chicken into uniform 1-inch pieces. Also, make sure you’re frying in batches to maintain consistent oil temperature and give each piece enough space to cook evenly.
Beyond the Plate: Creative Serving Suggestions
Classic Pairings: Rice and Steamed Veggies
Serve your Crispy Glazed Chicken Bites with a side of fluffy jasmine or brown rice to soak up the glorious glaze. A simple side of steamed broccoli, asparagus, or green beans adds freshness and balances the richness.
If you enjoy this method for keeping the crunch intact, you’ll want to check out these crispy pineapple chicken bites next.
Appetizer Perfection: Game Day or Party Starter
These bites are ideal for entertaining! Serve them on a platter with toothpicks for easy grabbing during game day or as an impressive appetizer at your next party. Everyone will love their irresistible flavor and texture.
Fresh & Crunchy Additions: Sliced Cucumbers or Radishes
Cut through the richness with crisp, refreshing elements. Thinly sliced cucumbers, quick-pickled radishes, or a simple side salad with a light vinaigrette provide a delightful textural and flavor contrast.
Noodle Bowls: An Asian-Inspired Fusion
Elevate your weeknight meals by adding these flavorful chicken bites to ramen bowls, stir-fried noodles, or even a deconstructed pad Thai. The crispy, glazed chicken makes a fantastic protein component for a satisfying Asian-inspired fusion dish.
If you enjoy this crispy chicken technique, these ginger chicken lettuce wraps avoid sogginess in a similar way.
Plan Ahead: Storage, Reheating, and Make-Ahead Tips
Storing Leftovers for Best Results
While best served immediately, any leftover Crispy Glazed Chicken Bites should be stored in an airtight container in the refrigerator for up to 3-4 days. For optimal crispness upon reheating, store the sauced chicken separately from any remaining sauce, if possible.
Reheating for Retained Crispness
Avoid the microwave, as it will make the chicken soggy. For the best chance at regaining crispness, reheat the chicken in a preheated air fryer at 350°F (175°C) for 5-7 minutes, or in an oven at 375°F (190°C) for 10-15 minutes, until heated through and crisped up. If reheating sauced chicken, toss it quickly in a hot pan to re-crisp.
Can I Prep Components in Advance?
Yes! You can certainly make the glaze entirely in advance and store it in the refrigerator for up to 5 days; gently reheat before tossing. You can also coat the chicken up to an hour ahead, keeping it on a wire rack in the fridge, or even perform the first fry, cool the chicken completely, and then refrigerate it, ready for its second fry.
Your Crispy Glazed Chicken Bites Questions Answered!
Can I use an air fryer for this recipe instead of deep frying?
You can use an air fryer, but the texture will be different. Air frying will produce a good crisp, but it won’t replicate the deep-fried texture and overall crunch quite as perfectly. Air fry at 375°F (190°C) for 12-18 minutes, flipping halfway, then proceed with the second fry instructions if desired.
Is there a gluten-free option for the coating and sauce?
Absolutely! For the coating, use a 1:1 gluten-free all-purpose flour blend. Cornstarch is naturally gluten-free. For the glaze, substitute regular soy sauce with tamari, which is a gluten-free alternative. This will ensure your Crispy Glazed Chicken Bites are entirely gluten-free.
How can I make the glaze spicier or less sweet?
To increase the spice, add more red pepper flakes to the glaze, or a dash of your favorite hot sauce like Sriracha during the last minute of simmering. For less sweetness, reduce the brown sugar by a tablespoon or two, or add an extra teaspoon of rice vinegar to brighten the flavor.
What’s the best oil for deep frying and can I reuse it?
Neutral oils with a high smoke point like vegetable, canola, grapeseed, or peanut oil are best. Yes, you can reuse frying oil! Let it cool completely, then strain it through a fine-mesh sieve or cheesecloth to remove any food particles. Store it in an airtight container in a cool, dark place and reuse 1-2 times.
Can I bake the chicken instead of frying?
While baking won’t achieve the exact same deep-fried crispness, you can still get tasty results. Toss the coated chicken with a tablespoon or two of oil, then bake on a wire rack set over a baking sheet at 400°F (200°C) for 20-25 minutes, flipping halfway, until golden and cooked through. It will be less crispy, but still delicious.
Ready to Impress? Share Your Crispy Glazed Chicken Bites Masterpiece!
Now that you’re armed with all the secrets, it’s your turn to create the most incredible Crispy Glazed Chicken Bites. Experience the joy of a truly satisfying crunch, perfectly coated in that irresistible sweet and savory glaze.
What to Serve with Crispy Glazed Chicken Bites
These chicken bites work great as a snack or part of a bigger meal. For a lighter option that contrasts the glaze, or for more sticky, savory crunch, try one of these.
- Balance the sweet glaze with a cool, tangy bite from Sweet and Spicy Chicken Salad — the fresh vegetables and dressing cut through the richness.
- Double down on sticky, savory flavor with Sticky Garlic Ginger Wings, which share a similar crispy-then-glazed technique for a full chicken spread.
Don’t just make dinner; create a memorable meal that will have everyone asking for your recipe. Try this method, savor the results, and confidently share your magnificent culinary creation with friends and family!
Crispy Glazed Chicken
Course: Main CourseCuisine: AsianDifficulty: medium4
servings20
minutes20
minutes750
kcal40
minutesTired of soggy glazed chicken? This recipe reveals the secret to ultra-crispy chicken bites that stay crunchy even after being coated in a sweet and savory glaze. Master the double-fry technique for an irresistible texture every time.
Ingredients
1.5 lbs boneless, skinless chicken thighs or breasts, cut into 1-inch pieces
1/2 cup all-purpose flour
1/2 cup cornstarch, divided
1 large egg
1/4 cup water
1/2 teaspoon salt
1/4 teaspoon black pepper
3 cups vegetable oil, for frying
1/2 cup soy sauce
1/4 cup brown sugar
2 tablespoons rice vinegar
1 tablespoon fresh ginger, grated
2 cloves garlic, minced
1/4 teaspoon red pepper flakes (optional)
2 green onions, sliced, for garnish
1 teaspoon sesame seeds, for garnish
Directions
- Prepare the chicken: Pat the chicken pieces very dry with paper towels. In a medium bowl, combine the flour, 1/4 cup of the cornstarch, salt, and pepper. In another bowl, whisk the egg with 1/4 cup water. Dip each chicken piece first into the egg mixture, allowing excess to drip off, then dredge thoroughly in the flour mixture, ensuring it is fully coated. Set aside on a wire rack.
- First Fry for Crispness: Heat the vegetable oil in a large deep pot or Dutch oven over medium-high heat until it reaches 350F. Carefully add about half of the chicken pieces to the hot oil, making sure not to overcrowd the pot. Fry for 4-5 minutes until light golden brown and cooked through. Remove chicken with a slotted spoon to a clean wire rack set over a baking sheet to drain. Repeat with the remaining chicken.
- Prepare the Sauce: While the chicken is frying, whisk together the soy sauce, brown sugar, rice vinegar, grated ginger, minced garlic, and red pepper flakes (if using) in a small saucepan. In a separate small bowl, mix the remaining 1/4 cup cornstarch with 2 tablespoons of water to create a slurry.
- Thicken the Sauce: Bring the sauce mixture in the saucepan to a simmer over medium heat. Stir in the cornstarch slurry and cook, stirring constantly, for 1-2 minutes until the sauce thickens to a glossy, syrupy consistency. Remove from heat.
- Second Fry for Ultimate Crunch: Increase the oil temperature to 375F. Carefully return all of the fried chicken to the hot oil. Fry for an additional 2-3 minutes, stirring occasionally, until the chicken is deeply golden brown and extra crispy. This crucial second fry is what locks in that amazing crunch.
- Sauce and Serve Immediately: Remove the extra crispy chicken from the oil with a slotted spoon, allowing excess oil to drain. Immediately transfer the hot, crispy chicken to a large mixing bowl. Pour the warm, thickened sauce over the chicken and quickly toss to coat evenly. Serve immediately, garnished generously with sliced green onions and sesame seeds. Enjoy that perfect, non-soggy crunch!
Notes
- The crucial second fry ensures ultimate crispness and prevents sogginess.