Decadent Caramel Layer Cake: Never Soggy, Always Perfect!
For years, I faced the common dilemma of soggy layers in rich, filled cakes. That’s why I perfected this Decadent Caramel Layer Cake recipe, ensuring every slice is beautifully moist, structurally sound, and utterly delicious. It’s the ultimate solution for impressive, never-soggy layers, making you a dessert hero every time.
Why This Decadent Caramel Layer Cake Will Be Your New Favorite
The Secret to Perfectly Moist, Never-Soggy Layers
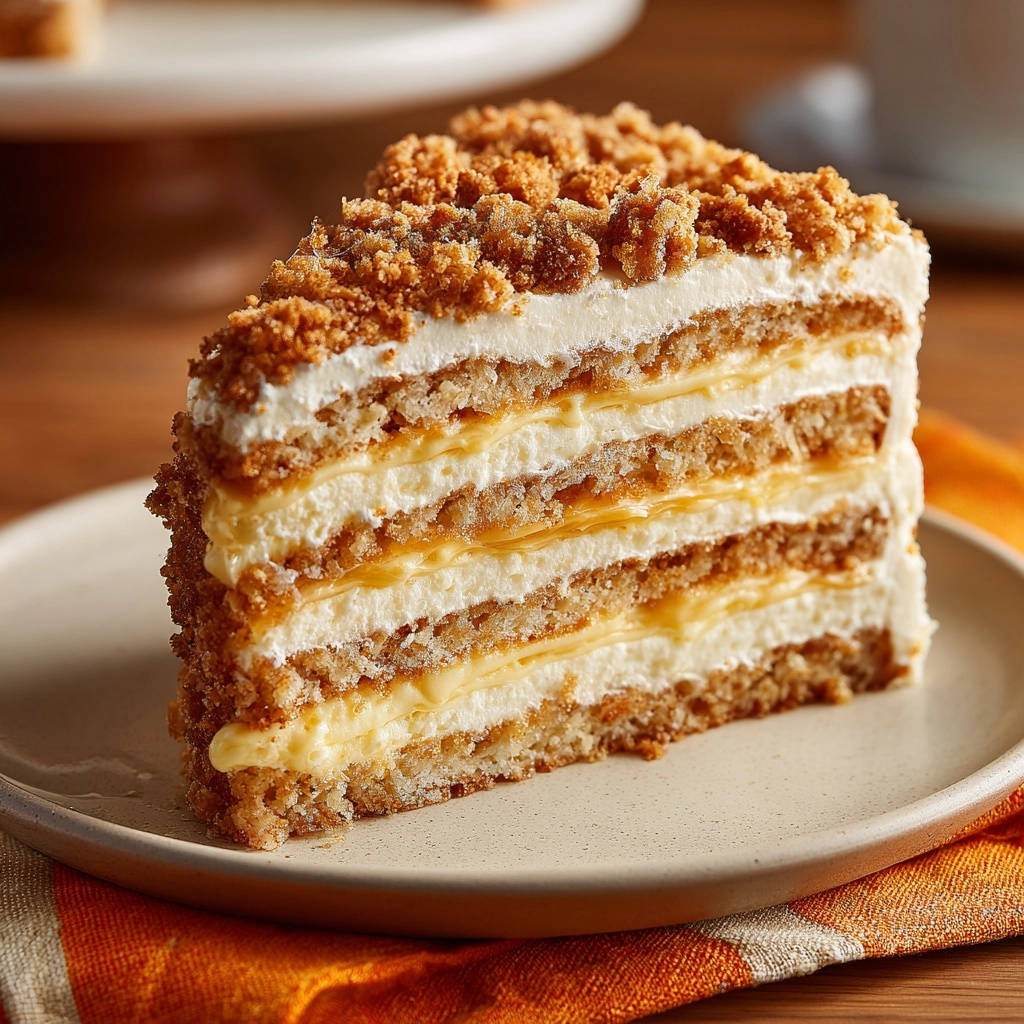
The innovation in this recipe lies in a clever moisture barrier: a thin layer of cream cheese frosting. This simple yet crucial trick prevents the luscious caramel custard from saturating the delicate cake layers.
The result is consistently tender, perfectly moist cake layers that retain their structure beautifully, offering a superior texture in every single bite.
A Symphony of Textures and Flavors in Every Bite
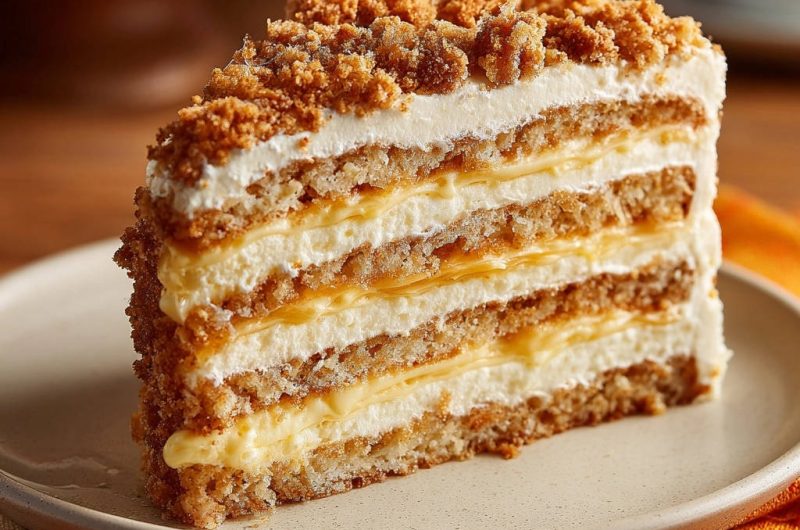
Prepare your palate for an extraordinary sensory experience. This caramel cake harmoniously blends fluffy, vanilla-scented cake layers with a silky-smooth, deep caramel custard.
The tangy, rich cream cheese frosting provides a perfect counterpoint, all crowned with an irresistible crunchy crumb topping. It’s a truly balanced and engaging dessert.
Impressive Elegance Made Accessible for Home Bakers
Despite its sophisticated appearance and multi-component nature, this Decadent Caramel Layer Cake is remarkably achievable for home bakers of various skill levels.
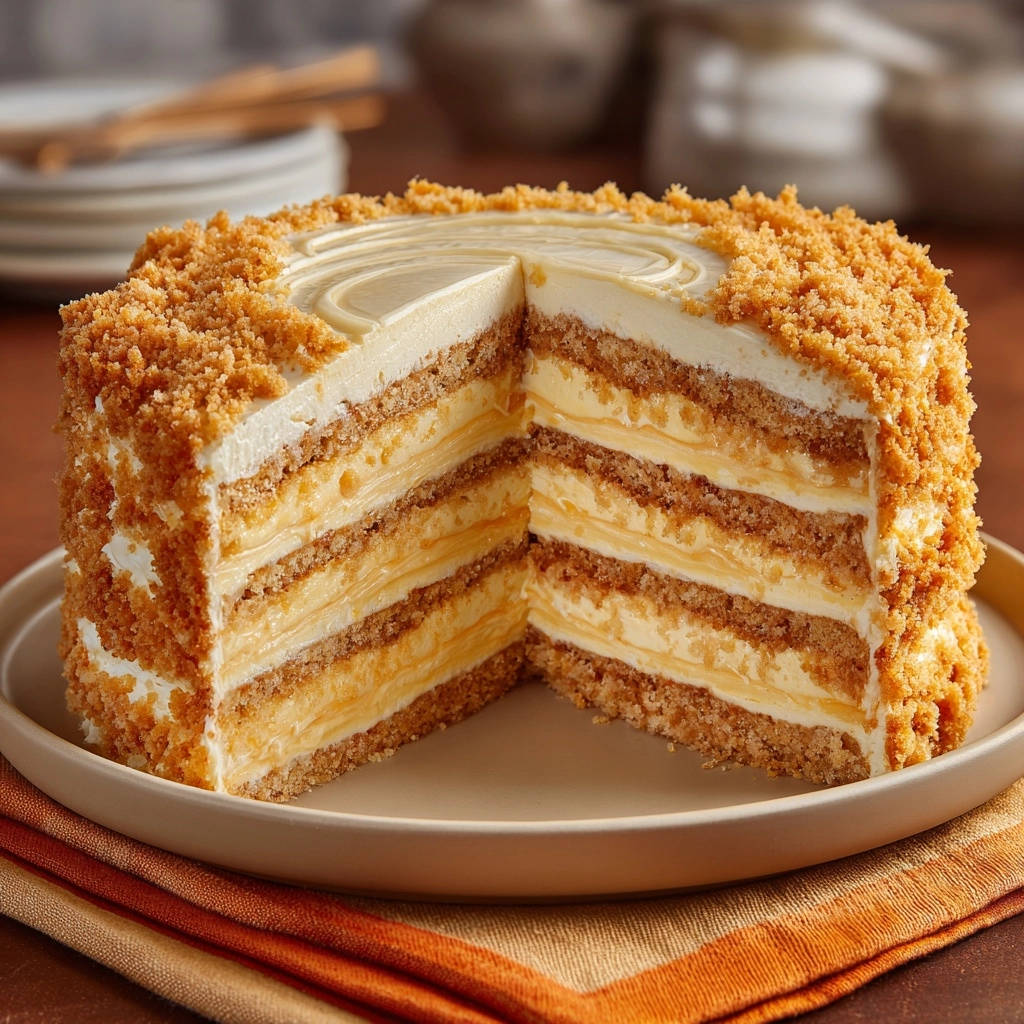
With clear, detailed instructions, you can confidently create a stunning, “wow” factor dessert that looks and tastes like it came from a professional patisserie.
Gather Your Culinary Arsenal: Essential Tools for Cake Success
For Your Cake Layers
You’ll need three 8-inch round cake pans for even baking and distinct layers. A sturdy electric mixer, either stand or hand-held, is crucial for creaming butter and sugar effectively.
Assorted mixing bowls are also essential for keeping wet and dry ingredients separate until combined.
For Frosting and Filling
A heavy-bottomed saucepan is indispensable for making the caramel safely and evenly. A whisk ensures smooth incorporation of ingredients into the caramel custard.
Separate bowls and plastic wrap are necessary for chilling the custard properly, while your electric mixer will make quick work of the cream cheese frosting.
Assembly and Finishing Touches
A wire cooling rack is vital for cooling your cakes thoroughly. An offset spatula will be your best friend for smooth frosting application and crumb coats.
Finally, a beautiful serving plate or cake stand will proudly display your finished caramel cake masterpiece.
The Flavor Foundation: Deconstructing Each Decadent Component
Building Blocks for the Fluffy Cake Layers
All-purpose flour provides the necessary structure, while baking powder ensures a light, airy rise and delicate crumb for your cake layers.
Softened unsalted butter contributes tenderness and rich flavor; granulated sugar adds sweetness and crucial moisture, keeping the cake from drying out.
Large eggs bind the ingredients and enrich the batter, and milk provides essential moisture for a truly tender crumb. Vanilla extract introduces a classic, aromatic depth.
Rich Cream Cheese Frosting Essentials
Softened cream cheese delivers a delightful tang and creamy base, perfectly balancing the sweetness of the cake and caramel.
Softened unsalted butter adds richness and stability, helping the frosting hold its shape beautifully for assembly and decoration.
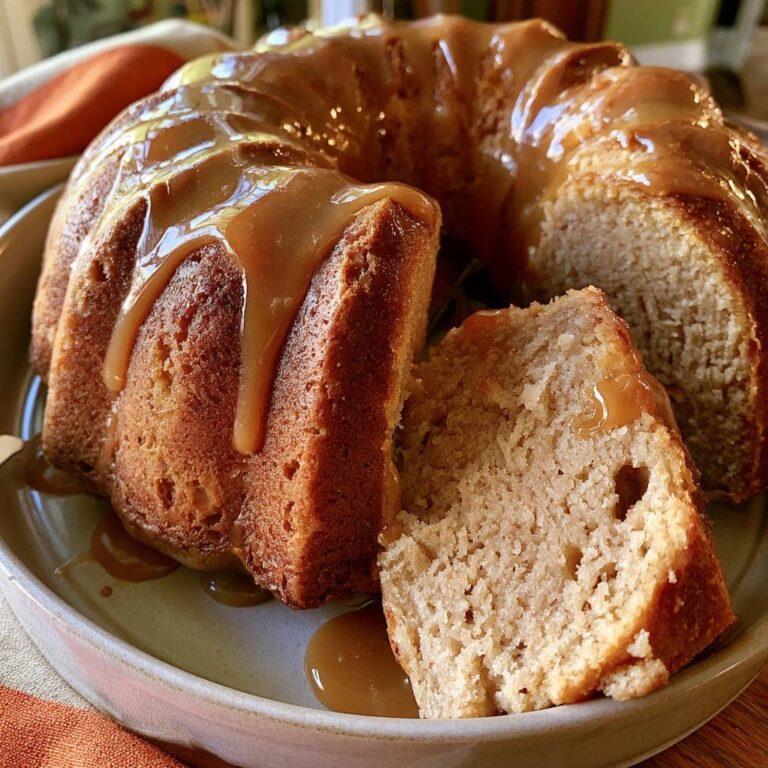
The same cold-butter trick ensures a tender crumb in this glazed blueberry lemon bundt cake.
Powdered sugar sweetens the frosting and creates a smooth, melt-in-your-mouth texture without any grittiness. Vanilla extract enhances the luxurious aroma and flavor profile.
Crafting the Silky Caramel Custard Filling
Granulated sugar and water form the base for the deep, amber caramel, offering a complex, toasted sweetness. Warmed heavy cream is crucial for safely whisking into the hot caramel, adding luxurious richness.
Egg yolks provide thickening power and a velvety texture, while cornstarch ensures a stable, pudding-like consistency. Milk thins the mixture to the perfect creamy consistency.
Vanilla extract introduces a warm, comforting note, and a final stir of unsalted butter adds a beautiful gloss and extra richness to the custard.
The Irresistible Crumb Topping
All-purpose flour and light brown sugar create the foundational texture and deep, sweet notes for our crisp crumb topping.
Cold, cubed unsalted butter is absolutely essential for achieving distinct, crisp crumbs when baked, preventing a dense, cakey texture.
Optional ground cinnamon adds a warm, spicy hint that perfectly complements and enhances the rich caramel flavors in the cake.
Your Journey to Perfection: Crafting Every Layer of This Decadent Caramel Masterpiece
Prepping Your Perfect Crumb Topping
Step 1: Combine and Cut Butter. In a small bowl, mix flour, brown sugar, and optional cinnamon. Add cold, cubed butter and cut in until coarse crumbs form. Cold butter is paramount here; it prevents the butter from fully incorporating, creating distinct, flaky crumbs rather than a uniform dough.
Step 2: Bake and Cool. Spread the crumbs on a baking sheet and bake at 350°F (175°C) for 8-10 minutes until golden. Cooling completely is essential to ensure the crumbs retain their crisp texture and do not melt or soften when added to the frosted cake.
Baking Fluffy Cake Layers from Scratch
Step 3: Prepare Pans and Dry Ingredients. Preheat oven to 350°F (175°C). Grease and flour three 8-inch round cake pans. In a medium bowl, whisk together flour, baking powder, and salt. Whisking dry ingredients ensures even distribution of leavening agents, vital for a consistent rise and tender cake texture.
Step 4: Cream Butter and Sugar. In a large bowl, beat softened butter and granulated sugar with an electric mixer until light and fluffy. This step incorporates air, creating a pale yellow, voluminous mixture that contributes significantly to the cake’s airy crumb.
Step 5: Incorporate Eggs and Alternate Wet/Dry. Beat in eggs one at a time, mixing well after each addition. Gradually add dry ingredients to the wet, alternating with milk, beginning and ending with dry. Avoid overmixing once the flour is added; this can overdevelop gluten, leading to a tough, dense cake.
Step 6: Bake Until Golden. Divide batter evenly among prepared pans. Bake for 25-30 minutes, or until a wooden skewer inserted into the center comes out clean. An even bake ensures level layers, preventing uneven stacking. The skewer test is your best indicator of doneness.
Step 7: Cool Completely. Let cakes cool in pans for 10 minutes, then invert onto a wire rack to cool fully. It’s imperative that your cake layers are completely cool before frosting; warm cakes will melt the frosting and cause a messy, unstable cake structure.
Mastering the Silky Caramel Custard
Step 8: Make the Caramel. Combine sugar and water in a heavy-bottomed saucepan. Cook over medium heat without stirring until the sugar dissolves and the mixture turns a deep amber caramel color. Watch for a rich copper hue; this indicates a perfectly flavorful caramel, avoiding the bitterness of overcooked sugar.
Step 9: Whisk in Cream. Carefully remove from heat and slowly whisk in warmed heavy cream. Set aside. Be cautious, as the mixture will bubble intensely upon addition. Warming the cream beforehand minimizes the temperature shock and vigorous bubbling.
Step 10: Temper Egg Yolks. In a separate bowl, whisk egg yolks, cornstarch, and milk until smooth. Slowly pour a small amount of the warm caramel mixture into the egg yolk mixture while whisking constantly. This tempering step gradually raises the temperature of the yolks, preventing them from scrambling when added to the hot caramel.
If you enjoy the rich caramel flavor here, you will love the intense depth of this flourless dark chocolate torte.
Step 11: Cook the Custard. Slowly pour the tempered egg yolk mixture into the remaining caramel, whisking constantly. Return to medium-low heat and cook, whisking continuously, until the custard thickens to a pudding-like consistency. This constant motion prevents scorching and ensures a smooth, lump-free custard. Remove from heat, stir in vanilla extract and butter for a glossy finish.
Step 12: Chill Thoroughly. Pour into a shallow dish, cover with plastic wrap pressed directly onto the surface to prevent a skin from forming, and chill completely in the refrigerator for at least 2 hours. Proper chilling is crucial for the custard to set firm enough to spread without oozing and to maintain its texture within the cake.
Whipping Up Dreamy Cream Cheese Frosting
Step 13: Cream Cheese and Butter. In a large bowl, beat softened cream cheese and butter until smooth and creamy. Ensure both are at true room temperature to achieve a perfectly smooth, lump-free frosting that’s easy to spread and pipe.
Step 14: Add Sugar and Vanilla. Gradually add powdered sugar, beating until fully incorporated. Beat in vanilla extract until light and fluffy. The goal is a light, airy consistency that holds its shape well, perfect for both spreading and creating our crucial moisture barrier.
The Secret to No More Soggy Layers: Expert Cake Assembly
Step 15a: First Layer and Moisture Barrier. Place one cooled cake layer on your serving plate or cake stand. Spread a thin, even layer of the cream cheese frosting across the top. This thin layer is your secret weapon: it acts as a crucial moisture barrier, preventing the rich caramel custard filling from soaking into the delicate cake layers and making them soggy.
Step 15b: Add Caramel Filling. Pipe or spread chilled caramel custard over the frosting, leaving a small border. The border is vital to contain the soft custard, preventing it from oozing out the sides once the next cake layer is added.
Step 15c: Second Layer & Repeat. Place the second cake layer on top. Repeat step 15a with another thin layer of cream cheese frosting. Again, this creates a protective seal, ensuring every layer of your Decadent Caramel Layer Cake remains perfectly moist and firm.
Step 15d: More Caramel. Pipe or spread another layer of caramel custard over the cream cheese frosting. Ensure even distribution to maintain balance in every delicious bite.
Step 15e: Top Layer. Top with the third cake layer, gently pressing down to ensure it sits level and secure on your cake. A level top layer sets the foundation for a professional finish.
Step 15f: The Crumb Coat. Apply a thin crumb coat of cream cheese frosting over the entire cake (top and sides). Refrigerate for 20-30 minutes to firm it up. This thin “seal” traps any loose crumbs, ensuring your final layer of frosting is perfectly smooth and crumb-free.
Step 15g: Final Frosting. Once chilled, apply the remaining cream cheese frosting generously over the entire cake. Use an offset spatula to achieve a smooth, elegant finish on the sides and top of your caramel cake.
Step 15h: Crumb Topping & Final Chill. Gently press the cooled crumb topping onto the top and sides of the cake for textural contrast and visual appeal. Refrigerate the finished Decadent Caramel Layer Cake for at least 1 hour before slicing. This crucial final chill allows all components to set, guaranteeing clean, perfect slices every time.
Chef’s Secrets: Elevating Your Decadent Caramel Layer Cake Game
Room Temperature is Your Best Friend: Ensure butter, cream cheese, and eggs are at true room temperature. This allows them to emulsify correctly, resulting in a smoother, airier cake batter and a lump-free, creamy frosting that’s easier to work with.
Don’t Rush the Cooling Process: Fully cooled cake layers are non-negotiable for structural integrity. Attempting to frost warm cakes will cause the frosting to melt and slide, compromising the structure and appearance of your beautiful caramel cake.
Mastering Caramel Color: Cook your sugar and water until it reaches a deep amber, like an old penny. This color indicates a rich, complex flavor; pushing it too far into a dark brown can result in an unpleasantly bitter taste.
The Art of the Level Cake: If your cake layers bake with a slight dome, use a long serrated knife or a dedicated cake leveling tool to trim the tops flat once completely cool. Level layers are key for a stable, professional-looking stacked cake.
Sifting for Superior Texture: Sift both your dry ingredients for the cake and your powdered sugar for the frosting. This simple step eliminates lumps, aerates the ingredients, and contributes to a wonderfully light, fine-crumb cake and silky-smooth frosting.
Side Dishes That Pair Well With Caramel Cake
If you’re serving a rich caramel layer cake as the main dessert, try adding a savory side dish to balance the sweetness. These two recipes bring creamy, comforting flavors that contrast nicely with the cake’s caramel notes.
- For a creamy vegetable side that echoes the cake’s smooth texture, try this Skillet Creamed Corn with its thick, buttery sauce.
- Another option is a cheesy, sliceable side like Classic Baked Mac & Cheese; the rich cheese sauce and tender pasta make a satisfying counterpoint to the cake’s sweetness.
Troubleshooting Your Decadent Caramel Layer Cake: Common Questions, Expert Answers
My Cake Layers are Dry or Dense
First, check your oven’s accuracy with a thermometer, as temperature variations can lead to overbaking. Avoid overmixing the batter once flour is added, as this develops gluten and makes cakes tough and dense. Always rely on the skewer test rather than strict timing.
My Caramel Custard Didn’t Thicken Properly
If your custard isn’t thickening, return it to medium-low heat and continue whisking continuously. Ensure you correctly measured the cornstarch and fully tempered your egg yolks to prevent them from seizing. Remember, the custard will firm up considerably as it chills, so patience is key.
My Cream Cheese Frosting is Too Soft or Runny
This often happens if ingredients were too warm. Refrigerate the frosting for 15-30 minutes, then beat again. If still too soft, add another tablespoon or two of sifted powdered sugar until the desired consistency is achieved. Ensure your butter and cream cheese are softened, not melted.
My Cake Layers Are Sliding During Assembly
Ensure all cake layers are completely cool before frosting to prevent melting and slippage. The initial thin cream cheese moisture barrier and the subsequent crumb coat, followed by a brief chill, are critical for stability. You can also place a small dollop of frosting on your cake stand to anchor the very first cake layer.
Beyond the Bake: Serving, Storing, and Making Ahead
Elegant Serving Suggestions
For a truly stunning presentation, dust your caramel cake with a touch of powdered sugar just before serving. A few fresh raspberries or a light drizzle of extra caramel sauce can also add a beautiful touch.
This rich Decadent Caramel Layer Cake pairs beautifully with a hot cup of coffee, a soothing tea, or a scoop of premium vanilla bean ice cream for an extra indulgent experience.
Keeping Your Cake Fresh: Storage Tips
Store your assembled cake in an airtight cake carrier or under a dome in the refrigerator. This crucial step protects it from drying out and absorbing other fridge odors, maintaining its exquisite flavor.
The cake is best enjoyed within 3-4 days when properly refrigerated, maintaining its optimal taste and delightful texture for a prolonged indulgence.
Can I Make Parts of the Cake Ahead?
Absolutely! The crumb topping can be made several days in advance and stored in an airtight container at room temperature. Cake layers can be baked, wrapped tightly, and frozen for up to a month, or refrigerated for 2-3 days.
The caramel custard filling can be made up to 2 days ahead and stored, covered, in the refrigerator. This staggered approach makes assembly day much less stressful and more enjoyable.
Your Decadent Caramel Layer Cake FAQs Answered
What is the “simple trick” for non-soggy layers in this recipe?
The secret for this particular caramel cake is applying a thin, even layer of cream cheese frosting directly onto each cake layer before adding the caramel custard. This frosting acts as a protective moisture barrier, preventing the caramel from soaking into the delicate cake layers.
Can I substitute store-bought caramel for the homemade custard filling?
While using store-bought caramel is a time-saver, it often lacks the depth of flavor and specific pudding-like consistency of our homemade caramel custard. If you must substitute, choose a high-quality, thick caramel sauce, but be aware the final texture and richness of the finished cake may differ slightly.
How do I prevent lumps in my cream cheese frosting?
The key to a silky-smooth frosting is ensuring both cream cheese and butter are thoroughly softened to room temperature. Beat them together until completely smooth before gradually adding sifted powdered sugar. Sifting the sugar is vital to avoid any gritty texture.
Is this Decadent Caramel Layer Cake recipe suitable for beginners?
While this caramel cake has multiple delicious components, each step is clearly detailed and achievable for a dedicated home baker. Take your time with each section, especially the caramel making and assembly, and you’ll achieve a stunning, professional-looking result.
What can I do with leftover caramel custard or crumb topping?
Leftover caramel custard is incredibly versatile; it’s delicious drizzled over ice cream, yogurt, or as a dip for apple slices. Any extra crumb topping can be sprinkled over oatmeal, yogurt parfaits, or even mixed into cookie dough for added crunch and flavor.
Ready to Create Your Own Decadent Caramel Layer Cake Magic?
Embarking on this baking journey will not only fill your kitchen with incredible aromas but reward you with a truly spectacular Decadent Caramel Layer Cake. The pride and joy in serving such a beautifully moist and flavorful creation are unmatched.
Don’t hesitate to share your baking triumphs! We love seeing your creations, so please leave a comment below or rate the recipe once you’ve experienced this perfectly crafted caramel cake.
Caramel Layer Cake
Course: DessertCuisine: AmericanDifficulty: medium12
servings2
hours40
minutes750
kcal300
minutesExperience the ultimate Decadent Caramel Layer Cake, featuring moist layers, luscious caramel custard, and fluffy cream cheese frosting. This recipe reveals the simple trick for perfectly tender, never-soggy layers that impress every time, making it an unforgettable dessert.
Ingredients
For the Cake Layers:
2 and 1/2 cups all-purpose flour
2 teaspoons baking powder
1/2 teaspoon salt
1 cup (2 sticks) unsalted butter, softened
2 cups granulated sugar
4 large eggs
1 cup milk
2 teaspoons vanilla extract
For the Cream Cheese Frosting:
16 ounces cream cheese, softened
1 cup (2 sticks) unsalted butter, softened
4 cups powdered sugar
2 teaspoons vanilla extract
For the Caramel Custard Filling:
1 cup granulated sugar
1/4 cup water
1/2 cup heavy cream, warmed
2 large egg yolks
2 tablespoons cornstarch
1 cup milk
1/2 teaspoon vanilla extract
2 tablespoons unsalted butter
For the Crumb Topping:
1/2 cup all-purpose flour
1/4 cup light brown sugar
1/4 cup (1/2 stick) unsalted butter, cold and cubed
1/2 teaspoon ground cinnamon (optional)
Directions
- For the Crumb Topping: In a small bowl, combine flour, brown sugar, and cinnamon (if using). Cut in the cold cubed butter with your fingers or a pastry blender until coarse crumbs form. Spread on a small baking sheet and bake at 350 degrees Fahrenheit for 8-10 minutes, or until lightly golden. Let cool completely.
- For the Cake Layers: Preheat oven to 350 degrees Fahrenheit. Grease and flour three 8-inch round cake pans. In a medium bowl, whisk together flour, baking powder, and salt. In a large bowl, beat softened butter and granulated sugar with an electric mixer until light and fluffy. Beat in eggs one at a time, mixing well after each addition. Gradually add the dry ingredients to the wet ingredients, alternating with the milk, beginning and ending with the dry ingredients. Stir in vanilla extract. Divide batter evenly among the prepared pans. Bake for 25-30 minutes, or until a wooden skewer inserted into the center comes out clean. Let cakes cool in pans for 10 minutes, then invert onto a wire rack to cool completely.
- For the Caramel Custard Filling: In a heavy bottomed saucepan, combine granulated sugar and water. Cook over medium heat without stirring until the sugar dissolves and the mixture turns a deep amber caramel color. Carefully remove from heat and slowly whisk in the warmed heavy cream (mixture will bubble intensely). Set aside. In a separate bowl, whisk egg yolks, cornstarch, and milk until smooth. Slowly pour the egg yolk mixture into the caramel, whisking constantly. Return to medium low heat and cook, whisking continuously, until the custard thickens to a pudding like consistency. Remove from heat, stir in vanilla extract and butter. Pour into a shallow dish, cover with plastic wrap pressed directly onto the surface to prevent a skin from forming, and chill completely in the refrigerator for at least 2 hours.
- For the Cream Cheese Frosting: In a large bowl, beat softened cream cheese and butter until smooth and creamy. Gradually add powdered sugar, beating until fully incorporated. Beat in vanilla extract until light and fluffy.
- Assemble the Cake (The key to no more soggy layers!):
- Place one cooled cake layer on your serving plate or cake stand. Spread a thin, even layer of the cream cheese frosting across the top of the cake. This layer acts as a crucial moisture barrier, protecting the cake from the caramel custard filling.
- Pipe or spread a layer of the chilled caramel custard filling over the cream cheese frosting, leaving a small border to prevent oozing.
- Place the second cake layer on top. Repeat step 5a with another thin layer of cream cheese frosting.
- Pipe or spread another layer of caramel custard filling over the cream cheese frosting.
- Top with the third cake layer.
- Apply a thin crumb coat of cream cheese frosting over the entire cake (top and sides). This helps lock in any stray crumbs. Refrigerate the cake for 20-30 minutes to firm up this crumb coat.
- Once chilled, apply the remaining cream cheese frosting generously over the entire cake.
- Gently press the cooled crumb topping onto the top and sides of the cake. Refrigerate the finished cake for at least 1 hour before slicing to allow the fillings and frosting to set, ensuring perfect slices every time.
Notes
- The thin layer of cream cheese frosting acts as a crucial moisture barrier, preventing soggy cake layers when using the caramel custard filling.