Mastering the Flourless Dark Chocolate Torte
Forget those flourless cakes that arrive at the table as a weeping, greasy mess with a soggy bottom. A truly great Flourless Dark Chocolate Torte should be a masterclass in texture, offering a dense, velvety crumb that holds its shape with structural integrity. When you take that first bite, it should feel like a cross between a rich truffle and a cloud-like mousse, delivering an intense hit of 70% cacao without any cloying sweetness.
The secret to avoiding the common pitfalls of this dessert lies in the “Anti-Soggy Bottom” philosophy. Most bakers fail because they rush the process, leading to a separation of fats that pools at the base of the pan. By focusing on the temperature of your emulsion and the specific aeration of your eggs, you can lock in a uniform texture that remains consistent from the top crust down to the very last crumb.
I’ve found that the absolute key to success is patience during the cooling phase of the melted chocolate. If you add eggs to chocolate that is even slightly too hot, you destroy the protein structure before the cake even hits the oven. Therefore, we use a precise cooling method to ensure the fats and proteins bond perfectly, creating that signature fudgy interior we all crave.
The Science of Emulsion in Flourless Baking
In traditional baking, gluten provides the “scaffolding” that holds a cake together. However, in a flourless torte, we rely entirely on egg proteins to do the heavy lifting. This makes the recipe more of a delicate custard-cake hybrid than a standard sponge. If the emulsion breaks, the butter separates from the solids, resulting in a cake that feels oily on the tongue and looks sunken in the middle.
Temperature management is your most powerful tool here. Specifically, you must hit the 110°F threshold before combining your chocolate and eggs. At this temperature, the chocolate is fluid enough to incorporate smoothly but cool enough that it won’t “cook” the eggs on contact. This prevents the fat in the butter and chocolate from leaching out during the bake, which is the primary cause of that dreaded “weeping” effect.
Furthermore, the stability of your batter depends on how those egg proteins are treated. When you whisk the eggs with sugar, you are creating a network of tiny air bubbles. These bubbles provide the only lift the torte receives. If the chocolate is too hot, it collapses these bubbles instantly, leading to a flat, rubbery disc instead of a thick, luxurious torte.
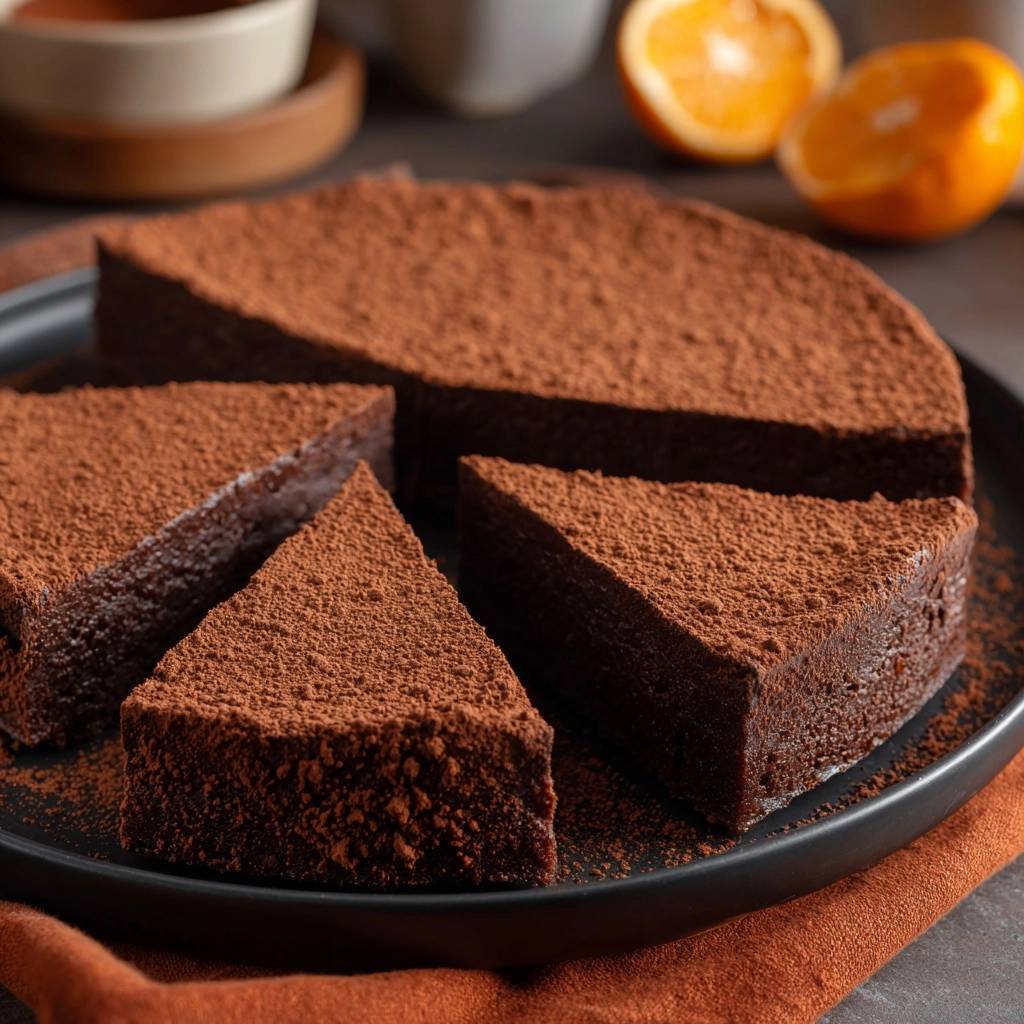
Essential Components for a Dark Chocolate Torte
Because this recipe has so few ingredients, the quality of each one is magnified. I always recommend using high-quality dark chocolate with a cacao percentage between 60% and 70%. This range provides the perfect balance of cocoa butter for structural integrity and enough sugar to keep the bitterness in check. If you go much higher, the torte can become brittle; much lower, and it may not set firmly enough.
Your eggs must be at room temperature before you start whisking. Cold eggs won’t trap air nearly as effectively, which means your torte will lack the necessary height and lightness. Additionally, don’t view the espresso powder as a coffee flavoring. It acts as a chemical flavor enhancer that deepens the earthy notes of the cacao without making the cake taste like a latte.
Selecting the Right Cacao Percentage
Using milk chocolate in this recipe is a mistake because the high milk solid and sugar content interferes with the setting process. On the other hand, an 85% dark chocolate can result in a torte that feels too dry or crumbly. The cocoa butter content in the 60-70% range ensures the final set is creamy yet firm enough to slice into sharp, clean wedges.
The Role of Sifted Cocoa Powder
Sifting your cocoa powder is a non-negotiable step in this process. Cocoa powder is notorious for clumping in the container. If those clumps make it into your batter, they create steam pockets during baking. These pockets eventually collapse, leading to an uneven, “cratered” surface that ruins the professional look of your dessert.
Required Equipment for Structural Success
To get the best results, you really need an 8-inch springform pan. The removable sides are essential because this torte is too delicate to flip upside down like a standard cake. Lining the bottom with parchment paper is also a must; it ensures the base doesn’t stick and helps prevent the bottom from overcooking against the metal.
In addition, make sure you have a wire cooling rack ready. Airflow is vital during the cooling phase. If the pan sits directly on a counter, heat gets trapped underneath, creating condensation. That moisture will soften the base of your torte, undoing all your hard work to prevent a soggy bottom.
Step-by-Step: Preparing the Flourless Dark Chocolate Torte
Preparing this torte is a three-phase process that requires your full attention. We move from melting the base to creating air, and finally, merging the two into a stable emulsion. If you follow these sensory cues, you’ll achieve a professional-grade result every single time.
Phase 1: Achieving a Glossy Chocolate Base
Start by melting your chopped chocolate and cubed butter. I prefer a double boiler for gentle heat, but the microwave works if you use short 30-second bursts. You are looking for a finish that is completely smooth and glossy. Once melted, set it aside for 5 to 8 minutes. It should feel warm to the touch, like a comfortable bath, but never hot.
Phase 2: Aerating Eggs for Uniform Crumb
While the chocolate cools, whisk your eggs and sugar vigorously for at least 2 minutes. You’ll notice the color change from a deep yellow to a pale, creamy lemon hue. This step is where you build the “lift.” The mixture should look slightly thickened and foamy, which indicates you’ve trapped enough air to support the heavy chocolate.
Phase 3: Folding and Stabilizing the Batter
Slowly pour the cooled chocolate into the egg mixture while whisking constantly. This “tempering” motion prevents the eggs from shocking. Finally, sift in the cocoa powder and use a spatula to fold it in gently. Use a figure-eight motion to ensure you don’t deflate those precious air bubbles you worked so hard to create in Phase 2.
The same careful temperature control makes all the difference in deep dish chocolate chunk cookie cake.
Thermal Management: Baking and Cooling Phases
When the torte goes into the oven, keep a close eye on the “jiggle.” After about 30 minutes, the edges should look puffed and set, but the center should still wobble slightly when you gently shake the pan. This is crucial because the torte will continue to cook from residual heat for several minutes after you pull it out.
The 2-hour cooling mandate is the hardest part, but it is the most important. During this time, the proteins “lock” the fats in place. If you cut into it while it’s still warm, the texture will be grainy and the fat will run. Letting it set fully at room temperature ensures that every slice is perfectly dense and fudgy.
Troubleshooting Your Flourless Dark Chocolate Torte
If your torte develops large cracks on top, it usually means the oven was too hot or you over-whisked the eggs, incorporating too much air. A small amount of cracking is normal and can be hidden with cocoa powder. However, if you see oil pooling at the bottom, it’s a sign the chocolate was too hot when it met the eggs, causing the emulsion to break.
A grainy texture is another common complaint. This usually happens if you use low-quality chocolate with high fillers or if the sugar didn’t fully dissolve into the eggs. To prevent this, ensure your eggs are at room temperature so the sugar crystals can break down properly during the 2-minute whisking phase.
Serving Suggestions and Texture Pairings
This torte is incredibly rich, so it benefits from a bit of contrast. A handful of tart raspberries or a dollop of unsweetened whipped heavy cream cuts through the intensity of the dark chocolate beautifully. For a more sophisticated touch, a small spoonful of mascarpone cheese adds a silky tang that complements the 70% cacao perfectly.
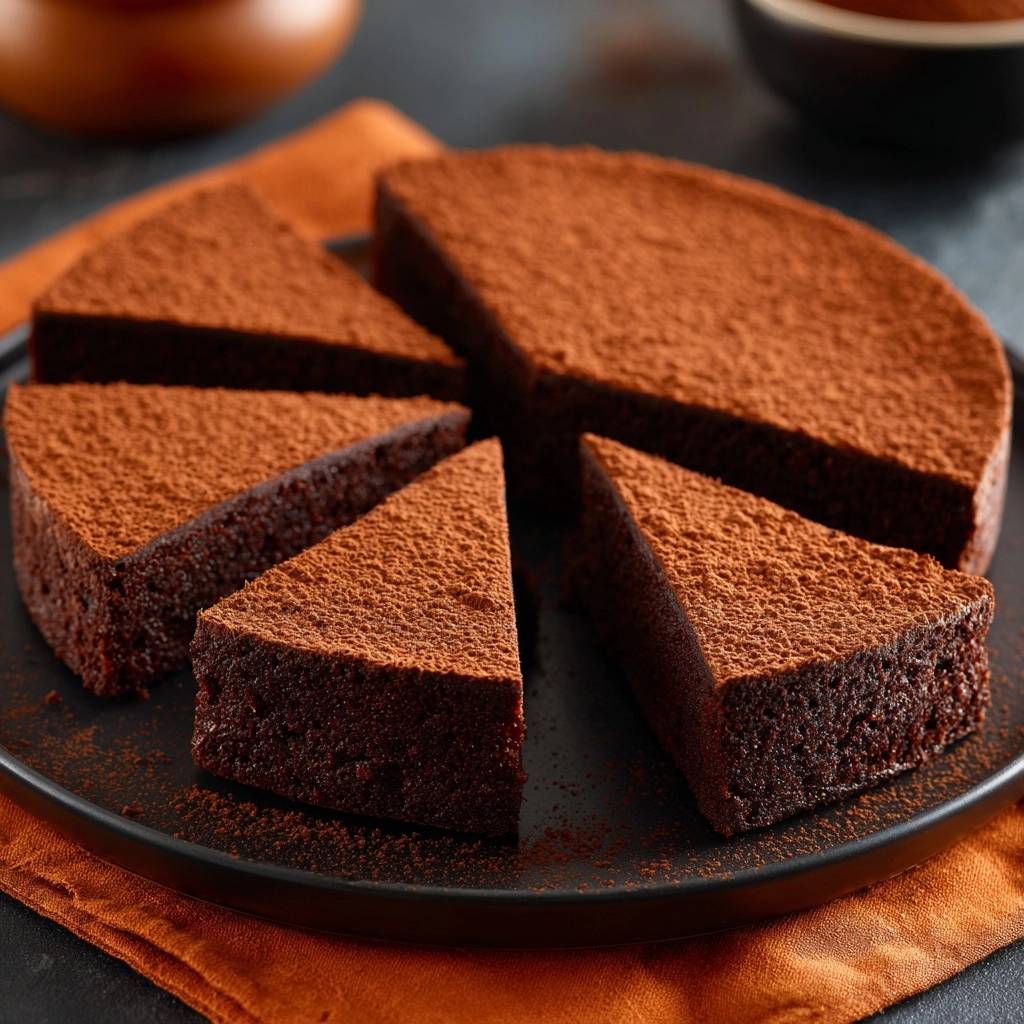
To get those beautiful, sharp wedges you see in high-end bakeries, use a hot knife. Run your knife under hot water, wipe it dry, and make one clean slice. Wipe the knife clean and reheat it between every single cut. This prevents the fudgy interior from sticking to the blade and tearing the cake.
Storage and Make-Ahead Instructions
This is a fantastic make-ahead dessert because the flavor actually deepens after a day in the fridge. You can store the torte in an airtight container for up to 5 days. Be aware that the texture becomes significantly firmer and fudgier when cold. If you prefer a softer, melt-in-your-mouth feel, let the slices sit at room temperature for 30 minutes before serving.
When storing in the refrigerator, wrap the pan or container tightly in plastic wrap. Chocolate is like a sponge for odors, and you don’t want your beautiful torte tasting like the onions or leftovers stored nearby. I don’t recommend freezing this specific torte, as the moisture can cause the texture to become slightly grainy upon thawing.
Expert Tips for Flourless Torte Success
Firstly, always use a kitchen scale for your chocolate if possible; 8 ounces is exactly 226 grams. Secondly, never skip the salt, as it balances the sugar and highlights the fruity notes of the cacao. Thirdly, remember to tap the pan firmly on the counter before baking to pop any large air bubbles that could cause a lopsided rise.
For a visually stunning finish, use Dutch-processed cocoa powder for the final dusting. It has a darker, more intense color than natural cocoa powder. Finally, check the seal on your springform pan before you start. If it feels loose, you can wrap the outside of the pan in a layer of foil just in case any butter tries to escape during the early stages of baking.
Can I use a different size pan?
You can use a 9-inch springform pan if that is all you have, but keep in mind the math of surface area. A 9-inch pan will result in a much thinner torte. Because it is thinner, it will bake faster. You should start checking for the “jiggle” at least 5 to 7 minutes earlier to prevent the edges from becoming dry and brittle.
Is there a substitute for espresso powder?
If you don’t have espresso powder, you can simply omit it, but you’ll lose a bit of that flavor depth. A great alternative is using the seeds from half a vanilla bean or a tiny pinch of ground cinnamon. Both of these options provide a warm background note that enhances the chocolate without introducing any caffeine or coffee flavor.
How do I prevent the parchment from wrinkling?
Wrinkled parchment paper can leave weird indentations on the bottom of your torte. To get a perfectly flat surface, use a tiny dab of softened butter on the bottom of the pan to act as “glue.” Press the parchment circle firmly onto the butter, smoothing it from the center outward until it is completely flat and secure.
Why is my torte dry instead of fudgy?
Dryness is almost always a result of over-baking or over-aeration. If you whisk the eggs for 5 minutes instead of 2, you’ve created too much structure. More commonly, people wait until the center looks “done” before pulling it from the oven. Remember, the torte continues to cook for about 10 minutes after it leaves the heat, so that slight jiggle is your best friend.
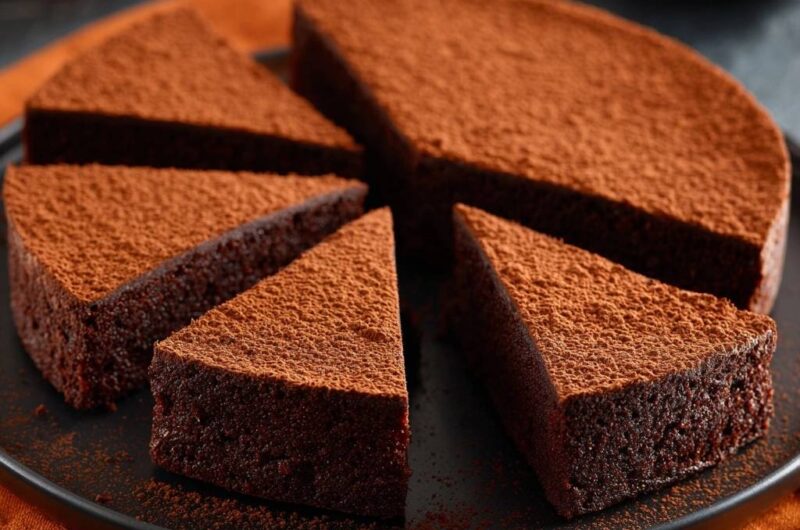
Flourless Dark Chocolate Torte
Course: DessertCuisine: AmericanDifficulty: medium8
servings15
minutes35
minutes340
kcal50
MinutesThis rich and fudgy chocolate torte solves the common issue of greasy, weeping bases by focusing on temperature control and egg aeration. Made with high quality dark chocolate and cocoa powder, it delivers a professional, bakery-style texture.
Ingredients
8 ounces high quality dark chocolate (60-70% cacao), finely chopped
3/4 cup unsalted butter, cubed
1 cup granulated sugar
4 large eggs, room temperature
1/2 cup unsweetened cocoa powder, plus extra for dusting
1 teaspoon vanilla extract
1/2 teaspoon salt
1/4 teaspoon espresso powder (optional, to enhance chocolate depth)
Directions
- Preheat your oven to 350°F (175°C). Grease an 8-inch springform pan and line the bottom with parchment paper. Grease the parchment as well to ensure a clean release.
- Melt the chopped chocolate and cubed butter together using a double boiler or in 30-second intervals in the microwave. Stir until completely smooth and glossy.
- To solve the soggy bottom issue, you must let the chocolate mixture cool for 5 to 8 minutes until it is warm to the touch but not hot (approx. 110°F). If it is too hot, it will break the egg proteins and cause the fat to leach out, leading to a greasy base.
- In a separate bowl, whisk the eggs and sugar together vigorously for 2 minutes until slightly pale. This creates the structural “lift” needed for a uniform crumb.
- Slowly pour the cooled chocolate mixture into the egg mixture, whisking constantly to create a stable emulsion. Stir in the vanilla, salt, and espresso powder.
- Sift in the cocoa powder. Sifting is mandatory to prevent clumps that create air pockets, which lead to a sunken center. Fold gently with a spatula until no streaks remain.
- Pour the batter into the prepared pan. Tap the pan firmly on the counter three times to release any large trapped air bubbles.
- Bake for 30 to 35 minutes. The edges should be set and slightly puffed, but the center should still have a very slight jiggle. Do not overbake, or the torte will lose its fudgy interior.
- Let the cake cool completely in the pan on a wire rack for at least 2 hours. This resting period allows the fats and proteins to set fully, preventing a “weeping” bottom.
- Once cool, run a thin knife around the edge and remove the springform ring. Dust generously with a thick layer of cocoa powder as seen in the image. Use a hot, clean knife to slice into sharp wedges.
Notes
- To ensure a clean release, grease both the pan and the parchment paper. Letting the chocolate cool to approximately 110 degrees Fahrenheit before adding eggs is critical to prevent the fats from separating and creating a soggy bottom.