Elegant Poached Pears: Master the Tender, Beautiful Bite
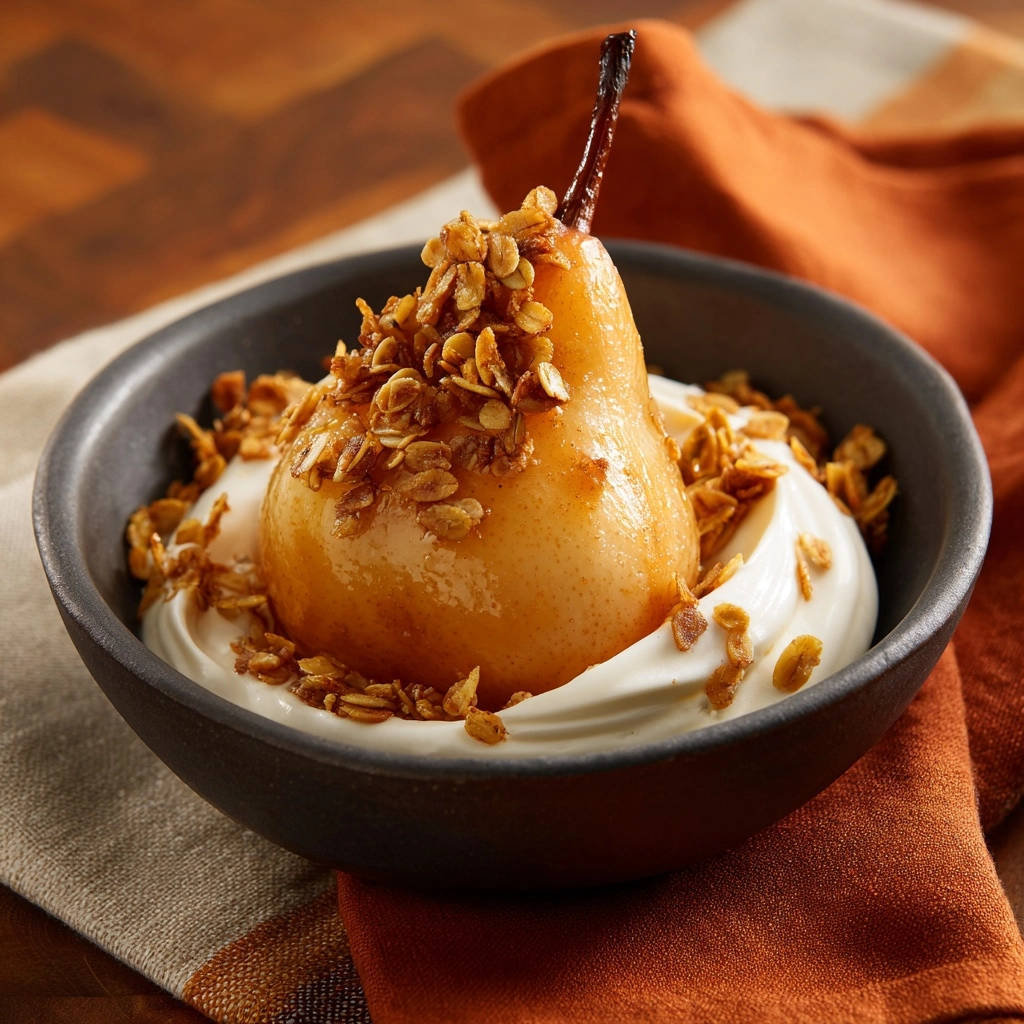
I distinctly remember the apprehension I used to feel about making Elegant Poached Pears. It often felt like a culinary gamble, resulting in either unyielding, hard fruit or, worse, sad, mushy lumps. But after much experimentation, I finally cracked the code to achieving that consistently ideal tender bite, all while preserving their stunning, elegant shape.
This recipe transforms the humble pear into a sophisticated dessert with a simple, reliable technique. You’ll discover the secret to perfectly tender pears that hold their form, making every bite a delight and impressing anyone at your table.
Why This Elegant Poached Pears Recipe is Your New Favorite
The End of Mushy Mistakes: A Foolproof Method
Say goodbye to disappointing, overcooked pears. Our method focuses on a gentle, controlled simmer that coaxes the fruit to perfect tenderness without compromising its structural integrity. This precise approach ensures your pears are firm enough to hold their shape but yield beautifully with every forkful.
Achieving That Ideal Tender Texture, Every Time
The secret lies in understanding the nuances of pear ripeness and adjusting cooking times accordingly, a skill you’ll master with our clear guidance. We provide visual and tactile cues, so you can confidently achieve that “just right” texture, making this recipe incredibly reliable for consistent results.
Effortless Elegance: Simple Steps, Stunning Results
Despite their sophisticated appearance, these poached pears are surprisingly simple to prepare. With straightforward steps and readily available ingredients, you can create a truly stunning dessert that looks far more complex than it is. It’s an approachable recipe for cooks of all skill levels, delivering impressive results every time.
Essential Ingredients for Your Poached Pear Perfection
Choosing the Perfect Pear: Bosc vs. Anjou
Selecting the right pear is paramount for successful poaching. We highly recommend Bosc or Anjou varieties because their firm flesh holds up beautifully during the poaching process.
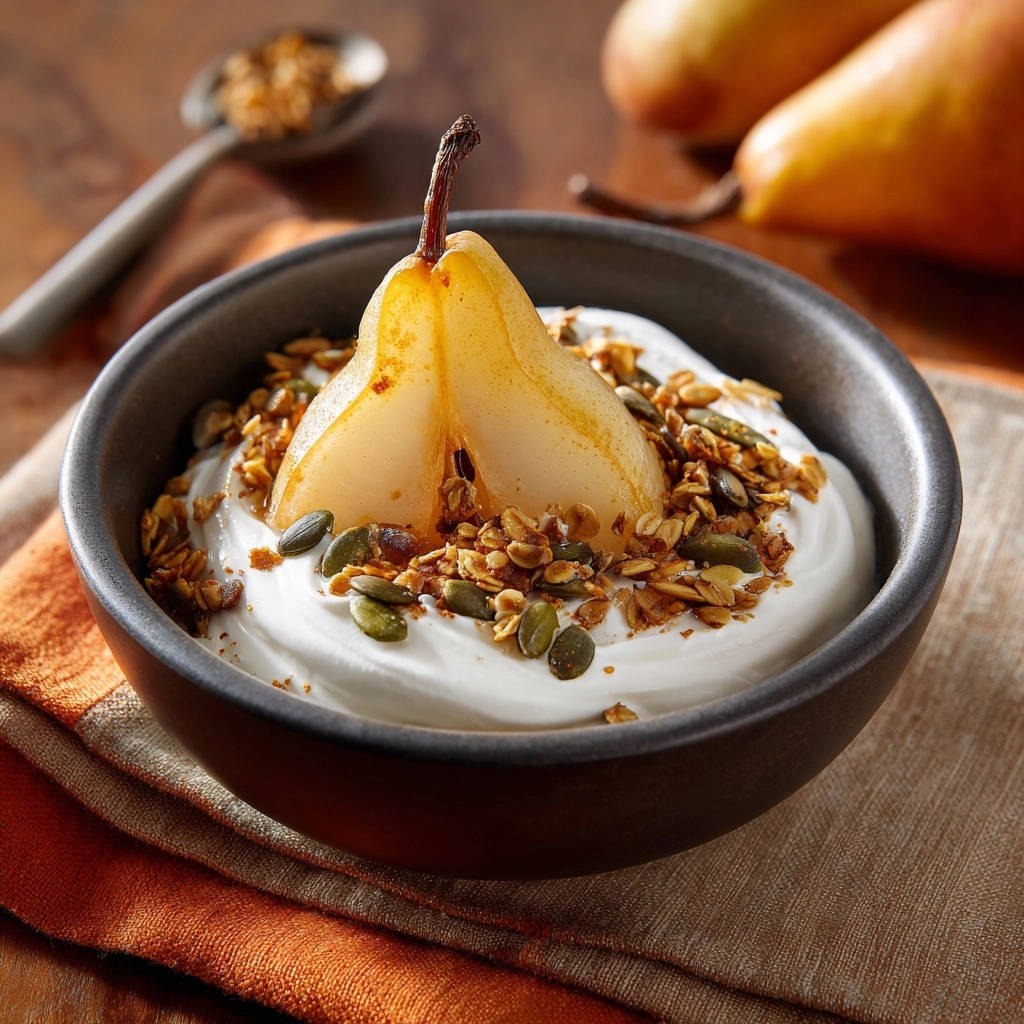
Look for pears that are firm to the touch but have a slight give when gently squeezed near the stem. Avoid overly soft or bruised pears, as they are prone to becoming mushy.
The Aromatic Poaching Liquid: Sweet & Spiced
The poaching liquid infuses the pears with delicate sweetness and inviting warmth.
Water: Forms the base of your poaching liquid.
Granulated Sugar: Provides the essential sweetness and helps create a lovely syrup.
Vanilla Extract: Adds a classic, comforting aroma that complements the natural pear flavor.
Cinnamon Stick: Imparts a subtle, spicy warmth that enhances the overall dessert experience.
Beyond the Pear: Ideal Companions for Serving
While the Elegant Poached Pears are stars on their own, their accompaniments elevate the dish.
Plain Greek yogurt offers a creamy, tangy contrast that brightens the flavors and adds a welcome coolness. Granola provides a crucial textural crunch, turning a simple fruit dessert into a satisfying culinary experience.
Tools of the Trade: Equipping Your Kitchen
Must-Have Equipment for Poaching
Having the right tools makes the poaching process smooth and successful.
Medium Saucepan: Choose one deep enough to comfortably submerge your pears, ensuring even cooking. A wider pot is better for laying pears flat.
Slotted Spoon or Tongs: Essential for carefully handling and removing the delicate poached pears without damaging them.
Small Spoon or Melon Baller: Used for the optional but recommended step of coring the pears from the bottom, which aids in presentation and even cooking.
Optional Tools for Enhanced Presentation
While not strictly necessary, these tools can improve your poached pear presentation.
A vegetable peeler makes quick work of peeling, ensuring a smooth finish. A fine-mesh sieve can be useful for straining your reduced poaching liquid, giving you a perfectly clear syrup.
Crafting Your Elegant Poached Pears: Step-by-Step
Preparation is Key: Peeling and Coring Your Pears
- Carefully prepare the pears:
Begin by gently peeling the pears, making sure to leave the stems intact for a beautiful presentation. Their stems also give you a convenient handle for turning them later.
For an optimal culinary experience, you can use a small spoon or melon baller to gently remove the core from the bottom of each pear. This optional step allows for more even cooking and creates a neat cavity for presentation, but be careful not to go all the way through or damage the pear’s structure.
Building the Flavor Base: The Aromatic Poaching Liquid
- Combine and simmer the liquid:
In your medium saucepan, combine the water, granulated sugar, vanilla extract, and cinnamon stick. Stir the mixture over medium heat until the sugar is completely dissolved, then bring it to a gentle simmer.
A gentle simmer, not a rolling boil, is crucial; it ensures the flavors meld without evaporating too quickly, setting the stage for perfectly infused pears.
The Poaching Process: Gentle Simmering for Perfection
- Add pears to the pot:
Once the poaching liquid is simmering gently, carefully place the peeled pears into the pot. They should be mostly submerged in the liquid. If not, add a little more water to ensure they are fully covered for uniform cooking.
- Cook gently to tender perfection:
Reduce the heat to low, maintaining a very gentle simmer throughout the cooking process. Cook the pears for 15 to 25 minutes, turning them occasionally to ensure even cooking and color development.
Submersion and Even Cooking Tips
Ensuring your pears are adequately submerged is vital for uniform cooking and flavor absorption. Turning them occasionally during the gentle simmer allows all sides to absorb the aromatic liquid and cook evenly, preventing one side from becoming too soft while another remains firm.
The Critical Tenderness Test: Avoiding Mushy Pears
The key to perfect Elegant Poached Pears is to cook them until they are tender when pierced with a fork, but critically, they must still hold their shape beautifully and not feel soft or mushy. The exact cooking time will vary depending on the ripeness and variety of your pears, so check them often starting around the 15-minute mark.
Cooling and Reducing: Enhancing Flavor and Texture
- Cool the pears:
Once the pears reach that perfect tender but firm texture, carefully remove them from the poaching liquid using a slotted spoon or tongs. Place them on a plate and let them cool slightly.
The pears will continue to soften just a tiny bit as they cool, so it’s better to slightly undercook them than overcook them at this stage.
- Reduce the poaching liquid:
While the pears cool, you can let the poaching liquid continue to simmer on low heat. This will reduce it slightly, concentrating its flavors into a delicious, thicker syrup perfect for drizzling later.
Presentation Perfection: Serving Your Elegant Poached Pears
- Prepare the serving bowls:
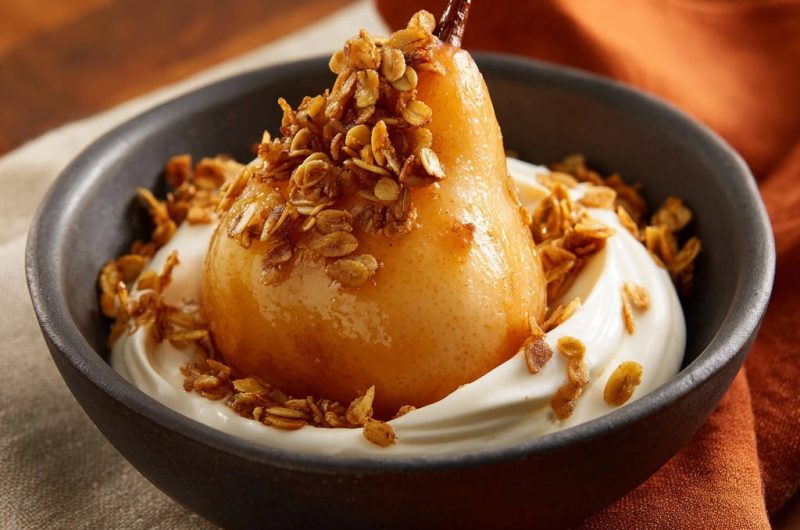
To serve, spoon a generous amount of plain Greek yogurt into individual bowls, creating a creamy bed for your pears.
- Assemble and garnish:
Place one cooled poached pear on top of the yogurt. Drizzle with a little of the reserved poaching syrup (if you chose to reduce it) and sprinkle generously with granola for that perfect, contrasting crunch.
Enjoy this elegant and simple dessert, knowing you’ve mastered a truly impressive dish!
If you enjoy the delicate, sweet finish of these pears, you will love the crisp layers in this strawberry crunch parfait.
Unlock the Secrets: Expert Tips for Flawless Poached Pears
Mastering the Poaching Process: The Key to Tender, Firm Pears
The “simple trick” for perfect pears is maintaining a consistently low, gentle simmer. Too high a heat can cause the pears to cook unevenly or break down rapidly. Keep an eye on the bubbles in the liquid; they should be small and infrequent, not a rolling boil. This slow cooking allows the pears to gently tenderize while retaining their beautiful structure.
Maximizing Flavor: Resting & Reducing the Syrup
Allowing the poached pears to cool slightly after removing them from the liquid lets them settle and firm up just a bit, preventing them from becoming mushy upon serving. Reducing the poaching liquid concentrates its sweet and spicy notes, transforming it into a rich, flavorful syrup that adds an extra layer of decadence to your dessert.
Creative Serving Suggestions Beyond Yogurt & Granola
While Greek yogurt and granola are excellent companions, don’t limit your creativity! Try serving your Elegant Poached Pears with a dollop of mascarpone cheese, a scoop of vanilla bean ice cream, or even a drizzle of chocolate sauce.
For a different fruity delight, consider how the spiced syrup could complement other desserts, perhaps even a batch of perfect cinnamon sugar apples or as a glaze for a simple cake.
Troubleshooting Your Poached Pear Journey
Why Are My Pears Too Hard After Poaching?
If your pears remain hard, they likely didn’t poach long enough. Remember, cooking time varies based on ripeness.
Gently return them to the simmering liquid and continue cooking, checking every 5 minutes until they reach the desired tender-firm texture.
My Pears Disintegrated/Became Mushy! What Went Wrong?
This usually happens due to overcooking or using pears that were too ripe to begin with. Ensure your pears are firm but ripe, not soft, before starting.
Also, maintain a very gentle simmer and check for tenderness frequently to avoid overcooking. It’s better to err on the side of slightly underdone than completely mushy.
The Poaching Liquid Isn’t Flavorful Enough
If your syrup lacks punch, it might need more time to reduce and concentrate its flavors. Simmer it gently after removing the pears until it reaches your desired intensity.
For future batches, consider adding a strip of citrus peel (lemon or orange), a star anise pod, or a few whole cloves to the liquid for an extra aromatic boost.
Beyond the First Bite: Storing and Reusing Poached Pears
Proper Storage for Freshness
Once cooled, store your Elegant Poached Pears in an airtight container in the refrigerator, preferably submerged in their poaching liquid. This helps them retain moisture and flavor.
They will keep beautifully for up to 3-4 days, making them an excellent make-ahead dessert.
Can You Make Elegant Poached Pears Ahead of Time?
Absolutely! Poached pears are an ideal make-ahead dessert. Preparing them a day or two in advance allows the flavors to deepen and meld even further.
Serve them chilled directly from the refrigerator, or gently warm them in a little of their syrup on the stovetop if you prefer them warm.
Creative Uses for Leftover Poaching Liquid
Don’t discard that flavorful poaching syrup! It’s a culinary gem that can be repurposed in many delightful ways.
Drizzle it over pancakes or waffles, stir it into your morning oatmeal, or use it as a base for a sophisticated non-alcoholic cocktail. You can also reduce it further to create a thicker glaze for other fruits or baked goods, like a lovely accompaniment for zesty lemon bundt cake.
Your Poached Pear Questions Answered
What kind of pears are truly best for poaching?
While Bosc and Anjou are our top recommendations due to their firm, dense flesh that holds up well to simmering, other good options include Forelle or Comice pears. The key is to choose varieties that maintain their structure and don’t break down easily when cooked.
Can I use other sweeteners or flavorings in the poaching liquid?
Yes, absolutely! While granulated sugar provides a clean sweetness, you can experiment with honey, maple syrup, or even brown sugar for different flavor profiles. For added complexity, consider infusing your liquid with ginger slices, star anise, cardamom pods, or orange zest. The possibilities for customization are vast!
Are Elegant Poached Pears a healthy dessert option?
When paired with plain Greek yogurt and a sprinkle of wholesome granola, Elegant Poached Pears can be a wonderfully healthy and satisfying dessert. Pears are rich in fiber and vitamins, and yogurt adds protein and probiotics. It’s a lighter, naturally sweet alternative to many heavy desserts.
What to Serve with Poached Pears
After a delicate, gently sweet pear dessert, you might want something light and fresh to start your meal or a warming bowl to follow. Here are two recipes that fit alongside or after poached pears.
- A Tropical Green Smoothie Bowl brings bright fruit and a thick, cool texture that echoes the softness of poached pears without overwhelming their subtle flavor.
- For a savory contrast, Hearty Shredded Chicken Veggie Soup with Rich Poached Broth offers a warm, nourishing start that complements the gentle sweetness of the pears later on.
Can I serve them warm or cold? What’s recommended?
These poached pears are incredibly versatile and delicious both warm and cold. Serving them chilled highlights their refreshing qualities, making them perfect for warmer days or as a lighter end to a rich meal. Serving them gently warmed can enhance their comforting aromas, ideal for cooler evenings.
Ready to Transform Dessert? Your Elegant Poached Pears Await!
You now possess the expertise and the exact recipe to create truly extraordinary Elegant Poached Pears. No more guessing, no more mushy disappointments-just consistent, tender perfection that will elevate any meal.
This simple yet sophisticated dessert is a testament to how humble ingredients, combined with a precise technique, can yield stunning results. Embrace the ease and elegance of this recipe, and prepare to delight your taste buds and impress your guests.
Go ahead, pick up those pears, gather your simple ingredients, and embark on a culinary journey that promises both beauty and exceptional flavor. Your new favorite dessert awaits!
Poached Pears
Course: DessertCuisine: InternationalDifficulty: easy2
servings15
minutes25
minutes450
kcal40
minutesUnlock the secret to perfectly poached pears with this simple trick, ensuring a tender bite and beautiful shape every time. Served with creamy Greek yogurt and crunchy granola, this elegant dessert is surprisingly easy to make and will impress everyone.
Ingredients
2 firm but ripe Bosc or Anjou pears
4 cups water
1/2 cup granulated sugar
1 teaspoon vanilla extract
1 cinnamon stick
1 cup plain Greek yogurt
1/2 cup granola
Directions
- Carefully peel the pears, leaving the stems intact. If desired, use a small spoon or melon baller to gently remove the core from the bottom of each pear, being careful not to go all the way through or damage the pear’s structure. This step is optional but helps with even cooking and presentation.
- In a medium saucepan, combine the water, granulated sugar, vanilla extract, and cinnamon stick. Bring the mixture to a gentle simmer over medium heat, stirring until the sugar is dissolved.
- Once the poaching liquid is simmering gently, carefully place the peeled pears into the pot. Make sure they are mostly submerged. If not, add a little more water to cover.
- Reduce the heat to low, so the liquid maintains a very gentle simmer. Cook the pears for 15 to 25 minutes, turning them occasionally to ensure even cooking. The key here is to cook them until they are tender when pierced with a fork, but critically, they should still hold their shape beautifully and not feel soft or mushy. The exact time will depend on the ripeness of your pears. Check them often!
- Once the pears reach the perfect tender but firm texture, carefully remove them from the poaching liquid using a slotted spoon or tongs. Let them cool slightly on a plate. The pears will continue to soften just a tiny bit as they cool.
- While the pears cool, you can let the poaching liquid continue to simmer on low heat to reduce slightly if you’d like a thicker syrup to drizzle over later.
- To serve, spoon a generous amount of plain Greek yogurt into individual bowls. Place one cooled poached pear on top of the yogurt.
- Drizzle with a little of the reserved poaching syrup (if using) and sprinkle generously with granola for that perfect crunch. Enjoy this elegant and simple dessert!
Notes
- The exact cooking time for pears will vary based on their ripeness; check frequently for tenderness. You can reduce the poaching liquid for a thicker syrup to drizzle.