Flaky Star Pastries: Effortless Golden Perfection
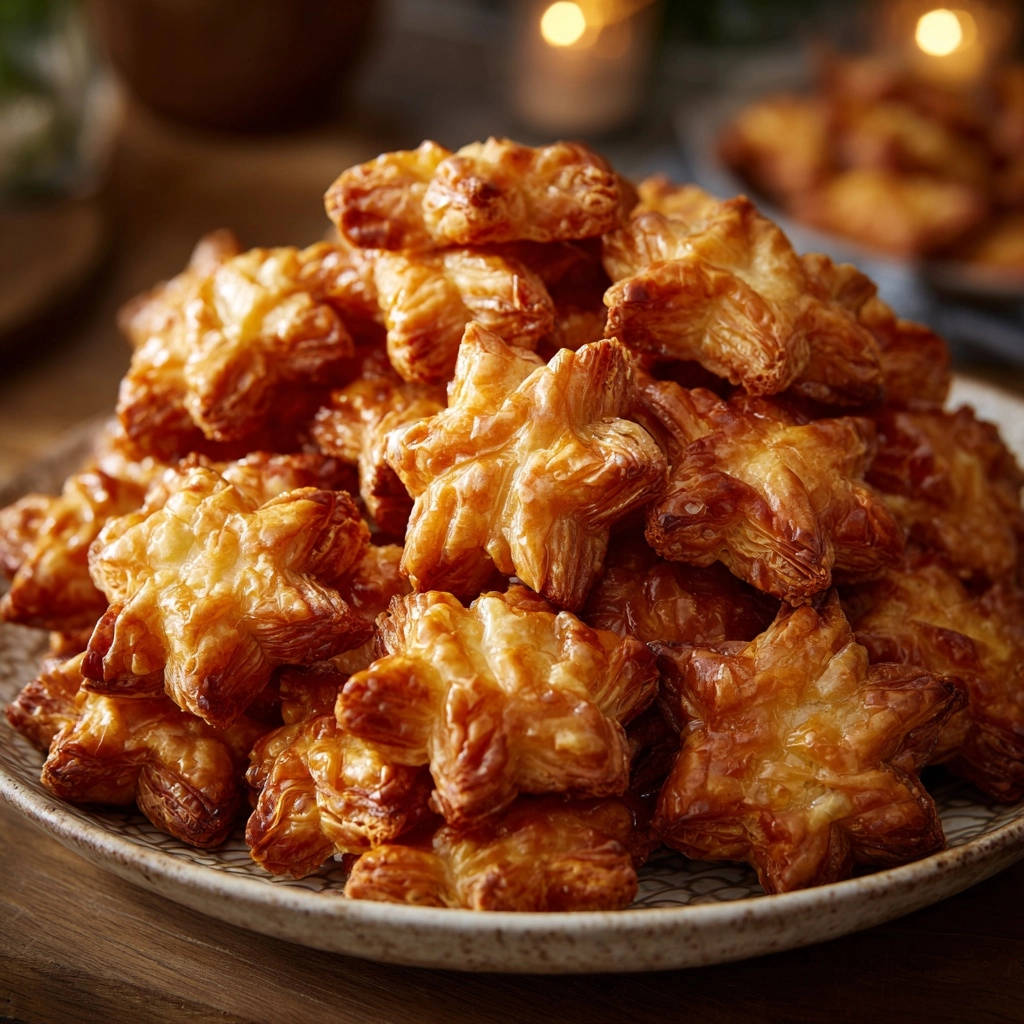
There’s nothing quite like biting into a perfectly golden, airy puff pastry, but I know the frustration when homemade attempts fall flat. My journey to consistently perfect Flaky Star Pastries taught me a simple, yet game-changing secret: temperature control. This recipe reveals that easy trick, ensuring your star-shaped treats puff up beautifully every single time.
Why These Flaky Star Pastries Are Your New Go-To Recipe
These aren’t just any pastries; they’re designed for guaranteed success and pure delight. You’ll achieve professional-looking results with minimal effort, making them a fantastic addition to any occasion.
The “Cold Dough” Secret for Incredible Puff
The core of this recipe’s success lies in maintaining the puff pastry’s chill. Cold dough prevents butter from melting prematurely, creating distinct layers that expand dramatically in the oven.
This critical technique ensures maximum lift and an incredibly airy, flaky texture. It’s the secret to that coveted tall, golden rise you’re looking for.
Achieving That Signature Golden Crisp
The simple egg wash in this recipe is your ticket to a stunning finish. It creates a beautiful, deep golden-brown crust that’s both visually appealing and perfectly crisp.
The even baking temperature combined with the egg wash guarantees a uniformly perfect exterior, making these pastries irresistible.
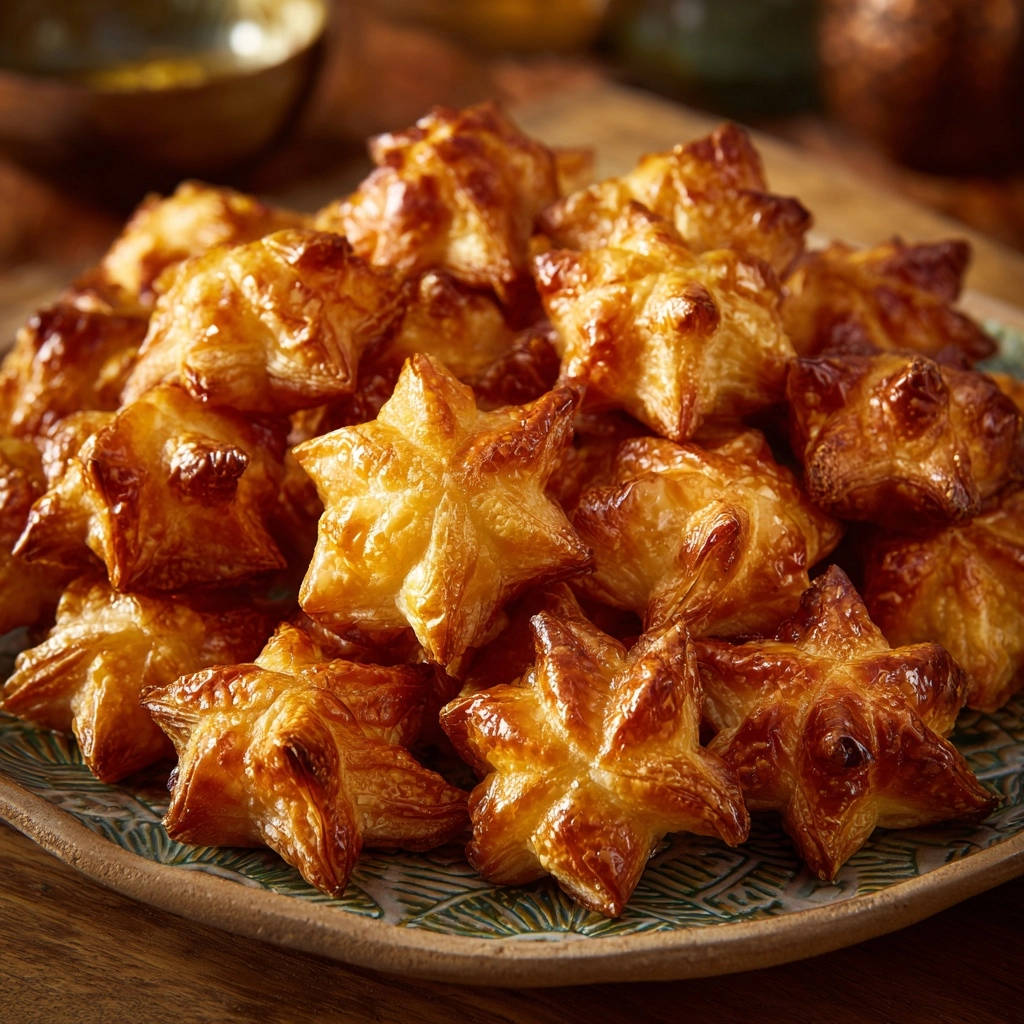
Quick Impressiveness for Any Occasion
From prep to plate, these Flaky Star Pastries are remarkably fast. They require just a few minutes of active work, making them ideal for last-minute guests or a spontaneous treat.
Their adorable star shape and impressive puff make them perfect for celebrations, brunches, or simply elevating an everyday snack.
Gathering Your Ingredients for Stellar Pastries
High-quality ingredients, even for a simple recipe, make a noticeable difference in the final product. Here’s what you’ll need.
The Foundation: Quality Puff Pastry
Start with a good quality frozen puff pastry sheet, typically around 14 ounces. Look for brands known for their butter content, as this significantly impacts flakiness.
Ensure it’s thawed completely but still very cold to the touch before you begin. This precise temperature is crucial for the pastry’s structure.
The Egg Wash: Your Golden Ticket
A single large egg whisked with a tablespoon of water creates our essential egg wash. This mixture provides that beautiful, glossy, golden crust.
It’s a simple step that adds a professional sheen and enhances the pastry’s visual appeal.
Optional Finishing Touches
A light sprinkle of granulated sugar transforms these into a sweet treat, perfect for dessert. Alternatively, a pinch of salt offers a savory option, ideal for appetizers.
These small additions allow for versatile flavor profiles, adapting the pastries to any meal or craving.
Tools of the Trade: Equipping Your Kitchen
Having the right tools simplifies the baking process and contributes to better results. You likely have most of these on hand already.
Essential Equipment for Pastry Perfection
Baking Sheet & Parchment Paper: A sturdy baking sheet ensures even heat distribution. Lining it with parchment paper prevents sticking and makes cleanup effortless.
Small Bowl & Whisk: Necessary for preparing the egg wash. A small bowl allows for easy whisking and dipping.
Beyond the Basics: Smart Additions
Star-Shaped Cookie Cutter: A 2 to 3-inch star cutter creates those charming, uniform shapes. Using a specific cookie cutter adds a delightful, festive touch.
Wire Rack: Essential for cooling your Flaky Star Pastries. Air circulation helps prevent the bottoms from becoming soggy, maintaining their crispness.
Pastry Brush: Ideal for evenly applying the egg wash without disturbing the delicate pastry layers. A good brush ensures full coverage and a consistent golden finish.
Crafting Your Flaky Star Pastries: A Detailed Method
Follow these steps closely, paying attention to the details, and you’ll achieve perfectly puffed, golden-brown results every time.
Prepping for Success: Oven & Sheet
Preheat your oven to 400°F (200°C) without delay. A hot oven is crucial for immediate puff. Line a baking sheet with parchment paper, ensuring easy removal and preventing any sticking.
Proper preheating is paramount for activating the steam within the puff pastry, leading to a quick and high rise.
The Critical “Keep it Cold” Step
This is your secret weapon! Once your puff pastry sheet is thawed, carefully unroll it onto a lightly floured surface. It must remain very cold to the touch – pliable but still firm.
Work quickly to cut your shapes, preventing the dough from warming up excessively. A warm dough means the butter will soften, hindering that amazing puff.
Shaping Your Stars with Precision
Using your 2 to 3-inch star-shaped cookie cutter, cut out as many stars as possible from the pastry. Minimize waste by placing cuts close together.
Gather any scraps gently, press them together without kneading, then lightly re-roll and cut more stars. Overworking scraps makes them tough, so handle with care.
Place the cut stars directly onto your prepared cold baking sheet, spacing them about an inch apart. Give them room to expand generously.
Applying the Lustrous Egg Wash
In a small bowl, whisk together the large egg and one tablespoon of water until well combined. This is your golden-hue provider.
Lightly brush the tops of each pastry star with the egg wash. Apply an even, thin layer for the best color and shine. If desired, sprinkle lightly with granulated sugar for a sweet finish, or a tiny pinch of salt for a savory touch.
Baking to Full, Puffed Glory
Immediately place the cold baking sheet with the pastry stars into the preheated hot oven. This temperature shock is key for immediate expansion and a light, airy interior.
Bake for 12-15 minutes, or until the pastries are gloriously golden brown and fully puffed up. A common pitfall is opening the oven door too early, especially in the first 8-10 minutes, as this can cause your beautiful puff pastry to deflate. Resist the urge!
Cooling for Optimal Texture and Enjoyment
Once baked to perfection, carefully transfer the hot stars to a wire rack. This allows air to circulate around them, preventing condensation and maintaining their crispness.
Let them cool slightly on the rack before serving warm for the best experience. They can also be enjoyed at room temperature, maintaining their delightful texture.
Unlock the Secrets: Pro Tips for Flaky Star Pastries
Even small details can make a big difference when working with puff pastry. These tips will help you achieve outstanding results consistently.
Mastering the Chill Factor
Always work with puff pastry that is just thawed but still very cold. If it softens too much during handling, pop the whole baking sheet with the cut stars into the refrigerator for 10-15 minutes before baking.
This re-chilling step ensures the butter layers remain solid, leading to maximum puff in the oven. It’s a non-negotiable for truly flaky star pastries.
Smart Handling of Pastry Scraps
When re-rolling scraps, stack them loosely rather than balling them up. Gently press them together to form a rough shape, then roll lightly.
Avoid excessive kneading or pressing, as this develops gluten and can make the subsequent stars tough and less flaky. Gentle handling preserves the delicate layers.
The No-Peek Rule: Why It Matters
It’s tempting, but do not open the oven door during the initial baking phase (the first 8-10 minutes). A sudden drop in temperature causes the steam inside the pastry to condense.
This condensation leads to deflated, sad pastries rather than tall, proud stars. Trust the process and your oven.
Achieving Uniform Baking
If your oven has hot spots, consider rotating your baking sheet halfway through the baking time. This helps ensure all your star-shaped treats bake evenly.
Consistent browning across all pastries makes for a more appealing and delicious batch.
Troubleshooting Common Flaky Star Pastries Hurdles
Even with simple recipes, questions can arise. Here are solutions to common issues you might encounter.
Why Aren’t My Pastries Puffing Up?
The most common culprit is warm dough. If the butter melts before baking, you’ll get flat, dense pastries. Ensure your dough is very cold when it goes into the oven.
Another reason could be an oven that isn’t hot enough. Always allow your oven ample time to fully preheat to the specified temperature before baking.
Lastly, check your puff pastry’s expiration date. Old or improperly stored pastry may lose its leavening power.
Dealing with Uneven Browning
Uneven browning often indicates hot spots in your oven. Try rotating the baking sheet 180 degrees halfway through the baking time.
Ensure your egg wash is applied evenly across all surfaces. Too much in one spot can lead to darker patches, while too little can result in pale areas.
Pastry Is Too Tough or Dense
This usually happens from overworking the dough, especially when re-rolling scraps. Excessive handling develops the gluten, making the pastry chewy instead of flaky.
Always handle puff pastry with a light touch and work quickly to keep it cold. Gentle pressing and minimal re-rolling are key to maintaining tenderness.
Serving Suggestions & Creative Variations
These versatile Flaky Star Pastries are delicious on their own, but they also serve as a wonderful base for countless additions.
Sweet & Savory Inspirations
Sweet Toppings: Drizzle with a simple glaze (powdered sugar and milk), sprinkle with cinnamon sugar, or serve with fresh berries and whipped cream. They pair beautifully with a dollop of fruit jam or chocolate spread.
Savory Bites: Before baking, sprinkle with grated Parmesan cheese, dried herbs like rosemary or thyme, or a pinch of garlic powder. They make fantastic dippers for soups or chili, and are excellent with a light cream cheese spread for an appetizer.
Presentation Perfect: Pairing Ideas
Serve them alongside a fruit salad for a light breakfast or brunch. Their elegant shape makes them perfect for a special occasion.
If you enjoy working with puff pastry, these crispy ham and egg tarts make a fantastic quick breakfast.
Accompany with coffee or tea for an afternoon treat. For a truly indulgent experience, pair them with a scoop of vanilla bean ice cream.
For a perfect pairing, try our Caramelized Onion Puff Pastry Pinwheels: Flaky Party Bites.
Storing Your Flaky Star Pastries for Lasting Freshness
Proper storage ensures your beautiful pastries remain delightful for as long as possible.
What to Serve with These Pastries
These flaky star pastries are light and buttery, so pair them with something sweet or savory to round out a breakfast or brunch table.
- For a cinnamon-sugar twist, the Sugared Cinnamon Morning Buns share the same crispy, golden base and warm spice notes.
- If you want a protein-rich contrast, the Spinach Pepper Egg Muffins bring fluffy eggs and fresh vegetables that balance the pastry’s sweetness.
Best Practices for Storage
Allow baked Flaky Star Pastries to cool completely before storing. Place them in an airtight container at room temperature for up to 2-3 days.
For longer storage, they can be frozen for up to one month. Thaw at room temperature, then crisp them up in a 350°F (175°C) oven for 5-7 minutes.
Can You Make Them Ahead?
You can cut out the star shapes and arrange them on the parchment-lined baking sheet, then cover and refrigerate for up to a few hours. This makes last-minute baking incredibly easy.
Just be sure to keep them well-chilled before baking for optimal puff. This strategy is ideal for entertaining, allowing you to focus on other preparations.
Flaky Star Pastries FAQs: Your Questions Answered
Have more questions? Here are some common inquiries about making these delightful pastries.
Is frozen puff pastry essential?
While this recipe is designed for convenience with frozen puff pastry, you could certainly use homemade puff pastry if you prefer. Just ensure it is well-chilled before cutting and baking.
For more advanced baking projects involving layered doughs, explore recipes that teach you how to make more complex pastries, like a savory cheesy layered pastry from scratch.
What if I don’t have a star cutter?
No star cutter? No problem! You can use any cookie cutter shape you have on hand, such as circles, squares, or even hearts. If you don’t have cutters, simply use a sharp knife or pizza cutter to cut the pastry into small squares or rectangles.
The shape won’t affect the incredible flakiness, only the aesthetic appeal.
Can I add fillings to these pastries?
For a simple filling, you can place a small dollop of jam, Nutella, or a tiny cube of cheese in the center of one star, then top with another star before baking. Crimp the edges gently to seal.
Be cautious not to overfill, as this can prevent proper puffing. The focus of this recipe is on the beautiful, airy texture of the pastry itself.
Are there gluten-free alternatives for puff pastry?
Yes, many grocery stores now carry gluten-free puff pastry in the freezer section. The baking method should remain similar, but always check the package directions for specific temperature or time adjustments.
Using a gluten-free option allows those with dietary restrictions to enjoy these delightful Flaky Star Pastries too.
Ready to Bake Your Own Golden Stars?
Now that you’re armed with all the insider tips and tricks, it’s time to bring these beautiful Flaky Star Pastries to life in your own kitchen. They’re proof that impressive results don’t always require complex techniques.
Whip up a batch for your next gathering, a quiet morning, or just because you deserve a little golden delight. Don’t forget to share your creations; we love seeing your culinary triumphs! For more effortless and delicious ideas, explore our collection of easy-to-follow recipes, like our incredibly satisfying perfect apple crumble bars.
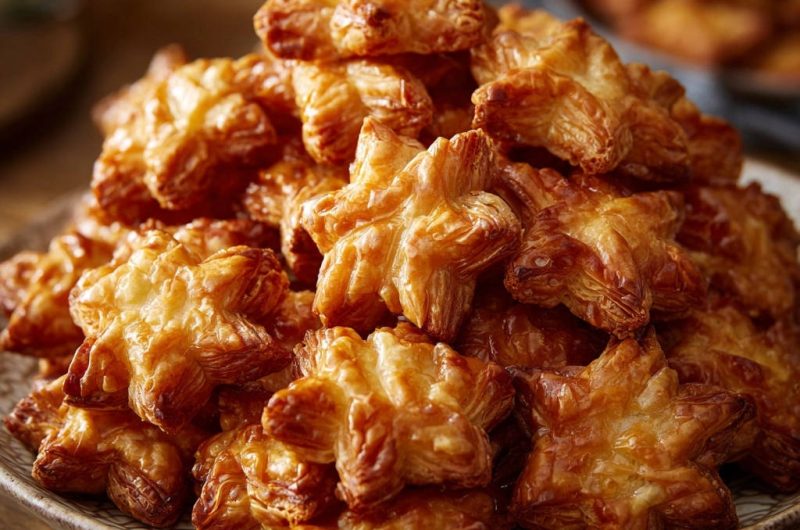
Star Pastries
Course: PastryCuisine: AmericanDifficulty: easy4
(approx. 12-18 stars)15
minutes15
minutes240
kcal30
minutesThere’s nothing quite like biting into a perfectly golden, airy puff pastry. This recipe reveals the secret to guaranteed success, ensuring your adorable star pastries puff up beautifully every single time. Enjoy them warm or at room temperature.
Ingredients
1 sheet (approx. 14 ounces) frozen puff pastry, thawed
1 large egg
1 tablespoon water
Optional: A sprinkle of granulated sugar or a pinch of salt
Directions
- Prep: Preheat your oven to 400°F (200°C). Line a baking sheet with parchment paper. This is key for even heat.
- Keep it Cold (The Technique Highlight): This is the secret! Once your puff pastry sheet is thawed but still very cold to the touch (it should be pliable but firm), carefully unroll it onto a lightly floured surface. Work quickly to prevent it from warming up too much.
- Cut Shapes: Using a 2 to 3-inch star-shaped cookie cutter, cut out as many stars as you can from the pastry. Gather any scraps, gently press them together (do not knead!), re-roll lightly, and cut more stars. Place the cut stars directly onto the prepared cold baking sheet, giving them about an inch of space.
- Egg Wash for Golden Perfection: In a small bowl, whisk together the egg and water to create an egg wash. Lightly brush the tops of each pastry star with the egg wash. If desired, sprinkle lightly with sugar or a pinch of salt.
- Bake for the Rise: Immediately place the cold baking sheet with the pastry stars into the preheated hot oven. Bake for 12-15 minutes, or until the pastries are beautifully golden brown and fully puffed up. Resist the urge to open the oven door too early, especially in the first 8-10 minutes, as this can cause the pastry to deflate.
- Cool and Serve: Carefully transfer the baked stars to a wire rack to cool slightly. Serve warm or at room temperature.
Notes
- The key to perfectly puffed pastries is keeping the dough very cold throughout the preparation process.