Homemade Chocolate Chunk Ice Cream: Velvety Smooth Perfection
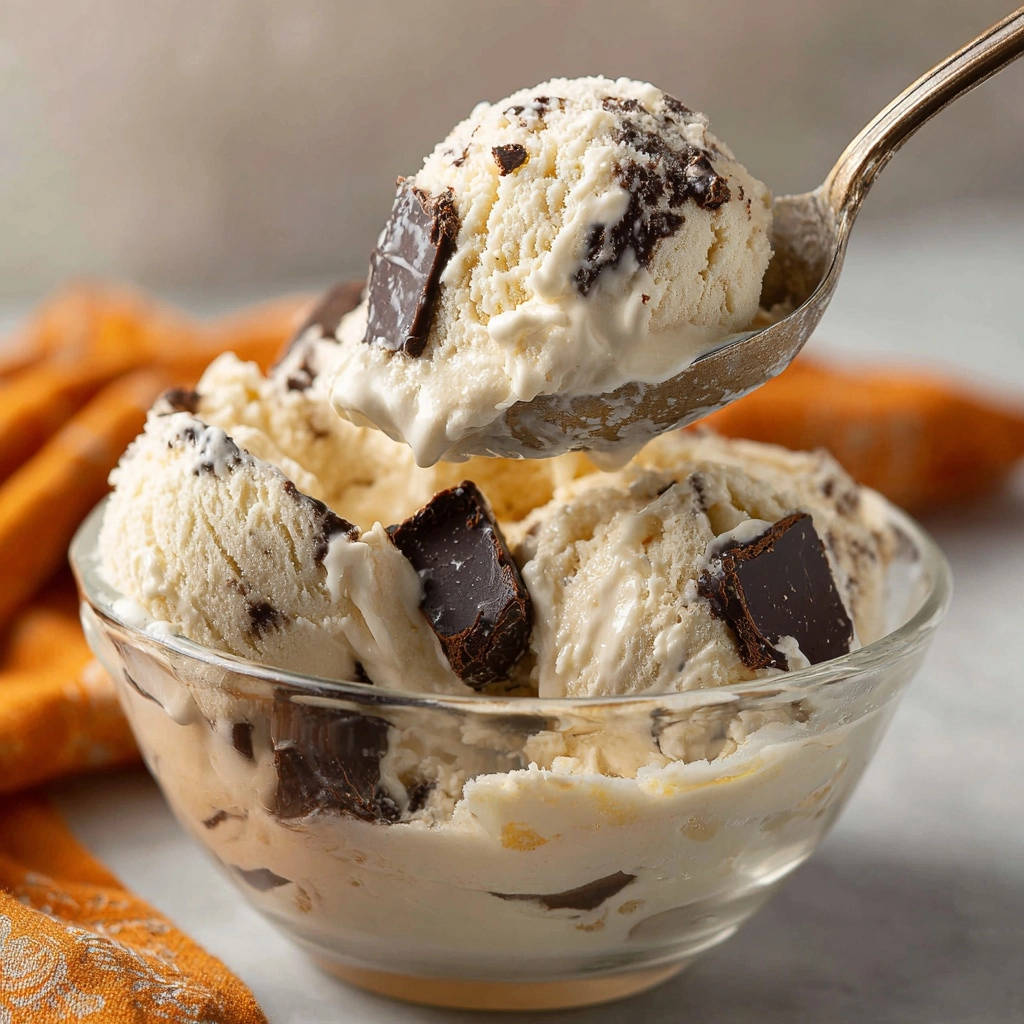
Who else has faced the disappointment of homemade ice cream turning out like an icy block instead of a luxurious, scoopable treat? I’ve certainly been there! But after countless batches, I cracked the code to truly velvety smooth Homemade Chocolate Chunk Ice Cream, free from dreaded ice crystals, all thanks to one simple, game-changing trick.
This recipe isn’t just about mixing ingredients; it’s about mastering a technique that guarantees perfectly creamy results every time. Prepare to indulge in spoonfuls of rich, chocolate-studded bliss, straight from your own kitchen.
Why This Homemade Chocolate Chunk Ice Cream Will Transform Your Dessert Game
This isn’t just another ice cream recipe; it’s a proven method for dessert perfection. Our secret ensures a texture that’s consistently smooth and delightfully scoopable, even after extended freezer time.
Say goodbye to disappointing icy batches. This approach virtually eliminates ice crystal formation, delivering that luxurious mouthfeel you crave from premium ice cream.
The intentional preparation of this Homemade Chocolate Chunk Ice Cream builds a deep, nuanced flavor profile that truly elevates the classic combination of vanilla and rich chocolate.
Essential Tools for Your Frozen Culinary Journey
The Heart of Creaminess: Your Ice Cream Maker
An ice cream maker is indispensable for achieving the desired creamy texture. These machines continuously churn the mixture as it freezes, breaking up ice crystals as they form.
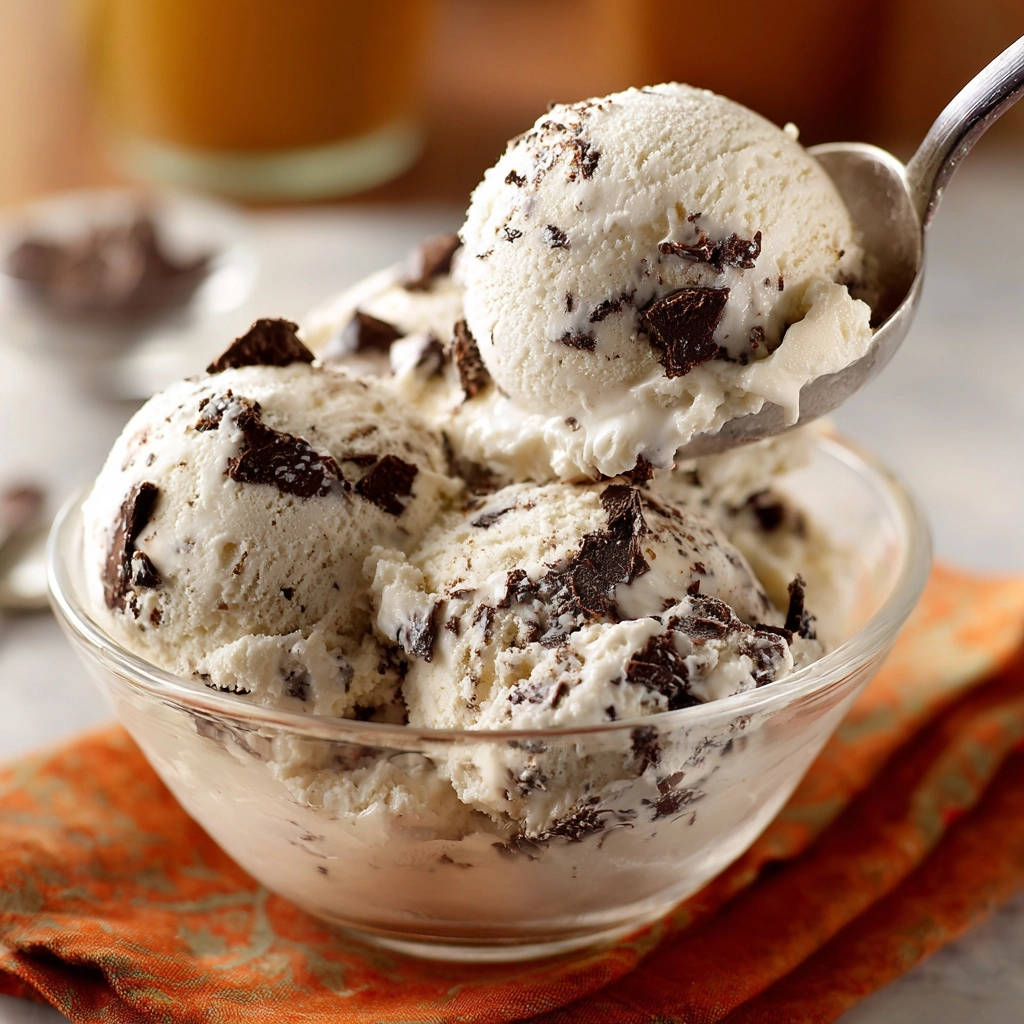
Whether you use a compressor model (which freezes as it churns) or a freezer-bowl type (which requires pre-freezing the bowl), understanding your machine’s specifics is crucial. Always follow the manufacturer’s instructions, especially for pre-freezing the bowl for optimal results.
Beyond the Machine: Must-Have Kitchen Gadgets
Large Whisking Bowl: A spacious bowl allows for easy and thorough mixing of the ice cream base without spills.
Sturdy Whisk: Essential for completely dissolving the sugar, which is a critical step for preventing an icy texture.
Accurate Measuring Cups and Spoons: Precision in quantities ensures the right balance of fat, sugar, and liquid for proper freezing.
Rubber Spatula: Ideal for scraping down the sides of bowls and transferring the churned ice cream efficiently.
Quality Freezer-Safe Container: An airtight container is paramount for storing your finished ice cream, protecting it from freezer burn and maintaining its fresh flavor.
The Flavor Foundation: Ingredients for Unforgettable Chocolate Chunk Ice Cream
Rich & Creamy Core: Heavy Cream and Whole Milk
Heavy cream, with its high-fat content, is the cornerstone of a rich and smooth ice cream. The fat molecules interfere with water crystallization, significantly reducing ice formation.
Whole milk contributes to the overall liquid volume and body while adding a complementary creamy flavor. Using both in precise ratios balances richness without becoming overly dense.
If you enjoy working with rich chocolate and cream, try this dense, fudgy flourless dark chocolate torte for another decadent dessert.
Sweetness, Balance, and Depth: Granulated Sugar, Vanilla, and Salt
Granulated sugar not only provides sweetness but also plays a vital role in texture by lowering the freezing point of the mixture. This prevents the ice cream from freezing rock solid, making it scoopable.
Pure vanilla extract adds a warm, aromatic depth that complements the chocolate beautifully. A pinch of salt enhances all the flavors, balancing the sweetness and making the chocolate taste even more intense.
The Irresistible Stars: Dark Chocolate Chunks
For the ultimate Homemade Chocolate Chunk Ice Cream experience, choose a high-quality dark chocolate (60-70% cacao) that you enjoy eating on its own. Quality chocolate melts smoothly and provides superior flavor.
Chopping a chocolate bar yourself yields irregular chunks, creating delightful pockets of melty chocolate and textural contrast. Avoid waxy chocolate chips, which often contain stabilizers that prevent them from melting as beautifully in the ice cream.
Mastering the Art of Homemade Chocolate Chunk Ice Cream: A Step-by-Step Guide
Whisking Perfection: Creating Your Silky Base
In a large bowl, combine the heavy cream, whole milk, granulated sugar, vanilla extract, and salt.
Whisk vigorously for at least 2 to 3 minutes, ensuring the sugar is completely dissolved. This meticulous step is foundational for preventing an icy texture, as undissolved sugar can lead to grittiness.
The Secret Weapon: The Overnight Chill
Cover the prepared mixture and refrigerate it for a minimum of 4 hours, though ideally overnight (8-12 hours). This extended chilling period is the game-changing trick to achieving perfectly smooth ice cream, allowing ingredients to meld deeply and chill uniformly before churning.
Preparing for Churning Success: The Frozen Bowl
Confirm your ice cream maker’s freezer bowl has been in the freezer for at least 24 hours, or until it is completely frozen solid. Refer to your manufacturer’s specific instructions, as a super-cold bowl is essential for rapid freezing and inhibiting the formation of large ice crystals.
The Churn: Transforming Liquid to Soft-Serve
Pour the thoroughly chilled ice cream base into your pre-frozen ice cream maker bowl. Churn according to your manufacturer’s directions, which typically takes 20 to 25 minutes, or until the mixture reaches the consistency of soft-serve ice cream. Avoid overchurning, as this can negatively impact the final texture.
The Chocolate Infusion: Adding the Chunks
During the final 5 minutes of churning, add the chopped dark chocolate chunks directly to the ice cream maker. This timing ensures they are evenly distributed throughout the developing ice cream without settling at the bottom.
The Final Freeze: Setting for Perfection
Transfer the freshly churned ice cream to a freezer-safe container. To prevent any ice crystals from forming on the surface, press a piece of parchment paper directly onto the ice cream, then cover the container tightly with its lid.
Freeze for another 2 to 4 hours, or until it reaches your desired firm consistency. This final freeze allows the ice cream to set perfectly, maintaining its smooth texture thanks to the meticulously prepared base and proper chilling techniques.
Chef’s Secrets: Elevate Your Homemade Chocolate Chunk Ice Cream Game
The Unbeatable Power of a Perfectly Chilled Base
Chilling the base for an extended period, ideally overnight, is paramount. This allows the fat globules to solidify, the proteins to hydrate, and the sugar to fully dissolve, all of which contribute to a significantly smoother texture and dramatically reduce ice crystal formation.
If you love the rich chocolate flavor in this ice cream, you will enjoy these sea salt dark chocolate chunk cookies too.
Don’t Skimp on Sugar Dissolution
Every single sugar granule must be completely dissolved before churning. Undissolved sugar creates a grainy texture and can even promote ice crystal growth. If you struggle, gently warm about half a cup of the milk with the sugar to dissolve it completely, then chill it fully before combining with the rest of the ingredients.
Choosing and Preparing Your Chocolate Chunks
Opt for a high-quality baking chocolate bar (like Ghirardelli, Valrhona, or Callebaut) over standard chocolate chips. Chips often contain ingredients that prevent them from melting properly in your mouth, leading to a waxy sensation.
Roughly chop the chocolate bar into varied sizes; this creates delightful textural surprises, from small shards to larger, satisfying chunks within your Homemade Chocolate Chunk Ice Cream.
Avoiding the Overchurn: Texture is Key
Overchurning can incorporate too much air into your ice cream, making it fluffy and less dense, or it can even begin to break the emulsion, leading to a buttery texture. Stop churning when the ice cream resembles soft-serve, as it will firm up further in the freezer.
The Parchment Paper Barrier: Your Anti-Crystal Shield
Pressing parchment paper directly onto the surface of the churned ice cream before covering it is a simple yet powerful trick. This creates a physical barrier that prevents air from reaching the surface, which is the main culprit behind freezer burn and surface ice crystals.
Troubleshooting Common Homemade Ice Cream Woes
Why is My Homemade Chocolate Chunk Ice Cream Icy?
Icy texture usually stems from insufficient chilling of the base or freezer bowl, or the sugar not being fully dissolved. Ensure your base chills for at least 8 hours and your ice cream maker bowl is rock solid frozen for 24 hours.
Additionally, make sure you are using heavy cream and whole milk as specified, as lower fat content can contribute to more ice.
My Ice Cream Didn’t Get Firm Enough After Freezing
This can happen if the base wasn’t churned long enough or if your freezer isn’t cold enough. Ensure the mixture reached a soft-serve consistency during churning.
Check your freezer’s temperature; it should be at 0°F (-18°C) or colder for optimal freezing. The fat and sugar content in the recipe are carefully balanced for firmness.
Why Did My Chocolate Chunks Sink to the Bottom?
Chocolate chunks sink if they are added too early in the churning process when the ice cream base is still quite liquid. It’s crucial to add them during the last 5 minutes of churning.
At this stage, the ice cream has thickened enough to suspend the chunks evenly throughout, preventing them from settling.
Serving, Storing, and Savoring Your Frozen Delight
The Perfect Scoop: Serving Suggestions for Your Masterpiece
Enjoy your Homemade Chocolate Chunk Ice Cream simply in a bowl, allowing its rich flavor to shine. For an extra treat, drizzle with homemade hot fudge, a sprinkle of sea salt, or a dollop of fresh whipped cream.
It also makes a phenomenal base for sundaes, nestled alongside warm brownies or cookies, or as an indulgent accompaniment to a fruit tart.
What to Serve with Your Ice Cream
That chocolate chunk ice cream is rich and creamy, so you want sides that add crunch or a warm contrast.
- Thread a batch of Mini Pancake Skewers for a fun, carby side that soaks up the melting ice cream.
- Bake a Cinnamon Streusel Coffee Cake and serve warm slices alongside the cold ice cream for a contrast in temperature and spice.
Keeping it Fresh: Optimal Storage for Homemade Chocolate Chunk Ice Cream
To maintain its smooth texture and prevent freezer burn, always store your ice cream in an airtight, freezer-safe container. The parchment paper trick, pressed directly onto the surface, is your best defense against ice crystals.
Store the container in the coldest part of your freezer, ideally towards the back, where temperatures are most consistent and less susceptible to fluctuations from opening the freezer door.
Make-Ahead Magic: Planning Your Dessert
This Homemade Chocolate Chunk Ice Cream is an ideal make-ahead dessert. You can prepare it up to a week in advance, allowing it to fully firm up and deepen in flavor.
Knowing you have a container of this homemade delight waiting makes impromptu dessert cravings or last-minute entertaining a breeze. Just remember to let it soften slightly on the counter for a few minutes before serving for the best scoopability.
Frequently Asked Questions About Homemade Chocolate Chunk Ice Cream
Can I use a different type of chocolate for the chunks?
Absolutely! While dark chocolate offers a sophisticated contrast, you can experiment with milk chocolate for a sweeter profile or even white chocolate for a different flavor dimension. Just ensure it’s a good quality baking chocolate for best texture.
For extra flair, consider adding other mix-ins like chopped nuts, toffee bits, or even a swirl of caramel during the last few minutes of churning.
What if I don’t have an ice cream maker?
While an ice cream maker provides the smoothest results, you can still make ice cream without one using methods like the shallow pan method or the blender method. These involve freezing in layers and blending or stirring every 30-60 minutes to break up ice crystals.
Be aware that the texture may not be as consistently smooth or airy as machine-churned ice cream, but it will still be a delicious frozen treat.
Can I reduce the sugar in this recipe?
Sugar is crucial for both sweetness and texture in ice cream, as it lowers the freezing point and keeps the ice cream soft and scoopable. While you can reduce sugar slightly (e.g., by 1-2 tablespoons), significant reductions will result in harder, icier ice cream.
Taste the base before chilling to ensure it meets your sweetness preference, but understand the textural implications of changing sugar content too much.
How long does homemade chocolate chunk ice cream last in the freezer?
For optimal flavor and texture, Homemade Chocolate Chunk Ice Cream is best enjoyed within 1 to 2 weeks. While it’s safe to eat for longer, its quality can diminish over time.
Proper storage in an airtight container with parchment paper pressed against the surface will help maintain its deliciousness for as long as possible.
Ready to Indulge? Your Homemade Chocolate Chunk Ice Cream Awaits!
Now that you’re equipped with all the secrets, it’s time to create your own batch of truly exceptional Homemade Chocolate Chunk Ice Cream. This recipe isn’t just about a dessert; it’s about the satisfaction of crafting something extraordinary with your own hands.
Dive in, follow these expert tips, and prepare to delight your taste buds with velvety smooth, deeply flavorful ice cream that will impress everyone. Don’t forget to share your delicious creations and tag us – we love seeing your homemade triumphs!
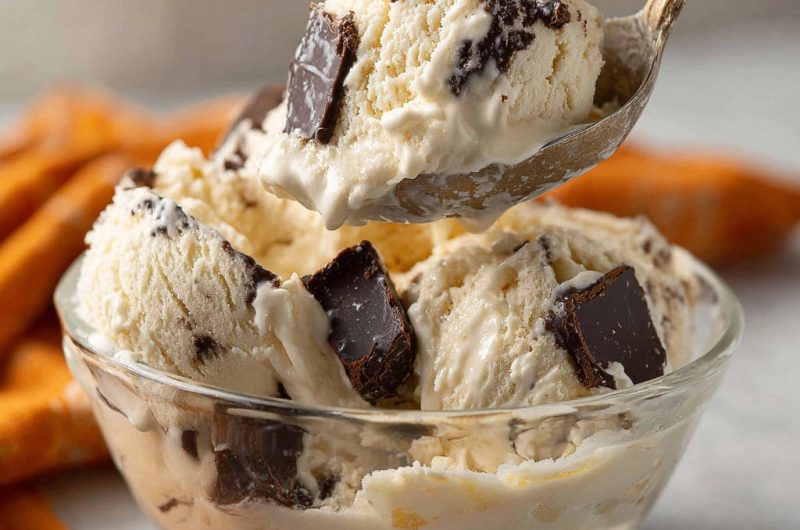
Chocolate Chunk Ice Cream
Course: DessertCuisine: AmericanDifficulty: medium6
servings15
minutes25
minutes560
kcal40
minutesTired of icy homemade ice cream? Discover the simple trick to making perfectly smooth, scoopable Homemade Chocolate Chunk Ice Cream without any ice crystals. This recipe ensures a luscious, creamy texture every time.
Ingredients
2 cups heavy cream
1 cup whole milk
3/4 cup granulated sugar
1 teaspoon vanilla extract
1/4 teaspoon salt
6 ounces dark chocolate, chopped into small chunks
Directions
- In a large bowl, whisk together the heavy cream, whole milk, granulated sugar, vanilla extract, and salt until the sugar is completely dissolved. Stir thoroughly for at least 2 to 3 minutes to ensure no sugar granules remain. This is a crucial step for a smooth texture.
- Cover the mixture and refrigerate it for a minimum of 4 hours, or ideally, overnight. This prolonged chilling of the base is the secret weapon against icy ice cream, allowing ingredients to fully meld and chill evenly before churning.
- Make sure your ice cream maker’s freezer bowl has been in the freezer for at least 24 hours, or until completely frozen solid, following your manufacturer’s instructions. A super cold bowl ensures quick freezing and prevents large ice crystals.
- Pour the thoroughly chilled ice cream base into your frozen ice cream maker bowl. Churn according to the manufacturer’s directions, typically for 20 to 25 minutes, or until the mixture is the consistency of soft-serve ice cream. Do not overchurn.
- During the last 5 minutes of churning, add the chopped dark chocolate chunks to the ice cream maker, allowing them to distribute evenly.
- Transfer the churned ice cream to a freezer-safe container, press a piece of parchment paper directly onto the surface to prevent ice crystals from forming on top, then cover tightly.
- Freeze for another 2 to 4 hours, or until firm, before serving. This final freeze allows the ice cream to firm up without developing large ice crystals, thanks to the perfectly prepared base and correct churning.