Layered Chocolate Vanilla Dream Pie Recipe
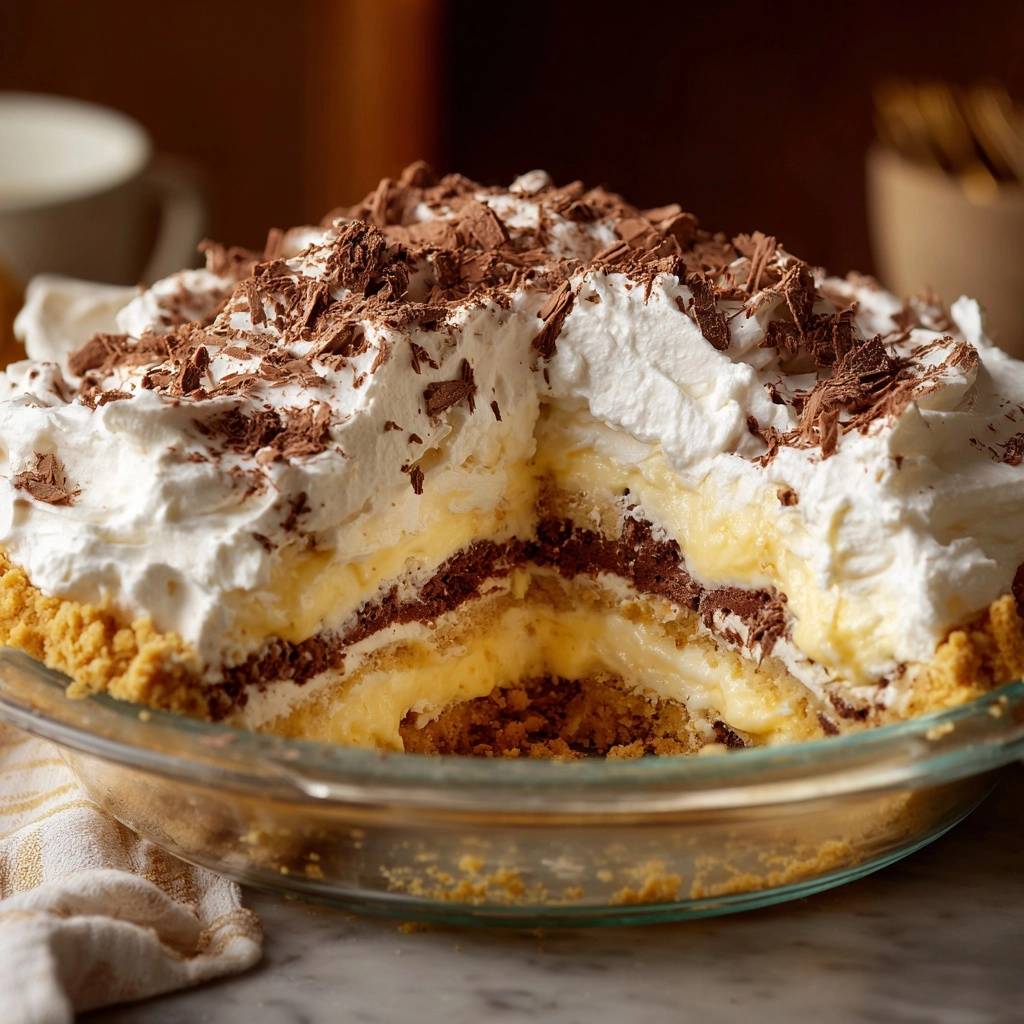
Picture this: you slice into a no-bake pie expecting that satisfying crunch, but instead you hit a soggy mess. Frustrating, right? This Layered Chocolate Vanilla Dream Pie fixes that forever with a freezer-chilled crust and a chocolate seal that keeps every bite crisp.
Therefore, you get those dreamy layers of thick chocolate pudding, smooth vanilla, and fluffy whipped topping without any mush. It’s the no-bake dessert that actually holds up. Plus, it comes together in minutes, no oven required.
Here’s the pro tip that makes this Layered Chocolate Vanilla Dream Pie shine: chill the graham crust in the freezer for 20 minutes first. That solidifies the butter, creating an unbreakable base before any wet layers touch it.
Why Layered Chocolate Vanilla Dream Pie Stays Crisp
Traditional no-bake pies fail because moist fillings soak right into the crust. However, this method changes everything. You freeze the graham base solid, then add a chocolate pudding barrier that locks out moisture completely.
In addition, each layer chills separately, so flavors stay distinct and the structure never wavers. That’s the science behind your perfect chocolate vanilla layered pie. No more disappointment, just reliable crispness.
More Chocolate to Try
For everyone who loves a good chocolate fix, these two desserts bring their own twist on rich, sweet indulgence.
- The Spooky Chocolate Bundt Cake gives you that same deep cocoa satisfaction with a fun, dramatic shape that stands out on any dessert table.
- Decadent Chocolate Cherry Dream Cake pairs chocolate with fruity cherry notes, adding a bright contrast to the creamy vanilla layers of the pie.
Freezer Chill Prevents Soggy Graham Crust
The 20-minute freezer step turns your crumb-butter mix into a rock-hard shield. At room temperature, it stays crumbly and absorbs everything. But frozen, it resists like iron.
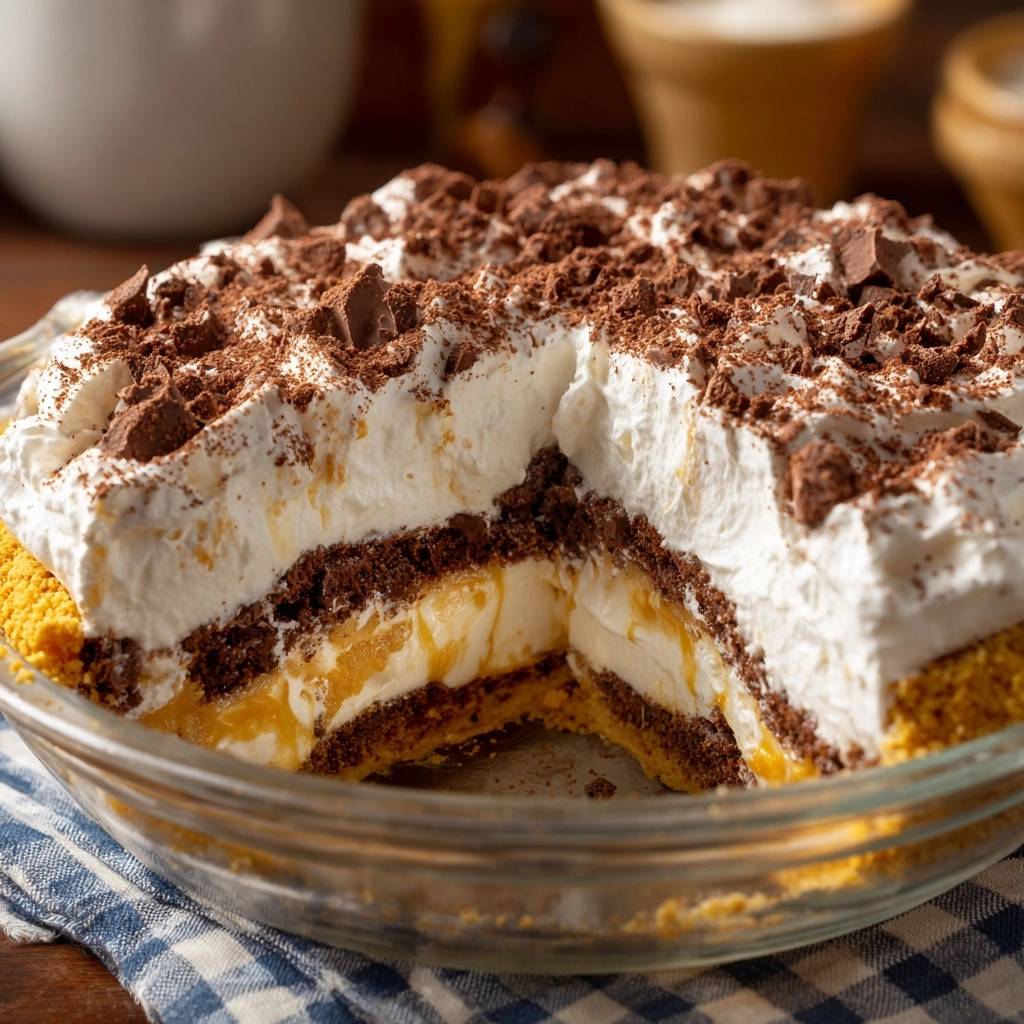
Press it into that wet sand texture first. You’ll smell the buttery graham aroma as it firms up. This single hack saves your Layered Chocolate Vanilla Dream Pie every time.
Chocolate Layer Seals Against Moisture
Chocolate pudding sets fast and thick, forming a waterproof coat over the crust. Its starch grabs the milk proteins instantly, blocking vanilla layer wetness. That’s your Layered Chocolate Vanilla Dream Pie crust protector.
Spread it smooth, and chill for 30 minutes. You won’t see any bleed-through. Crisp base guaranteed.
Gathering Ingredients for Dreamy Layers
Start with 2 cups graham cracker crumbs and 1/2 cup unsalted butter. Unsalted keeps the flavor clean, no salty surprises. These create the sturdy base that holds up under pudding weight.
Next, grab two 3.4 oz packages: one instant chocolate pudding mix, one vanilla. Divide 3 cups cold milk precisely, 1 1/2 cups each. Cold milk thickens it right away for stable layers.
Finish with an 8 oz tub of thawed whipped topping and 2 oz shaved dark chocolate. The topping stays fluffy without deflating. Shavings add crunch and that rich cocoa scent.
Graham Crumbs and Butter Base
Two cups fine crumbs plus 1/2 cup melted unsalted butter bind tightly. Unsalted butter melts evenly without overpowering. Press firm for sides that won’t slump.
Pudding Mixes and Cold Milk Ratios
Instant mixes whisk up in two minutes with cold milk. That 1 1/2 cup split ensures perfect thickness. Shave dark chocolate fresh for bitter snap against sweetness.
Whipped Topping for Stability
One 8 oz tub holds shape under weight better than fresh cream, which weeps. Thaw slowly in the fridge. It crowns your layered chocolate vanilla dream pie perfectly.
Equipment Essentials for Perfect Layers
You need a 9-inch pie plate, a sturdy whisk, and freezer space. A microplane shaves chocolate fine. No fancy gear, just basics that work.
Glass or metal plates chill faster than others. Measure milk accurately with cups. These ensure your Layered Chocolate Vanilla Dream Pie layers stay even.
9-Inch Pie Plate Selection
Pick one with deep sides for all four layers. Glass lets you watch the chill progress. It conducts cold evenly for quick setting.
Whisk and Measuring Precision
A sturdy whisk beats pudding smooth in two minutes. Use dry measuring cups for milk. Precision prevents runny disasters.
Science of No-Bake Pudding Layers
Instant pudding thickens when cold milk hits the starch and proteins. Whisking shears it into a gel that holds firm. Chocolate sets quicker due to cocoa density.
Therefore, layer-by-layer chills prevent mixing. Your chocolate vanilla layered pie stays separated and crisp. It’s simple chemistry for pro results.
Instant Pudding Thickening Mechanism
Cold milk activates the mix without heat. Starch swells and traps water fast. Two minutes of whisking creates that spoonable texture.
Chill Times Lock Layer Separation
Thirty minutes per layer firms the edges. Skip it, and they slide together. This keeps your Layered Chocolate Vanilla Dream Pie distinct.
Building the Layered Chocolate Vanilla Dream Pie
Follow these phases exactly for your Layered Chocolate Vanilla Dream Pie. Each step builds on the last with chill times. You’ll end up with crisp perfection.
Phase 1: Solidify Crisp Crust Base
Mix 2 cups crumbs with 1/2 cup melted butter to wet sand. Press evenly into the 9-inch plate, up the sides too. Freeze 20 minutes until hard as rock. This prevents sogginess in your Layered Chocolate Vanilla Dream Pie.
Phase 2: Spread Chocolate Seal Layer
Whisk chocolate pudding mix with 1 1/2 cups cold milk for two minutes. It thickens fast, smells deeply cocoa. Spread over crust, chill 30 minutes to seal tight.
Phase 3: Add Vanilla Pudding Layer
Whisk vanilla mix with 1 1/2 cups cold milk two minutes. Gently spread over chocolate. Chill 30 minutes more. Layers stay separate, no bleed.
Phase 4: Top with Whipped Cream
Spread thawed whipped topping evenly. Shave 2 oz dark chocolate over top for crunch. Chill the whole Layered Chocolate Vanilla Dream Pie 3 hours or overnight. Slice clean.
Avoiding Common Layered Pie Pitfalls
Many mess up by skipping chills or using warm milk. However, follow timings and stay cold. Your pie holds together beautifully.
Fixing Weak or Uneven Crust
Press harder with a glass bottom if crumbly. Add a teaspoon more melted butter if dry. Firm pressure up the sides prevents slips.
Preventing Pudding Layer Bleed
Always chill 30 minutes between layers. Use cold spoons to spread. Rushing causes slides and mush.
Ensuring Whipped Topping Stability
Thaw in fridge overnight. Don’t let it sit out. It stays perky on top.
Flavor Twists on Chocolate Vanilla Layers
Keep the crisp method, swap flavors for fun. These twists elevate your Layered Chocolate Vanilla Dream Pie without sogginess.
If you enjoy the crisp contrast of a chilled dessert, you will love these no-bake lemon delight bars.
Nutty Peanut Butter Variation
Swap vanilla pudding for peanut butter instant mix. It layers creamy and rich over chocolate. Chill same way for nutty contrast.
Fruity Berry Insert
Spoon a thin layer of raspberry jam between chocolate and vanilla. The tartness cuts sweetness. Freeze crust first to block extra moisture.
Coffee-Infused Chocolate Boost
Stir 1 tsp instant coffee into chocolate milk before whisking. Deepens flavor without bitterness. Sets just as firm.
Make-Ahead and Storage for Dream Pie
Assemble fully and chill overnight for best taste. It stores well, keeps crisp. Plan ahead easily.
Freezing Whole Pie Guide
Chill fully, then wrap tightly in plastic and foil. Freeze up to one month. Thaw in fridge overnight, crust stays crisp.
Refrigerator Storage Duration
Store covered in fridge up to four days. Use parchment under lid to avoid smudges. Slices clean with sharp knife.
Pairing Sides with Layered Chocolate Vanilla Dream Pie
Keep sides light to let the pie shine. Fresh picks balance the richness perfectly.
Fruit Companions
Serve with fresh raspberries or strawberries. Their tart juiciness contrasts the creamy layers. A handful adds color and pop.
If you enjoy the creamy texture here, these creamy lemon coconut bars offer a bright, refreshing contrast.
Beverage Matches
Black coffee cuts through the sweetness sharply. Sparkling cranberry juice refreshes too. Both enhance chocolate vanilla notes.
Troubleshooting Layered Chocolate Vanilla Dream Pie
Why is my Layered Chocolate Vanilla Dream Pie crust soggy?
You likely skipped the 20-minute freezer chill or didn’t press firmly. Always freeze the butter-crumb base solid first. The chocolate layer seals it, but only if the crust starts impenetrable. Next time, test by tapping; it should feel rock-hard.
Can I bake the crust for Layered Chocolate Vanilla Dream Pie?
No, baking defeats the no-bake ease and risks over-browning with moist layers. The freezer method solidifies butter faster without heat. It stays crisp longer too. Stick to chilling for foolproof results.
Can I substitute homemade pudding in Layered Chocolate Vanilla Dream Pie?
Homemade often stays too liquidy and soaks the crust. Instant mix thickens reliably in two minutes with cold milk. If you must, cook it extra thick and chill layers twice as long. Instant keeps it simple and crisp.
Are there dairy-free options for Layered Chocolate Vanilla Dream Pie?
Yes, use dairy-free graham crumbs, vegan butter, and chilled plant milk like almond or oat. Pick instant pudding mixes labeled dairy-free. Thaw coconut whipped topping. Chill times stay the same for crisp layers.
How do I get clean slices from Layered Chocolate Vanilla Dream Pie?
Chill overnight fully, then use a sharp, hot knife. Dip in hot water, wipe dry between cuts. The firm layers and chocolate seal make it slice like butter. Warm knife prevents dragging whipped topping.
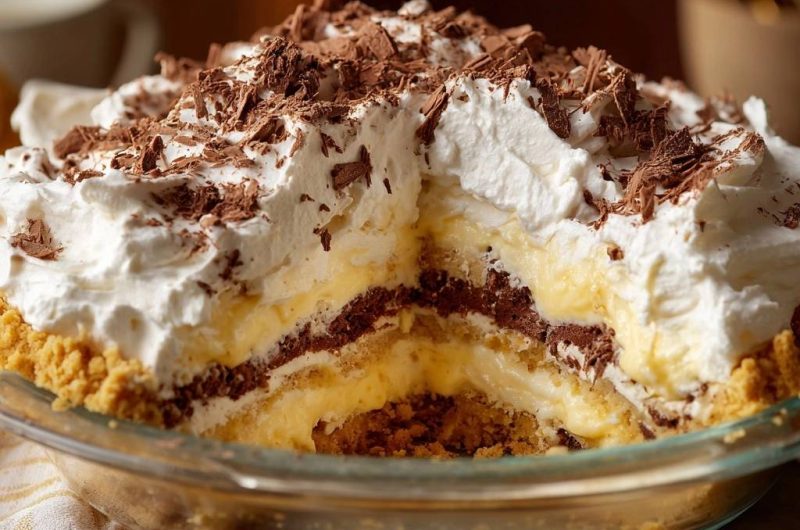
Chocolate Vanilla Dream Pie
Course: DessertCuisine: AmericanDifficulty: easy8
servings20
minutes350
kcal240
MinutesTired of no-bake pies where the crust turns mushy? This method chills the crust solid first, seals it with chocolate to lock out moisture, and layers creamy vanilla pudding and stable whipped cream for a crisp, dreamy pie every time.
Ingredients
2 cups graham cracker crumbs
1/2 cup unsalted butter, melted
1 package (3.4 oz) instant chocolate pudding mix
1 package (3.4 oz) instant vanilla pudding mix
3 cups cold milk, divided
1 tub (8 oz) whipped topping, thawed
2 oz dark chocolate bar, shaved for topping
Directions
- Mix graham cracker crumbs and melted butter until it resembles wet sand. Press firmly into a 9-inch pie plate, covering bottom and sides evenly. Chill in freezer for 20 minutes to solidify and prevent sogginess, the key step that keeps your crust crisp under moist layers.
- Prepare chocolate pudding: whisk 1 package chocolate pudding mix with 1 1/2 cups cold milk for 2 minutes until thickened. Spread evenly over chilled crust. This chocolate barrier seals the crust completely from future moisture. Chill 30 minutes to set firm.
- Prepare vanilla pudding: whisk 1 package vanilla pudding mix with 1 1/2 cups cold milk for 2 minutes until thickened. Spread over set chocolate layer. Chill 30 minutes to lock layers without blending or sogginess.
- Spread thawed whipped topping over vanilla layer. Sprinkle shaved chocolate on top.
- Chill entire pie for at least 3 hours or overnight. Slice and serve. Crust stays perfectly crisp thanks to the initial freeze and layer-by-layer chilling.
Notes
- Chilling the crust in the freezer first and using a chocolate barrier layer prevents sogginess. Chill pie overnight for best results.