Spooky Chocolate Bundt Cake: Flawless Release Every Time
Unlocking the Magic: Why This Spooky Chocolate Bundt Cake Is a Must-Bake
Say Goodbye to Sticky Pans: Our Perfect Release Secret
The biggest challenge with bundt cakes is often the release. Our recipe introduces a crucial cocoa powder dusting technique, instead of traditional flour. This creates a non-stick layer that won’t leave unsightly white residue on your dark chocolate cake.
You’ll achieve a clean, beautifully sculpted cake every time, eliminating all the guesswork and frustration. It’s the secret to bundt cake confidence.
Beyond Basic: A Deep, Rich Chocolate Flavor
This isn’t just any chocolate cake; it’s an intensely flavored experience. We use a generous amount of unsweetened cocoa powder, further enhanced by hot brewed coffee.
The hot coffee “blooms” the cocoa, deepening its natural richness without adding a coffee taste. This creates an incredibly moist crumb and a profound chocolate essence that truly stands out.
Effortless Elegance for Your Halloween Haunt
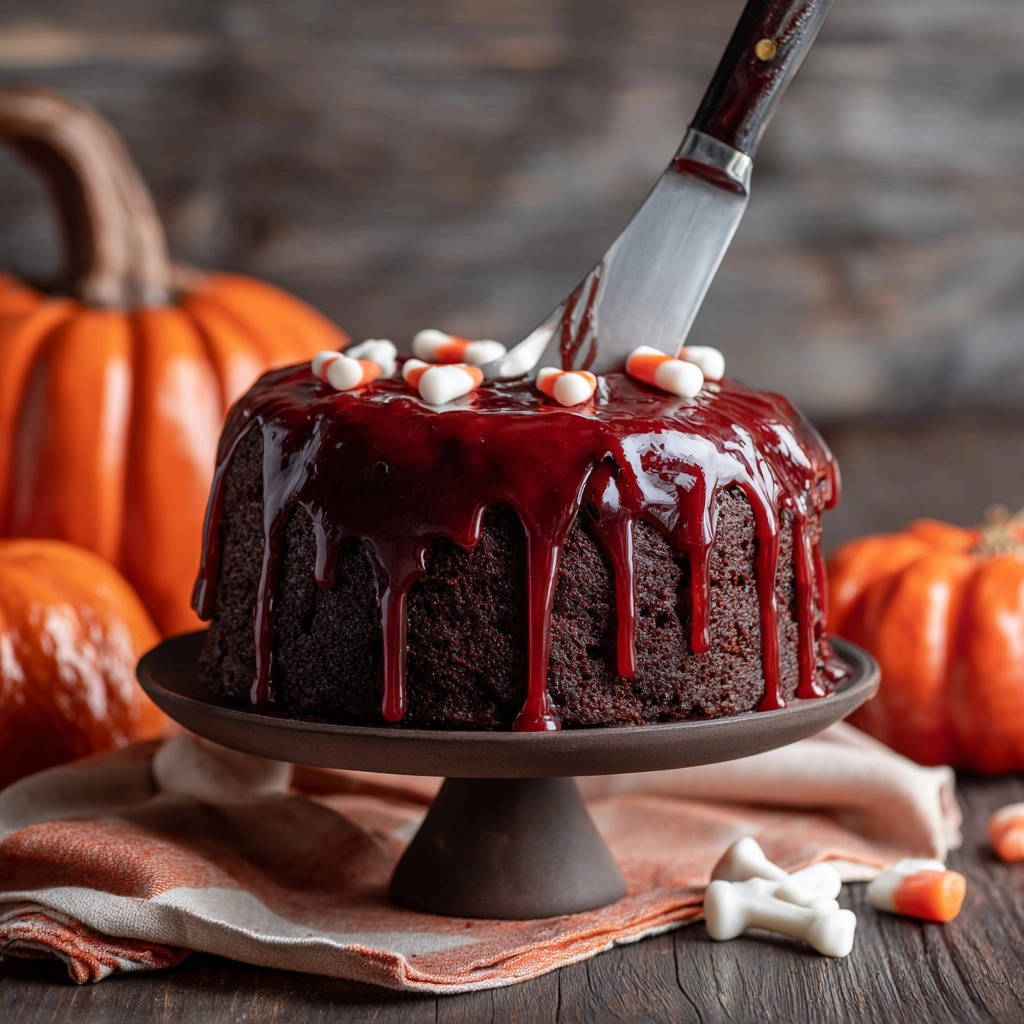
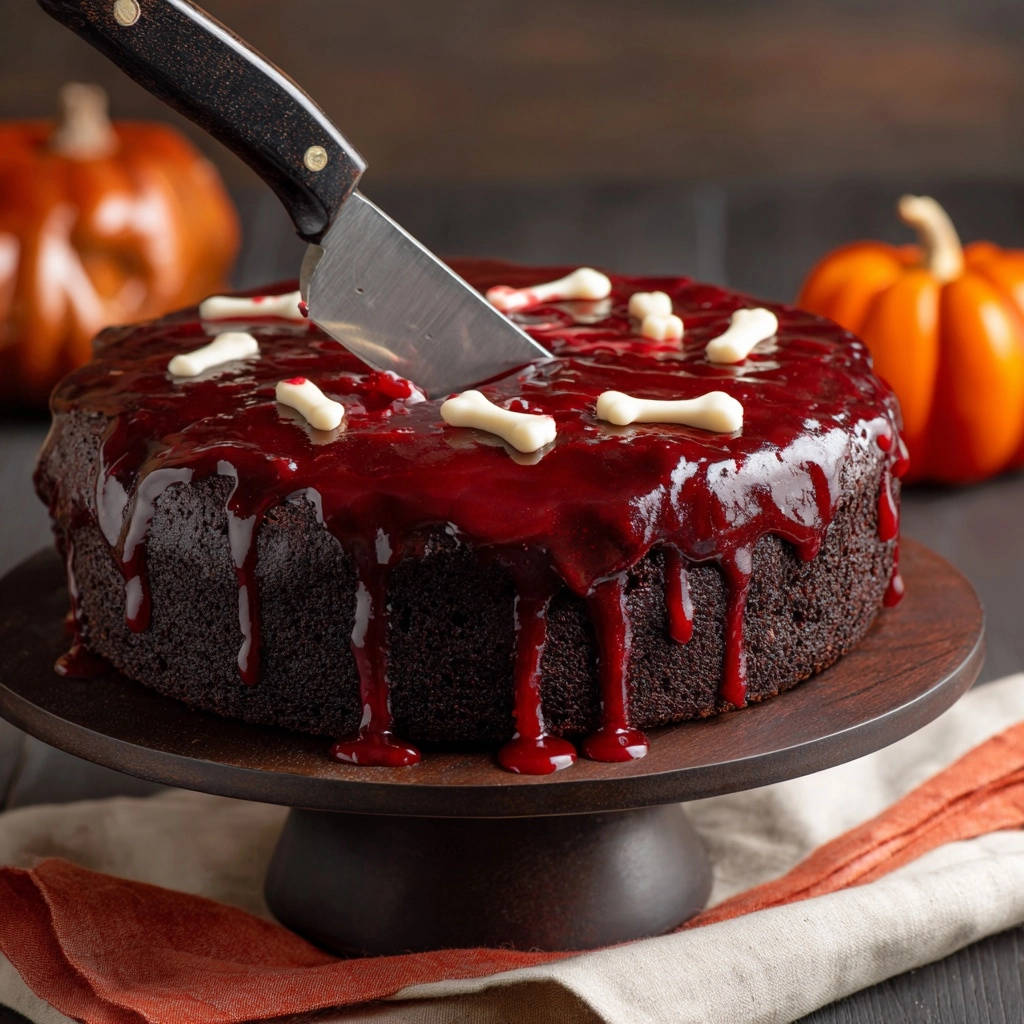
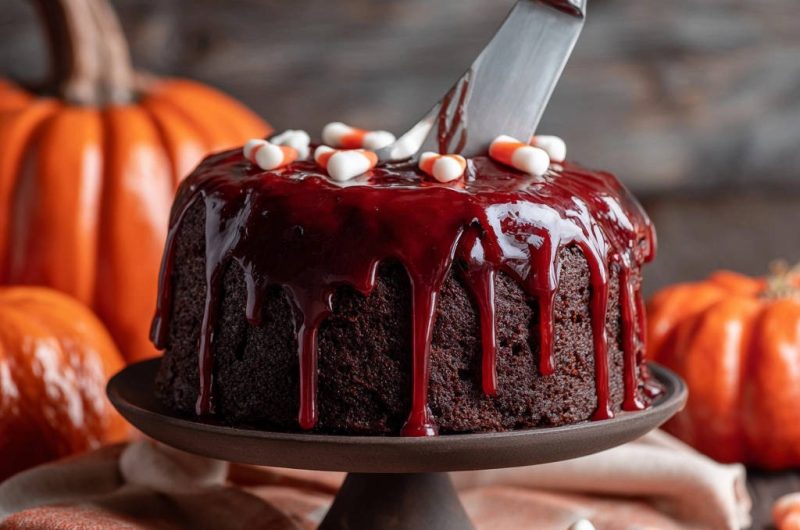
Despite its impressive appearance, this Spooky Chocolate Bundt Cake is remarkably straightforward to prepare. The dramatic blood-red glaze and playful Halloween candy decorations add instant festive flair.
It’s the perfect dessert for entertaining, offering both visual appeal and undeniable deliciousness with minimal fuss. Your guests will be delightfully impressed.
For a perfect pairing, try our Ultra Moist Chocolate Layer Cake Recipe.
The Building Blocks of Spooky Chocolate Bundt Cake Perfection
For the Irresistible Chocolate Bundt Cake Base
All-Purpose Flour, Baking Soda, and Baking Powder: These form the cake’s structure and provide the lift, ensuring a light yet moist crumb. Proper leavening is key to a tender texture.
Granulated Sugar: Sugar sweetens the cake and helps retain moisture, contributing to its luscious texture. It also aids in browning for a beautiful crust.
Unsweetened Cocoa Powder: This is the heart of the chocolate flavor. Using good quality cocoa powder makes a significant difference in depth and richness.
Salt: A pinch of salt balances the sweetness and enhances all the other flavors in the cake, making the chocolate taste even more pronounced.
Buttermilk: Buttermilk adds a subtle tang, tenderizes the crumb, and contributes incredible moisture due to its acidity interacting with the leavening agents.
Vegetable Oil: Oil provides moisture and a tender crumb, ensuring the cake remains soft and delicious for days. Unlike butter, it keeps the cake moist even when cold.
Large Eggs: Eggs bind the ingredients, add richness, and contribute to the cake’s structure and rise. They create a stable emulsion in the batter.
Vanilla Extract: Vanilla complements and amplifies the chocolate flavor, adding a warm, aromatic depth that rounds out the cake’s profile.
Hot Brewed Coffee: This ingredient is a secret weapon. It activates the cocoa powder, intensifying the chocolate flavor without imparting a coffee taste to the final cake.
Crafting the Blood Red Glaze
Powdered Sugar: This fine sugar is the base for our smooth, quick-setting glaze. Its powdery texture dissolves easily, creating a silky finish.
Milk or Water: Used to adjust the glaze consistency, making it pourable yet thick enough to cling to the cake. Start with less and add slowly for perfect results.
Red Food Coloring: Gel food coloring is essential here. It provides a vibrant, deep “blood red” hue without thinning the glaze, ensuring maximum spooky impact.
Ghoulish Garnishes: Halloween Candy Decorations
Halloween Candies: Candy corn, gummy worms, bone shapes, or edible googly eyes transform your cake into a festive masterpiece. They add playful texture and a pop of color.
These decorations are crucial for the Spooky Chocolate Bundt Cake’s theme. Place them on the glaze immediately after pouring, before it sets, to ensure they adhere.
Essential Tools for Your Spooky Chocolate Bundt Cake Adventure
Must-Have Baking Equipment
10 to 12-Cup Bundt Pan: The star of the show! A good quality non-stick bundt pan with intricate designs helps achieve those beautiful ridges.
Large and Medium Mixing Bowls: Essential for separating wet and dry ingredients before combining. This organized approach ensures thorough mixing.
Whisks: For aerating dry ingredients and thoroughly combining wet ingredients by hand, if not using an electric mixer.
Electric Mixer (Handheld or Stand): While not strictly necessary, an electric mixer makes combining ingredients quick and effortless, preventing overmixing.
Wire Rack: Crucial for cooling the cake evenly after baking and allowing the glaze to set beautifully without sticking to surfaces.
Specialty Items for the Perfect Finish
Pastry Brush: Absolutely vital for thoroughly greasing every nook and cranny of your bundt pan. It ensures that critical flawless release, as discussed in the `
Prepping Your Pan
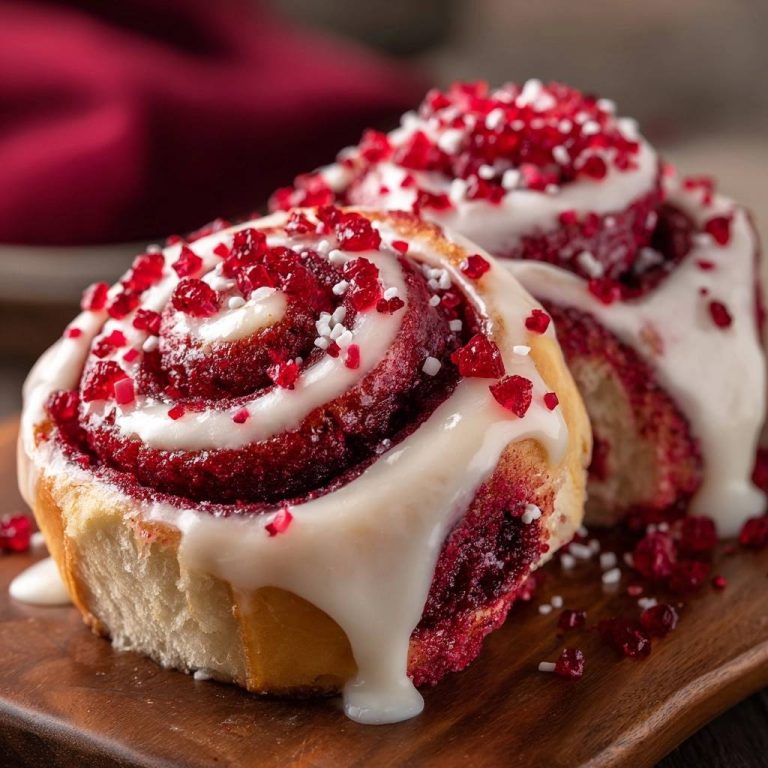
` section, and is also very useful for other intricate baking tasks like brushing simple syrups on cakes or pastries like these delicious cinnamon sugar pull-apart rolls.Wooden Skewer or Toothpick: Your reliable indicator for cake doneness. Inserted into the center, it should come out with moist crumbs, not wet batter.
Baking Your Spooky Chocolate Bundt Cake: A Detailed Guide
Prepping Your Pan for the Flawless Release (Crucial Step!)
This is the absolute secret to a perfect, pristine Spooky Chocolate Bundt Cake. Begin by thoroughly greasing a 10 to 12-cup bundt pan with softened butter or vegetable shortening. Ensure every single crevice is covered, leaving no spot untouched.
Use a pastry brush or your fingertips to work the fat into all the intricate designs, making sure the entire surface is coated. This meticulous step prevents any part of the cake from sticking.
Next, generously dust the greased pan with unsweetened cocoa powder. This is crucial: using cocoa powder instead of flour prevents any white residue on your dark chocolate cake, maintaining its rich color. For similar bundt cake success, remember these pan preparation techniques even when baking something like a classic marble bundt cake.
Tap the pan all around to distribute the cocoa powder evenly, ensuring it adheres to the greased surface. Finally, invert the pan and gently tap out any excess cocoa powder. This cocoa coating provides a flawless, non-stick layer for your cake.
- Step 1: Preheat Oven and Prepare Dry Ingredients.
Preheat your oven to 350F (175C). In a large bowl, whisk together the flour, granulated sugar, cocoa powder, baking soda, baking powder, and salt. This ensures all leavening and flavor components are evenly distributed.
- Step 2: Whisk Together Wet Ingredients.
In a separate medium bowl, combine the buttermilk, vegetable oil, eggs, and vanilla extract. Whisk until everything is smoothly incorporated.
- Step 3: Combine Wet and Dry Mixtures.
Pour the wet ingredients into the dry. Mix on low speed with an electric mixer, or by hand, until just combined. Be careful not to overmix, as this can lead to a tough, dense cake.
- Step 4: Incorporate the Hot Brewed Coffee.
Carefully stir in the hot brewed coffee. The batter will be thin, which contributes to the cake’s moist texture. The hot coffee also deepens the chocolate flavor without making the cake taste like coffee.
- Step 5: Fill the Bundt Pan.
Pour the thin batter evenly into your meticulously prepared bundt pan. Ensure it’s filled approximately two-thirds full.
- Step 6: Bake to Spooky Perfection.
Bake for 35-45 minutes, or until a wooden skewer inserted into the center of the cake comes out with moist crumbs, not wet batter. Baking time can vary, so visual and skewer tests are key.
- Step 7: The Critical Cooling Phase in the Pan.
Let the cake cool in the bundt pan on a wire rack for exactly 10 minutes. This allows the cake to firm up sufficiently for a clean release without breaking.
- Step 8: The Grand Unveiling!
After 10 minutes, place a wire rack on top of the bundt pan and carefully invert the cake. The cocoa powder coating should ensure a clean release. Lift the pan slowly; if it doesn’t immediately release, gently tap the bottom of the pan a few times. Let the cake cool completely on the wire rack before glazing.
Whipping Up the Blood Red Glaze
- Step 9: Mix Glaze Ingredients.
In a medium bowl, whisk the powdered sugar with 3 tablespoons of milk or water until smooth. Add more liquid, a teaspoon at a time, until you reach a pourable but not too thin consistency.
- Step 10: Achieve Spooky Color and Consistency.
Add red food coloring, drop by drop, until you achieve a deep “blood red” color. Gel food coloring works best for intense hues without adding excess liquid.
Decorating Your Hauntingly Delicious Spooky Chocolate Bundt Cake
- Step 11: Glaze the Cooled Cake.
Once the cake is completely cool, place it on a serving plate or cake stand. Slowly pour the blood red glaze over the top, letting it drip dramatically down the sides for a truly spooky effect.
- Step 12: Add Halloween Candies.
Decorate immediately with Halloween candies like candy corn, gummy worms, or bone shapes before the glaze sets. This ensures they adhere beautifully to your Spooky Chocolate Bundt Cake.
Chef’s Secrets: Elevate Your Spooky Chocolate Bundt Cake Game
Don’t Overmix the Batter: Overmixing develops gluten, leading to a tough, dense cake. Mix only until the ingredients are just combined for a tender, moist crumb.
The Magic of Hot Coffee: Using hot brewed coffee not only deepens the chocolate flavor but also helps to ‘bloom’ the cocoa powder, intensifying its richness. Don’t worry, your cake won’t taste like coffee!
Buttermilk is Best (But Substitutable): Buttermilk adds a subtle tang and incredible moisture. If you don’t have it, combine 1 cup of regular milk with 1 tablespoon of white vinegar and let it sit for 5 minutes before using.
Gel Food Coloring for Vibrancy: For that truly “blood red” glaze, gel food coloring is superior to liquid. It provides a more concentrated color without watering down your glaze.
Patience in Cooling is Key: Sticking to the 10-minute cooling time in the pan is crucial for a clean release. Then, allow the cake to cool completely on a wire rack before glazing, or your glaze will melt right off. For another delightful chocolate treat with stunning presentation, consider our chocolate crumb cheesecake bars, where similar cooling precision ensures a perfect result.
Troubleshooting Your Spooky Chocolate Bundt Cake: Common Issues Solved
My Spooky Chocolate Bundt Cake is Stuck! What Went Wrong?
If your cake didn’t release perfectly, don’t panic. Gently tap the pan’s bottom and sides. If it’s still stubborn, try letting it cool for another 5-10 minutes in the pan, as a slightly firmer cake can sometimes release better. Ensure your greasing and cocoa dusting technique was thorough in every crevice.
The Cake is Dry or Dense.
A dry cake is often a sign of overbaking. Ensure you’re testing for doneness with a skewer and removing it as soon as it comes out with moist crumbs. Density can be caused by overmixing the batter, which develops too much gluten. Mix only until just combined.
My Blood Red Glaze is Too Runny or Too Thick.
If the glaze is too runny, whisk in more powdered sugar, a tablespoon at a time, until the desired consistency is reached. If it’s too thick, add milk or water, a teaspoon at a time, until it’s pourable but still coats a spoon.
Serving, Storing, and Planning Your Spooky Chocolate Bundt Cake
Spooky Serving Suggestions
Beyond its festive candies, enhance your Spooky Chocolate Bundt Cake with a dollop of freshly whipped cream, a scoop of vanilla bean ice cream, or a dusting of powdered sugar. For an extra eerie effect, arrange dry ice (safely!) around the serving platter for a smoky ambiance.
Best Practices for Storing Leftovers
Store your glazed Spooky Chocolate Bundt Cake in an airtight container at room temperature for up to 3-4 days. For longer storage, you can refrigerate it for up to a week. Ensure it’s tightly sealed to prevent it from drying out.
Can I Make This Spooky Chocolate Bundt Cake Ahead?
Absolutely! The cake itself can be baked 1-2 days in advance and stored unglazed in an airtight container at room temperature. The glaze can be made a day ahead and stored in the refrigerator, then whisked well before pouring. Assemble and decorate just before serving for the freshest look.
Your Spooky Chocolate Bundt Cake Questions Answered!
Can I use regular milk instead of buttermilk for this recipe?
Yes, you can easily substitute buttermilk! Simply measure out 1 cup of regular milk (any fat percentage) and stir in 1 tablespoon of white vinegar or lemon juice. Let it sit for 5 minutes until it slightly curdles, then use it as directed in the recipe.
What if I don’t have hot brewed coffee on hand?
If you don’t have hot brewed coffee, you can dissolve 1-2 teaspoons of instant coffee granules or espresso powder in 1 cup of hot water. Alternatively, you can use plain hot water, but the coffee significantly enhances the chocolate flavor without making the cake taste like coffee itself.
Can I make this Spooky Chocolate Bundt Cake recipe gluten-free?
While this specific recipe uses all-purpose flour, many readers have had success substituting a 1:1 gluten-free baking flour blend. Ensure your chosen blend contains xanthan gum for best results. The texture might vary slightly, but it should still be delicious!
How far in advance can I decorate the cake with candies?
It’s best to decorate your Spooky Chocolate Bundt Cake with candies immediately after pouring the glaze, before the glaze sets. This ensures the candies adhere properly. If you wait too long, they may not stick. For more festive and spooky treats, you might also enjoy making our decadent pumpkin pie truffles!
Ready to Create Your Own Spooky Chocolate Bundt Cake Masterpiece?
Now that you’re armed with the secrets to a perfectly released, moist, and deeply chocolatey Spooky Chocolate Bundt Cake, it’s time to unleash your inner Halloween baker! This showstopping dessert is sure to be the star of any ghoulish gathering.
Don’t forget to share your eerie creations with us on social media using #SpookyChocolateBundtCake, and let us know in the comments below how your cake turned out!
Chocolate Bundt Cake
Course: DessertCuisine: AmericanDifficulty: medium10
servings25
minutes35
minutes350
kcal120
minutesDread making bundt cakes? Not anymore! This recipe guarantees a perfect, flawless release every time, turning out a terrifyingly good chocolate bundt cake. Top it with a blood-red glaze and Halloween candies for a truly spooky treat.
Ingredients
For the Cake:
2 cups all purpose flour
1 3/4 cups granulated sugar
3/4 cup unsweetened cocoa powder
2 teaspoons baking soda
1 teaspoon baking powder
1 teaspoon salt
1 cup buttermilk (or 1 cup milk with 1 tablespoon white vinegar, let sit 5 minutes)
1/2 cup vegetable oil
2 large eggs
1 teaspoon vanilla extract
1 cup hot brewed coffee
For the Blood Red Glaze:
2 cups powdered sugar
3 4 tablespoons milk or water
Red food coloring (gel works best for deep color)
For Decoration:
Halloween candies (candy corn, bone shapes, etc.)
Directions
- Preheat your oven to 350F (175C).
- The Secret to a Perfect Release: This is crucial for avoiding a sticky bundt pan mess. Thoroughly grease a 10 to 12 cup bundt pan with softened butter or vegetable shortening, ensuring every crevice is covered. Use a pastry brush or your fingers to get into all the nooks and crannies. Then, generously dust the pan with unsweetened cocoa powder (instead of flour, which can leave white residue on a dark cake). Tap the pan all around to distribute the cocoa powder evenly, then invert and tap out any excess. This cocoa coating provides a perfect non-stick layer.
- In a large bowl, whisk together the flour, granulated sugar, cocoa powder, baking soda, baking powder, and salt.
- In a separate medium bowl, whisk together the buttermilk, vegetable oil, eggs, and vanilla extract until well combined.
- Pour the wet ingredients into the dry ingredients and mix on low speed with an electric mixer, or by hand, until just combined. Do not overmix.
- Carefully stir in the hot brewed coffee until the batter is smooth. The batter will be thin.
- Pour the batter into your meticulously prepared bundt pan.
- Bake for 35 45 minutes, or until a wooden skewer inserted into the center of the cake comes out with moist crumbs, not wet batter.
- Let the cake cool in the bundt pan on a wire rack for exactly 10 minutes. This allows the cake to firm up slightly.
- After 10 minutes, place a wire rack on top of the bundt pan and carefully invert the cake. The cocoa powder coating should ensure a clean release. Lift the pan slowly. If it doesn’t immediately release, gently tap the bottom of the pan a few times. Let the cake cool completely on the wire rack before glazing.
- To make the glaze: In a medium bowl, whisk the powdered sugar with 3 tablespoons of milk or water until smooth. Add more liquid, a teaspoon at a time, until you reach a pourable but not too thin consistency. Add red food coloring, drop by drop, until you achieve a deep “blood red” color.
- Once the cake is completely cool, place it on a serving plate or cake stand. Slowly pour the blood red glaze over the top, letting it drip down the sides for a spooky effect.
- Decorate immediately with Halloween candies like candy corn and bone shapes before the glaze sets. Serve and enjoy!
Notes
- Don’t skip the cocoa powder dusting for a perfect, flawless bundt cake release!