Mastering Braised Mediterranean Chicken Thighs with Crispy Skin
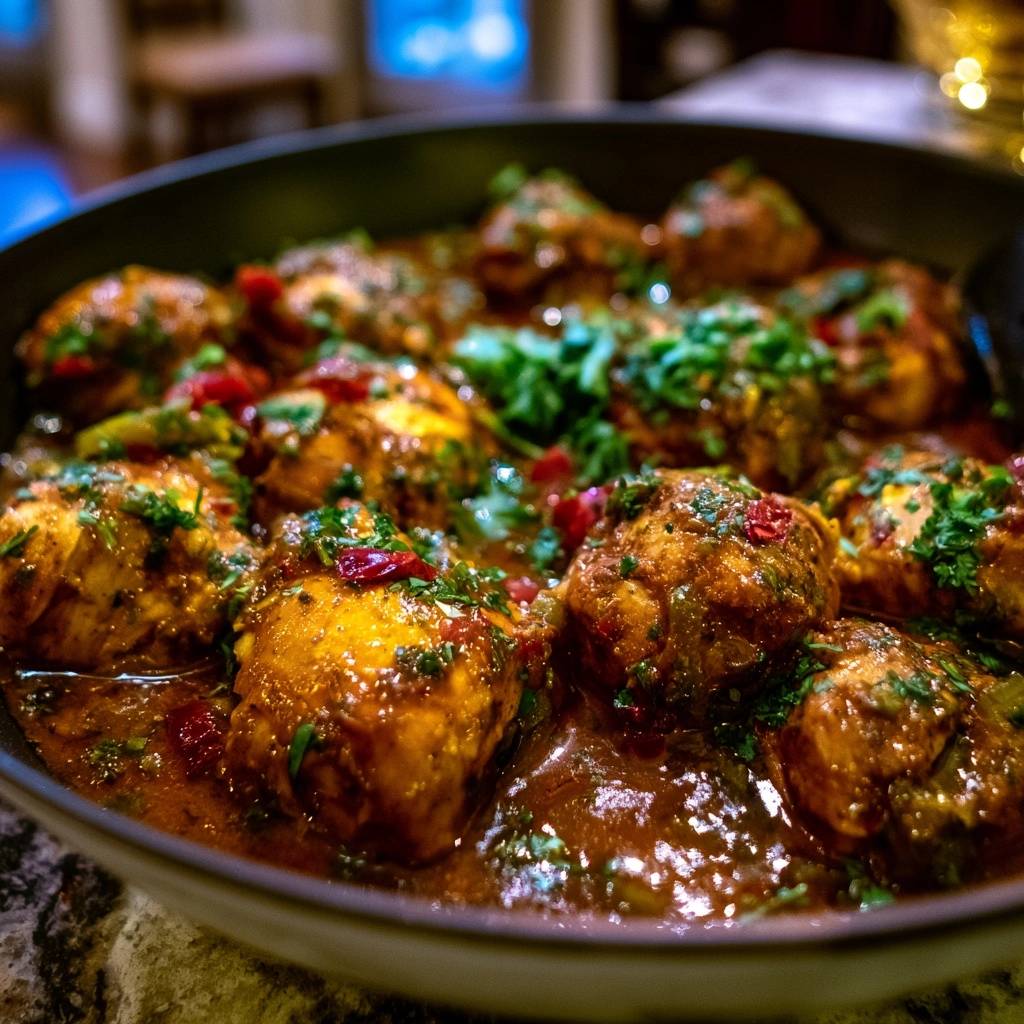
Most home cooks avoid braising chicken because they dread the inevitable result: rubbery, pale, and unappealing skin. While the meat underneath might be tender, the texture of the skin usually suffers the moment it hits the liquid. This recipe flips that script by using a specific shallow-braise method that protects the integrity of the exterior while the dark meat transforms into something succulent and fall-off-the-bone tender.
You’re going to love the sensory contrast in this dish. The smoky depth of the paprika and the sweetness of the sautéed bell peppers create a rich, concentrated sauce that coats the back of a spoon. Because we keep the skin above the liquid line, you get that satisfying crackle and rendered fat that traditional slow-cooking destroys. It’s a vibrant, one-pan meal that brings the bright flavors of the Mediterranean straight to your dinner table without the soggy disappointment.
The secret to this success lies in the moisture control. I’ve found that even a tiny bit of surface water on the raw chicken will cause it to steam rather than sear. By aggressively drying the meat and using a high-heat rendering phase, we build a flavor foundation that carries the entire dish. You aren’t just cooking chicken; you’re engineering a perfect balance of textures.
The Science of Rendering Fat for Better Texture
When you cook bone-in, skin-on chicken thighs, you’re working with a cut that’s naturally resilient. Unlike chicken breasts, which dry out the moment they’re overexposed to heat, thighs contain enough connective tissue and fat to withstand a long simmer. However, that fat needs to be managed. If you don’t render it out during the initial sear, it stays trapped under the skin, resulting in a greasy, flabby texture that no one wants to eat.
The Maillard reaction is your best friend here. This chemical reaction between amino acids and reducing sugars gives browned food its distinctive flavor. To achieve this, moisture is your primary enemy. If the chicken skin is damp when it hits the oil, the energy of the pan goes into evaporating that water instead of browning the proteins. This is why patting the meat dry with paper towels is a non-negotiable step for a professional-grade result.
Once the chicken is in the pan, the skin acts as a protective thermal barrier. As the meat simmers in the aromatic broth, the skin side stays exposed to the dry heat of the air inside the skillet. This prevents the skin from re-absorbing moisture from the braising liquid. The result is a piece of poultry that is effectively poached from the bottom and roasted from the top simultaneously.
Essential Components for Mediterranean Braised Chicken
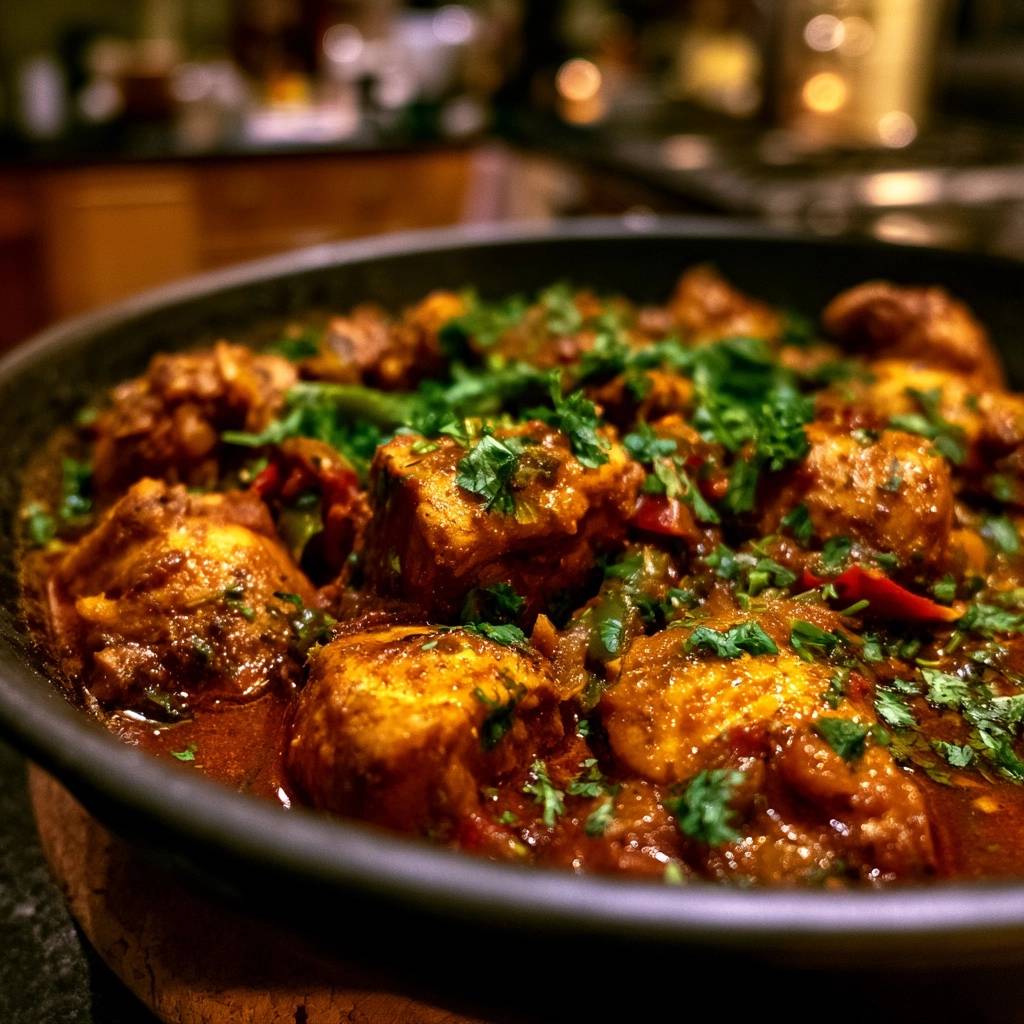
Success starts with the quality of your fats and spices. Use a high-quality extra virgin olive oil with a high smoke point to start the sear. The smoked paprika is the heavy lifter in this spice profile, providing a deep, earthy red color and a hint of woodsmoke without overwhelming the palate with heat. It bridges the gap between the savory chicken and the sweet vegetables.
The bell peppers aren’t just for color; they provide the structural base of the sauce. Red peppers offer a high sugar content that caramelizes beautifully, while green peppers add a subtle, necessary bitterness that cuts through the richness of the chicken fat. When these soften into the tomato paste and garlic, they create a thick, jammy consistency that clings to the meat.
For the liquid, I always recommend a low-sodium chicken broth. As the sauce simmers and the lid is eventually removed, the liquid reduces and the flavors concentrate. If you start with a full-sodium broth, the final sauce can become unpleasantly salty. Using a lower-sodium base gives you total control over the seasoning, allowing the natural flavors of the oregano and garlic to shine through.
Selecting the Right Skillet or Braiser
You need a heavy-bottomed vessel for this recipe, preferably cast iron or heavy stainless steel. These materials hold heat consistently, which is vital when you add the cold chicken to the pan. A thin, cheap pan will drop in temperature immediately, causing the chicken to release its juices and boil in its own liquid rather than searing.
Size also matters. If you crowd the thighs into a pan that’s too small, the moisture trapped between them will steam the skin. Choose a skillet large enough to give each thigh a little breathing room. You also need a tight-fitting lid for the simmering phase to ensure the heat circulates evenly around the top of the chicken.
Step-by-Step: Searing for Maximum Flavor Extraction
Once your oil is shimmering and just starting to wispy-smoke, place the chicken skin-side down. Now, here is the hardest part: don’t touch it. You might be tempted to peek or move them around, but every time you lift the meat, you break the contact with the heat and interrupt the crust formation. Let them sizzle for a full 6 to 8 minutes.
You’re looking for a deep, mahogany gold color. If the skin sticks to the pan when you try to flip it, it isn’t ready yet. The meat will naturally release from the surface once the proteins have properly caramelized. When you finally flip the thighs, you’ll see a beautiful, rendered surface that looks like it came out of a high-end bistro kitchen.
After searing the bottom for just a couple of minutes to lock in the juices, remove the chicken to a plate. Don’t worry that it isn’t cooked through yet; the braise will handle that. Look at the liquid left in the pan. That golden fat is liquid gold, packed with chicken essence. We’re going to use that exact fat to sauté our peppers and aromatics, layering flavor upon flavor.
Building the Aromatic Braising Base
After the peppers have softened, it’s time to build the “fond.” That’s the French term for the browned bits stuck to the bottom of your skillet. When you stir in the tomato paste and garlic, the paste will begin to darken and smell slightly sweet. Be careful here; garlic can turn bitter in seconds if it burns, so keep everything moving with a wooden spoon.
Deglazing is the most satisfying part of the process. As you pour in the chicken broth, the liquid will bubble violently. Use your spoon to scrape every single bit of that caramelized fond off the bottom. Those bits dissolve into the broth, turning a simple liquid into a complex, savory sauce. This is the difference between a bland stew and a professional braise.
The tomato paste acts as a natural thickener here. As it integrates with the broth and the juices from the peppers, it creates a velvety texture. By the time you’re ready to add the chicken back in, the kitchen should smell like a rustic villa in the hills of Greece or Italy. The base is now ready to transform the chicken into something spectacular.
The Shallow-Liquid Braising Technique
This is the “Halfway Rule” that changes everything. When you return the chicken to the skillet, nestle the thighs into the peppers and broth skin-side UP. The liquid should only reach about halfway up the side of the meat. If you submerge the skin, you’ve just wasted all that hard work you put into the sear. The skin needs to stay high and dry.
Cover the pan and turn the heat down to a gentle simmer. For the next 20 minutes, the bottom half of the chicken is essentially poaching in a flavorful bath, which keeps the meat incredibly moist. Meanwhile, the steam trapped under the lid cooks the top of the chicken without saturating the skin. It’s a dual-zone cooking method that yields perfect results every time.
For the final 5 minutes, take the lid off. This is a crucial step that many people skip. Removing the lid allows the excess moisture to escape, which thickens the sauce into a rich glaze. It also allows the dry heat to hit the skin one last time, ensuring it stays firm and flavorful rather than becoming soft during the resting period.
Troubleshooting Common Braising Obstacles
If you find that your sauce is still too thin after the lid-off simmer, don’t panic. Simply remove the chicken to a serving platter and turn the heat up to medium-high for two minutes. The sauce will reduce rapidly. Conversely, if the pan looks like it’s running dry during the simmer, add a splash more broth or even a little water to keep the bottom from scorching.
Burning the garlic is a common mistake that can ruin the whole batch. If you see the garlic turning dark brown or black before you add the liquid, it’s best to wipe the pan and start the aromatic step over. The bitterness of burnt garlic will permeate the entire sauce and can’t be masked by other spices.
You can check for doneness without a thermometer by looking at the bone. When the meat starts to slightly pull away from the bone and the juices run clear when pierced, it’s ready. The meat should feel tender when pressed with a fork, offering very little resistance. If it feels bouncy or tough, it needs another five minutes under the lid.
Optimal Pairings for Mediterranean Poultry
You want a side dish that can act as a sponge for that incredible red pepper sauce. A lemon-herb couscous is a fantastic choice because the tiny grains soak up the broth without becoming heavy. Alternatively, a pile of creamy mashed potatoes or roasted fingerling potatoes provides a comforting, starchy base that complements the smoky paprika perfectly.
If you want to keep things lighter, a thick slice of toasted sourdough bread is all you really need to mop up the skillet. The acidity of the sourdough balances the richness of the chicken fat. I also love serving this alongside a bright, crisp salad. A simple mix of cucumbers, tomatoes, and red onions with a heavy squeeze of lemon juice provides a refreshing contrast to the warm, braised flavors.
Don’t forget the garnish. The fresh parsley isn’t just for looks; it adds a hit of grassy freshness that wakes up the cooked-down flavors of the peppers and garlic. Sprinkle it on right before you bring the skillet to the table for the best aromatic impact.
Storage and Reheating Without Losing Texture
Leftovers of this dish are actually a treat because the flavors in the sauce continue to develop overnight. Store the chicken and sauce together in an airtight container in the refrigerator for up to three days. The sauce will likely thicken into a gel-like consistency due to the natural collagen from the chicken bones, but it will liquefy again once heated.
Whatever you do, avoid the microwave for reheating if you want to save the skin. The microwave will turn that beautiful skin into a rubbery mess. Instead, place the chicken and sauce in a small baking dish, cover the meat loosely with foil (leaving the skin exposed if possible), and heat in a 350°F oven for about 15 minutes.
If you have an air fryer, that’s even better. Heat the sauce separately on the stove and pop the chicken thighs into the air fryer at 375°F for 4 to 5 minutes. This will bring the skin back to its original crispy glory while the meat stays juicy. It’s the best way to enjoy “day two” chicken without sacrificing the quality of the meal.
Expert Troubleshooting and Technical FAQ
Why is my chicken skin still soft after searing?
Soft skin usually happens for two reasons: the pan wasn’t hot enough or you crowded the pan. If the oil isn’t shimmering, the fat won’t render quickly. If the thighs are touching each other, the moisture gets trapped between them, creating steam. Make sure you hear a loud sizzle the moment the meat hits the oil and work in batches if your skillet is small.
Can I use chicken breasts for this recipe?
I don’t recommend using chicken breasts for this specific braising technique. Breasts are very lean and lack the connective tissue found in thighs, meaning they will likely become dry and stringy during a 25-minute simmer. Additionally, without the thick skin and bone, you lose the thermal protection that allows the meat to stay succulent while the sauce reduces.
How do I prevent the smoked paprika from tasting bitter?
Smoked paprika has a high sugar content and can burn very easily if exposed to direct heat for too long. To protect the flavor, add the paprika at the same time as the tomato paste and only cook it for about 30 to 60 seconds before adding the chicken broth. The liquid immediately drops the temperature of the pan and stops the spices from scorching.
What is the best way to deglaze the pan?
The best way to deglaze is to use a flat-edged wooden spoon or spatula. Once you pour in the room-temperature broth, the liquid will lift the caramelized bits. Use firm strokes to scrape the bottom of the skillet until the surface feels smooth. Those browned bits are concentrated umami and are essential for a professional-tasting sauce.
Can I add other vegetables like olives or capers?
Absolutely. Mediterranean flavors are very forgiving. You can add a handful of kalamata olives or a tablespoon of drained capers during the last 10 minutes of simmering. Just be mindful of the salt content; both olives and capers are very briny, so you may want to reduce the amount of added salt in the initial seasoning of the chicken.
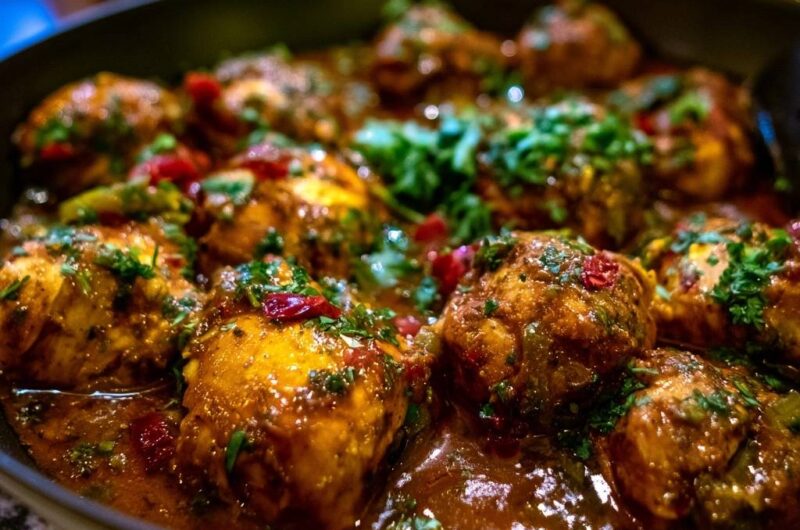
Braised Mediterranean Chicken Thighs
Course: Main CourseCuisine: MediterraneanDifficulty: easy4
servings15
minutes35
minutes50
Minutes420
kcalMediterranean
Ingredients
8 bone-in, skin-on chicken thighs
2 tablespoons olive oil
1 large red bell pepper, diced
1 green bell pepper, diced
4 cloves garlic, minced
1 cup chicken broth
1 tablespoon tomato paste
1 teaspoon dried oregano
1 teaspoon smoked paprika
1/2 teaspoon crushed red pepper flakes
Salt and black pepper to taste
1/4 cup fresh parsley, chopped for garnish
Directions
- Pat the chicken thighs completely dry with paper towels. This is the most important step to prevent steaming. Season both sides generously with salt and pepper.
- Heat the olive oil in a large, heavy skillet over medium-high heat. Place the chicken skin-side down. Do not crowd the pan.
- Sear the chicken for 6 to 8 minutes without moving it. This renders the fat and creates a crispy barrier that prevents the skin from getting soggy during the braise. Flip and sear the other side for 2 minutes, then remove chicken to a plate. The chicken is done when it reaches 165°F (74°C) in the thickest part.
- In the same pan, add the diced peppers. Sauté for 3 minutes until slightly softened. Stir in the garlic, tomato paste, oregano, paprika, and red pepper flakes. Cook for 1 minute until fragrant.
- Pour in the chicken broth, using a wooden spoon to scrape up all the browned bits from the bottom of the pan. This is where the deep flavor lives.
- Return the chicken to the pan, skin-side UP. Crucially, the liquid should only reach halfway up the sides of the chicken. The skin must remain above the liquid line to maintain its texture.
- Reduce heat to low, cover with a lid, and simmer for 20 to 25 minutes.
- Remove the lid for the final 5 minutes of cooking to allow the sauce to reduce and thicken.
- Garnish with a heavy sprinkle of fresh parsley and serve directly from the skillet.
Notes
- The most important step is keeping the skin above the liquid line during the simmer to maintain the texture achieved during the initial sear.