The Ultimate Grilled Peanut Butter, Banana, and Brie Panini
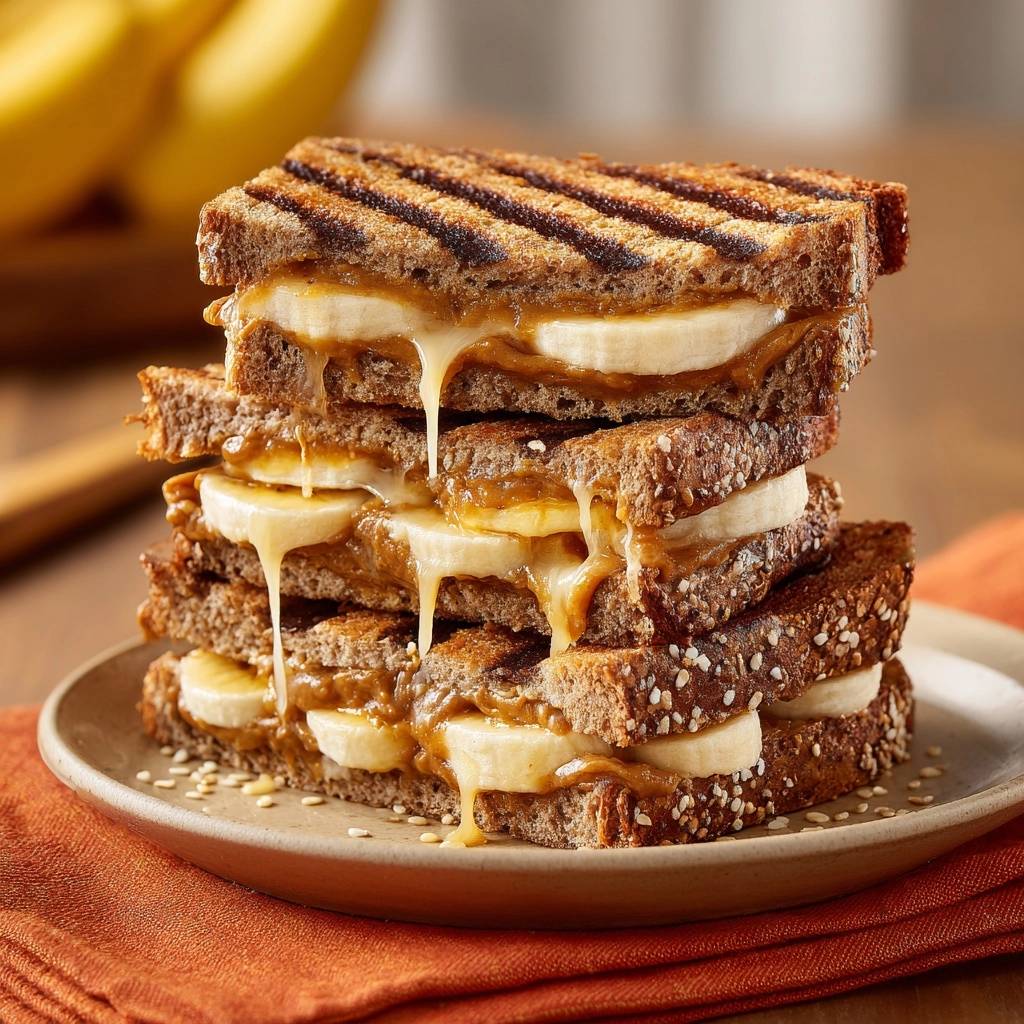
Imagine biting into a sandwich where the exterior offers a deafening crunch, immediately followed by a molten, velvety center of salty peanut butter and earthy, melted Brie. This isn’t your average childhood snack; it’s a sophisticated balance of flavors that hits every part of your palate. The saltiness of the peanut butter cuts through the floral sweetness of the honey, while the Brie adds a sophisticated, buttery funk that elevates the entire experience.
However, most people struggle with the execution of warm fruit sandwiches because they end up with a soggy, structural mess. To master this dish, you have to treat it like a culinary engineering project rather than just a quick lunch. We’re focusing on a specific layering technique and heat management to ensure the bread stays crisp while the interior transforms into a gooey masterpiece.
The real secret to success lies in the moisture barrier. By using the fat in the peanut butter and the proteins in the Brie as a shield, you protect the bread from the natural juices released by the bananas as they heat up. If you’ve ever had a sandwich turn mushy within seconds of hitting the plate, it’s because you didn’t create this essential “fat-gate” to block the steam.
The Physics of the Anti-Soggy Bread Secret
When you apply heat to a banana, the cellular structure breaks down and releases moisture and natural sugars. In a standard sandwich, this liquid migrates directly into the crumb of the bread, turning it into a gummy, unappealing sponge. Therefore, we must use the science of hydrophobicity—where fats repel water—to keep our panini structurally sound.
By spreading a thick, edge-to-edge layer of peanut butter on the interior of both slices, you create a waterproof coating. In addition to the peanut butter, the Brie acts as a secondary physical barrier. Because Brie has a high fat content and a distinct rind, it sits between the fruit and the bread, catching any escaping juices before they can reach the crust.
Furthermore, the heat control plays a massive role in the physics of the crunch. If the heat is too high, the exterior sugars in the bread carbonize and burn before the internal moisture has a chance to evaporate. By using medium heat, you allow the sandwich to “dry out” slightly as it toasts, ensuring that the final result is shatteringly crisp rather than just browned on the surface.
Essential Components for the Perfect Panini
Quality ingredients are non-negotiable when the recipe is this simple. You should start with a thick-cut seeded multigrain bread. The seeds provide extra texture, but more importantly, the dense grain structure of multigrain holds up much better under the weight of a panini press than airy white bread or sourdough.
The honey acts as a humectant, which helps keep the interior moist without being watery, while the cinnamon serves as a flavor bridge. Cinnamon naturally complements the earthy notes of the Brie and the roasted flavor of the peanuts, tying the sweet and savory elements together. Always use unsalted butter for the exterior to control the salt levels and prevent the bread from tasting overly seasoned.
Selecting the Right Brie and Peanut Butter
For the best results, choose a creamy peanut butter over a crunchy variety. Creamy peanut butter spreads more evenly, creating a more consistent moisture barrier across the entire surface of the bread. It also melts into a smoother sauce-like consistency that coats the bananas perfectly when heated.
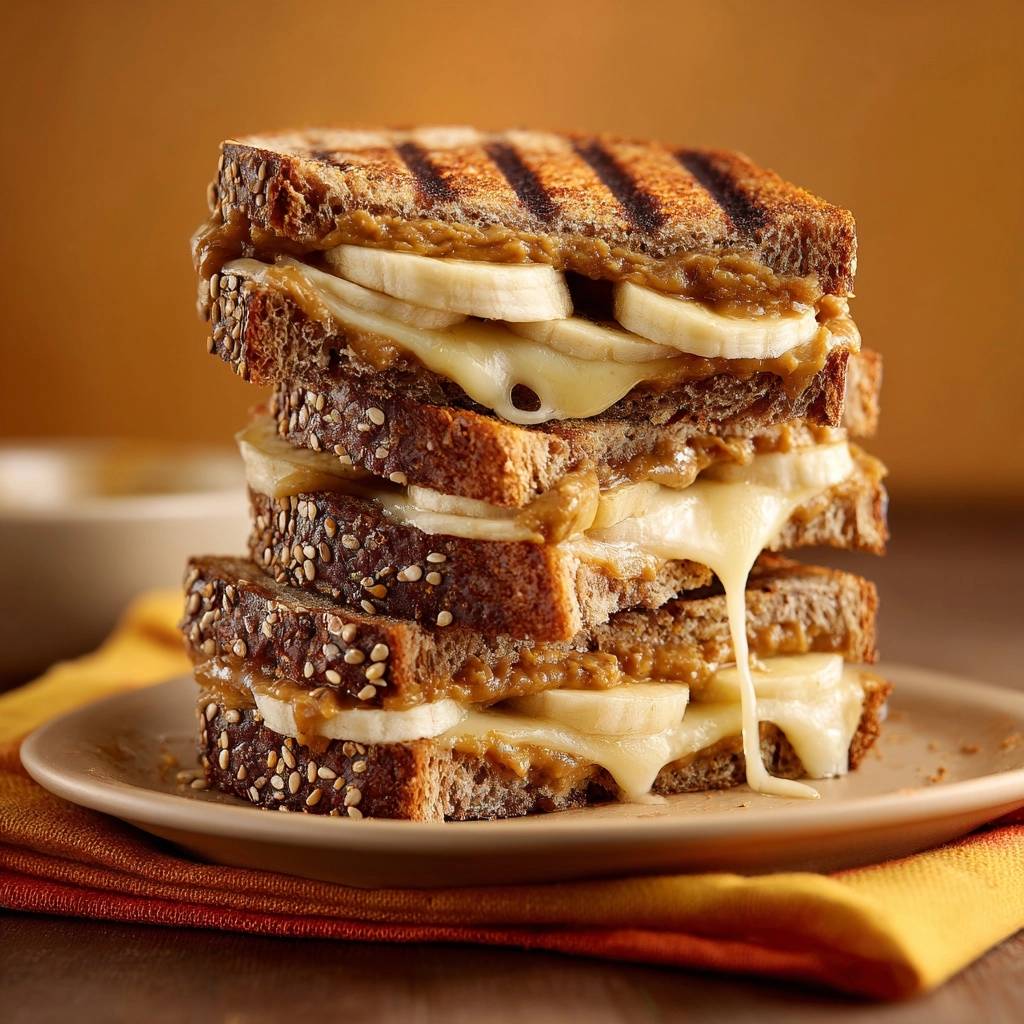
When it comes to the Brie, look for a wheel that is slightly firm to the touch. An over-ripe, “runny” Brie will escape the sides of the sandwich before it even hits the grill. A younger Brie provides better structural integrity and a milder flavor that won’t overpower the banana. You can leave the rind on for a rustic texture, but removing it ensures a more uniform, “oozing” melt.
Why High-Starch Bananas Yield Better Results
The ripeness of your banana can make or break this panini. You want bananas that are solid yellow with perhaps a few tiny brown specks. If the bananas are too ripe and spotted, they contain too much liquid and will turn into a mushy puree the moment they feel the heat.
Firm, high-starch bananas hold their circular shape even under the pressure of a heavy grill pan. This provides a much better “mouthfeel” and prevents the fruit from sliding out of the sides of the sandwich when you take your first bite. Think of the banana slices as the structural pillars of your panini.
Step-by-Step: Constructing the Moisture Barrier
Construction begins with the “Dual Barrier” method. You must spread the peanut butter on both interior sides of the bread, ensuring you reach every single corner. This isn’t just for flavor; it’s your primary defense against sogginess. If you leave even a small patch of bread exposed, the banana steam will find it and soften the crust from the inside out.
Next, place your thin slices of Brie directly onto the peanut butter on the bottom slice. By placing the cheese under the fruit, you create a heavy base that anchors the bananas in place. The cheese melts into the peanut butter, creating a thick, savory cream that encapsulates the fruit and prevents it from shifting during the flipping process.
Finally, arrange the banana slices in a tight, single layer. Do not overlap them too much, or the sandwich will become too tall to grill evenly. A light drizzle of honey and a dusting of cinnamon over the fruit adds the final layer of complexity before you seal the sandwich with the second slice of peanut-butter-coated bread.
Layering for Structural Integrity
The specific order of operations is: Bread, Peanut Butter, Brie, Banana, Honey/Cinnamon, Peanut Butter, and finally, Bread. This symmetry ensures that no matter which way you flip the sandwich, there is a fat barrier protecting the exterior. The Brie must sit between the fruit and the bottom slice because it has a higher melting point than peanut butter, providing a stable foundation.
If you put the honey directly on the bread, it will soak in and make the sandwich sticky and soft. By drizzling it only over the bananas, the honey stays trapped in the center. This keeps the sweetness concentrated where it belongs and protects the integrity of your toasted crust.
The Edge-to-Edge Buttering Technique
Before the sandwich hits the heat, you need to butter the outside of the bread. Use softened, room-temperature butter and spread it from edge to edge. Many people just put a dollop in the middle, but this leads to “spotty” browning where the edges stay dry and the center gets greasy.
An even coat of butter facilitates the Maillard Reaction, which is the chemical reaction between amino acids and reducing sugars that gives browned food its distinctive flavor. This thin layer of fat fries the surface of the bread, creating a structural, golden-brown crust that can withstand the weight of the fillings without collapsing.
This browning technique also works beautifully on fruit, like these tender, caramelized grilled peaches with vanilla ice cream.
Mastering Heat Control and Pressing Techniques
Patience is the most important ingredient when grilling a panini. You should preheat your pan over medium heat for at least three minutes before adding the sandwich. If the pan is too hot, the bread will char and taste bitter before the Brie has even begun to soften.
Medium heat allows the thermal energy to travel slowly through the thick slices of multigrain bread. This ensures that by the time the outside is a perfect dark golden brown, the peanut butter is liquid and the Brie is beginning to ooze out of the sides. You are looking for a slow sizzle, not a violent sear.
Using a Panini Press vs. Grill Pan
A panini press is the easiest tool because it applies even heat to both sides simultaneously. However, you can achieve professional results with a standard grill pan. The trick is to use the “Weighted Method.” Once you place the sandwich in the pan, set a heavy cast-iron skillet or a foil-wrapped brick on top of it.
This constant pressure forces the bread into the ridges of the grill pan, creating those iconic, deep charred marks. It also compresses the layers together, ensuring the cheese and peanut butter fuse into a single, cohesive filling. Flip the sandwich carefully after about three minutes, and re-apply the weight for the second side.
The Critical 60-Second Wire Rack Rest
This is the step most home cooks skip, and it’s the most important one for texture. When you remove a hot sandwich from the pan and put it directly on a flat plate, the bottom of the sandwich “sweats.” The trapped steam has nowhere to go, so it re-absorbs into the bread, ruining your hard work.
Instead, place your panini on a wire cooling rack for exactly 60 seconds. This allows air to circulate around the entire sandwich, letting the steam dissipate into the kitchen rather than into your crust. This short rest also allows the molten cheese to set slightly, so the fillings don’t come pouring out the moment you slice into it.
Flavor Variations and Ingredient Swaps
Once you master the basic technique, you can start experimenting with “grown-up” flavor profiles. For a deeper, more complex sweetness, try replacing the honey with a dark grade-A maple syrup or even a balsamic glaze. If you want to cut through the richness, a tiny pinch of flaky sea salt or a few red chili flakes can add a surprising and welcome kick.
You can also swap the nut butter to change the fat profile. Almond butter offers a more toasted, nutty flavor that pairs beautifully with the Brie, while cashew butter provides an even creamier, milder base. For those who want a bit more crunch, adding a tablespoon of toasted sunflower seeds or crushed pecans inside the sandwich adds a great textural contrast.
Optimal Pairings for a Rich Panini
Because this panini is incredibly rich and calorie-dense, you want to serve it with something that provides a sharp, acidic contrast. A simple arugula salad dressed with nothing but fresh lemon juice and a touch of olive oil is the perfect companion. The peppery bite of the arugula cuts right through the heavy fats of the cheese and peanut butter.
Alternatively, serving a few slices of tart green apple or a handful of fresh raspberries on the side can cleanse the palate between bites. If you are serving this for a weekend brunch, a glass of sparkling cranberry juice provides a bright, refreshing acidity that balances the warm, savory notes of the grilled sandwich.
Troubleshooting Your Grilled Peanut Butter Panini
If you find that your cheese isn’t melting by the time the bread is browned, your heat is likely too high. To fix this mid-cook, lower the flame and cover the pan with a lid for 60 seconds. The lid traps the heat and creates a mini-oven effect that will melt the Brie quickly without further browning the crust.
If the bananas are sliding out of the sandwich, you might be using too much honey or your fruit is over-ripe. Next time, try slicing the bananas slightly thinner and ensure they are tucked well away from the edges of the bread. The peanut butter “dam” technique—leaving a small border of dry bread at the very edge—can also help keep everything contained.
Why is my bread still soft?
Soft bread usually results from two things: using bread that is too thin or not applying enough pressure during the cooking process. Ensure you are using thick-cut slices and pressing down firmly with a spatula or weight. This compression is vital for creating a dense, crispy exterior that resists moisture.
Can I use frozen bread?
You can use frozen bread, but you must let it thaw completely or toast it lightly before assembling the sandwich. Frozen bread contains excess ice crystals that turn into steam when heated. If you build the sandwich while the bread is still frozen, that internal moisture will be trapped by the peanut butter and result in a gummy, wet interior.
How do I prevent the peanut butter from leaking?
The best way to prevent leaks is to use the “Dam Method.” When spreading your peanut butter, leave a 1/4 inch border of bare bread around the entire perimeter. As the sandwich is pressed and the peanut butter melts, it will expand to fill that gap without spilling over the edges and burning in the pan.
Is there a dairy-free alternative for Brie?
Yes, you can use a high-fat vegan camembert or a cashew-based “cheese” spread. Look for products that specifically mention they are formulated for melting. While the flavor profile will be slightly different, the high fat content in these alternatives will still provide that necessary moisture barrier and creamy texture.
Can this be made in an air fryer?
You can definitely use an air fryer for this recipe. Set it to 375°F and cook for about 4-5 minutes, flipping halfway through. While you won’t get the traditional “press” marks, the circulating air does an incredible job of crisping the exterior. Just be sure to secure the top slice of bread with a toothpick so the fan doesn’t blow it off!
How should I store and reheat leftovers?
This sandwich is best eaten fresh, but you can store leftovers in an airtight container in the fridge for up to 24 hours. To reheat, avoid the microwave at all costs as it will make the bread rubbery. Instead, place it back in a dry skillet over medium-low heat for 2 minutes per side, or pop it in a toaster oven until the cheese is bubbly again.
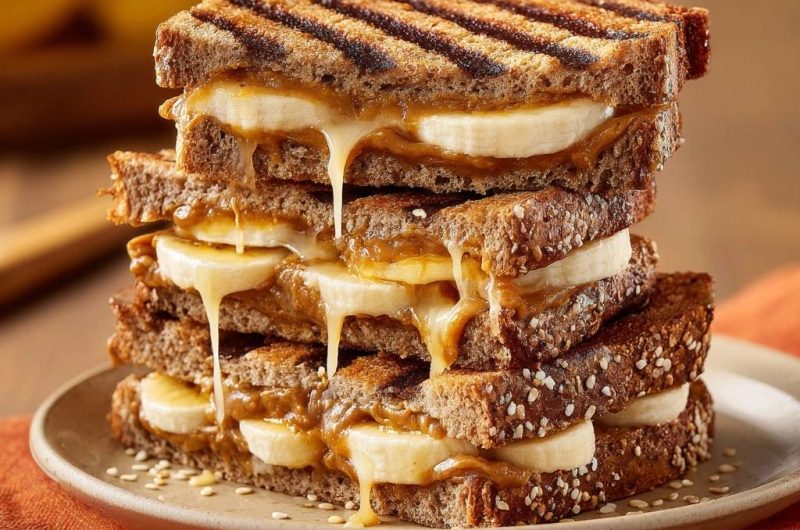
Peanut Butter Banana Brie Panini
Course: Main CourseCuisine: AmericanDifficulty: easy2
servings5
minutes6
minutes540
kcal11
MinutesA gourmet twist on a classic sandwich that uses layering techniques and Brie cheese to create a moisture barrier, ensuring the bread stays crunchy while the interior remains melted and sweet.
Ingredients
4 slices thick-cut seeded multigrain bread
1/2 cup creamy peanut butter
2 ripe bananas, sliced into 1/4 inch rounds
4 oz Brie cheese, sliced thin (rinds removed if preferred)
2 tablespoons unsalted butter, softened
1 tablespoon honey
1/4 teaspoon ground cinnamon
Directions
- The secret to preventing sogginess is creating a dual moisture barrier. Spread a generous, even layer of peanut butter on both interior sides of the bread slices. This fat-based layer prevents banana juices from soaking into the crumb.
- Place a thin layer of Brie cheese over the peanut butter on the bottom slices. The cheese acts as a secondary barrier and provides the creamy, white “drip” seen in the professional result.
- Arrange the banana slices in a single layer over the cheese. Drizzle lightly with honey and a pinch of cinnamon. Top with the remaining bread slices (peanut butter side down).
- Lightly butter the outside of the bread from edge to edge. This ensures even browning and a structural, toasted crunch.
- Preheat a grill pan or panini press over medium heat. Do not use high heat, as the bread will burn before the cheese and peanut butter reach the ideal melting point.
- Place the sandwiches on the grill. If using a pan, press down firmly with a heavy spatula to create deep grill marks. Grill for 3 minutes per side until the bread is dark golden and the cheese begins to ooze.
- The key finish: Once removed from the heat, let the sandwich rest on a wire rack for 60 seconds. This allows steam to escape rather than being trapped against a flat plate, keeping the crust perfectly toasted and dry. Slice diagonally and serve immediately.
Notes
- To ensure the bread stays shatteringly crisp, always rest the finished sandwich on a wire rack for 60 seconds to allow steam to escape.