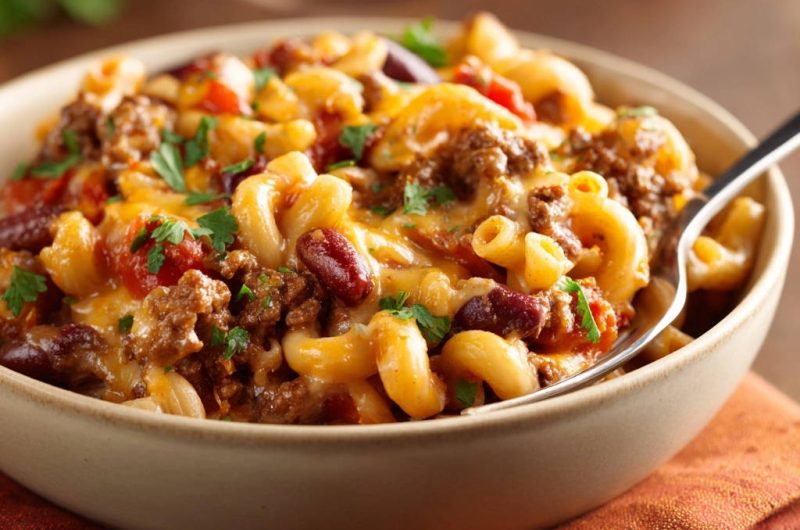
Hearty Chili Mac Skillet: The Flavor-Packed Skillet Meal
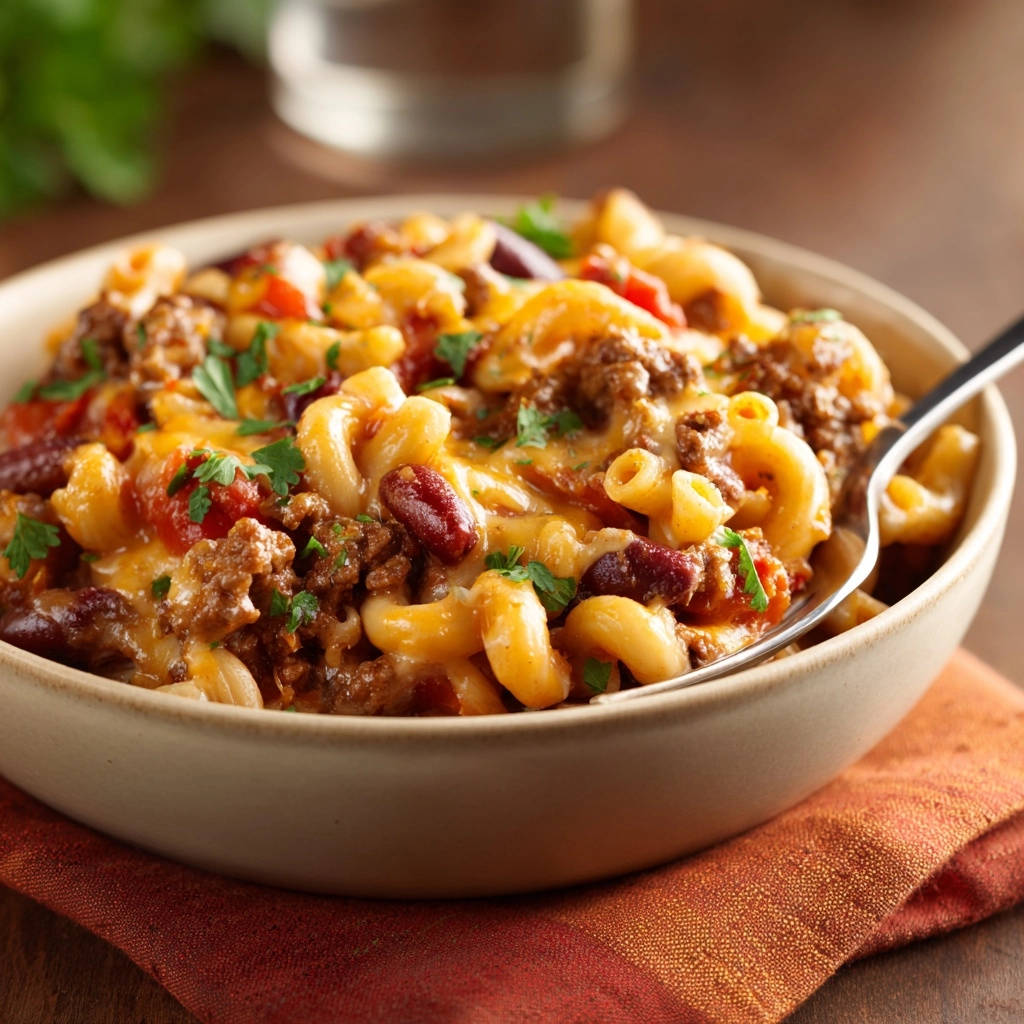
My journey to the perfect chili mac used to be filled with dishes that, while good, just didn’t quite hit that deep, rich flavor I craved. After countless attempts, I finally cracked the code with a simple browning and spice-toasting technique that transforms this classic comfort food.
This Hearty Chili Mac Skillet recipe isn’t just easy; it’s a reliable, one-pan wonder that delivers unparalleled depth of flavor, making it an instant family favorite in your rotation.
Beyond Basic: What Makes This Hearty Chili Mac Skillet Truly Special?
The Secret to Unforgettable Flavor: Our Browning & Toasting Method
Deeply browning the ground beef creates a foundational layer of rich, savory notes through the Maillard reaction. This crucial step is often overlooked but is essential for developing complex flavors.
Toasting the chili powder, cumin, and oregano directly in the hot skillet with the aromatics awakens their full aromatic potential. It removes any raw edge, intensifying their warmth and earthiness before any liquids are added.
These two techniques, combined, ensure every bite of this skillet meal is packed with an incredible, well-developed flavor profile that sets it apart from typical chili mac.
Quick Comfort: Why It’s Your New Weeknight Go-To
This Hearty Chili Mac Skillet is designed for efficiency without compromising on taste. Its one-pan nature significantly reduces cleanup, making it a dream for busy evenings.
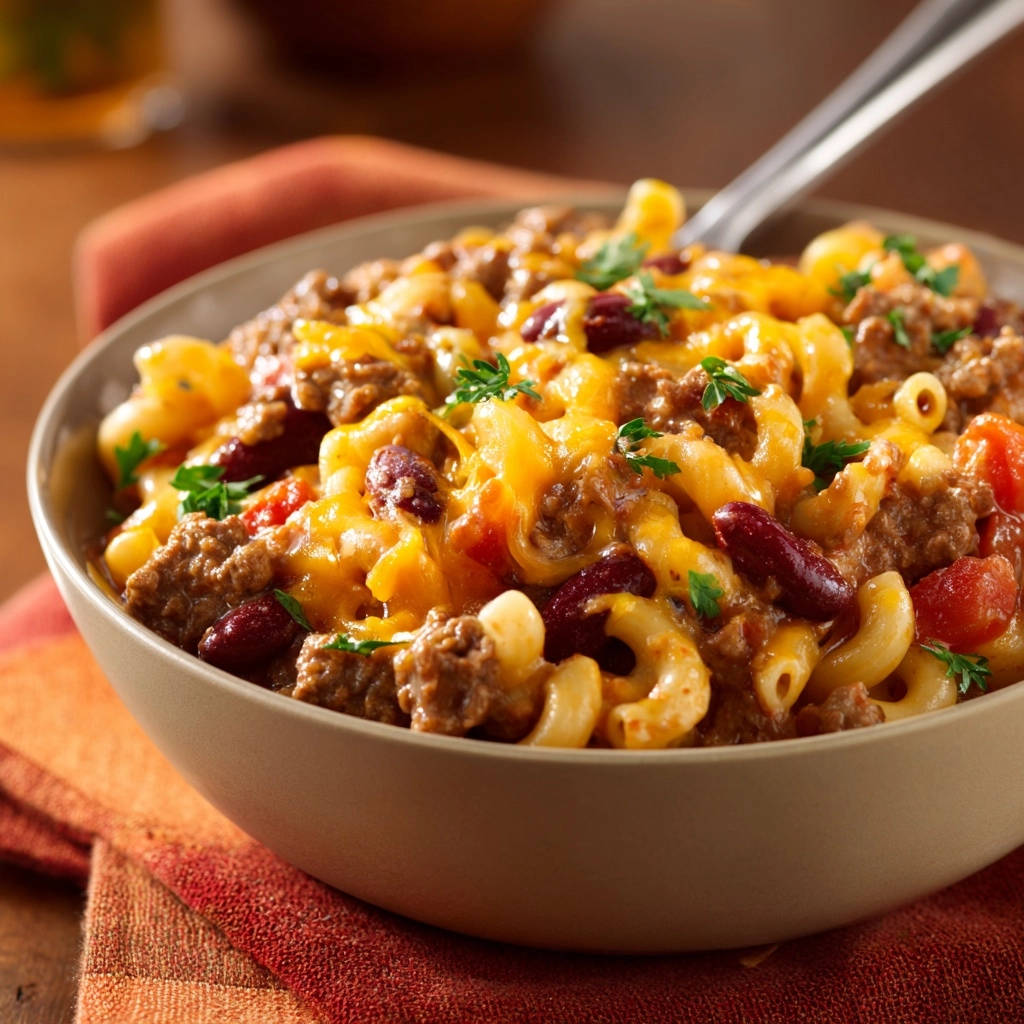
From start to finish, you can have a deeply satisfying, hearty meal on the table in under an hour. It’s the ultimate comfort food solution for when time is short but cravings are high.
Family-Approved & Adaptable: A Meal for Everyone
The classic, comforting flavors of this chili mac appeal to a wide range of palates, making it a guaranteed hit with both kids and adults. Its familiar taste provides a sense of warmth and satisfaction.
If you prefer your pasta firm rather than soft, this foolproof no-gummy chili mac uses the same skillet technique.
This recipe is also incredibly versatile, easily customizable with various toppings or protein alternatives to suit different dietary needs or taste preferences. It’s a reliable base for endless delicious variations, just like our incredibly popular Cheesy Beef Shells Skillet.
Essential Ingredients for Your Skillet Chili Mac Masterpiece
The Heart of the Dish: Ground Beef & Aromatics
Lean Ground Beef: Choose lean ground beef (85-90% lean) to provide robust flavor and hearty texture without excessive grease. Proper browning of the beef is paramount for building the dish’s flavor foundation.
Yellow Onion & Garlic: Freshly chopped yellow onion and minced garlic are the aromatic backbone of this dish. They sweeten as they cook, adding depth and complexity to the savory profile.
Spice Blends: Unleashing Deep Chili Flavor
Chili Powder, Ground Cumin, Dried Oregano: This classic trio forms the signature chili flavor. Chili powder provides warmth and a robust base, cumin adds earthy notes, and oregano brings a subtle herbaceousness.
Toasting these spices briefly in the skillet before adding liquids unlocks their full aromatic compounds, making their flavors more pronounced and vibrant.
Building the Base: Tomatoes, Beans & Broth
Diced Tomatoes (Undrained): Canned diced tomatoes contribute essential acidity, body, and crucial liquid for the macaroni. Their undrained juices are packed with natural tomato flavor that enriches the sauce.
Kidney Beans: A staple in classic chili, kidney beans add protein, fiber, and a satisfying, meaty texture. Rinsing them well removes excess starch and sodium, ensuring a clean flavor.
Water or Beef Broth: This is the primary liquid for cooking the macaroni and forming the chili mac sauce. While water works, beef broth adds an extra layer of savory depth to the overall flavor.
The Mac Factor: Perfect Pasta Every Time
Elbow Macaroni (Uncooked): Small, curved elbow macaroni is ideal for this dish. Its shape perfectly captures the rich chili sauce, and cooking it directly in the skillet allows it to absorb all the wonderful flavors.
Finishing Touches: Cheese & Garnish
Shredded Sharp Cheddar Cheese: Sharp cheddar melts beautifully, lending a creamy, smooth texture and a tangy, rich flavor that complements the chili. Shredding it yourself is highly recommended for best melt.
Fresh Parsley: Chopped fresh parsley serves as a vibrant, fresh garnish. It adds a pop of color and a light, herbaceous note that brightens the entire Hearty Chili Mac Skillet.
Kitchen Essentials for Skillet Chili Mac Success
The Right Skillet: Size & Material Matters
For this Hearty Chili Mac Skillet, a large (10-12 inch) heavy-bottomed skillet or a Dutch oven is ideal. The generous size allows for ample surface area to brown the beef effectively without overcrowding, which is crucial for flavor development.
A heavy-bottomed pan ensures even heat distribution, preventing hot spots that can lead to burning and promoting consistent cooking of both the meat and the pasta. Cast iron or stainless steel options work exceptionally well.
Basic Prep Tools: Knives, Spoons & More
A sharp chef’s knife and a sturdy cutting board are essential for efficiently chopping your onion and mincing garlic. Proper knife skills contribute to even cooking and flavor distribution.
You’ll also need standard measuring spoons for accurately portioning your spices, and measuring cups for liquids like water or broth. A durable wooden spoon or heat-resistant spatula is necessary for breaking up ground beef and stirring ingredients throughout the cooking process.
Step-by-Step Guide: Crafting Your Perfect Hearty Chili Mac Skillet
- Heat Oil & Brown Beef:
In your large skillet or Dutch oven, heat 1 tablespoon of vegetable oil over medium-high heat. Add 1 pound of lean ground beef, breaking it up with a spoon as it cooks. It’s crucial to let the beef cook until it’s deeply browned and caramelized, not just gray. This deep browning builds incredible savory depth. Once thoroughly browned, carefully drain any excess grease from the skillet to ensure your chili mac isn’t oily.
- Sauté Aromatics:
Reduce the heat to medium. Add 1 medium chopped yellow onion to the skillet. Cook, stirring occasionally, for about 5 minutes, or until the onion softens and becomes translucent. Stir in 2 cloves of minced garlic and continue cooking for just one more minute until the garlic is fragrant. Be careful not to burn the garlic, as it can turn bitter.
- Toast the Spices:
Now for the most important flavor-building hack: Add 2 tablespoons of chili powder, 1 teaspoon of ground cumin, and 1/2 teaspoon of dried oregano directly to the skillet with the beef, onion, and garlic. Stir well to thoroughly coat all the ingredients with the spices. Cook for 1 to 2 minutes, stirring constantly. This brief toasting period awakens the full, vibrant flavor potential of the spices, making them incredibly aromatic.
- Add Liquids & Beans:
Stir in 1 (14.5 ounce) can of undrained diced tomatoes, 1 (15 ounce) can of rinsed and drained kidney beans, and 2 1/2 cups of water or beef broth. Bring the mixture to a gentle simmer, ensuring all ingredients are well combined and the spices are integrated into the liquid base.
- Cook the Macaroni:
Add 1 cup of uncooked elbow macaroni, stirring gently to ensure it is fully submerged in the simmering liquid. Cover the skillet tightly, reduce the heat to low, and let it simmer for 15 to 20 minutes. Stir occasionally during this time to prevent the macaroni from sticking to the bottom of the pan or clumping together. Cook until the macaroni is tender and most of the liquid has been absorbed, resulting in a thick, rich sauce.
- Melt in the Cheese:
Remove the skillet from the heat. Stir in 1 cup of shredded sharp cheddar cheese until it is completely melted and smooth. The residual heat from the chili mac will melt the cheese perfectly, creating a luscious, creamy texture.
- Season to Taste:
Taste your Hearty Chili Mac Skillet. Season generously with salt and black pepper as needed to balance and enhance all the flavors. Proper seasoning is key to a truly delicious dish.
- Serve & Garnish:
Serve the Hearty Chili Mac Skillet hot. Garnish each serving with fresh chopped parsley for a bright burst of color and a touch of fresh herbaceous flavor. Enjoy your homemade skillet masterpiece!
What to Serve Alongside
That chili mac skillet is a full meal on its own, but a couple of cool, creamy sides or warm, buttery biscuits make it even better. Here are two recipes that fit the table without stealing the spotlight.
- Balance the heat of the chili mac with a cool, tangy Loaded Creamy Potato Salad – the creamy texture and crisp bits of celery and onion add a fresh contrast to the saucy skillet.
- Soak up every last bit of chili sauce with flaky Garlic Herb Cheddar Biscuits; the sharp cheese and savory herbs mirror the cheddar and spices already in the skillet.
Chef’s Secrets: Elevating Your Hearty Chili Mac Skillet
Don’t Skip the Deep Brown!
The success of this Hearty Chili Mac Skillet hinges significantly on how well you brown the ground beef. Resist the urge to rush this step. Allow the beef to develop a deep, rich brown crust on the bottom of the pan.
This browning is where incredible savory depth and complex flavor compounds are created, forming the backbone of your chili mac. It’s a foundational flavor builder that cannot be replicated.
Spice Toasting: The Ultimate Flavor Booster
Toasting the dry spices directly in the hot skillet with the cooked beef and aromatics is a game-changer. This brief 1-2 minute step warms the spices, releasing their essential oils and intensifying their aroma and taste.
It eliminates any raw, dusty flavor, making the chili powder, cumin, and oregano much more vibrant and integrated into the overall dish. Never skip this quick but impactful technique.
Perfect Pasta Doneness
For the best texture, begin checking your macaroni for doneness a few minutes before the suggested 15-20 minute mark. It should be tender but still have a slight bite, or al dente, not mushy.
If the macaroni is too hard, add another splash of hot water or broth and continue simmering briefly. Overcooked pasta will absorb too much liquid and become soft and unpleasant, so keep an eye on it.
Adjusting Consistency to Your Liking
After the macaroni has cooked, your Hearty Chili Mac Skillet should be thick and saucy. If it appears too thick for your preference, simply stir in an extra 1/4 to 1/2 cup of hot water or beef broth until it reaches your desired consistency.
Conversely, if the dish seems too soupy, remove the lid from the skillet and allow it to simmer for an additional 5-10 minutes over low heat, stirring frequently. This will allow excess liquid to evaporate and the sauce to thicken to perfection.
Cheese Choices & Melt Factor
For the absolute best melt and flavor in your Hearty Chili Mac Skillet, always shred your own block of cheese. Pre-shredded varieties often contain anti-caking agents like cellulose, which can prevent them from melting smoothly and result in a grainy texture.
Experiment with different cheese blends beyond sharp cheddar. A mix of sharp cheddar and Monterey Jack can provide extra creaminess, or a touch of smoked cheddar can add a wonderful layer of smoky depth.
Troubleshooting Common Chili Mac Dilemmas
Problem: My Chili Mac is Too Dry/Too Soupy!
Solution: Consistency is key! If your chili mac turns out too dry after cooking, stir in hot water or beef broth, about 1/4 cup at a time, until it reaches your preferred saucy consistency. If it’s too soupy, simply remove the lid and simmer it gently over low heat for an additional 5-10 minutes, stirring often, to allow the excess liquid to evaporate and the sauce to thicken naturally.
Problem: My Macaroni is Mushy/Too Hard!
Solution: Mushy pasta is usually a sign of overcooking. To prevent this next time, start checking the macaroni for doneness around the 12-minute mark and remove it from the heat as soon as it’s tender with a slight bite. If your pasta is too hard, add another small splash of liquid (water or broth) and continue simmering, covered, for a few more minutes until it reaches your desired tenderness.
Problem: The Flavor Falls Flat
Solution: A flat flavor often stems from not adequately browning the ground beef or skipping the crucial spice-toasting step. Ensure the beef develops a deep, dark crust, and always toast your spices for 1-2 minutes until incredibly fragrant before adding liquids. Also, be sure to taste and adjust your seasoning with salt and black pepper at the end; proper seasoning balances all the elements.
Serving Suggestions, Storage & Make-Ahead Tips
Creative Toppings & Sides
Elevate your Hearty Chili Mac Skillet with a variety of delicious toppings! Consider a dollop of cool sour cream or Greek yogurt, a sprinkle of freshly sliced green onions or chives, a dash of your favorite hot sauce for a kick, or some crunchy crushed tortilla chips. Chopped fresh cilantro or a sprinkle of extra shredded cheese also make excellent additions.
For a complete and comforting meal, serve this flavorful skillet dish alongside a crisp, simple green salad with a vinaigrette dressing. Alternatively, pair it with some warm, buttery golden glazed cornbread, which is perfect for soaking up every last bit of the delicious chili sauce.
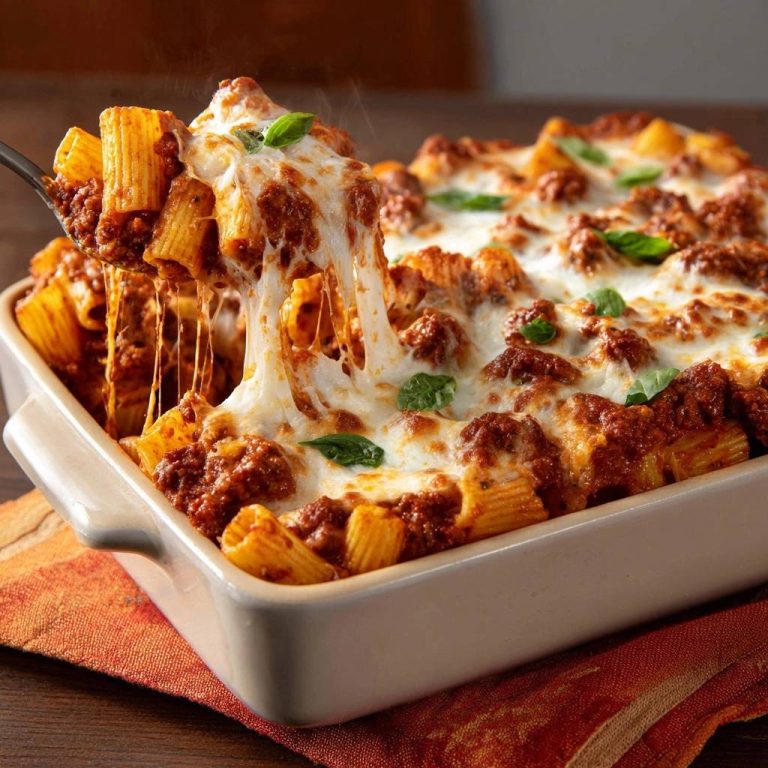
For a perfect pairing, try our Baked Beef & Mac Casserole: The No-Mush Secret!.
Storing Leftovers for Best Flavor
Allow any leftover Hearty Chili Mac Skillet to cool completely to room temperature before transferring it to an airtight container. Properly stored, it will keep beautifully in the refrigerator for up to 3-4 days.
When reheating, gently warm on the stovetop over low heat, adding a splash of water or beef broth to loosen the sauce and rehydrate the macaroni as needed. You can also reheat individual portions in the microwave, stirring occasionally.
Can You Make it Ahead?
While this Hearty Chili Mac Skillet is best enjoyed fresh, you can certainly prepare the chili base (steps 1-4) in advance. Cook the beef, aromatics, and spices, then add the tomatoes, beans, and broth, simmering briefly.
Allow the base to cool, then refrigerate for up to 2-3 days. When ready to serve, bring the chili base to a simmer on the stovetop, then add the uncooked macaroni and proceed with step 5 onwards. This approach significantly cuts down on weeknight prep time.
Your Top Hearty Chili Mac Skillet Questions Answered
Can I Use Different Kinds of Meat?
Yes, absolutely! While ground beef provides a classic rich flavor, you can easily substitute it with lean ground turkey or ground chicken for a lighter version of this Hearty Chili Mac Skillet. Be aware that leaner meats may require a little more oil for browning, and the overall flavor profile might be slightly less robust, but still delicious.
What if I Don’t Have Kidney Beans?
No kidney beans? No problem! Pinto beans or black beans are excellent and readily available substitutions for kidney beans in this recipe. They offer a similar hearty texture and readily absorb the wonderful chili flavors. Just remember to rinse and drain them thoroughly before adding them to the skillet.
Is This Recipe Gluten-Free?
The core components of the chili (ground beef, vegetables, spices, beans, tomatoes) are naturally gluten-free. To ensure your entire Hearty Chili Mac Skillet is gluten-free, simply use a certified gluten-free elbow macaroni. Additionally, always check the label of your beef broth to confirm it does not contain any hidden gluten-containing ingredients.
Can I Make This in a Slow Cooker?
While this recipe is designed as a quick one-skillet meal, it can be adapted for a slow cooker with some modifications. You’ll still want to brown the ground beef and toast the spices on the stovetop first, as this step is crucial for flavor development. Then, combine the browned meat, aromatics, spices, tomatoes, beans, and broth in your slow cooker. Cook on high for 3-4 hours or low for 6-8 hours. Add the uncooked macaroni during the last 30-45 minutes of cooking, stirring it in until tender. Stir in the cheese just before serving.
Time to Savor: Share Your Chili Mac Skillet Story!
There’s nothing quite like a steaming, cheesy bowl of this Hearty Chili Mac Skillet to bring warmth and comfort to your table. It’s a testament to how simple techniques, like proper browning and spice-toasting, can unlock extraordinary flavor, transforming a classic dish into something truly unforgettable.
I truly hope this recipe brings as much joy and satisfaction to your kitchen as it does to mine. Don’t be afraid to make it your own by experimenting with your favorite additional spices or a wider array of creative toppings.
Once you’ve whipped up this incredibly flavorful skillet meal, I’d absolutely love to hear about your experience! Feel free to share your photos or leave a comment below with your thoughts and any personal twists you added. For more delicious and easy family-friendly meals, be sure to explore the rest of our recipes!
Chili Mac
Course: Main CourseCuisine: AmericanDifficulty: easyServings4
servingsPrep time10
minutesCooking time35
minutesCalories550
kcalTotal time45
minutesDiscover the secret to truly amazing chili mac! This recipe guarantees a deep, rich flavor with one simple, transformative step. A comforting and hearty skillet meal perfect for any night.
Ingredients
1 tablespoon vegetable oil
1 pound lean ground beef
1 medium yellow onion, chopped
2 cloves garlic, minced
2 tablespoons chili powder
1 teaspoon ground cumin
1/2 teaspoon dried oregano
1 (14.5 ounce) can diced tomatoes, undrained
1 (15 ounce) can kidney beans, rinsed and drained
2 1/2 cups water or beef broth
1 cup elbow macaroni, uncooked
1 cup shredded sharp cheddar cheese
Salt to taste
Black pepper to taste
Fresh parsley, chopped, for garnish
Directions
- Heat the vegetable oil in a large skillet or Dutch oven over medium high heat. Add the ground beef and cook, breaking it up with a spoon, until deeply browned. This deep browning is crucial for building foundational flavor. Drain any excess grease.
- Reduce heat to medium. Add the chopped onion to the skillet and cook until softened, about 5 minutes, stirring occasionally. Add the minced garlic and cook for another minute until fragrant.
- Now for the flavor depth hack: Add the chili powder, ground cumin, and dried oregano directly to the skillet with the beef, onion, and garlic. Stir well and cook for 1 to 2 minutes, allowing the spices to toast and become fragrant. This step awakens their full flavor potential. Cook until no pink remains and it reaches 160°F (71°C).
- Stir in the undrained diced tomatoes, rinsed and drained kidney beans, and water or beef broth. Bring the mixture to a simmer.
- Add the uncooked elbow macaroni, stirring to combine. Cover the skillet, reduce the heat to low, and simmer for 15 to 20 minutes, or until the macaroni is tender and most of the liquid has been absorbed, stirring occasionally to prevent sticking.
- Remove the skillet from the heat. Stir in the shredded cheddar cheese until completely melted and smooth. Season with salt and black pepper to taste.
- Serve hot, garnished with fresh chopped parsley.
Notes
- Deeply browning the ground beef and toasting the spices are crucial steps for maximum flavor.