Mastering Chocolate Coconut Pecan Dream Bars
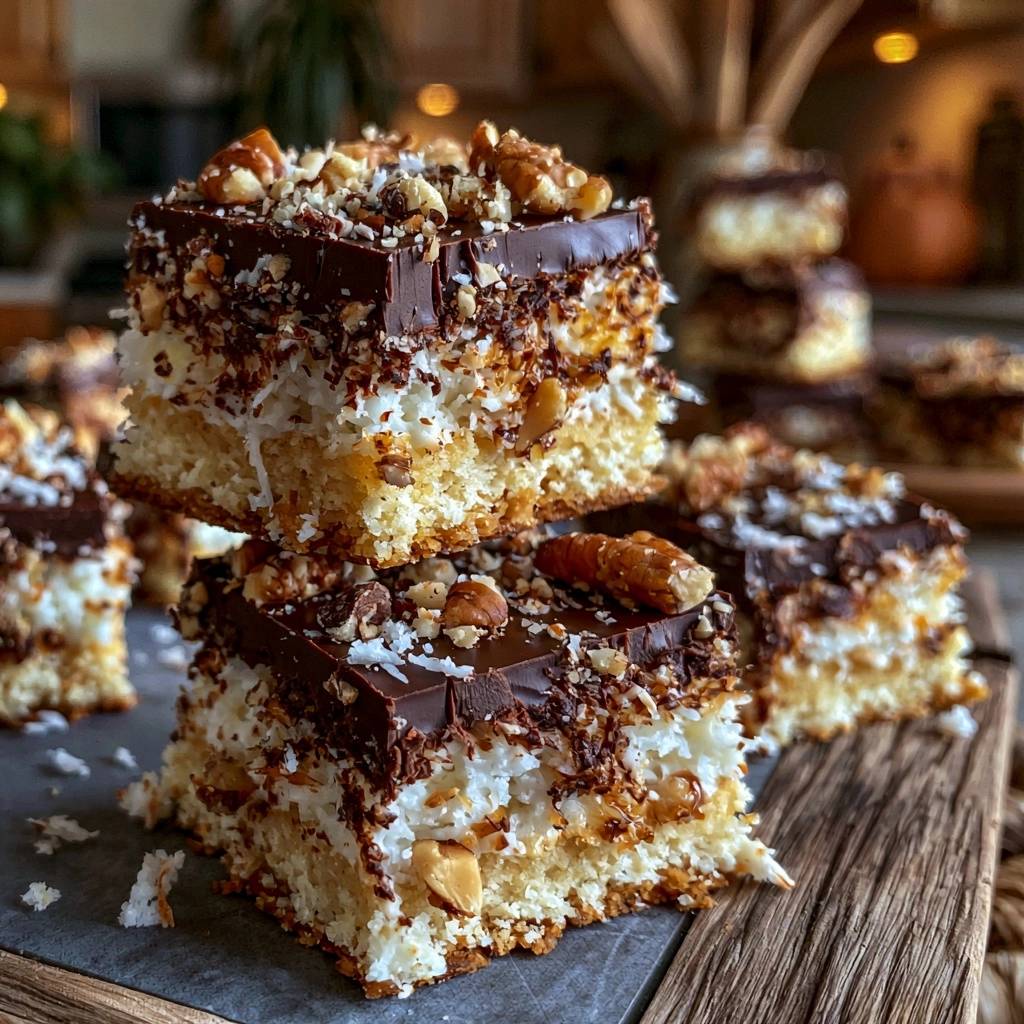
Imagine biting into a dessert where a sturdy, buttery shortbread base gives way to a chewy, tropical center, all finished with a snap of rich dark chocolate and the deep crunch of toasted pecans. These Chocolate Coconut Pecan Dream Bars aren’t your average tray bake; they’re an architectural marvel of textures. You get the crumbly, cake-like foundation, the macaron-style coconut middle, and a silky ganache that ties every element together into one cohesive bite.
The beauty of this recipe lies in the contrast. While many bar desserts end up as a singular, soft mush, these maintain distinct, beautiful layers that look as professional as they taste. You’re looking for that specific mouthfeel where the sweetness of the coconut is immediately balanced by the slight bitterness of the chocolate and the earthy, roasted notes of the nuts. It’s a sophisticated upgrade to the classic magic bar that will have everyone asking for your secret.
Expertise in baking these comes down to one critical factor: moisture management. The secret is par-baking the base to create a moisture barrier. If you skip this, the sweetened condensed milk from the coconut layer will soak into the raw dough, leaving you with a soggy, heavy mess. By setting the crust first, you ensure a crisp, clean snap in every single square you serve.
The Architecture of a Perfect Layered Bar
Building a successful layered bar requires more than just stacking ingredients; it requires structural integrity. Most home bakers struggle with bars that fall apart the moment they’re lifted from the pan. This happens because the base is often too thin or too greasy to support the weight of the toppings. We solve this by using a high-ratio shortbread that acts as a literal floor for the dessert.
Density is your friend here. By incorporating a bit of baking powder into the flour, we create a base that is sturdy yet has a slight “give,” preventing it from becoming a hard brick. This density ensures that when you bite through the thick chocolate and chewy coconut, the base holds its shape rather than crumbling into your lap. It’s all about balancing the heavy fats in the topping with a reliable, dry crumb underneath.
Why the Anti-Soggy Bottom Technique Works
The science of par-baking is the difference between a mediocre bar and a masterpiece. When you put that shortbread dough into the oven alone for the first 15 minutes, the heat immediately begins to set the flour proteins and starches. This creates a sealed surface. If you were to pour the wet coconut and condensed milk mixture onto raw dough, the liquid would seep into the cracks, preventing the dough from ever fully cooking.
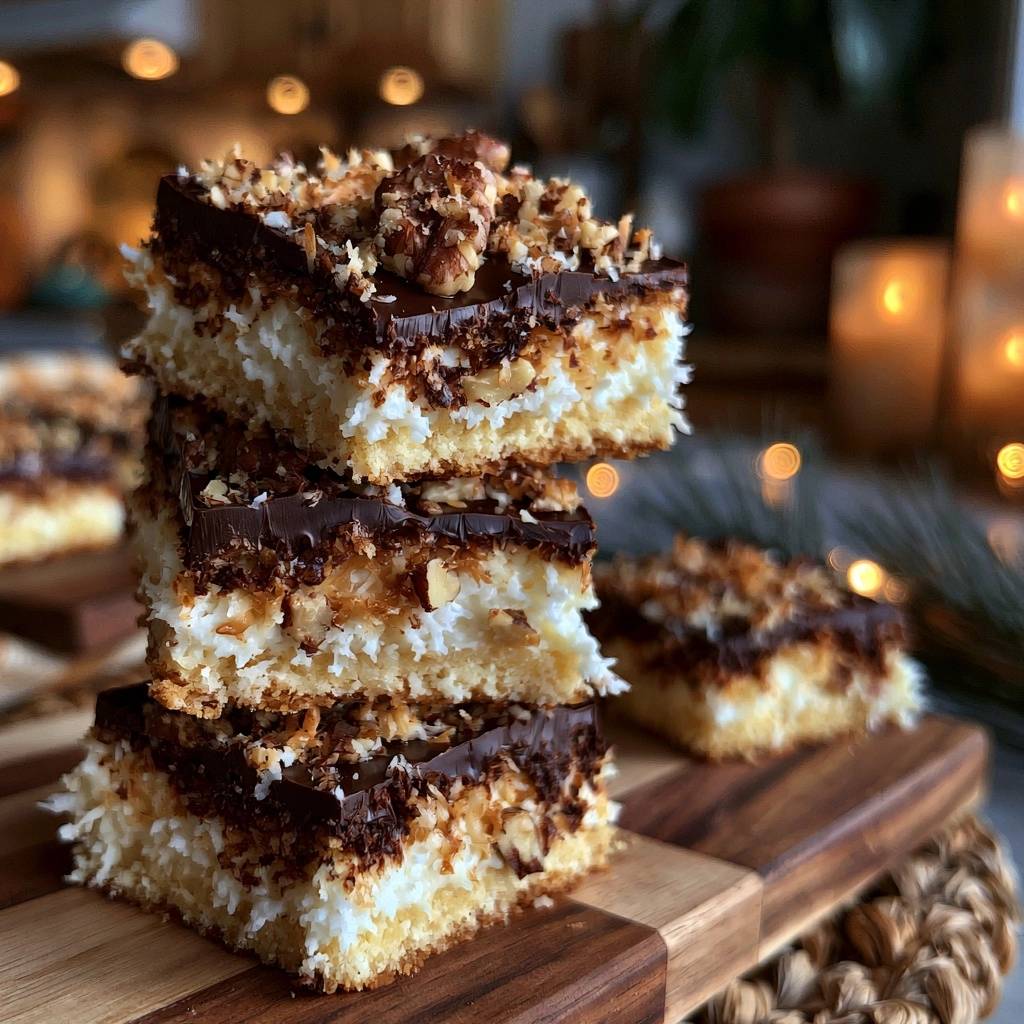
Many “one-pan” recipes suggest throwing everything in at once to save time, but that method is fundamentally inferior. It results in a gummy interface where the crust meets the filling. By par-baking, you create a heat-set crust that can withstand the moisture of the sweetened condensed milk. This extra step ensures that even after three days in the fridge, the bottom of your Chocolate Coconut Pecan Dream Bars remains perfectly crisp and golden.
Essential Components for Chocolate Coconut Pecan Dream Bars
Quality ingredients dictate the final flavor profile of these bars. Since the recipe relies on a few heavy hitters, you want to choose wisely. For the butter, always use unsalted so you can control the seasoning yourself. The fat content in high-quality butter provides that melt-in-your-mouth quality to the shortbread. When it comes to the chocolate, reach for semi-sweet chips with at least 55% cacao. This provides the necessary bite to cut through the intense sweetness of the coconut layer.
Selecting the Right Shredded Coconut
You’ll find both sweetened and unsweetened coconut in the baking aisle, but for this specific dream bar, sweetened shredded coconut is the way to go. The added sugar in the shreds helps them bond with the condensed milk, creating a texture reminiscent of a high-end macaroon. Unsweetened coconut tends to be drier and more fibrous, which can lead to a “woody” texture that doesn’t meld as well with the creamy ganache topping. The moisture in the sweetened variety is key to that chewy center.
The Role of Toasted Pecans in Texture
Never use raw pecans straight from the bag. Raw nuts have a soft, almost waxy texture and a muted flavor that gets lost among the chocolate. Toasting the pecans triggers the Maillard reaction, which develops deep, smoky aromas and a brittle, satisfying crunch. Furthermore, toasting releases the natural oils within the nut. These oils act as a flavor bridge, helping the pecans adhere to the chocolate ganache while preventing the chocolate from feeling too heavy or waxy on the palate.
Step-by-Step: Engineering the Shortbread Foundation
Start by creaming your butter and sugar. You want your butter “softened,” which technically means about 65°F. If it’s too cold, it won’t incorporate the sugar; if it’s melted, your crust will be greasy. Beat them until the mixture looks pale and fluffy. When you add the egg, do so just until combined. Over-beating at this stage introduces too much air, which can cause the base to puff up and then collapse, creating an uneven surface for your layers.
Once you stir in the flour, baking powder, and salt, a soft dough will form. It should feel pliable, almost like playdough. Don’t be tempted to add liquid if it looks a little crumbly at first; just keep working it with your spatula or clean hands. The goal is a cohesive mass that doesn’t stick excessively to your fingers but holds together when pressed. This sturdy foundation is what allows the bars to be portable and easy to eat without a fork.
Pressing and Docking the Dough
Getting an even layer is harder than it looks. Most people naturally push more dough toward the edges, leaving a thin, fragile center. To fix this, use the flat bottom of a metal measuring cup or a heavy glass to press the dough into the corners of your parchment-lined pan. This ensures a uniform thickness across the entire base. You can also lightly prick the dough with a fork—a technique called docking—to prevent any large air bubbles from lifting the crust during the par-bake.
Step-by-Step: Achieving the Golden Coconut Mid-Layer
Mixing the coconut layer is straightforward, but don’t rush it. You want every single shred of coconut to be glistening with sweetened condensed milk. If you see dry patches, the layer won’t set properly and will fall apart when sliced. I highly recommend adding that half-teaspoon of almond extract. While optional, it provides a subtle, bakery-style floral note that makes the coconut taste more complex and less like a candy bar. It’s that “hidden” ingredient that makes people wonder why your bars taste better than theirs.
Timing the Second Bake for Maximum Chew
When you return the pan to the oven with the coconut layer, keep a close eye on the clock. You aren’t looking for a deep brown color here. Instead, aim for “toasted blonde.” The tips of the coconut shreds should just be starting to turn golden. Remember that carry-over cooking is a real factor. The residual heat in the pan will continue to firm up the condensed milk for several minutes after you pull it out of the oven, so don’t wait until it looks fully browned or it will become tough.
Step-by-Step: Crafting the Glossy Chocolate Ganache Seal
A ganache is far superior to just melting chocolate chips alone. Plain melted chocolate becomes very hard when chilled, which causes it to crack and shatter when you try to bite into the bar. By adding heavy cream, you create a stable emulsion that stays slightly soft and fudgy even when cold. Use a 6:1 ratio of chocolate to cream for these bars. This ensures the topping is firm enough to stack but soft enough to yield to your teeth without effort.
If you’re using the microwave, go slow. Heat in 30-second bursts and stir vigorously in between. It might look like it’s not melting at first, but the residual heat from the cream will eventually turn the mixture into a glossy, dark liquid. If you prefer the stove, a double boiler works perfectly. Just ensure no water splashes into the chocolate, or it will seize into a grainy clump. Once smooth, pour it over the coconut while it’s still warm to create a flat, mirror-like seal.
Applying the Garnish for Visual Impact
Timing is everything when garnishing. You must press the toasted pecans into the ganache while it is still wet and fluid. If you wait too long, the chocolate will set, and the nuts will just roll off. Arrange the pecan halves so they are visible and slightly raised above the surface; this gives the bars a rustic, artisanal look. Sprinkle the extra coconut flakes last, letting them fall naturally to create a beautiful color contrast against the dark chocolate background.
Temperature Control and the Art of Slicing
Patience is the hardest part of this recipe. You cannot slice these bars while they are warm. If you try, the ganache will smear and the coconut layer will slide right off the base. Allow the pan to sit at room temperature for at least an hour. This prevents “blooming,” which is that white, powdery look chocolate gets when it experiences a rapid temperature shock. Once the pan is no longer warm to the touch, move it to the fridge for at least two hours to fully set the fats.
How to Get Clean, Professional Squares
To get those sharp, clean edges you see in bakeries, use the “hot knife” technique. Run a large chef’s knife under hot water, wipe it completely dry, and make one long, decisive cut. The heat from the blade will glide through the chocolate ganache without cracking it. Crucially, you must wipe the blade clean and re-heat it between every single cut. This prevents the white coconut filling from smearing onto the dark chocolate top, keeping your layers distinct and beautiful.
Troubleshooting Common Layered Bar Issues
If your shortbread base turns out too crumbly, you likely over-measured your flour or didn’t cream the butter long enough. Always fluff your flour with a spoon before leveling it off in the measuring cup. If the coconut layer feels runny or liquid after cooling, it simply needed a few more minutes in the oven. The condensed milk needs enough heat to caramelize slightly and bind the shreds together. If this happens, you can sometimes save them by chilling them longer, but they will be extra messy to eat.
Another common issue is the chocolate “sweating” or developing beads of moisture. This usually happens if the bars are put into the refrigerator while still hot. The steam gets trapped and condenses on the surface. Always ensure the bars are at room temperature before they hit the cold air of the fridge. If the chocolate does sweat, you can gently blot it with a paper towel, though it may lose some of its glossy sheen.
Storage Logistics and Make-Ahead Strategies
These bars are incredibly sturdy, making them perfect for gifting or parties. You can store them in an airtight container at room temperature for up to three days, but for the best texture, keep them in the refrigerator. They will stay fresh for up to a week when chilled. The cold temperature keeps the ganache firm and the coconut chewy. If you need to stack them, always place a sheet of parchment paper between the layers to prevent the chocolate from sticking to the bottom of the bar above it.
For long-term storage, these bars freeze beautifully. Wrap individual squares in plastic wrap and then place them in a freezer-safe bag. They will keep for up to three months. When you’re ready to eat one, let it thaw in the fridge overnight. Avoid thawing them on the counter, as the rapid temperature change can cause the chocolate to lose its temper and become soft or dull.
Expert Tips for Recipe Success
Adjusting for High Humidity Environments
If you live in a very humid climate, the coconut layer may take longer to set because the sugar in the condensed milk absorbs moisture from the air. In these conditions, increase your second bake time by 3 to 5 minutes. You want to ensure the coconut feels firm to a light touch before you pull it out. If it feels “jiggly,” it needs more time to dehydrate and set properly.
Alternative Nut and Seed Variations
While pecans offer the classic “Dream Bar” flavor, you can easily swap them out. Walnuts provide a similar crunch with a slightly more bitter edge that pairs well with the sweet coconut. If you have a nut allergy, toasted sunflower seeds or even toasted oats can provide that necessary textural contrast. Just maintain the one-cup ratio to ensure you have enough garnish to cover the ganache surface without overwhelming the other layers.
Frequently Asked Questions
Can I use evaporated milk instead of sweetened condensed milk?
No, you cannot substitute these. Evaporated milk is much thinner and lacks the high sugar content required to bind the coconut shreds together. Sweetened condensed milk acts as the “glue” for the middle layer; using evaporated milk will result in a liquid mess that will never set, even after hours of baking.
How do I make these Chocolate Coconut Pecan Dream Bars gluten-free?
You can successfully swap the all-purpose flour for a high-quality 1:1 gluten-free flour blend. Look for a blend that already contains xanthan gum to ensure the shortbread base doesn’t become too brittle. The rest of the ingredients—coconut, condensed milk, chocolate, and pecans—are naturally gluten-free, but always check your labels to be safe.
Why did my chocolate topping turn white or dull?
This is known as chocolate bloom. It usually happens for two reasons: either the chocolate was overheated during the melting process, or the bars were moved to a cold refrigerator while the ganache was still too hot. To avoid this, melt your chocolate gently and always let the bars reach room temperature before refrigerating them. The bars are still perfectly safe to eat, they just won’t be as shiny.
Can I bake this recipe in a larger 9×13 inch pan?
Yes, you can, but you must double all the ingredients to maintain the thickness of the layers. If you use the original measurements in a 9×13 pan, the layers will be too thin and will likely overcook or burn. When doubling the recipe, you may need to add 5-8 minutes to the baking times for both the base and the coconut layer to ensure the center is fully set.
My base is stuck to the pan, how do I get the bars out?
This is why using parchment paper with an “overhang” is essential. If you didn’t use parchment, you can try briefly placing the bottom of the pan in an inch of warm water for 30 seconds. This will slightly soften the butter in the crust, allowing you to slide a spatula underneath. For future bakes, always leave two inches of paper hanging over the sides to use as handles for lifting the entire block out at once.
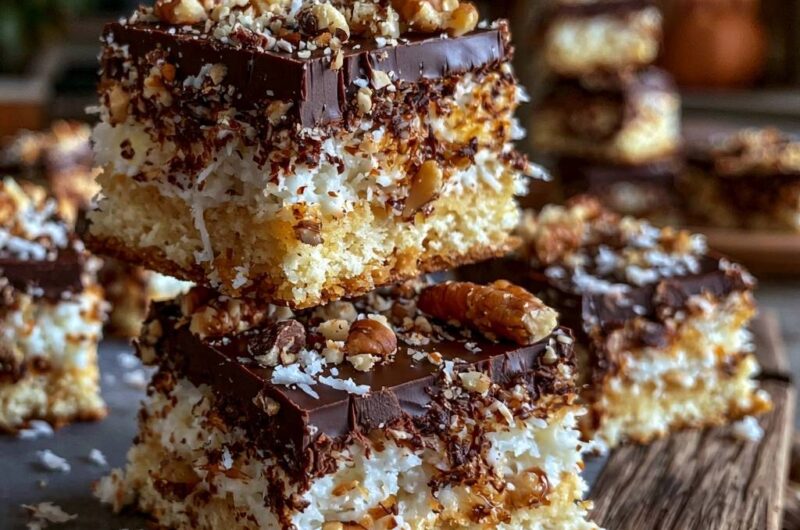
Chocolate Coconut Pecan Dream Bars
Course: DessertCuisine: AmericanDifficulty: easy16
bars20
minutes35
minutes55
Minutes340
kcalAmerican
Ingredients
For the Base:
1/2 cup unsalted butter, softened
1/2 cup granulated sugar
1 large egg
1 teaspoon vanilla extract
1 1/2 cups all-purpose flour
1/2 teaspoon baking powder
1/4 teaspoon salt
For the Coconut Layer:
3 cups shredded sweetened coconut
3/4 cup sweetened condensed milk
1/2 teaspoon almond extract (optional)
For the Chocolate Topping & Garnish:
1 1/2 cups semi-sweet chocolate chips
1/4 cup heavy cream
1 cup pecan halves and pieces, toasted
1/4 cup shredded coconut for garnish
Directions
- Preheat your oven to 350°F (175°C). Line an 8×8 inch square baking pan with parchment paper, ensuring the paper overhangs the sides for easy removal.
- Prepare the Base: In a medium bowl, cream together the softened butter and sugar until fluffy. Beat in the egg and vanilla. Stir in the flour, baking powder, and salt until a soft dough forms. Press the dough evenly into the bottom of the prepared pan.
- Par-bake the Base: Bake for 15-18 minutes until the base is set and the edges are a light golden brown. This creates the “anti-soggy” foundation required to hold the heavy toppings.
- Prepare the Coconut Layer: While the base bakes, mix 3 cups of shredded coconut with the sweetened condensed milk and almond extract in a bowl until the coconut is thoroughly coated.
- Assemble and Second Bake: Spread the coconut mixture firmly and evenly over the hot, par-baked crust. Return the pan to the oven and bake for another 15 minutes until the coconut is set and the tips are beginning to turn golden.
- Prepare the Ganache: While the bars cool slightly, combine the chocolate chips and heavy cream in a microwave-safe bowl. Heat in 30-second intervals, stirring in between, until the mixture is glossy and completely smooth.
- Top the Bars: Pour the warm chocolate ganache over the coconut layer, spreading it with a spatula to the very edges to create a thick, flat seal.
- Garnish: Immediately press the toasted pecans and the extra shredded coconut into the wet chocolate. Ensure some larger pecan pieces are visible to match the rustic, textured look of the image.
- Set and Slice: Allow the bars to cool at room temperature for 1 hour, then refrigerate for at least 2 hours. This is crucial for the chocolate to firm up enough to achieve the clean, sharp cuts shown in the photo. Lift out by the parchment paper and slice into 16 squares.
Notes
- The secret to the perfect layered bar is par-baking the base to prevent a soggy bottom. Ensure the bars are refrigerated for at least 2 hours before slicing to achieve clean, sharp edges.