Mastering Salted Caramel Pecan Cookies
You’ve likely experienced the heartbreak of a caramel cookie gone wrong. You pull a beautiful tray out of the oven, let them cool, and drizzle that golden sauce over the top, only to find a soggy, sticky mess an hour later. Most recipes allow the caramel to soak straight through the crumb, destroying the texture and leaving you with a limp cookie that falls apart in your hands.
The secret to a truly professional Salted Caramel Pecan Cookie lies in the “Anti-Soggy Secret,” a specific temperature-staged chilling method that creates a structural barrier. This technique ensures your cookies maintain crisp, golden edges and a dense, chewy center that stands up to the weight of the toppings. By controlling the moisture migration, we keep the crunch of the pecans and the snap of the cookie perfectly intact.
I’ve found that the real trick is all about the viscosity of your caramel and the temperature of the cookie base during the drizzle. If you apply caramel to a even a slightly warm cookie, the heat thins the sauce, allowing it to penetrate the surface like a sponge. We’re going to wait until these are completely cold to ensure that caramel sits proudly on top, exactly where it belongs.
The Science of the Anti-Soggy Chilling Method
Chilling your dough for 2 to 24 hours isn’t just a suggestion; it’s a fundamental requirement for a high-quality cookie. When the dough rests in the refrigerator, the flour proteins have time to fully hydrate, absorbing the moisture from the eggs and butter. This creates a much sturdier crumb structure that acts as a natural moisture barrier against the caramel sauce later on.
Furthermore, chilling solidifies the butter within the dough. When cold dough hits a hot oven, the fat takes longer to melt, which significantly reduces spreading. This results in a thicker cookie with a concentrated flavor profile. You’ll notice the edges get that perfect “snap” while the middle stays soft and fudgy because the center didn’t overcook while waiting for the edges to set.
This resting period also encourages the Maillard reaction, which is the chemical process that gives browned food its distinctive, savory-sweet flavor. As the enzymes in the flour break down starches into simple sugars, the dough browns more deeply and evenly. You aren’t just making a cookie; you’re aging the dough to develop a complex, toffee-like undertone that pairs beautifully with the pecans.
Essential Components for Salted Caramel Pecan Cookies
Every ingredient in this recipe serves a specific structural purpose. We use dark brown sugar because its high molasses content provides a deep acidity that reacts with the baking soda, creating a lovely lift and a signature chewiness. The extra moisture in dark brown sugar, compared to light brown, is what gives these cookies their “bendy” center.
When it comes to the pecans, I always recommend buying large halves and chopping them yourself. Pre-chopped nuts often lose their natural oils and can taste dusty or stale. By hand-chopping, you keep larger chunks intact, which provides a massive textural contrast against the soft dough and ensures the nutty oils stay inside the pecan until you take a bite.
The caramel itself must be high-viscosity. If you use a thin, pourable syrup meant for coffee, it will run right off the cookie. You want a sauce that passes the “spoon test”—it should be thick enough to hold its shape on a spoon for several seconds before slowly sliding off. This thickness is what allows the caramel to “set” on the surface of the cookie.
Finally, flaky sea salt is the only way to finish these. Unlike fine table salt, which would dissolve into the caramel and make it overly salty, flaky salt provides a localized “pop” of flavor. It cuts through the richness of the butter and sugar, balancing the palate so you can eat more than just one.
The same creaming method helps create the soft center and crackled top in these ginger molasses cookies.
Selecting the Right Pecan Grade
Look for “Mammoth” or “Junior Mammoth” halves at the store. These grades ensure the nuts are plump and full of flavor. If you have an extra five minutes, lightly toast the pecans in a dry skillet over medium heat until they smell fragrant. This extra step releases the aromatic oils and makes the nuttiness much more pronounced in the finished cookie.
The Importance of Room Temperature Emulsions
It is vital that your eggs are at room temperature before you begin. Cold eggs will cause the creamed butter and sugar to seize, resulting in a “broken” or curdled batter. A proper emulsion creates a smooth, pale mixture that traps air effectively, leading to a uniform rise and a consistent spread in the oven.
Step-by-Step: Preparing the Pecan Cookie Base
Start by creaming your softened butter with both the dark brown and granulated sugars. Don’t rush this part; you want to beat them for at least 3 to 4 minutes. You’ll see the mixture transform from a gritty, dark paste into a light, aerated, and pale fluff. This aeration is what gives the cookie its structure and prevents it from becoming a leaden disk.
Once you’ve added your eggs and vanilla, it’s time for the dry ingredients. Switch your mixer to the lowest setting or use a sturdy spatula. You want to mix until the white streaks of flour just barely disappear. Overmixing at this stage develops gluten, which will turn your cookies tough and bread-like instead of tender and chewy.
The “Pecan Fold” is the final manual step. Use a large rubber spatula to gently incorporate the chopped pecans. Try to use a folding motion—cutting through the center and lifting from the bottom—to keep the air you’ve worked so hard to beat into the butter. You want those large pecan chunks distributed evenly so every bite has a crunch.
At this point, the dough will feel quite soft, which is exactly why the chilling phase is next. Don’t be tempted to add more flour! The dough just needs time to firm up. If you bake it now, the cookies will puddles on the tray. Trust the process and get that dough into the fridge.
Executing the Temperature-Staged Chilling Process
Scoop your dough into 2-tablespoon balls before chilling. It’s much easier to portion the dough while it’s soft than to hack away at a cold block later. Place the balls on a tray and cover them tightly. If you’re chilling for the full 24 hours, use an airtight container or beeswax wrap to prevent the dough from absorbing any “fridge smells” like onions or leftovers.
A 2-hour chill is the minimum for structural integrity, but a 24-hour chill is the gold standard for flavor. During this time, the fats solidify completely. When these cold balls hit the 350°F oven, the outside sets quickly while the inside stays cool for a few extra minutes, ensuring that perfect contrast between a crispy rim and a soft heart.
Baking and Cooling for Structural Integrity
Before you bake, ensure your oven is truly at 350°F by using an oven thermometer. Most home ovens are off by 10 to 25 degrees, which can ruin the bake time. Space your chilled dough balls at least 3 inches apart. This allows for proper airflow, which is essential for getting those edges golden and crisp.
If rancid nuts ruin your cookies, you’ll want to avoid that with these dark chocolate chunk cookies too.
Watch for the “Carryover Cooking” principle. You should pull the cookies out when the edges are set and brown, but the centers still look slightly underbaked and soft. They will continue to cook on the hot baking sheet for several minutes after you remove them. If they look fully done in the oven, they will be hard as rocks once they cool.
Let the cookies rest on the hot pan for exactly 5 minutes. This allows the base to firm up enough so you can move them without breaking. Then, transfer them to a wire rack. The wire rack is crucial because it allows air to circulate under the cookie, preventing steam from building up and making the bottom soggy.
The Finishing Touch: Caramel Application and Salting
Patience is your best friend here. The cookies must be “cold to the touch” before you even think about the caramel. If there is any residual heat, the caramel will melt and soak into the crumb. I often wait an hour after baking just to be absolutely sure the structural barrier has fully formed.
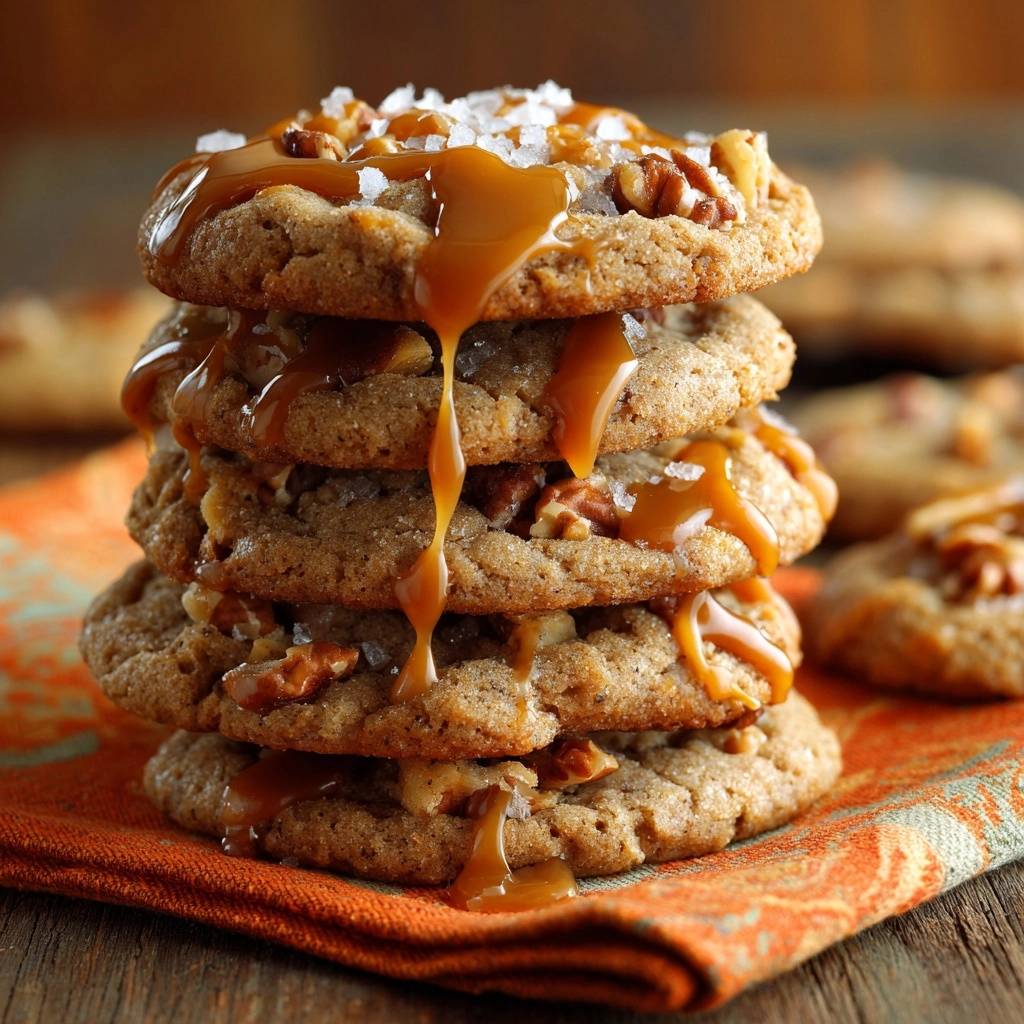
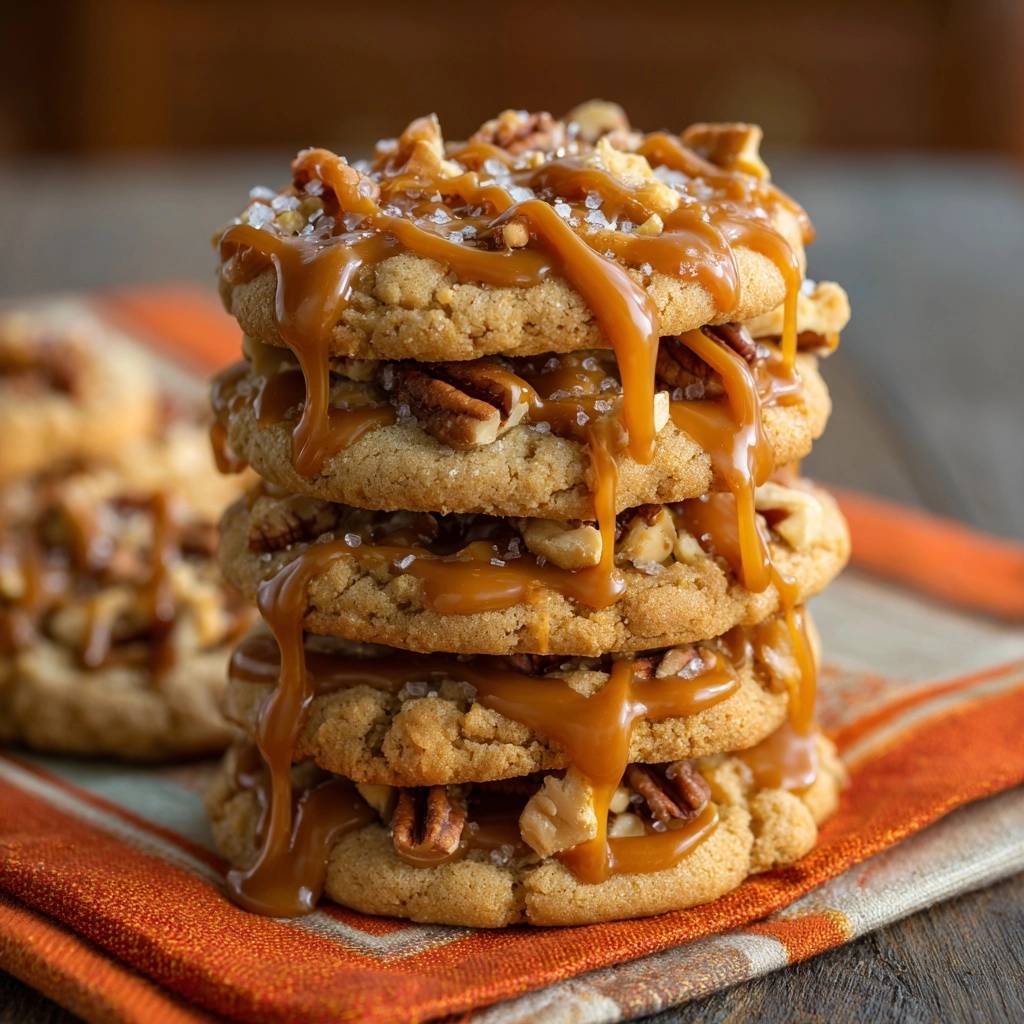
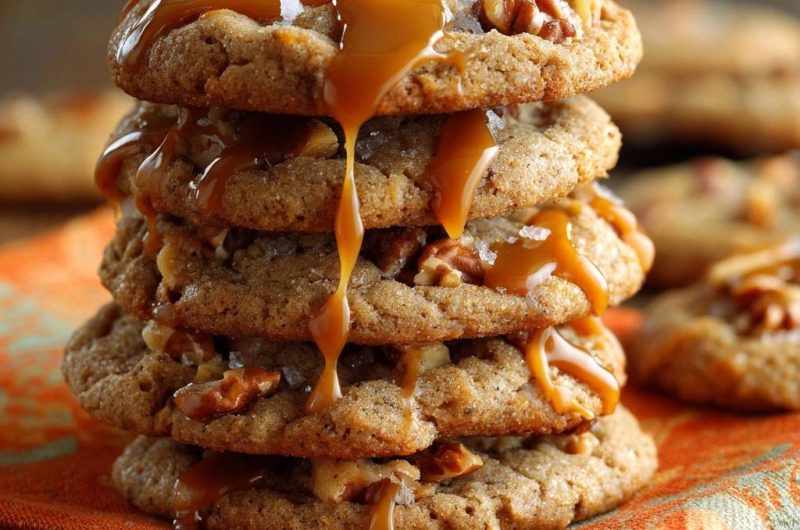
Use a spoon to drizzle the thick caramel in a zig-zag pattern. If you want a more professional look, you can snip the corner off a small plastic bag and pipe the caramel. Let the sauce naturally drip down the sides of the pecans. This creates those beautiful “caramel rivers” that make the cookies look like they came from a high-end bakery.
Timing the salt is the final trick. You must sprinkle the flaky sea salt while the caramel is still tacky. If you wait too long and the caramel sets, the salt will just bounce off. If you do it too early while the caramel is too fluid, the salt might sink. Aim for that sweet spot about 30 seconds after drizzling.
Troubleshooting Common Pecan Cookie Obstacles
If your cookies spread too thin and turned into one giant pancake, your butter was likely too warm when you started creaming, or you didn’t chill the dough long enough. Make sure the butter is “cool room temperature”—it should indent when pressed but still hold its shape. Also, double-check that you aren’t over-beating the eggs, which can add too much air and cause a collapse.
If the caramel is sliding right off the cookie, your sauce is likely too thin. This often happens with “ice cream topping” style caramels. You need a dessert sauce that is specifically labeled as thick or “fleur de sel” style. Additionally, ensure the cookie is completely cooled; even a tiny bit of warmth acts as a lubricant for the caramel to slide.
Bitter pecans are usually a sign of rancidity. Because pecans have a high oil content, they can go bad quickly if left in a warm pantry. Always taste a nut before adding it to your batter. If they taste “off” or sharp, they are past their prime. Store your pecans in the freezer to keep them fresh for months.
How to Fix Thin Caramel Sauce
If you accidentally bought a thin caramel sauce, don’t panic. Pour it into a small saucepan and simmer it over low heat for 5 to 8 minutes, stirring constantly. This evaporates some of the water content and thickens the sugars. Let it cool completely in the fridge before drizzling; it will thicken significantly as the temperature drops.
What’s Next?
Try these delicious pairings:
- The Ultimate Southern Biscuits and Mushroom Gravy
- Mastering the Cinnamon Streusel Coffee Cake: The Anti-Soggy Method
Maintaining the Crunch in High Humidity
In humid climates, salt acts as a humectant, pulling moisture from the air and causing the caramel to “sweat.” To prevent this, store your finished cookies in an airtight container with a small piece of parchment paper between layers. If they do soften, a quick 2-minute stay in a 300°F oven (before adding caramel!) can crisp them back up.
Storage and Make-Ahead Strategies
These cookies stay fresh at room temperature for up to 5 days if kept in a sealed container. However, because of the caramel and salt, they are best enjoyed within the first 48 hours. If you find the salt has dissolved into the caramel after a few days, you can always add a tiny fresh pinch before serving.
For the best results, I recommend freezing the dough balls rather than the finished cookies. Flash-freeze the raw dough balls on a tray for an hour, then toss them into a freezer bag. You can bake them straight from frozen—just add 2 minutes to the baking time. This way, you can have a fresh, crisp cookie whenever the craving hits.
If you must freeze finished cookies, do so without the caramel drizzle. The caramel can become quite messy during the thawing process. Thaw the plain pecan cookies at room temperature, then apply the fresh caramel and salt right before you plan to serve them to ensure the best texture.
Expert Tips for Professional Results
For perfectly round cookies, use a large circular cookie cutter or a glass. Immediately after taking the tray out of the oven, place the cutter over a cookie and gently “scoot” it in a circular motion. This pulls in any stray edges and creates a perfect circle while the dough is still soft and malleable.
Another pro tip is to save a few extra pecan halves to press into the tops of the dough balls right before they go into the oven. This ensures that the pecans are visible on the surface and aren’t all buried inside the dough, giving the cookies a much more artisanal, “loaded” appearance.
How should I store Salted Caramel Pecan Cookies?
Store these cookies in a single layer in an airtight container at room temperature for up to 5 days. If you must stack them, place a sheet of parchment paper between the layers to prevent the caramel from sticking to the bottoms of the cookies above. Avoid refrigerating the finished cookies, as the moisture in the fridge can make the cookie base lose its crispness and cause the salt to dissolve into the caramel.
Why did my caramel soak into the cookie?
This usually happens for two reasons: either the cookie was still warm when you applied the caramel, or the caramel sauce was too thin. Heat thins out the sugars in the caramel, allowing it to seep into the porous crumb of the cookie. Always ensure the cookies are completely cold to the touch and use a high-viscosity, thick caramel sauce that holds its shape on a spoon.
Can I use a different type of nut?
Absolutely! While pecans offer a classic buttery flavor that pairs perfectly with caramel, walnuts or macadamia nuts are excellent substitutes. If using walnuts, follow the same hand-chopping method to maintain texture. If you prefer a saltier profile, roasted peanuts also work incredibly well with the caramel drizzle, though the flavor profile will shift toward a “candy bar” style cookie.
Why are my cookies flat and greasy?
Flat, greasy cookies are typically the result of butter that was too soft or even melted before creaming. Butter should be “pliable” but still cool. Another culprit could be skipping the chilling step. Chilling the dough for at least 2 hours is mandatory for this recipe; it allows the fat to solidify so the cookies hold their height and develop that chewy, thick center instead of spreading into a thin disc.
Can I make these gluten-free?
Yes, you can substitute the all-purpose flour with a high-quality 1:1 gluten-free flour blend that contains xanthan gum. Because gluten-free flour takes longer to hydrate, I strongly recommend the full 24-hour chill in the refrigerator. This prevents the cookies from having a “gritty” texture and helps them hold together better since they lack the traditional gluten structure.
Salted Caramel Pecan Cookies
Course: DessertCuisine: AmericanDifficulty: easy24
cookies15
minutes10
minutes240
kcal120
MinutesA specialized cookie recipe designed to prevent sogginess using a specific chilling and cooling process. These cookies feature a sturdy crumb structure, toasted pecans, and a high-viscosity caramel finish topped with flaky sea salt.
Ingredients
1 cup unsalted butter, softened
1 cup dark brown sugar, packed
1/2 cup granulated sugar
2 large eggs, room temperature
1 teaspoon vanilla extract
2 1/2 cups all-purpose flour
1 teaspoon baking soda
1/2 teaspoon salt
1 1/2 cups large pecan halves, roughly chopped
1/2 cup thick, high-quality caramel sauce (thick enough to hold its shape)
1 tablespoon coarse flaky sea salt
Directions
- Cream the Base: In a large bowl, cream the butter, dark brown sugar, and granulated sugar until the mixture is light and aerated. This should take about 3 to 4 minutes on medium-high speed.
- Emulsify: Add the eggs one at a time, beating well after each addition, followed by the vanilla extract. Mix until the batter is smooth and pale.
- Dry Ingredients: In a separate bowl, whisk together the flour, baking soda, and salt. Gradually add the dry ingredients to the wet ingredients, mixing on low speed until just combined. Do not overmix.
- The Pecan Fold: Fold in the chopped pecans by hand. Ensure you leave some larger chunks for the visual texture shown in the image.
- The Anti-Soggy Secret (Chilling): Scoop the dough into 2-tablespoon sized balls. Place them on a tray and chill in the refrigerator for at least 2 hours (or up to 24 hours). This solidifies the fats and hydrates the flour, creating a sturdy crumb structure that prevents the caramel from penetrating the base of the cookie later.
- Bake: Preheat your oven to 350°F (175°C). Line a baking sheet with parchment paper. Space the chilled dough balls 3 inches apart. Bake for 10 to 12 minutes until the edges are set and golden brown, but the centers still look slightly soft.
- The Cooling Phase: Let the cookies cool on the baking sheet for 5 minutes before transferring them to a wire rack to cool completely. Crucial Step: If you drizzle caramel while they are warm, the heat will thin the sauce and pull the moisture into the cookie.
- The Finish: Once the cookies are entirely cold to the touch, stack them as desired. Use a spoon to drizzle the thick caramel sauce over the top, allowing it to drip down the sides.
- Set the Topping: Immediately sprinkle with a generous amount of coarse flaky sea salt. The salt and the cool surface of the cookie will help “set” the caramel’s exterior, keeping the cookie perfectly crisp underneath.
Notes
- The secret to preventing a soggy bottom is chilling the dough for at least 2 hours and ensuring the cookies are completely cold before applying the caramel drizzle.