Apple Crumble Pie: The Trick to a Flawless Filling
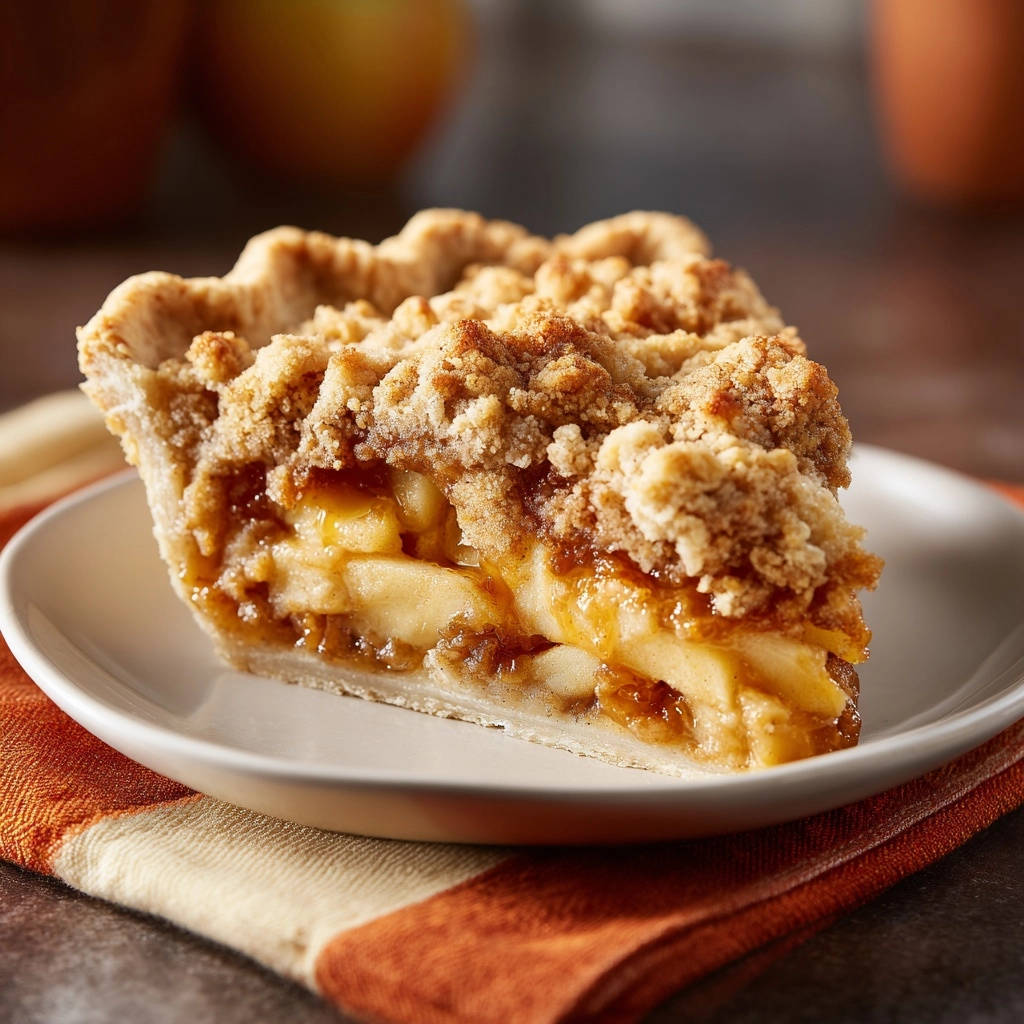
If you’ve ever experienced the disappointment of a beautiful Apple Crumble Pie with a runny filling, you know the frustration. I’ve certainly been there, but after countless experiments, I uncovered a simple trick that transforms good pies into truly exceptional ones.
This recipe isn’t just about baking; it’s about mastering the art of a perfectly set, luscious apple filling that holds its shape with elegance. Get ready to create an Apple Crumble Pie that will impress every single time.
Say Goodbye to Runny Pies: Why This Apple Crumble Pie Recipe Works
The secret to a pristine slice of fruit pie lies in understanding moisture. Many recipes overlook the natural water content of apples, leading to a watery filling that compromises the texture of both the fruit and the crust.
This particular Apple Crumble Pie recipe specifically addresses this challenge. It employs two critical techniques designed to manage moisture and ensure your filling is always beautifully set.
You can confidently bake, slice, and serve this pie knowing it will maintain its delicious integrity from the first slice to the last.
The Magic of Moisture Management: Your Secret Weapon
The core of our no-runny-pie strategy involves a two-pronged attack on excess moisture. First, we allow the sliced apples to sit with the sugars and spices, drawing out their natural liquid.
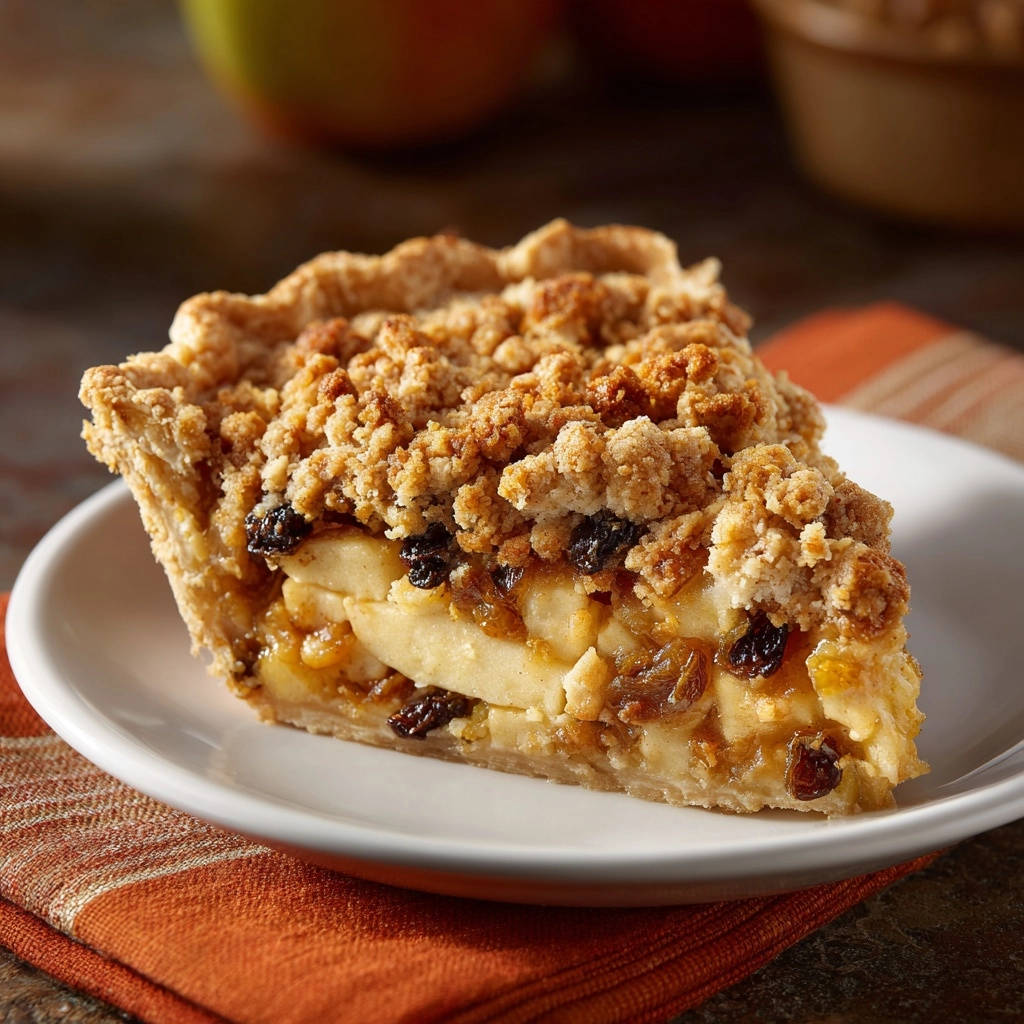
This liquid is then separated and reduced on the stovetop. This concentrates the apple flavor while pre-thickening the most watery component before it even meets the pie crust.
That Essential Cooling Time: The Final Set
Beyond active moisture management, patience is your greatest ally. The extended cooling time after baking is absolutely non-negotiable for this Apple Crumble Pie.
This allows the starches and natural pectins to fully gel and set, transforming the liquid filling into a firm, sliceable delight. Skipping this step is the fastest route back to a runny pie.
Gather Your Baking Arsenal: Essential Tools for Pie Perfection
Having the right tools makes the baking process smoother and more enjoyable. These essentials will help you craft a flawless Apple Crumble Pie.
- 9-inch Pie Plate:
A ceramic or glass pie plate ensures even heat distribution and a beautifully golden-brown crust.
- Large Mixing Bowls (2):
You’ll need one for the apple filling and another for preparing the crumble topping, keeping your workspace organized.
- Whisk:
Essential for combining dry ingredients evenly in both the filling and the crumble.
- Pastry Blender or Your Fingertips:
Perfect for cutting cold butter into the flour for the crumble, creating that signature crumbly texture. Your hands work wonderfully too.
- Small Saucepan:
Used to simmer and reduce the drained apple liquid, concentrating flavor and pre-thickening the filling base.
- Measuring Cups and Spoons:
Accurate measurements are crucial for successful baking, so have your set ready.
- Wire Rack:
An absolute must for cooling the pie completely, allowing air circulation for a crisp bottom crust and proper setting of the filling.
The Heart of the Crumble: Understanding Your Ingredients
Every ingredient in this Apple Crumble Pie plays a specific role, contributing to its overall flavor, texture, and structural success. Let’s explore the ‘why’ behind each choice.
Choosing the Perfect Apples for Your Filling
For this apple pie, a blend of sweet and tart apples is ideal. Varieties like Honeycrisp or Granny Smith are fantastic choices due to their firm texture, which holds up well during baking without turning mushy.
Granny Smith apples add a delightful tartness that balances the sweetness of the sugars. Honeycrisp offers a crisp texture and a lovely sweetness.
You can also experiment with other firm baking apples like Braeburn or Jonagold. Just be sure to avoid overly soft or mealy varieties.
Sweeteners and Spices: Balancing the Flavor Profile
We use a combination of granulated and brown sugar in both the filling and the crumble. Granulated sugar provides clean sweetness, while brown sugar adds depth, a hint of molasses flavor, and extra moisture.
Cinnamon and nutmeg are the classic spice duo for apple crumble pie, offering warmth and aromatic complexity. These spices beautifully complement the apples without overpowering them.
The Secret to a Set Filling: Flour & Lemon Juice
The small amount of all-purpose flour added directly to the drained apples acts as a final thickening agent, ensuring the filling achieves a perfect consistency.
Lemon juice is essential for two reasons: it brightens the apple flavor, preventing the pie from tasting overly sweet, and it helps prevent the apples from browning too quickly when exposed to air.
Crafting the Irresistible Crumble Topping
The crumble topping relies on cold unsalted butter, all-purpose flour, both granulated and brown sugars, and a touch of salt. Using cold butter is paramount.
Cold butter, when cut into the flour, creates pockets that melt during baking, resulting in a delightfully crisp, tender, and “crumbly” texture. The sugars provide sweetness and encourage browning, while salt balances the flavors.
Mastering Each Step: Your Guide to a Flawless Apple Crumble Pie
Follow these detailed steps carefully, paying close attention to the explanations for a truly flawless Apple Crumble Pie.
Prepping Your Workspace & Crust
- Preheat Oven and Prepare Crust:
Set your oven to 375°F (190°C). This ensures the oven is at the correct temperature for even baking from the start. Carefully unroll your pre-made pie crust and settle it gently into a 9-inch pie plate, crimping the edges as desired.
The Apple Filling’s “Secret”: Moisture Release & Flavor Concentration
- Combine Apples and Initiate Moisture Release:
In a large bowl, combine the peeled, cored, and sliced apples with 1/2 cup granulated sugar, 1/4 cup packed brown sugar, 1 teaspoon cinnamon, 1/4 teaspoon nutmeg, and 2 tablespoons lemon juice. Toss these ingredients gently but thoroughly to ensure every apple slice is coated.
Now for the crucial step: let the mixture sit at room temperature for 30 minutes. This resting period actively draws out excess moisture from the apples, which is key to preventing a runny filling.
- Drain and Coat Apples:
After the apples have rested, carefully drain any accumulated liquid from the bowl into a small saucepan. This separated liquid is packed with flavor and potential runniness. Add the 1/4 cup all-purpose flour directly to the drained apples and toss to coat them evenly; this flour will help thicken the filling once it’s baked.
- Reduce and Thicken Liquid:
Bring the drained apple liquid in the saucepan to a simmer over medium heat. Cook, stirring frequently, for about 3 to 5 minutes, until the liquid has slightly thickened and reduced.
This step concentrates the apple flavor significantly and pre-thickens the most watery component of your filling, laying the groundwork for a perfectly set Apple Crumble Pie.
- Combine Thickened Liquid with Apples:
Pour the now-thickened liquid back over the flour-coated apples. Stir gently to combine all the elements, ensuring the apples are evenly coated with the flavorful, slightly viscous sauce.
Building Your Golden Crumble Topping
- Prepare Crumble Topping:
In a separate medium bowl, whisk together 1 cup all-purpose flour, 1/2 cup granulated sugar, 1/2 cup packed brown sugar, and 1/4 teaspoon salt. Cut the cold 1/2 cup (1 stick) unsalted butter into small pieces and add them to the dry ingredients.
Using your fingers or a pastry blender, work the cold butter into the flour mixture until coarse, pea-sized crumbs form. It’s important to keep the butter cold to achieve the best crumbly texture.
Assembling and Baking to Perfection
- Fill the Pie Crust:
Spoon the prepared apple filling evenly into your pie crust. Make sure the apples are distributed well, reaching into the edges of the pie plate.
- Add Crumble Topping:
Generously sprinkle the crumble topping over the apple filling. Ensure good coverage across the entire surface for that delightful crunchy contrast.
- Bake the Pie:
Bake for 45 to 60 minutes, or until the crumble is golden brown and the filling is visibly bubbly around the edges. If the crumble starts to brown too quickly before the filling is ready, loosely tent the pie with a piece of foil to protect it.
The Critical Cool-Down for a Perfect Set
- Cool Completely:
Transfer the baked Apple Crumble Pie to a wire rack and let it cool completely for at least 3 to 4 hours before slicing and serving. This extended cooling time is absolutely essential for the filling to fully set, guaranteeing it holds its beautiful shape when you cut into it.
Resist the temptation to cut into it early; patience here yields the most rewarding results.
Unlock Pro Secrets: Elevate Your Apple Crumble Pie Beyond Basics
Beyond the core instructions, these expert tips can take your homemade Apple Crumble Pie from great to truly unforgettable.
Achieving the Perfect Crumble Texture
For the best crumble, ensure your butter is very cold and cut into small pieces. Work it quickly into the flour mixture using your fingertips or a pastry blender to avoid melting the butter with the heat of your hands.
Aim for a mix of textures, from fine crumbs to pea-sized chunks. This variation provides wonderful textural interest in every bite of your sweet treat.
Enhancing Apple Flavor: Spices and Zest
Consider adding a pinch of ground cardamom or a tiny dash of allspice to your apple filling for an extra layer of complexity. A tablespoon of fresh orange zest can also brighten the overall flavor profile beautifully.
For a touch of elegance, a tiny splash of vanilla extract can be added to the reduced apple liquid before combining it with the apples.
Preventing a Soggy Bottom Crust
To ensure a crisp bottom crust, lightly brush the pie crust with a beaten egg white before adding the filling. This creates a barrier against moisture.
Alternatively, you can sprinkle a tablespoon of fine breadcrumbs or cornmeal over the bottom of the crust before adding the apple mixture. These absorb excess liquid, preventing sogginess.
Knowing When Your Pie is Truly Done
Beyond the golden-brown crumble, the most reliable sign that your Apple Crumble Pie is done is a visibly bubbly filling. You should see the fruit juices actively simmering through the crumble topping.
For extra assurance, insert a thin skewer or knife into the filling; the apples should feel tender. An internal temperature of around 200-205°F (93-96°C) for the filling also indicates doneness.
Customizing Your Crumble: Creative Topping Additions
Elevate your crumble by mixing in a 1/2 cup of chopped pecans or walnuts for added crunch and nutty flavor. A handful of rolled oats can also provide a chewiness and heartier texture.
For an extra kick, try adding a pinch of ground ginger or a dash of black pepper to your crumble topping; it creates an unexpected depth of flavor.
Troubleshooting Common Pie Dilemmas: Expert Solutions
Even experienced bakers encounter hiccups. Here are solutions to common challenges you might face when making Apple Crumble Pie.
Why Is My Filling Still Runny?
A runny filling typically stems from insufficient moisture management. Ensure you allowed the apples to sit and fully drain their liquid, and that you reduced that liquid until it visibly thickened on the stove.
Most importantly, allow the pie to cool completely for at least 3-4 hours. This extended cooling time is absolutely critical for the starches to set fully.
My Crumble Topping Burned Too Quickly!
If your crumble is browning too fast, your oven temperature might be slightly off or the pie is simply baking too close to the top element. Always use an oven thermometer to verify accuracy.
The solution is simple: lightly tent the pie with aluminum foil. This will protect the crumble while allowing the filling underneath to finish baking.
The Crust Is Soggy! How Can I Prevent It?
A soggy bottom crust is often caused by excess moisture from the filling or an underbaked crust. Ensure your apple filling isn’t overly wet by following the moisture management steps.
Consider blind baking your pie crust for 10-15 minutes before adding the filling. Serving the pie soon after it has cooled completely also helps maintain crust crispness.
My Apples Are Too Hard or Too Mushy!
The choice of apple variety is crucial here. Using firm baking apples like Honeycrisp or Granny Smith prevents mushiness. If apples are too hard, they likely need more baking time.
Ensure your apple slices are consistent in thickness for even cooking. Overly thick slices will remain hard, while very thin ones might turn mushy.
Beyond the Bake: Serving, Storing, and Enjoying Your Pie
Once your Apple Crumble Pie is perfectly baked and cooled, there are many ways to savor this delightful dessert.
If you’re partial to tender apple layers, you’ll appreciate the generous fruit filling in this deep dish apple pie.
Serving Suggestions: The Perfect Accompaniments
A warm slice of Apple Crumble Pie is exquisite on its own, but it truly shines with a scoop of vanilla bean ice cream. The cold, creamy ice cream melting into the warm, spiced apples is pure bliss.
A dollop of freshly whipped cream or a drizzle of homemade caramel sauce also makes for a decadent pairing. For a sophisticated touch, serve it with a small wedge of sharp cheddar cheese, a classic pairing that enhances the apple flavor.
Storing Leftovers: Keeping Your Apple Crumble Pie Fresh
Store any leftover Apple Crumble Pie covered tightly with plastic wrap or in an airtight container in the refrigerator. It will stay fresh and delicious for 3-4 days.
While it’s best enjoyed at room temperature or slightly warmed, ensure it’s properly chilled to maintain food safety and prevent the filling from softening.
Make-Ahead Tips: Bake Now, Enjoy Later
You can prepare the crumble topping in advance and store it in an airtight container in the refrigerator for up to 3 days, or freeze it for up to 1 month. The apple filling can also be prepared ahead (before draining and reducing liquid) and refrigerated overnight.
For convenience, you can fully bake the pie, let it cool completely, then wrap it tightly and freeze for up to 2-3 months. Thaw in the refrigerator overnight and reheat gently in a low oven for a freshly baked taste.
Your Apple Crumble Pie Questions Answered!
Here are answers to some common questions to further assist you in your Apple Crumble Pie baking journey.
For a fruit dessert with less mess, try this golden cherry cobbler with a crisp, non-soggy topping.
Can I use frozen apples for this recipe?
Yes, you can use frozen sliced apples, but they will release significantly more moisture. Thaw them completely and drain them very well, squeezing out as much liquid as possible before proceeding with the recipe’s moisture-draining step.
You might also need to add an extra tablespoon of flour to the filling to account for the additional moisture.
What if I don’t have lemon juice on hand?
If you don’t have fresh lemon juice, a splash of apple cider vinegar (about 1.5 tablespoons) can act as a substitute to provide the necessary acidity and prevent apple browning. The flavor will be slightly different but still pleasant.
However, the lemon juice also adds a bright, fresh flavor that is hard to replicate. If omitting, be aware apples might brown slightly more quickly.
Can I make this Apple Crumble Pie gluten-free?
Absolutely! Simply swap the pre-made pie crust for a store-bought gluten-free pie crust. For the flour in both the filling and the crumble, use a 1:1 gluten-free all-purpose flour blend.
Ensure your chosen GF flour blend contains xanthan gum for best results, or add a pinch if it doesn’t. This adjustment will allow you to enjoy a delicious gluten-free Apple Crumble Pie.
How do I know when the pie is fully baked?
Your Apple Crumble Pie is fully baked when the topping is a deep golden brown and the filling is actively bubbling around the edges of the pie plate. The apples inside should be tender when pierced with a thin skewer.
Trust your senses – the aroma will be incredible, and the visual cues are very reliable indicators of doneness.
Is it possible to prepare the crumble topping in advance?
Yes, the crumble topping is perfect for making ahead. Prepare it as directed, then store it in an airtight container in the refrigerator for up to 3 days. For longer storage, freeze it for up to a month.
You can sprinkle it directly onto the pie from the fridge or freezer when you’re ready to bake; no need to thaw it first.
Ready to Impress? Share Your Apple Crumble Pie Masterpiece!
Now you have all the knowledge and expert tips to create an Apple Crumble Pie with a flawlessly set, gloriously flavorful filling. Say goodbye to runny pies forever and embrace the confidence of a true pie master.
More Ways to Enjoy Apple Season
If you have extra apples or just want to keep the warm, spiced flavors going, these two recipes are a natural fit alongside your pie.
- For a breakfast treat that shares the same sweet apple filling, try these Apple Pie Pancakes — they skip the soggy texture and deliver fluffy, cinnamon-spiced stacks.
- When you want something with a similar cozy vibe but a different vegetable, the Amazing Glazed Carrot Muffins offer a moist crumb and a sweet glaze that pairs well with the pie’s buttery crust.
Go ahead, bake this incredible sweet treat and share its golden, crumbly perfection with friends and family. They’ll be raving about your perfectly sliced pie for days to come!
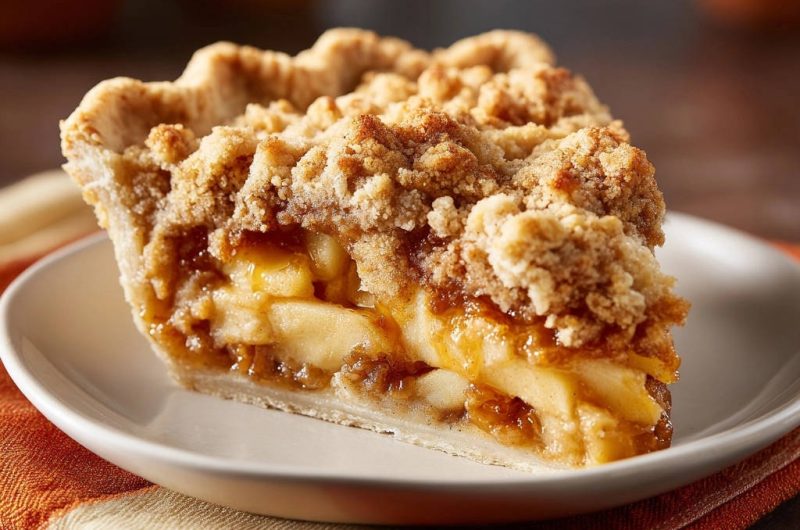
Apple Crumble Pie
Course: DessertCuisine: AmericanDifficulty: medium8
servings50
minutes50
minutes450
kcal300
minutesIf you’ve ever baked an apple pie and ended up with a runny, disappointing filling that just seeped out everywhere, you know the struggle! Discover a simple trick for a perfectly set, luscious, and flavorful apple filling that holds its shape every time.
Ingredients
1 pre-made pie crust (9-inch)
6 medium apples (like Honeycrisp or Granny Smith), peeled, cored, and sliced
1/2 cup granulated sugar
1/4 cup brown sugar, packed
1/4 cup all-purpose flour (for filling)
1 teaspoon ground cinnamon
1/4 teaspoon ground nutmeg
2 tablespoons lemon juice
1/2 cup (1 stick) unsalted butter, cold (for crumble)
1 cup all-purpose flour (for crumble)
1/2 cup granulated sugar (for crumble)
1/2 cup brown sugar, packed (for crumble)
1/4 teaspoon salt (for crumble)
Directions
- Preheat oven to 375°F (190°C). Place the pie crust into a 9-inch pie plate.
- In a large bowl, combine the sliced apples, 1/2 cup granulated sugar, 1/4 cup brown sugar, cinnamon, nutmeg, and lemon juice. Toss gently to coat. Let the mixture sit for 30 minutes at room temperature. This crucial step draws out excess moisture from the apples.
- While apples are resting, prepare the crumble topping. In a separate bowl, whisk together 1 cup all-purpose flour, 1/2 cup granulated sugar, 1/2 cup brown sugar, and salt. Cut the cold butter into small pieces and add to the dry ingredients. Using your fingers or a pastry blender, work the butter into the flour mixture until coarse crumbs form. Set aside.
- After the apples have rested, carefully drain any accumulated liquid from the bowl into a small saucepan. Add the 1/4 cup all-purpose flour directly to the apples and toss to coat evenly.
- Bring the drained liquid in the saucepan to a simmer over medium heat. Cook, stirring frequently, until the liquid thickens slightly and reduces, about 3 to 5 minutes. This concentrates the apple flavor and pre-thickens the most watery part.
- Pour the thickened liquid back over the apples and stir to combine.
- Spoon the apple filling into the prepared pie crust.
- Generously sprinkle the crumble topping over the apple filling.
- Bake for 45 to 60 minutes, or until the crumble is golden brown and the filling is bubbly. If the crumble starts to brown too quickly, you can lightly tent the pie with foil.
- Let the pie cool completely on a wire rack for at least 3 to 4 hours before slicing and serving. This extended cooling time is absolutely essential for the filling to fully set, guaranteeing it holds its shape beautifully when you cut into it.
Notes
- Allowing the pie to cool completely for at least 3-4 hours is essential for the filling to set properly.