Classic Banana Bread: Your Secret to Ultimate Moisture
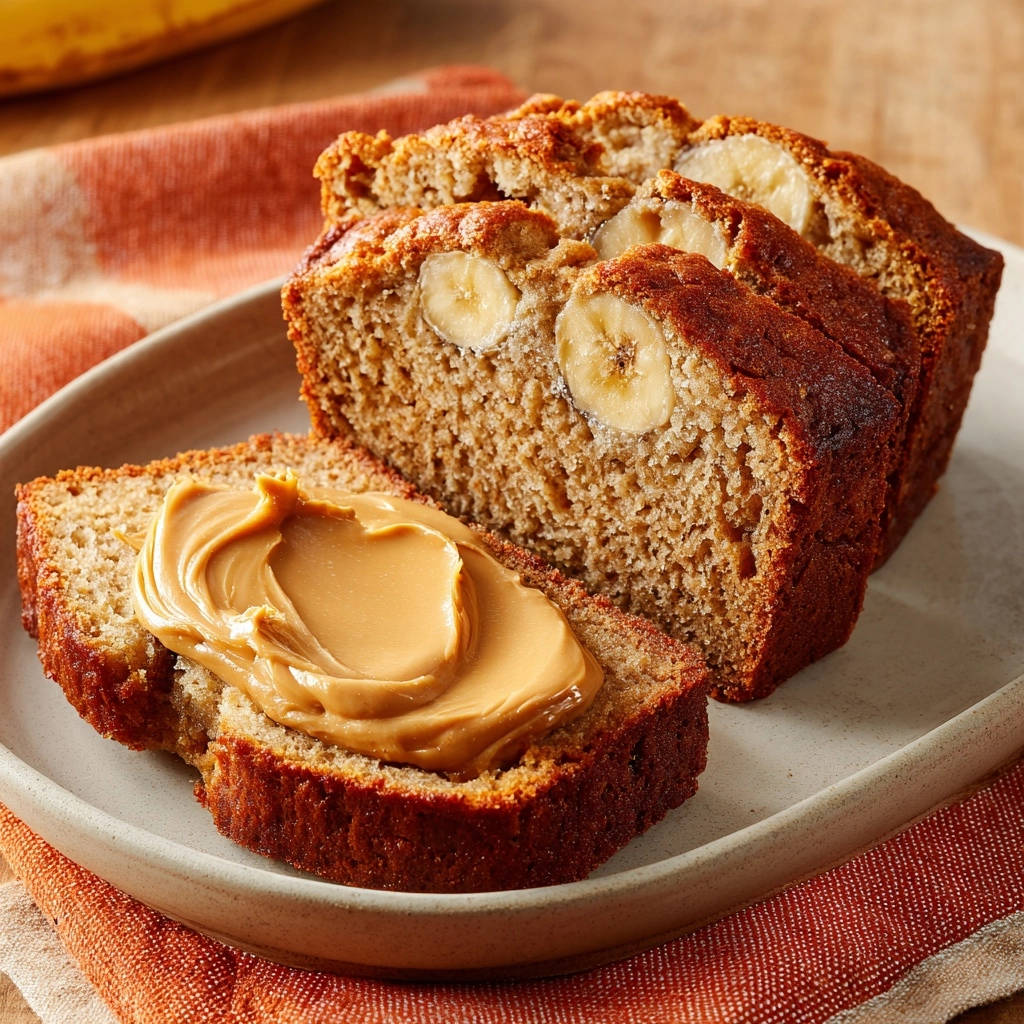
For years, I chased that elusive perfect loaf of Classic Banana Bread, often ending up with a dry, crumbly disappointment instead of the tender, moist slice I craved. This particular recipe finally cracked the code, delivering a consistently soft, melt-in-your-mouth texture every single time. It’s truly a game-changer for anyone seeking a foolproof approach to this beloved comfort food.
Why This Classic Banana Bread Recipe Shines
The Magic of Moisture: Never Dry, Always Tender
The standout feature of this Classic Banana Bread is its unparalleled moisture, which is achieved through a specific balance of ingredients and mixing technique. You’ll never again encounter a dry or crumbly slice.
Every bite is soft, tender, and truly melts in your mouth, making it an irresistible treat that disappears quickly.
Foolproof Baking: Simplicity Meets Success for All Skill Levels
This recipe is designed to be incredibly straightforward, ensuring success for both novice and experienced bakers. With clear steps and critical tips, it demystifies the baking process.
It’s about reliable results without unnecessary complexity, building your confidence in the kitchen with every perfect loaf.
Beyond the Basics: Flavor That Delights Every Palate
Beyond its perfect texture, this Classic Banana Bread boasts a rich, comforting flavor profile that is deeply satisfying. The combination of sugars and vanilla enhances the natural sweetness of the bananas without being cloying.
It’s a versatile base that welcomes your favorite additions, but truly shines on its own with its balanced and inviting taste.
The Irresistible Aroma: Bringing Warmth to Your Home
As this Classic Banana Bread bakes, your kitchen will fill with an incredibly inviting, sweet aroma. It’s the scent of pure comfort, promising a delicious treat.
This delightful fragrance alone can make your home feel warmer and more welcoming, setting the stage for a truly comforting experience.
That same warmth fills your kitchen when you pull a batch of golden skillet dinner rolls from the oven.
Gathering Your Essentials: The Building Blocks of Flavor
Dry Ingredients: The Foundation
These staples create the structure for your moist loaf. Accuracy in measurement ensures the right consistency.
- All-purpose flour: Provides the necessary structure; always measure by spooning into the cup and leveling.
- Baking soda: The primary leavening agent, reacting with the acid in the sour cream/yogurt and bananas for lift.
- Salt: Essential for balancing sweetness and enhancing all the other flavors in the bread.
Wet Ingredients: The Heart of the Loaf
These components contribute to the bread’s moisture, sweetness, and rich flavor. Using quality ingredients makes a difference.
- Unsalted butter, melted: Adds richness and moisture, keeping the crumb tender. Melting ensures even distribution.
- Granulated sugar & Packed light brown sugar: A blend that provides balanced sweetness, with brown sugar adding depth and additional moisture.
- Large eggs: Act as a binder, provide structure, and add moisture and richness to the batter.
- Vanilla extract: A flavor enhancer that complements the banana and sweet notes beautifully. Use pure vanilla for best results.
The Moisture Superstars: Ripe Bananas & Sour Cream or Greek Yogurt
These two ingredients are paramount to achieving that sought-after moist texture. They truly make this Classic Banana Bread exceptional.
- Very ripe bananas, mashed (about 1 cup): The riper, the better! Brown, spotty bananas offer intense sweetness and moisture.
- Sour cream or plain Greek yogurt: This is a secret weapon. Its fat content adds richness, while the acid reacts with baking soda for a tender, moist crumb.
Optional Mix-ins & Toppings for Extra Delight
While delicious on its own, this Classic Banana Bread welcomes additions. Consider what textures and flavors you might enjoy.
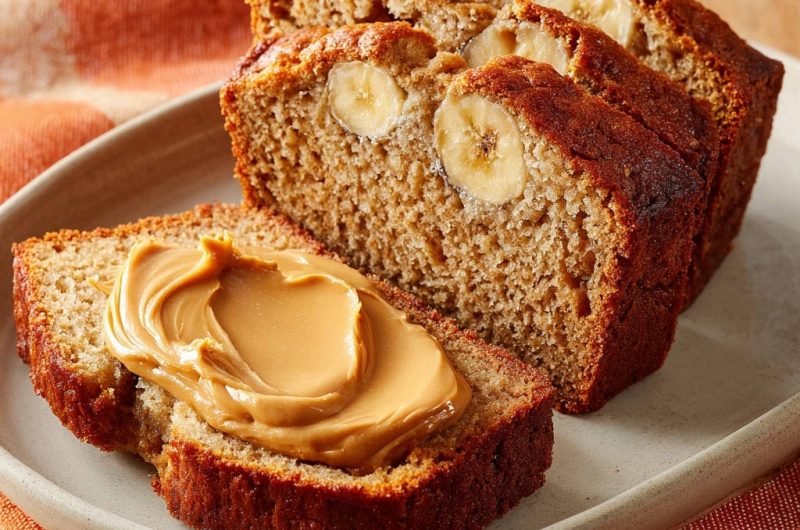
Creamy peanut butter is highly recommended for serving, adding a delightful savory-sweet contrast.
Your Step-by-Step Journey to Banana Bread Bliss
Prep for Success: Oven & Pan Setup
- Preheat Oven: Set your oven to 350 degrees Fahrenheit (175°C) to ensure it’s at the correct temperature when the batter is ready. This consistent heat is crucial for proper rising.
Prepare Loaf Pan: Generously grease and flour a 9×5 inch loaf pan. This prevents sticking and ensures your beautiful loaf can be easily removed after baking.
Whisking Wonders: Dry & Wet Foundations Separately
- Combine Dry Ingredients: In a medium bowl, whisk together the flour, baking soda, and salt until well combined. Whisking aerates the dry ingredients and ensures even distribution of the leavening agent.
Whisk Wet Ingredients: In a large bowl, combine the melted butter, granulated sugar, and brown sugar. Whisk thoroughly until the sugars are dissolved and the mixture is smooth, which creates a unified base for your wet ingredients.
Incorporate Eggs & Vanilla: Add the eggs one at a time to the wet mixture, whisking well after each addition to fully emulsify them into the batter. Finally, stir in the vanilla extract, ensuring its aromatic flavor is evenly distributed.
The Moisture Boost: Integrating Bananas and Creamy Goodness
- Fold in Bananas & Creamy Secret: Gently fold the mashed bananas and sour cream or Greek yogurt into the wet mixture until they are just combined. This particular combination of fat and acid is your key to achieving unparalleled moisture and a tender crumb in your Classic Banana Bread.
Avoid overmixing at this stage to prevent developing gluten prematurely, which can lead to a tougher loaf.
The Golden Rule: Combining Wet & Dry for the Perfect Crumb
- Add Dry to Wet: Here is the secret to consistent moisture and a tender crumb: Add the whisked dry ingredients to the wet ingredients. Mix just until no streaks of flour remain.
Avoid Overmixing: This step is critical. Overmixing develops gluten too much, which will result in a tough, dry Classic Banana Bread. A few small lumps in the batter are perfectly fine, even desirable; they indicate you haven’t overmixed.
Into the Oven: Baking for Perfection
- Fill Pan: Pour the batter into the prepared loaf pan and spread it evenly with a spatula. This ensures consistent baking and a beautiful shape.
Bake: Bake for 50 to 60 minutes, or until a wooden skewer inserted into the center comes out clean. Start checking around the 50-minute mark; every oven is different.
The Patience Pays Off: Cooling & Enjoying Your Loaf
- Cool in Pan: Let the Classic Banana Bread cool in the pan for 10 minutes after removing it from the oven. This allows the loaf to firm up and prevents it from breaking when transferred.
Transfer to Wire Rack: Carefully transfer the loaf to a wire rack to cool completely. Cooling completely on a rack is important for the texture to set and prevents the bottom from becoming soggy.
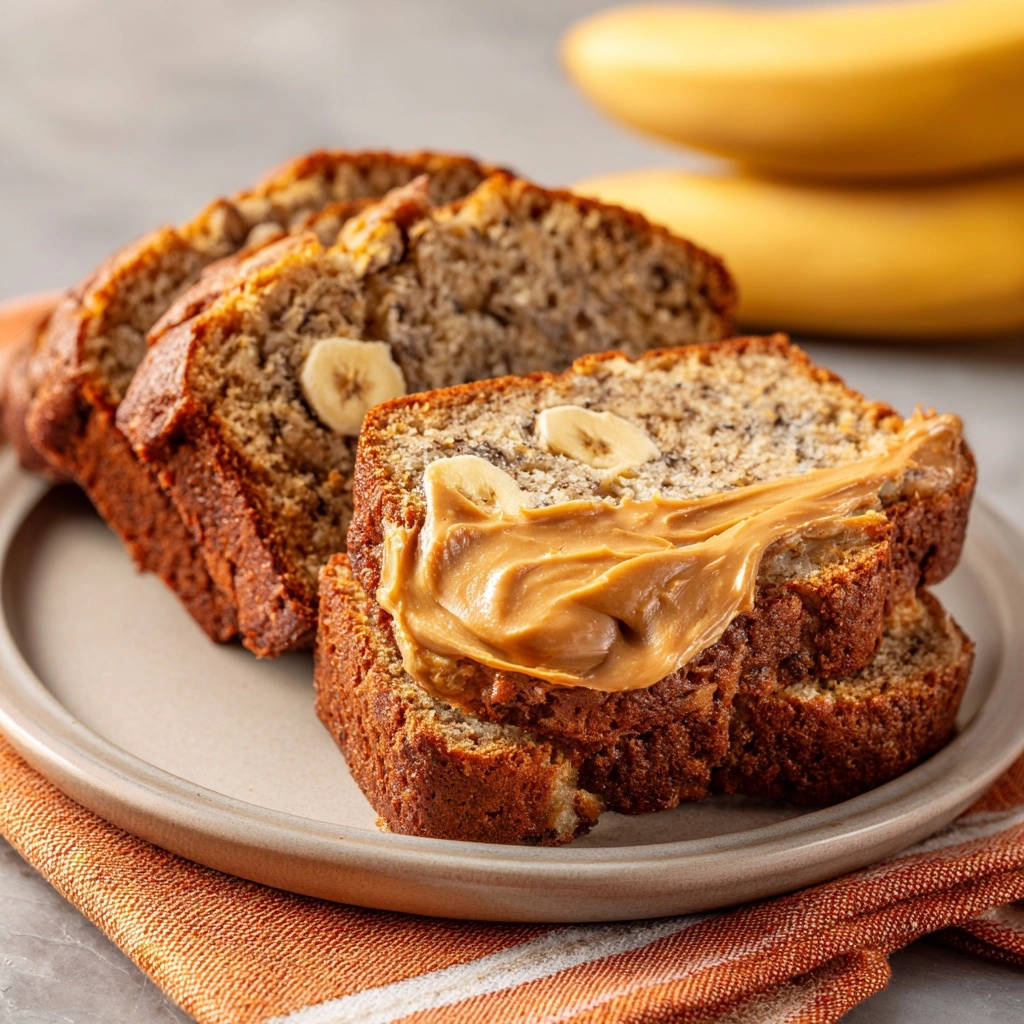
Slice and Enjoy: Once fully cooled, slice your perfectly moist banana bread and enjoy. A generous smear of creamy peanut butter elevates the experience, just like a professional baker would suggest!
Expert Tips for Your Best Banana Bread Yet
Banana Ripeness Matters: Why Brown is Best
The browner and spottier your bananas are, the sweeter and more flavorful your banana bread will be. As bananas ripen, their starches convert to sugars, intensifying their taste and moisture.
Using under-ripe bananas will result in a less flavorful and potentially drier loaf, so patience is key here.
The “No Overmixing” Mandate: Your Key to Tenderness
Overmixing is the most common mistake in banana bread. It develops gluten, leading to a tough, dense, and dry texture.
Mix your wet and dry ingredients only until just combined, with a few flour streaks still visible. Lumps are your friends!
Room Temperature Ingredients: A Subtle but Significant Difference
Ensuring your eggs and sour cream/yogurt are at room temperature allows them to emulsify better with the other ingredients. This creates a smoother, more uniform batter.
Room temperature ingredients also absorb fat and sugar more evenly, contributing to a more consistent and tender crumb.
Pan Prep Perfection: Ensuring an Easy Release
Properly greasing and flouring your loaf pan prevents sticking, ensuring your beautiful Classic Banana Bread slides out easily. Alternatively, you can line the pan with parchment paper, leaving an overhang to lift the loaf out.
A well-prepared pan saves you from frustration and helps maintain the loaf’s perfect shape.
Don’t Overbake! Knowing When Your Loaf is Truly Done
Overbaking is another major culprit for dry banana bread. Start checking for doneness at the lower end of the baking time.
A wooden skewer or toothpick inserted into the center should come out clean, or with a few moist crumbs attached, but not wet batter. The top should be golden brown and the edges pulling away slightly from the pan.
Troubleshooting Common Banana Bread Woes
Why is My Classic Banana Bread Dry or Crumbly?
The primary culprit is usually overmixing the batter. Overmixing develops too much gluten, making the bread tough and dry.
Another reason could be overbaking; pulling the loaf from the oven as soon as a skewer comes clean is essential.
My Loaf Sunk in the Middle! What Went Wrong?
A sunken middle often indicates the loaf was underbaked, causing the structure to collapse as it cools. Ensure your oven temperature is accurate and bake until a skewer comes out clean from the center.
Too much leavening agent or opening the oven door too frequently during baking can also cause a collapse.
Help! My Banana Bread is Too Dense!
Density can be caused by using too much flour or again, overmixing the batter. Always measure flour by spooning it into the measuring cup and leveling it, rather than scooping.
Ensure your leavening agents (baking soda) are fresh and active, as expired leavening won’t provide enough lift.
The Outside is Done, But the Inside is Raw!
This typically means your oven temperature is too high, causing the outside to cook too quickly while the inside remains raw. Consider investing in an oven thermometer to verify accuracy.
If the outside is browning too fast, you can loosely tent the loaf with foil for the last portion of baking to prevent overbrowning while the inside finishes cooking.
Elevate Your Loaf: Creative Serving & Storage Ideas
Delicious Pairings: More Than Just Butter
Beyond the simple smear of butter, try serving your Classic Banana Bread with a dollop of cream cheese frosting, a drizzle of warm honey, or a sprinkle of toasted nuts.
If you’re craving that same bright citrus flavor, try this glazed lemon blueberry loaf next.
It’s also fantastic lightly toasted with a scoop of vanilla ice cream for a decadent dessert.
Freshness Sealed: Storage Best Practices for Longevity
Store your banana bread at room temperature, tightly wrapped in plastic wrap or foil, or in an airtight container. This helps retain its moisture and prevents it from drying out.
It will stay fresh and delicious for 2-3 days on the counter. In humid climates, refrigeration might extend freshness slightly, but can also alter texture.
Can You Freeze Classic Banana Bread? (And How To!)
Yes, Classic Banana Bread freezes beautifully! Allow the loaf to cool completely, then wrap it tightly in plastic wrap, followed by a layer of aluminum foil.
It can be frozen for up to 3-4 months. To thaw, simply unwrap and let it come to room temperature on the counter, or gently warm slices in the microwave or oven.
Your Burning Questions About Classic Banana Bread, Answered
What’s the Best Way to Ripen Bananas Quickly for Baking?
If your bananas aren’t ripe enough, place them on a baking sheet and bake at 300°F (150°C) for 15-30 minutes, or until the skins are black and shiny. Let them cool before mashing.
Alternatively, you can place them in a paper bag with an apple or another ripe banana overnight; the ethylene gas will accelerate ripening.
Can I Substitute the Sour Cream or Greek Yogurt?
Yes, while sour cream or Greek yogurt provides the best results for moisture and tenderness, you can substitute with buttermilk or even milk, though the texture may be slightly less moist.
The fat and acidity are key, so if using milk, consider adding a teaspoon of lemon juice or vinegar to it to create a makeshift buttermilk.
Is it Possible to Make This Recipe Gluten-Free or Dairy-Free?
For a gluten-free version, substitute the all-purpose flour with a 1:1 gluten-free baking flour blend that contains xanthan gum. The texture might vary slightly.
To make it dairy-free, use a plant-based butter alternative and dairy-free sour cream or plain dairy-free yogurt. Ensure bananas are very ripe to compensate for any minor moisture changes.
How Long Does Homemade Banana Bread Last?
Properly stored at room temperature in an airtight container or tightly wrapped, homemade banana bread typically lasts for 2 to 3 days. In the refrigerator, it can last up to a week.
However, it truly is best enjoyed within the first 48 hours for optimal freshness and moisture.
Can I Add Nuts, Chocolate Chips, or Other Mix-Ins?
Absolutely! This Classic Banana Bread recipe is an excellent base for additions. Fold in 1/2 to 1 cup of chopped walnuts, pecans, chocolate chips, or even dried cranberries or shredded coconut.
Add them with the dry ingredients just before combining with the wet, ensuring they are evenly coated to prevent sinking to the bottom.
Ready to Bake? Share Your Classic Banana Bread Creation!
Now that you’re equipped with all the expert tips and a truly foolproof recipe, it’s time to bring the comforting aroma of Classic Banana Bread into your home. This moist, tender loaf is more than just a sweet treat; it’s a hug in food form.
What to Bake Next
If you have bananas on the counter and a sweet tooth to satisfy, these bundt cakes follow the same easy, from-scratch approach as the banana bread.
- For a bright, fruity contrast to the warm banana flavor, try this Glazed Blueberry Lemon Bundt Cake with its tart citrus finish.
- When you want that same cozy spice and tender crumb, the Cinnamon Sugar Apple Bundt Cake pairs perfectly with a cup of coffee.
Don’t hesitate to share your baking journey and the delicious results with us. We love seeing your kitchen triumphs!
Banana Bread
Course: BreadCuisine: AmericanDifficulty: medium1
loaf (10-12 slices)20
minutes55
minutes320
kcal75
minutesUnlock the secret to incredibly moist and tender homemade banana bread that turns out perfectly every time. This easy recipe uses a simple trick to ensure a melt-in-your-mouth loaf with a tender crumb, perfect for breakfast, a snack, or dessert.
Ingredients
1 and 1/2 cups all purpose flour
1 teaspoon baking soda
1/4 teaspoon salt
1/2 cup (1 stick) unsalted butter, melted
1/2 cup granulated sugar
1/4 cup packed light brown sugar
2 large eggs
1 teaspoon vanilla extract
3 very ripe bananas, mashed (about 1 cup)
1/4 cup sour cream or plain Greek yogurt
Optional: Creamy peanut butter for serving
Directions
- Preheat your oven to 350 degrees Fahrenheit. Grease and flour a 9×5 inch loaf pan.
- In a medium bowl, whisk together the flour, baking soda, and salt. Set aside.
- In a large bowl, whisk together the melted butter, granulated sugar, and brown sugar until well combined.
- Add the eggs one at a time, whisking well after each addition. Stir in the vanilla extract.
- Fold in the mashed bananas and sour cream or Greek yogurt until just combined. This combination of fat and acid is key to moisture.
- Here’s the secret to consistent moisture and a tender crumb: Add the dry ingredients to the wet ingredients. Mix just until no streaks of flour remain. Avoid overmixing at all costs! Overmixing develops gluten too much, leading to a tough and dry loaf. A few small lumps are perfectly fine.
- Pour the batter into the prepared loaf pan and spread evenly.
- Bake for 50 to 60 minutes, or until a wooden skewer inserted into the center comes out clean.
- Let the banana bread cool in the pan for 10 minutes before carefully transferring it to a wire rack to cool completely.
- Slice and enjoy, perhaps with a generous smear of creamy peanut butter, just like in the picture!
Notes
- Serve warm, optionally with creamy peanut butter.