Mastering the Deep Dish Golden Apple Pie
You’ve spent hours peeling, slicing, and crimping, only to have your first slice of pie collapse into a sad, watery puddle. It’s a heartbreak every home baker knows too well. That “soggy bottom” isn’t just a minor flaw; it’s a structural failure that ruins the contrast between a buttery crust and tender fruit. Most recipes fail because they don’t account for the massive amount of moisture trapped inside raw apples.
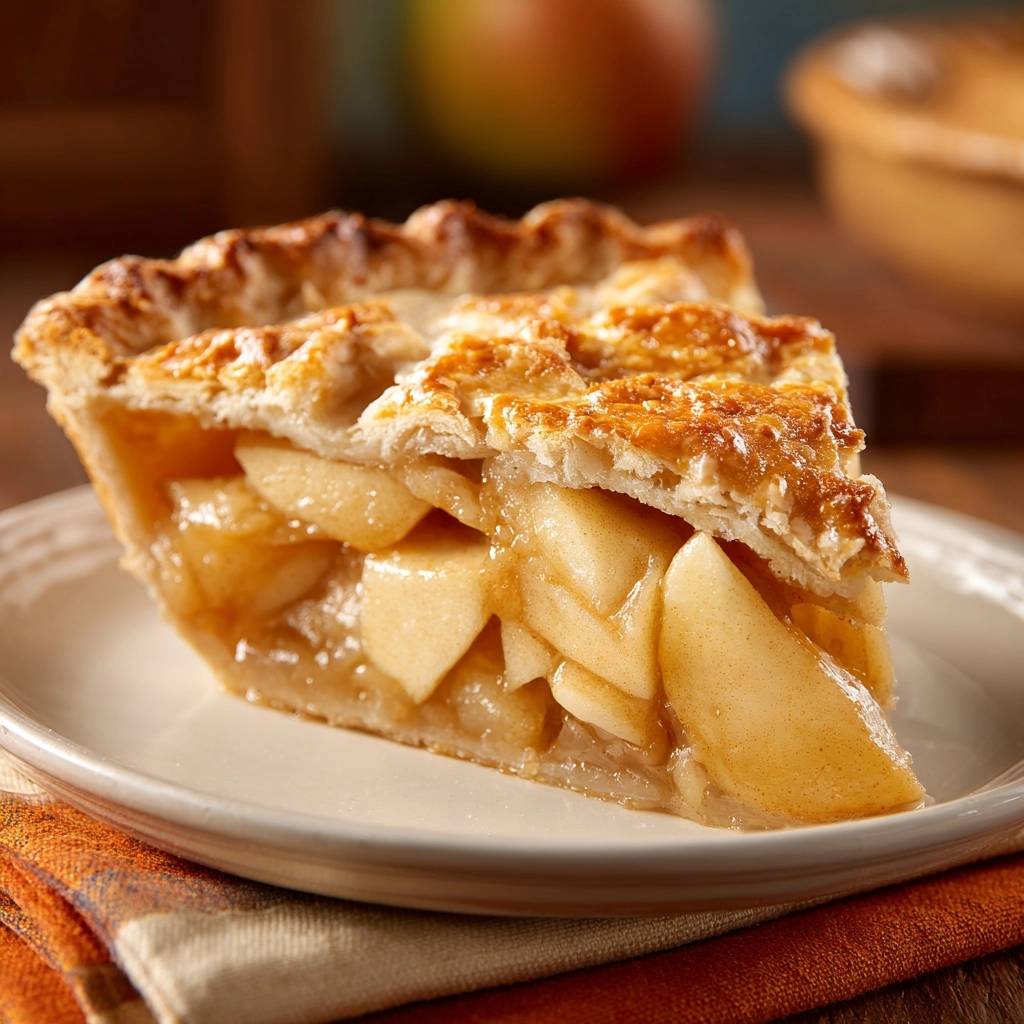
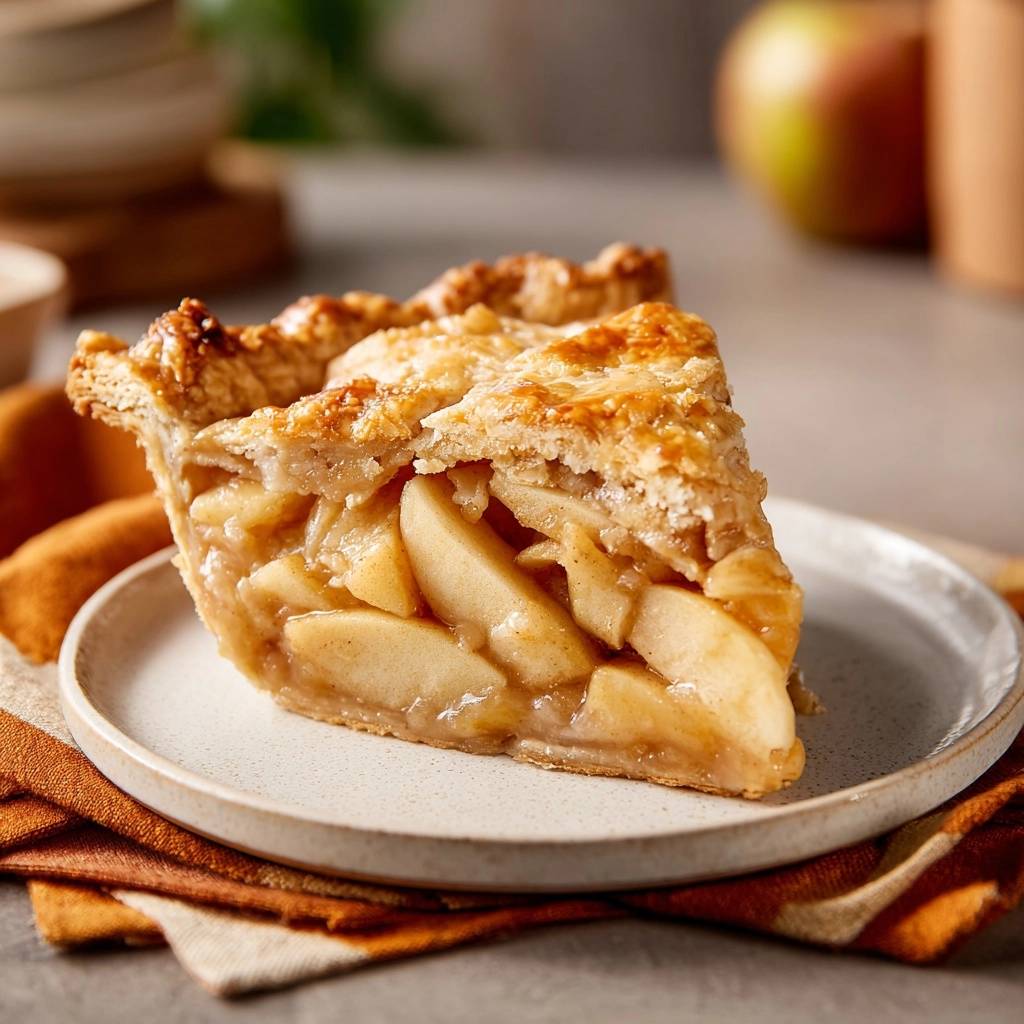
This Deep Dish Golden Apple Pie solves that epidemic by using a professional maceration and reduction technique. By drawing out the juices before the fruit ever touches the dough, you ensure the bottom crust stays crisp and shatter-proof. You’re left with a towering, deep-dish masterpiece featuring a crystalline, golden top and a structured, amber filling that holds its shape perfectly on the plate.
The secret to this success lies in the pre-heated baking sheet. By placing your pie directly onto a hot steel surface on the lowest rack, you sear the bottom crust immediately. This creates an instant barrier against moisture, guaranteeing that every bite has that satisfying, buttery crunch you crave. It’s a small step that makes a world of difference in your final result.
The Physics of a Perfect Apple Filling
Understanding why apple pies get soggy requires a quick look at the science of osmosis. When you toss sliced apples with sugar, the sugar draws water out of the apple cells and into the bowl. Raw apples are actually about 80% water. If you skip the maceration step, that water releases inside the oven, steaming the bottom crust from the inside out and turning it into mush.
By letting your apples rest for at least 45 minutes, you force this liquid out early. This rest period is the foundation of “Deep Dish” structural integrity. As the apples lose moisture, they shrink slightly and become more flexible. This allows you to pack them tightly into the pie plate, eliminating those annoying air gaps that cause the top crust to cave in during baking.
Therefore, that 45-minute wait isn’t just downtime; it’s an active part of the cooking process. You’ll notice the apples softening and a pool of fragrant, sweet liquid forming at the bottom of the bowl. This liquid is gold, but it needs to be transformed before it goes back into the pie. Managing this moisture is the only way to achieve a filling that is saucy but never runny.
Essential Components for the Golden Apple Pie
Choosing the right apple is the first step toward a professional-grade pie. I recommend a 50/50 blend of Granny Smith and Honeycrisp. Granny Smiths provide the necessary tartness and a firm structure that won’t turn into applesauce. Honeycrisps add a honey-like sweetness and a massive amount of juice that creates a rich, flavorful syrup. Together, they offer a complex flavor profile that isn’t one-note.
When it comes to thickening that juice, cornstarch is vastly superior to flour. Flour can leave the filling looking cloudy or tasting slightly pasty. Cornstarch, however, creates a translucent, glossy gel that looks exactly like the pies you see in high-end bakery windows. It provides a clean mouthfeel and allows the natural color of the amber apple syrup to shine through beautifully.
The sugar choice also plays a vital role in the texture. We use a mix of granulated sugar for clean sweetness and light brown sugar for a hint of molasses depth. The brown sugar adds moisture and a warm color to the filling. To keep the flavors balanced, always use unsalted butter in your syrup reduction. This allows you to control the sodium levels and ensures the butter adds a creamy richness without making the pie overly salty.
Specialized Tools for Deep Dish Success
For a pie this substantial, your choice of pie plate matters. A ceramic or glass deep-dish plate is preferable because these materials distribute heat more evenly than thin metal tins. Ceramic, in particular, holds heat well, which helps the filling bubble consistently from the edges to the very center. Make sure your dish is at least 2 inches deep to accommodate the generous apple filling.
The most important “tool” in this process, however, is a heavy-duty baking sheet. You must place this sheet in the oven while it preheats. This creates a hot conductor that mimics a pizza stone. When the cool pie plate hits that scorching metal, the bottom crust begins baking instantly. This immediate blast of heat is your best insurance policy against a soggy bottom.
Phase One: Macerating and Reducing the Syrup
Start by tossing your sliced apples with the sugars, lemon juice, and spices. As they sit, you’ll see the fruit begin to look slightly translucent at the edges. This is the visual cue that the sugar is doing its job. After 45 minutes, drain that liquid into a small saucepan. You’ll likely have about half a cup of thin, watery juice that would have otherwise ruined your crust.
Now, add the butter to the saucepan and bring it to a simmer over medium-high heat. Watch closely as the liquid transforms. It will start as a thin juice but quickly begin to bubble and thicken. After about 5 to 7 minutes, it will turn into a thick, amber-colored syrupy glaze. This reduction concentrates the apple flavor and creates a “pre-thickened” sauce that won’t run all over your plate.
While that syrup is still hot, toss your macerated apples with the cornstarch. Ensure there are no white powdery clumps left behind. Finally, pour that hot, reduced syrup back over the apples and toss to coat. The heat from the syrup starts to activate the cornstarch immediately, giving you a head start on a perfectly set filling before the pie even enters the oven.
Phase Two: Constructing the Deep Dish Layers
When you fill your bottom crust, don’t just dump the apples in. Use the “tight pack” method by pressing the slices down firmly with your hands. You want to eliminate as many air gaps as possible. This prevents the “dome gap” phenomenon, where the fruit shrinks during baking and leaves a hollow space between the filling and the top crust.
Once the top crust is on, trim the overhang to about an inch. Fold that extra dough under itself and crimp the edges high against the rim of the plate. This creates a decorative, fluted wall that holds the deep-dish filling in place. Don’t forget to cut four large steam vents in the center. These vents are essential for letting moisture escape, which keeps the interior from becoming too steamy and wet.
If you’re folding the crust to prevent a heavy edge, the same care applies to a rustic fruit lattice pie to keep the base crisp.
Phase Three: The Two-Stage Temperature Bake
Heat management is the final hurdle for a perfect pie. You must start the bake at 425°F on the lowest oven rack. This high heat sets the crust’s structure and ensures the bottom gets crispy. After 20 minutes, move the pie to the center rack and drop the temperature to 375°F. This lower heat allows the thick stack of apples to cook through without burning the exterior.
You’ll know the pie is ready when you see the filling bubbling vigorously through the steam vents. This bubbling is a critical indicator that the internal temperature has reached the point where the cornstarch can fully thicken. If the crust looks deep golden brown but the filling isn’t bubbling yet, keep it in the oven. The bubbles are the sign that your “Anti-Soggy” mission is a success.
Troubleshooting Common Apple Pie Failures
If you notice the fluted edges of your crust browning too quickly during the second half of the bake, don’t panic. Simply fold a piece of aluminum foil into a ring or use a pie shield to cover just the edges. This protects the delicate crimping while allowing the center of the pie to continue browning and the filling to finish cooking.
The most common mistake people make is slicing the pie too soon. I know the smell is incredible, but you must wait at least 4 hours. This cooling period is a molecular necessity. As the pie cools, the starches in the filling set firmly. If you cut into it while it’s hot, the juices will run everywhere, regardless of how well you reduced the syrup.
Another potential pitfall is a tough crust. This usually happens from over-handling the refrigerated dough. Work quickly and keep the dough as cool as possible. If the dough becomes too warm and soft, it will lose its flakiness. If you feel it getting sticky, pop it back in the fridge for ten minutes before you finish crimping the edges.
Make-Ahead Strategies and Storage Logistics
You can easily prep this pie in stages to save time. The apple filling can be macerated in the refrigerator overnight. In fact, a longer maceration can lead to an even deeper flavor. Just be sure to drain and reduce the liquid as directed right before you plan to assemble and bake the pie. This keeps the fruit fresh and the process manageable.
Leftovers should be stored in an airtight container at room temperature for up to two days, or in the fridge for four. To revive the crust’s crunch, avoid the microwave. Instead, reheat a single slice in a 350°F oven or toaster oven for about 10 minutes. This dries out any moisture the crust absorbed in the fridge and brings back that buttery, flaky texture.
Expert Tips for a Professional Finish
To get that “Golden” look, never skip the egg wash. The protein in the egg creates a deep, lacquered shine that water or milk simply can’t replicate. Brush it generously over every inch of the top crust, including the crimped edges. This acts as the glue for your final touch: the coarse sparkling sugar.
The coarse sugar provides a “skyscraper” texture and a professional shimmer that makes the pie look like it came from a high-end bakery. It adds a delightful crunch to every bite, contrasting beautifully with the soft, spiced apples inside. This simple two-step finish transforms a great home-cooked pie into a stunning centerpiece that guests will rave about.
How do I store leftovers so the crust stays crispy?
Store your leftover pie in an airtight container at room temperature for up to two days. If you need to keep it longer, move it to the refrigerator for up to four days. To maintain the crispness, always reheat slices in the oven at 350°F for 10 minutes rather than using a microwave, which can make the pastry chewy and tough.
Why is my apple pie filling still runny after baking?
A runny filling usually happens for two reasons: either the pie wasn’t baked long enough for the filling to bubble, or it wasn’t allowed to cool completely. The cornstarch needs to reach a specific temperature to thicken, and the filling needs at least 4 hours of cooling time to fully set. If you cut it while it’s warm, the juices haven’t had time to gel.
Can I use a different type of apple for this recipe?
Yes, you can use other firm varieties like Braeburn, Jonagold, or Pink Lady. However, avoid soft apples like McIntosh or Red Delicious, as they will break down into a grainy mush during the long baking process. The key is using an apple that maintains its shape under high heat to preserve the deep-dish structure.
Can I substitute the cornstarch with flour?
You can substitute flour, but you will need to use about 6 tablespoons of flour to match the thickening power of 3 tablespoons of cornstarch. Keep in mind that flour will result in a cloudier, more opaque filling and may slightly mask the bright flavor of the apples compared to the clean finish of cornstarch.
What if I don’t have a deep-dish pie plate?
If you only have a standard 9-inch pie plate, you should reduce the number of apples to about 5 or 6. A standard plate cannot hold the 3.5 pounds of apples called for in this recipe. If you try to cram them all in, the filling will likely overflow and create a mess in your oven, even with a baking sheet underneath.
Golden Apple Pie
Course: DessertCuisine: AmericanDifficulty: medium8
servings30
minutes55
minutes410
kcal85
MinutesThis method stabilizes fruit juices by reducing them into a syrup before baking, ensuring a shatter-proof bottom crust and a thick, golden filling that won’t collapse when sliced.
Ingredients
7-8 large Granny Smith or Honeycrisp apples (about 3.5 lbs), peeled and sliced into 1/2-inch thick wedges
3/4 cup granulated sugar
1/4 cup light brown sugar, packed
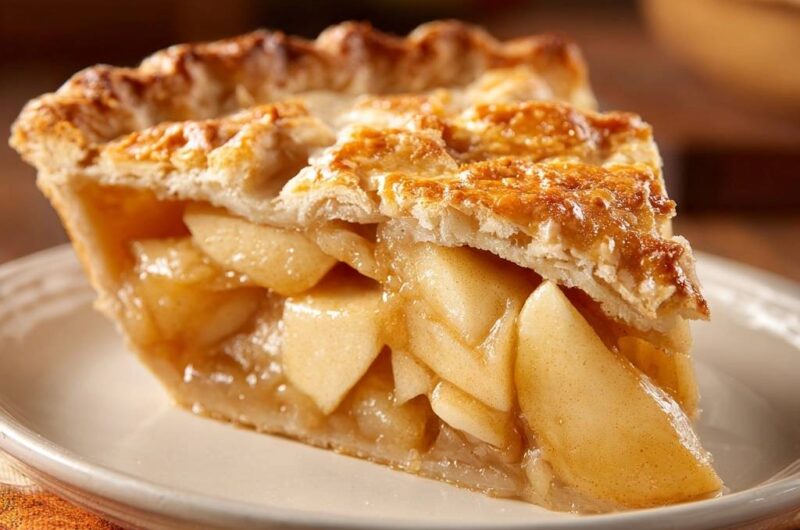
3 tablespoons cornstarch (superior to flour for the clear, thick gel seen in the image)
1 teaspoon ground cinnamon
1/4 teaspoon ground nutmeg
1/4 teaspoon salt
1 tablespoon lemon juice
2 tablespoons unsalted butter
1 package (14.1 oz) refrigerated double pie crusts, brought to room temperature
1 egg, beaten with 1 tablespoon water (egg wash)
1 tablespoon coarse sparkling sugar for topping
Directions
- To prevent a soggy bottom, place your sliced apples in a large bowl and toss with the granulated sugar, brown sugar, lemon juice, cinnamon, nutmeg, and salt. Let them sit at room temperature for at least 45 minutes. This draws out the excess liquid that usually ruins the crust.
- Drain the accumulated liquid from the bowl (you should have about 1/2 to 3/4 cup) into a small saucepan. Add the 2 tablespoons of butter. Simmer over medium-high heat for 5-7 minutes until the liquid reduces into a thick, amber-colored syrupy glaze.
- While the syrup reduces, toss the macerated apples with the 3 tablespoons of cornstarch until no white powdery clumps remain. Pour the hot reduced syrup back over the apples and toss to coat. This creates a pre-thickened filling that sets perfectly.
- Preheat your oven to 425°F (220°C). Place a heavy baking sheet on the lowest oven rack to get hot. Placing your pie directly on a preheated steel surface ensures the bottom crust sears and crisps immediately.
- Line a deep-dish 9-inch pie plate with the bottom crust. Fill with the apple mixture, packing them tightly to avoid air gaps.
- Top with the second crust. Trim the overhang to 1 inch, fold under, and crimp the edges high to create the decorative fluted rim shown in the image. Cut four 2-inch steam vents in the center.
- Brush the entire top crust and the crimped edges generously with the egg wash. Sprinkle evenly with the coarse sugar.
- Place the pie directly onto the preheated baking sheet on the bottom rack. Bake at 425°F for 20 minutes.
- Reduce the oven temperature to 375°F (190°C) and move the pie to the center rack. Bake for another 35-40 minutes. If the edges brown too quickly, shield them with foil. The pie is done when the crust is deep golden brown and the filling bubbles through the vents.
- Allow the pie to cool on a wire rack for at least 4 hours. This is the final secret to a perfect set; slicing too early will cause the juices to run.
Notes
- Letting the pie cool for at least 4 hours is essential for the filling to set properly. Use a preheated baking sheet on the lowest rack to ensure the bottom crust crisps immediately.