Mastering Creamy Coconut Brigadeiros: The Secret to a Silky Texture
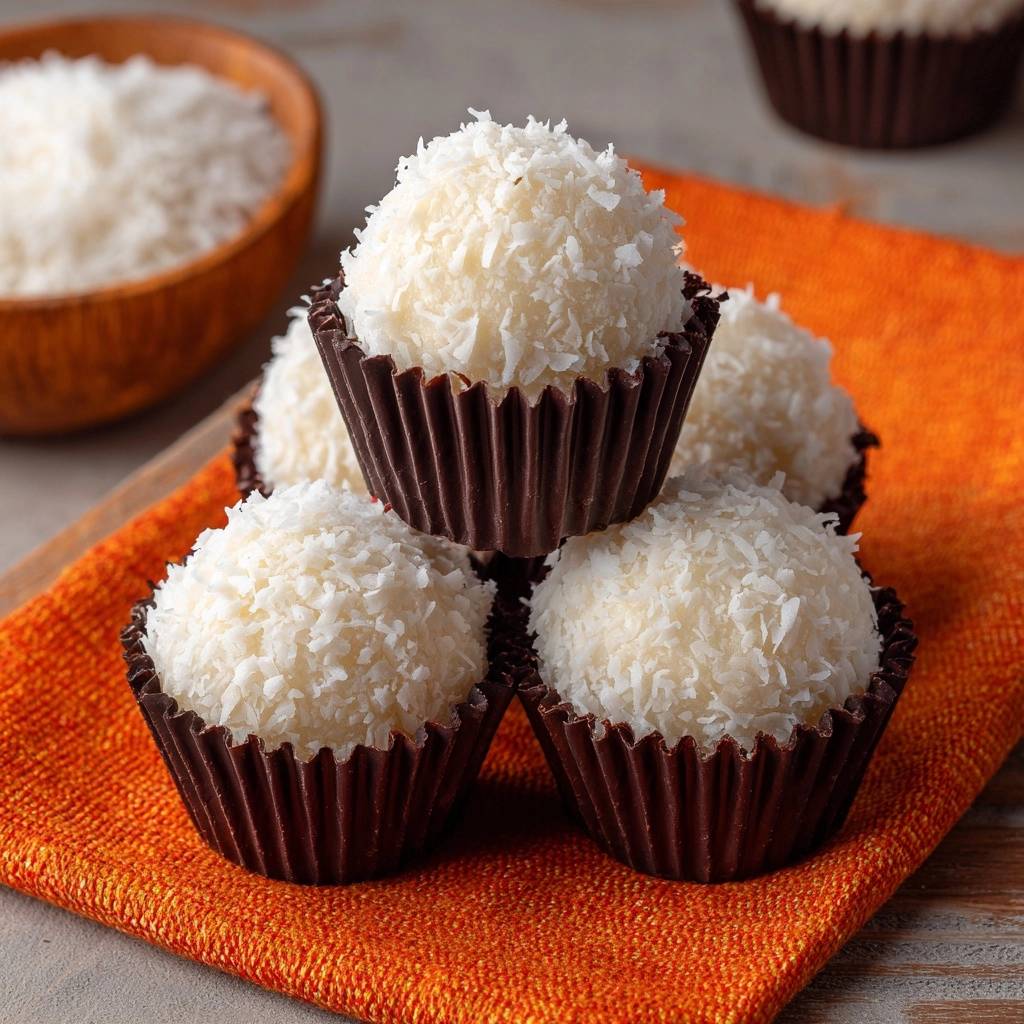
If you have ever bitten into a coconut truffle only to find it gritty or sandy, you know how disappointing that texture can be. These Brazilian treats, known as “Beijinho” in their coconut form, are beloved for their fudgy, melt-in-your-mouth consistency. However, achieving that professional finish at home often feels like a gamble between a sticky mess and a sugary rock.
The secret to a world-class brigadeiro isn’t just about the quality of your condensed milk; it’s about the chemistry of emulsification. By controlling the temperature and the order in which you combine your fats, you can prevent sugar crystallization entirely. This guide will walk you through the technical steps to ensure your sweets are as smooth as the ones found in a high-end São Paulo confectionery.
If the stove temperature runs a little high for these, the same low-and-slow approach is key for achieving the silky smooth glazed pecan clusters.
I’ve found that the biggest mistake most home cooks make is rushing the thickening process with high heat. The sugar in the condensed milk is incredibly sensitive to temperature spikes. One specific tip to remember: always use a heavy-bottomed pan to act as a heat buffer, which prevents the milk solids from scorching and creating those tiny, annoying brown lumps.
The Science of Smoothness in Coconut Confections
Sweetened condensed milk is essentially a concentrated solution of milk solids and sugar. When you heat it, you are evaporating the remaining water to create a thick, fudgy structure. However, as the water leaves, the sugar molecules want to find each other and form crystals, which creates that “sandy” mouthfeel we want to avoid.
To stop this, we use “interfering agents” like butter and heavy cream. These fats coat the sugar molecules, making it physically harder for them to bond together into crystals. By adding full-fat coconut milk and heavy cream, we increase the fat-to-sugar ratio, ensuring the final product remains velvety and pliable even after it cools.
Why Traditional Recipes Often Turn Out Grainy
Most recipes fail because they call for high heat to save time. High heat causes the milk proteins to denature and clump together, while simultaneously forcing the sugar to crystallize rapidly. If you see little brown specks in your mixture, those are scorched milk solids that will ruin the creamy aesthetic.
Another common pitfall is adding the dry shredded coconut too early in the cooking process. If the coconut simmers for too long, it releases its own oils unevenly and can become tough. We wait until the very end to fold in the coconut, preserving its delicate texture while keeping the base mixture perfectly smooth.
Essential Components for Creamy Coconut Brigadeiros
The foundation of this recipe is sweetened condensed milk, but the supporting actors are what define the texture. You must use full-fat canned coconut milk rather than the thin, watery version found in refrigerated cartons. The canned version contains the coconut cream necessary for a rich, stable emulsion that won’t break during the cooking process.
Salt might seem out of place in a candy recipe, but it is vital here. A quarter teaspoon of fine sea salt cuts through the intense, cloying sweetness of the condensed milk. It brightens the coconut flavor and makes the entire treat taste more sophisticated rather than just sugary.
Selecting the Right Shredded Coconut
Texture is everything when it comes to the “Beijinho.” While large coconut flakes look beautiful, they make it difficult to roll the brigadeiros into tight, uniform spheres. They also create an awkward contrast between the soft center and a chewy exterior.
I highly recommend using “finely shredded” unsweetened coconut. It integrates seamlessly into the fudge and provides a refined, professional look when used as a coating. If you only have large flakes, pulse them in a food processor for a few seconds until they reach a sandy consistency.
The Role of Heavy Cream and Butter Fat
Standard brigadeiros often rely solely on butter for fat, but adding heavy cream is a game-changer. The 36% milk fat in heavy cream provides a buffer against the high sugar content. This extra fat ensures that the brigadeiro doesn’t just feel chewy, but actually melts away the moment it hits your tongue.
Required Tools for Precision Candy Making
You cannot make a perfect brigadeiro in a thin, cheap pot. A heavy-bottomed saucepan is mandatory because it distributes heat evenly across the entire base. In a thin pan, you will get “hot spots” where the mixture burns before the rest of the pot even begins to thicken.
Furthermore, put away the wooden spoon. A heat-resistant silicone spatula is your best friend for this task. The flexible edge allows you to scrape every millimeter of the pan’s bottom and corners. If you don’t scrape constantly, a thin layer of sugar will cook faster on the bottom, eventually flaking off into your mixture as hard, burnt bits.
Phase One: Cold Emulsification and Heat Control
The “Cold Start” method is the most important technique for a smooth finish. Before you even think about turning on the stove, whisk the condensed milk, heavy cream, and coconut milk together in the pan. This ensures the fats and sugars are fully integrated while they are still stable.
Once the mixture is a uniform, pale liquid, add the butter and turn the heat to medium-low. By starting cold, you prevent the “thermal shock” that can cause the milk proteins to seize. The first five minutes should be a gentle warming period where the butter melts slowly into the liquid base.
Phase Two: Achieving the Ponto de Enrolar
As you stir, the mixture will transition from a liquid to a thick, lava-like paste. You are looking for the “ponto de enrolar,” or the rolling point. This is the stage where the candy is thick enough to hold its shape but soft enough to remain fudgy. It usually takes about 12 to 15 minutes of constant stirring.
To test this, use the “trench test.” Run your spatula through the middle of the mixture. If it creates a path that stays open for several seconds before slowly closing, it is ready. You can also try the “tilt test”: tilt the pan to the side; if the entire mass slides away from the bottom in one piece, remove it from the heat immediately.
Managing Temperature to Prevent Crystallization
Keep your flame at a consistent medium-low. It is tempting to turn it up when you don’t see immediate thickening, but patience is the key to quality. Rushing the process leads to a “sandy” finish because the sugar cooks too fast to stay suspended in the fat. If the mixture starts to bubble violently, lift the pan off the heat for a few seconds while stirring to bring the temperature back down.
Phase Three: The Cooling and Setting Protocol
Once you hit the rolling point, stir in the vanilla and shredded coconut, then pour the mixture onto a buttered plate. Do not scrape the very bottom of the pan too aggressively here. If any bits have slightly overcooked or stuck to the bottom, leave them there so they don’t ruin the texture of your smooth batch.
Take a piece of plastic wrap and press it directly onto the surface of the warm mixture. This “contact wrap” method prevents a tough skin from forming on top. Let it sit on the counter until it reaches room temperature before moving it to the fridge. If you put hot candy in the fridge, condensation will form under the plastic, making the surface sticky and hard to roll.
Phase Four: Hand-Rolling and Finishing Techniques
After at least two hours in the fridge, the mixture will be firm and ready to handle. To keep the balls uniform, use a small cookie scoop or a measuring tablespoon. This ensures every guest gets the same size treat and makes for a much better presentation on a serving platter.
Grease your palms with a tiny bit of room-temperature butter. This creates a non-stick barrier so you can roll the balls quickly. Try to use the tips of your fingers and the upper part of your palms; the center of your palm is the warmest part of your hand and can melt the fats in the brigadeiro, making it lose its shape.
Troubleshooting Common Brigadeiro Texture Issues
If your mixture is too soft to roll even after chilling, you likely didn’t cook it long enough. You can actually put it back in the pan with a splash of heavy cream, melt it down, and cook it for a few more minutes. Just be sure to use very low heat during this “rescue” phase.
If the mixture is too hard or rubbery, it was overcooked. You can still save it by gently reheating it with a tablespoon of coconut milk until it softens, then re-chilling it. If it feels slightly grainy, try stirring in a teaspoon of room-temperature butter while the mixture is still warm to help re-emulsify the fats.
Flavor Variations and Sophisticated Swaps
Once you master the base, you can get creative. For a “Toasted Coconut” version, toast your shredded coconut in a dry pan until golden brown before rolling the balls in it. This adds a nutty, smoky depth that pairs beautifully with the sweet center.
You can also add a bright note by folding in fresh lime zest at the very end of the cooking process. The acidity of the lime cuts through the richness of the coconut milk. For a surprise center, try wrapping the coconut dough around a single roasted almond or a small piece of dried apricot.
Storage Logistics and Make-Ahead Strategies
Brigadeiros are excellent for making ahead of time because the high sugar content acts as a natural preservative. They will stay fresh in an airtight container at room temperature for about 3 days. However, for the best texture over a longer period, keep them in the refrigerator for up to two weeks.
If you need to freeze them, do so before rolling them in the final coating of coconut. Wrap the bulk dough tightly in plastic wrap and place it in a freezer bag for up to 3 months. When you are ready to serve, thaw the dough in the fridge overnight, then roll and coat them fresh for the best appearance.
Expert Tips for Professional Presentation
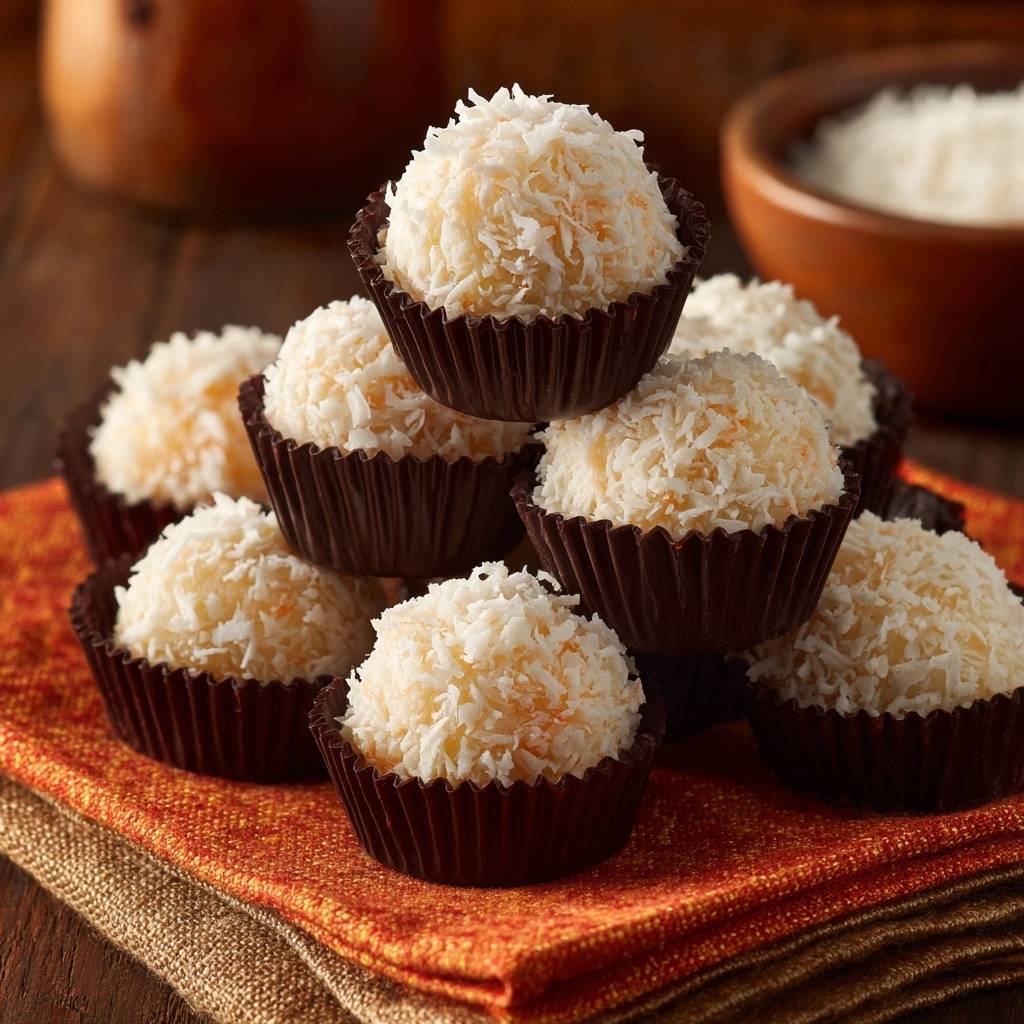
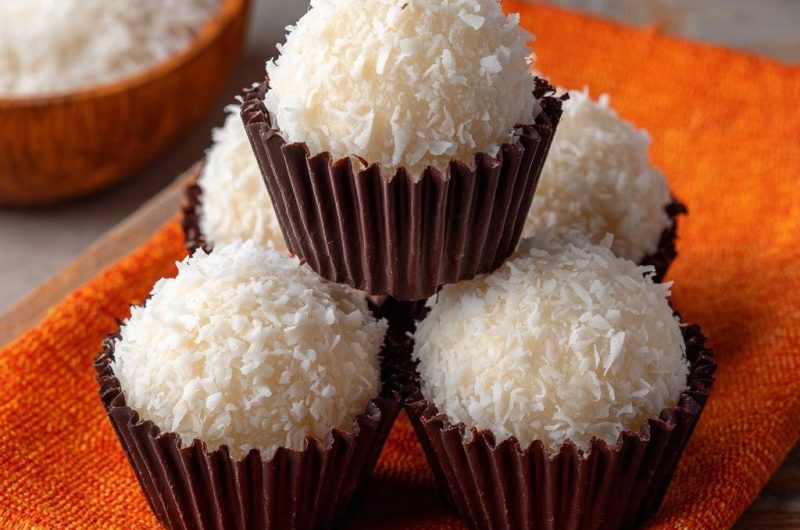
The visual appeal of a brigadeiro often comes from the contrast of the liner. Using dark brown or chocolate-colored pleated paper liners makes the white coconut pop, giving them a luxury, boutique look. It also keeps the coconut coating from rubbing off on other candies.
For a thicker, more impressive crust, use the “double-roll” technique. Roll the ball in coconut, let it sit for a minute, then give it a very gentle squeeze and roll it in the coconut a second time. This ensures no “bald spots” are visible and gives the treat a beautiful, fuzzy texture.
Serving Temperatures for Optimal Mouthfeel
While you should store them in the fridge, never serve them cold. Cold butter and milk fats are hard and mask the delicate coconut flavor. Take the brigadeiros out of the refrigerator at least 30 minutes before serving. At room temperature, the center becomes soft and creamy, which is exactly what a perfect brigadeiro should be.
Frequently Asked Questions
Can I use low-fat condensed milk for this recipe?
I strongly recommend against using low-fat or fat-free condensed milk. The fat content is what prevents the sugar from crystallizing and provides the structural integrity needed to roll the balls. Without that fat, the mixture will likely turn out sticky, translucent, and very grainy.
Why did my coconut milk separate during cooking?
This usually happens if the heat is too high or if you didn’t whisk the ingredients together while they were cold. If you see oil separating, try adding one teaspoon of heavy cream and whisking vigorously off the heat to bring the emulsion back together before continuing on low heat.
How do I prevent the coconut coating from falling off?
The key is to roll the balls while they are still slightly tacky from the warmth of your hands. If the balls have been sitting out and the surface has dried, the coconut won’t stick. If this happens, just roll the ball between your palms for a second to warm up the outer layer before dipping it in the coconut.
Can I make this without a silicone spatula?
While you can use a wooden spoon, it is much harder to prevent burning. Wooden spoons have a smaller surface area and cannot “sweep” the bottom of the pan as effectively as a flexible silicone spatula. If you must use wood, be extra vigilant about scraping the corners where the mixture tends to build up and scorch.
How long do these stay fresh at room temperature for gifting?
If you are gifting these, they are best consumed within 2 to 3 days if kept at room temperature. For the best presentation, place them in a sturdy box so they don’t get squashed, as the creamy centers are quite delicate. If the environment is very warm, the butter may soften too much, so keep them in a cool, dry place.
Brigadeiros
Course: DessertCuisine: BrazilianDifficulty: easy20
truffles15
minutes15
minutes145
kcal120
MinutesA refined version of the classic Brazilian coconut truffle, these brigadeiros use heavy cream and coconut milk to achieve a silky, professional finish. By using low heat and specific emulsification techniques, this recipe eliminates the common issues of grittiness and stickiness.
Ingredients
1 can (14 ounces) sweetened condensed milk
1 tablespoon unsalted butter
1/2 cup heavy cream
1/2 cup unsweetened coconut milk (canned, full fat)
1/4 teaspoon salt
1/2 teaspoon vanilla extract
1 1/2 cups unsweetened shredded coconut (finely shredded for the best texture), plus extra for rolling
20 chocolate or dark brown pleated paper liners
Directions
- To solve the grainy texture issue, start by combining the sweetened condensed milk, heavy cream, and coconut milk in a heavy-bottomed saucepan before turning on the heat. Whisking them cold ensures the fats and sugars are fully emulsified, preventing the milk solids from scorching and creating lumps.
- Add the butter and salt. Turn the heat to medium-low. It is vital to keep the heat low to prevent the sugar from crystallizing, which is what causes that dreaded sandiness.
- Stir constantly with a silicone spatula, scraping the bottom and sides of the pan continuously. Do not stop stirring. You are looking for the mixture to thicken until it reaches the “ponto de enrolar”-where the mixture pulls away from the bottom of the pan completely when tilted and stays separated for a few seconds when you run the spatula through the middle. This usually takes about 12 to 15 minutes.
- Once thickened, remove from heat and stir in the vanilla and 1 1/2 cups of finely shredded coconut. Immediately pour the mixture onto a buttered plate or shallow glass dish. Do not scrape the bottom of the pan too hard, as any overcooked bits will ruin the smooth texture.
- Press plastic wrap directly onto the surface of the mixture to prevent a skin from forming. Let it cool to room temperature, then refrigerate for at least 2 hours until firm.
- Grease your hands lightly with butter. Scoop small portions (about 1 tablespoon each) and roll them into smooth, uniform balls.
- Roll each ball in the extra shredded coconut until fully and thickly coated. Place them in dark brown or chocolate-colored paper liners as shown in the image. Serve at room temperature for the best creamy consistency.
Notes
- To ensure the smoothest texture, use finely shredded coconut and never stop stirring during the cooking process. Pressing plastic wrap directly onto the surface while cooling is essential to prevent a skin from forming.