Mastering the Decadent Dark Chocolate Mousse
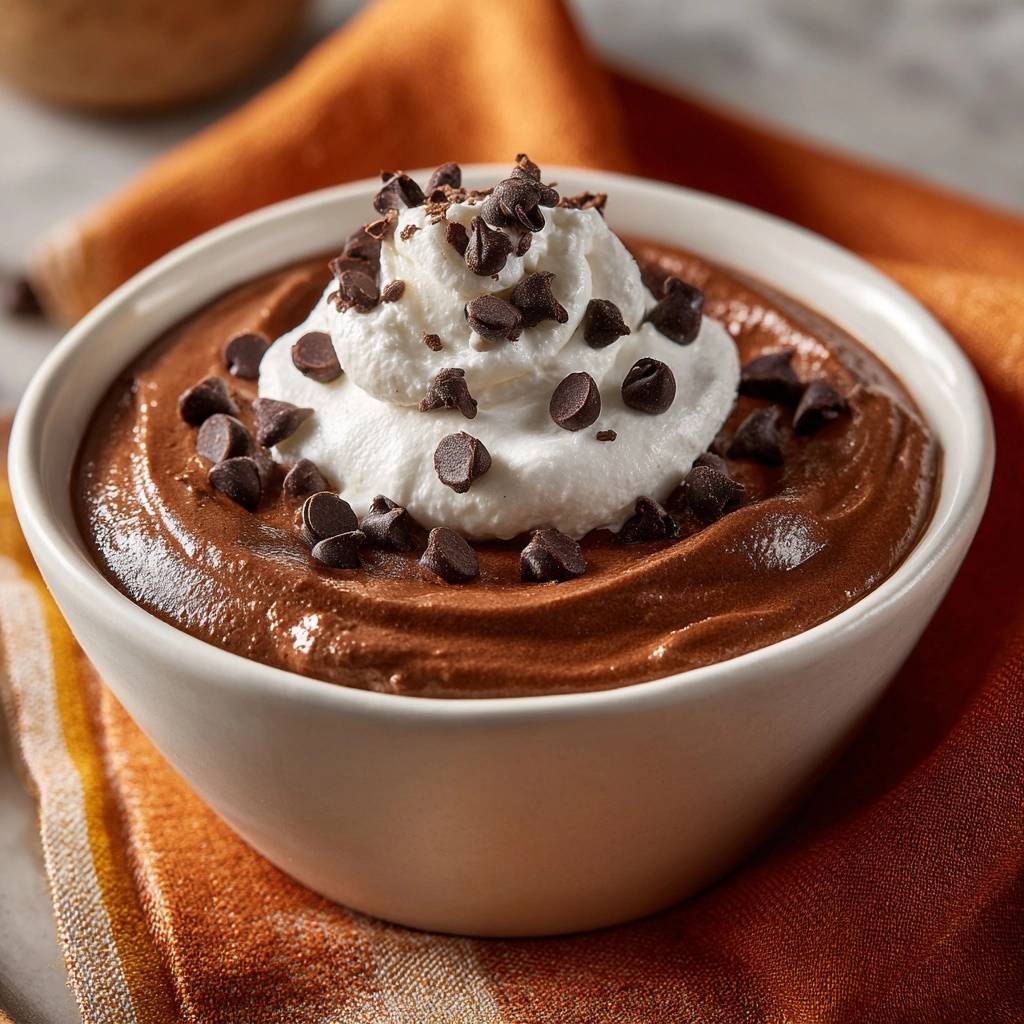
Imagine a dessert that feels like a cloud but tastes like the richest truffle you’ve ever encountered. That’s the hallmark of a perfect Decadent Dark Chocolate Mousse. It should be airy enough to dissolve on your tongue instantly, yet intense enough to satisfy a deep cocoa craving. However, many home cooks end up with a bowl of grainy, separated chocolate or a dense pudding that lacks that signature lift.
The frustration of a “broken” mousse usually stems from a lack of temperature control. When hot chocolate meets cold cream too quickly, the fats crystallize into tiny, gritty beads. This recipe solves that problem by using a specific tempering technique that bridges the gap between the warm ganache and the chilled whipped cream. It’s the difference between a mediocre snack and a professional-grade dessert.
The secret to this velvety finish is the three-minute rest rule. By letting the hot cream sit on the chocolate chips without stirring, you allow the heat to penetrate the cacao butter evenly. This prevents the cocoa solids from seizing, which is the primary cause of that dreaded sandy texture. Once you master this gentle start, the rest of the process becomes incredibly simple.
The Chemistry of a Perfect Chocolate Emulsion
Creating a mousse is essentially an exercise in food science. You’re trying to marry two very different substances: a fat-heavy chocolate ganache and a water-based whipped cream. Chocolate is notoriously temperamental because it contains cocoa solids and fats that hate sudden temperature shifts. If the mixture cools too fast, the fats clump together, creating a grainy mouthfeel that no amount of whisking can fix.
Using a 60% cacao semi-sweet chocolate provides the ideal structural integrity for this dish. At this percentage, there’s enough cocoa butter to help the mousse set firmly in the fridge, but enough sugar to keep the flavor balanced. If you go much higher, the mixture becomes too brittle; much lower, and it won’t have the “backbone” needed to hold those tiny air bubbles you’ve worked so hard to whip into the cream.
In addition to the chips, adding unsweetened cocoa powder is a strategic move for stability. Cocoa powder acts as a drying agent that absorbs excess moisture from the heavy cream. This prevents the mousse from weeping or becoming watery after a few hours in the refrigerator. It also provides a matte, dark finish that looks far more sophisticated than a pale, translucent chocolate foam.
Essential Components for Decadent Dark Chocolate Mousse
Quality is everything when the ingredient list is this short. Since chocolate is the star, you want to avoid standard baking chips that contain stabilizers and waxes designed to help them keep their shape in the oven. Instead, look for high-quality semi-sweet chips or a chopped chocolate bar. These melt much more fluidly, ensuring your ganache base is as smooth as silk before you ever introduce the cream.
The choice of sugar is equally important for the final texture. While granulated sugar is fine for baking, it can remain gritty in a cold mousse. Powdered sugar is the superior choice here because it contains a tiny amount of cornstarch, which helps stabilize the whipped cream, and it dissolves instantly into the fat. This ensures that the only thing you feel on your palate is the melt-of-the-chocolate, not the crunch of sugar crystals.
Finally, ensure your heavy whipping cream has a fat content of at least 36%. This high fat content is what allows the cream to trap air and hold its shape. If you use a lower-fat “light” cream, the bubbles will collapse under the weight of the chocolate, leaving you with a liquid mess rather than a fluffy mousse. Freshness matters too, as older cream doesn’t whip as vigorously.
Selecting the Right Cacao Percentage
While 60% is the sweet spot, you can experiment once you understand the mechanics. A 50% cacao chocolate will result in a much sweeter, softer mousse that might need extra chilling time. Conversely, a 70% dark chocolate will create a very stiff, intense mousse that may require an extra tablespoon of cream in the ganache stage to keep it from becoming too thick to fold.
Why Sifted Cocoa Powder is Non-Negotiable
Never skip sifting your cocoa powder into the chocolate chips. Cocoa powder is prone to forming small, stubborn clumps that won’t dissolve in the hot cream. Sifting ensures the powder integrates perfectly, providing that deep mahogany color and preventing any bitter “pockets” of dry powder in your finished dessert.
The Importance of Temperature-Controlled Equipment
Your tools are just as important as your ingredients when working with delicate emulsions. For the whipped cream, a chilled metal bowl is your best friend. Metal retains the cold much better than plastic or glass, which keeps the fat globules in the cream solid while you incorporate air. If the bowl is warm, the cream will take longer to whip and will be less stable.
For the ganache, however, a heat-proof glass bowl is ideal. Glass holds onto the residual heat from the warmed cream, giving the chocolate chips a cozy environment to melt slowly and completely. When it comes time to combine the two, always reach for a silicone spatula. Its flexible edge allows you to scrape the bottom of the bowl thoroughly without deflating the air bubbles you’ve spent time creating.
Phase One: Crafting the Glossy Ganache Base
The journey begins with the ganache. When heating your 1/2 cup of heavy cream, watch it like a hawk. You want to see small bubbles dancing around the edges of the pan, but you must stop before it reaches a rolling boil. If the cream is too hot, it can actually burn the chocolate, causing it to turn bitter and lumpy.
Once you pour that hot cream over your chocolate and cocoa powder, the most important step is to do absolutely nothing. Let it sit for at least three minutes. This “quiet time” allows the heat to move through the chocolate chips gently. If you start whisking immediately, you’ll lower the temperature of the cream too quickly, and the chocolate won’t melt fully, leading to those annoying little lumps.
After the rest, start whisking in the very center of the bowl using tiny circles. You’ll see a dark, glossy “nucleus” form. Gradually expand your circles until all the cream is incorporated. The result should be a shiny, dark liquid that leaves a brief trail when you lift the whisk. Let this sit until it reaches room temperature; if it’s too hot, it will melt your whipped cream on contact.
Phase Two: Achieving Stable Stiff Peaks
Whipping the remaining cream is where you build the volume. Start on a medium speed to create small, uniform bubbles, which are more stable than the large, erratic bubbles created by high speed. As the cream begins to thicken, add your powdered sugar and vanilla. The vanilla doesn’t just add flavor; it actually enhances the perception of sweetness in the dark chocolate.
You are looking for “stiff peaks,” which means when you lift the beaters, the cream stands straight up without drooping. However, be extremely careful. There is a very thin line between stiff peaks and homemade butter. If the cream starts to look slightly yellow or grainy, stop immediately. You can sometimes save over-whipped cream by gently folding in a tablespoon of fresh, liquid cream to smooth it back out.
Phase Three: The Delicate Folding Technique
This is the moment of truth. You have a heavy, dense ganache and a light, airy whipped cream. If you just dump them together and stir, the weight of the chocolate will crush the air out of the cream. Instead, use the “sacrificial spoonful” method. Take a large dollop of whipped cream and stir it vigorously into the ganache. This lightens the chocolate’s density, making it easier to fold into the rest of the cream.
This folding method is the same technique used to create the airy texture in a dreamy chocolate mousse.
Now, pour the lightened chocolate mixture over the remaining whipped cream. Use a “cut and fold” motion: cut down through the center with your spatula, scrape across the bottom, and fold the mixture over the top. Rotate the bowl as you go. This technique preserves the air bubbles while ensuring the chocolate is evenly distributed.
Stop the moment you see no more white streaks. Over-mixing at this stage is the number one reason for a dense, pudding-like mousse. You want the mixture to look uniform but still feel light and bouncy on the spatula. If you’ve done it correctly, the mousse will already have a soft, billowy texture even before it goes into the refrigerator to set.
Troubleshooting Common Mousse Textural Issues
If your mousse turns out grainy, the chocolate likely seized. This happens if a drop of water gets into the bowl or if the chocolate was overheated. To prevent this, ensure all your equipment is bone-dry. If it’s already grainy, you can sometimes fix it by whisking in a teaspoon of warm cream, though the texture may never be quite as airy as a perfect batch.
Runny mousse is usually the result of folding the chocolate into the cream while the ganache was still too warm. The heat melts the fat in the whipped cream, causing it to collapse. If this happens, you can’t really “re-whip” it, but it still makes an excellent chocolate sauce or cake filling. Next time, be patient and wait for that ganache to feel cool to the touch.
Lumpy streaks occur when the ganache has cooled too much and started to set before you folded it in. If the chocolate is too firm, it won’t integrate smoothly. It should be the consistency of thick honey. If it gets too cold while you’re whipping the cream, just pop it in the microwave for five seconds to loosen it back up before you start the folding process.
Optimal Chilling and Serving Temperatures
Patience is the final ingredient. While the mousse might taste good right away, it needs at least two hours in the fridge for the fats to realign and create that firm, scoopable texture. For the best results, four hours is even better. This allows the flavors to meld and the cocoa powder to fully hydrate, deepening the chocolate profile.
When you’re ready to serve, don’t take the mousse straight from the fridge to the table. Let it sit at room temperature for about five to ten minutes. This slight warming softens the cocoa butter just enough to give the mousse a silkier, more luxurious mouthfeel. It’s a small detail that makes a massive difference in how the dessert is perceived.
Sophisticated Variations and Flavor Infusions
Once you’ve mastered the base, you can start playing with flavors. For a deep, roasted profile, whisk a teaspoon of instant espresso powder into the hot cream before pouring it over the chocolate. The coffee won’t make it taste like a latte; instead, it acts as a flavor booster that makes the chocolate taste even more “chocolatey.”
Another modern twist is the addition of sea salt and high-quality olive oil. A tiny pinch of flaky sea salt folded in at the very end provides a beautiful contrast to the sweetness. You can even drizzle a tiny bit of fruity olive oil over the top just before serving. It sounds unusual, but the fat in the oil enhances the floral notes of the dark chocolate beautifully.
If you prefer something brighter, grate the zest of a fresh orange into the cream while it heats. The citrus oils will infuse the ganache with a refreshing aroma that cuts through the richness of the cream. Just be sure to use a fine microplane so you don’t end up with large, chewy bits of zest in your smooth mousse.
Expert Tips for Professional Presentation
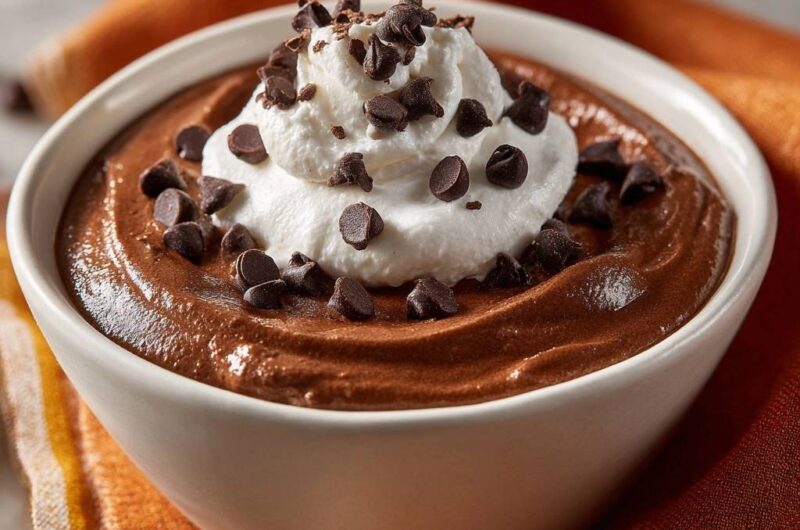
For a clean, dinner-party look, transfer your mousse into a piping bag fitted with a large round tip. Pipe the mixture into glass ramekins or glasses for an elegant silhouette. If you prefer a more rustic look, use a spoon to create a deep swirl on the surface of each serving. This creates little “valleys” that can hold extra garnishes.
To make professional chocolate shavings, take a room-temperature chocolate bar and run a vegetable peeler along the edge. The warmth of your hands will help the chocolate curl into beautiful ribbons. A final dusting of cocoa powder through a fine-mesh sieve adds a professional touch and provides a nice bitter contrast to the sweet whipped cream topping.
Frequently Asked Questions
Can I use milk chocolate instead of dark?
You can, but you will need to adjust the ratios. Milk chocolate has a higher sugar and milk solid content, which means it is softer at room temperature. To get a milk chocolate mousse to set properly, you should reduce the heavy cream in the ganache stage by about two tablespoons. Keep in mind it will be significantly sweeter than the dark version.
How long does homemade mousse stay fresh?
Homemade mousse is best enjoyed within 48 hours. Because it relies on the structure of whipped cream, it will eventually start to lose its air and become more dense. Store it in an airtight container in the back of the fridge (the coldest part) to keep it fresh. It does not freeze well, as the emulsion will break when thawed, leaving it grainy and watery.
Why did my chocolate turn into a hard clump?
This is called “seizing,” and it usually happens because a tiny amount of moisture (like steam or a wet spoon) got into the chocolate, or the chocolate was scorched by too much heat. When chocolate seizes, the sugar and cocoa particles clump together and separate from the fat. To avoid this, always use dry tools and never let the cream reach a full boil.
Is there a substitute for heavy whipping cream?
For this specific recipe, there isn’t a great substitute. The 36% fat content in heavy whipping cream is what provides the structural matrix that holds the air bubbles. Lower-fat options like half-and-half or whole milk simply won’t whip. If you need a dairy-free option, full-fat canned coconut cream can work, but it will change the flavor profile significantly.
Can I make this recipe sugar-free?
Yes, you can substitute the powdered sugar with a powdered sugar alternative like erythritol or monk fruit sweetener. Make sure it is the “powdered” or “confectioners” version so it dissolves properly. Also, ensure you are using sugar-free chocolate chips. Note that some sugar substitutes can have a cooling aftertaste that might slightly alter the flavor of the dark chocolate.
Dark Chocolate Mousse
Course: DessertCuisine: FrenchDifficulty: easy4
servings15
minutes5
minutes380
kcal20
MinutesA rich and airy chocolate mousse made with high-quality semi-sweet chocolate and cocoa powder. This method focuses on temperature control to ensure a smooth, non-grainy texture every time.
Ingredients
1 cup high-quality semi-sweet chocolate chips (60% cacao recommended)
2 tablespoons unsweetened cocoa powder (for deep color and stability)
2 cups heavy whipping cream, divided
3 tablespoons powdered sugar (dissolves better than granulated for a smooth texture)
1 teaspoon vanilla extract
1/4 cup mini chocolate chips for garnish
Whipped cream for topping
Directions
- The secret to avoiding graininess is the slow-melt base. Place the chocolate chips and the cocoa powder in a heat-proof glass bowl. Heat 1/2 cup of the heavy cream in a small saucepan over medium heat just until it begins to simmer and small bubbles form around the edges. Do not let it reach a rolling boil.
- Pour the hot cream over the chocolate chips and cocoa. Let it sit untouched for 3 to 5 minutes. This allows the chocolate to melt evenly from the inside out without agitation.
- Gently whisk the chocolate and cream starting from the center, moving in small circles until the mixture is completely glossy and smooth. If you stir too fast or too early, the chocolate can seize. Let this ganache cool to room temperature. It must be cool to the touch but still pourable before moving to the next step.
- In a separate chilled metal bowl, beat the remaining 1.5 cups of heavy cream with the powdered sugar and vanilla until stiff peaks form. Be careful not to over-beat into butter.
- To maintain the airy texture, fold one large spoonful of the whipped cream into the cooled chocolate ganache to lighten the density. Then, very gently fold the chocolate mixture into the remaining whipped cream using a silicone spatula. Use a “cut and fold” motion until no white streaks remain. Over-mixing at this stage will cause the mousse to deflate and become dense.
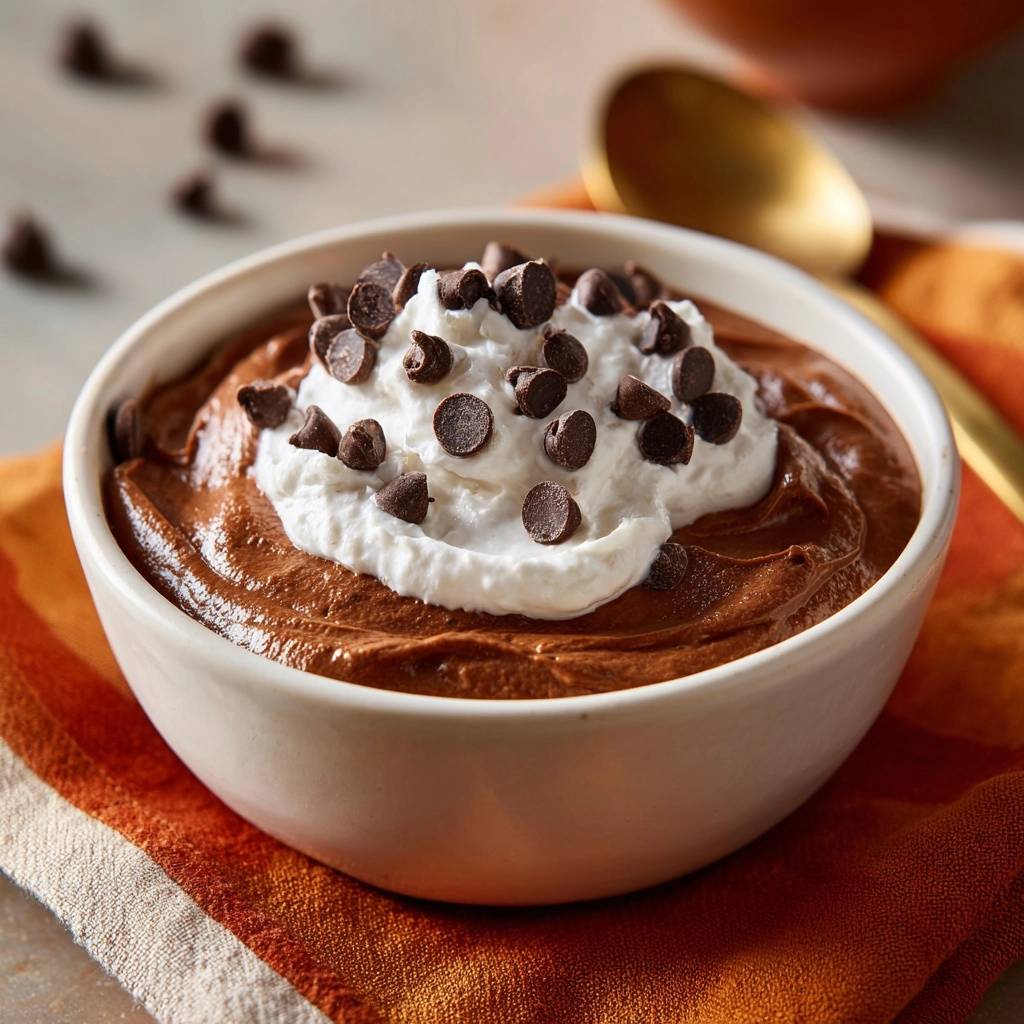
- Spoon the mousse into serving bowls. To match the visual presentation, use a spoon to create a slight swirl on the surface. Chill for at least 2 hours to set.
- Before serving, add a generous dollop of whipped cream to the center and garnish with mini chocolate chips and a dusting of cocoa powder or chocolate shavings.
Notes
- The secret to avoiding graininess is the slow-melt base and ensuring the ganache is cool to the touch before folding in the whipped cream.