Mastering Slow Braised Beef Short Ribs for Fork-Tender Results
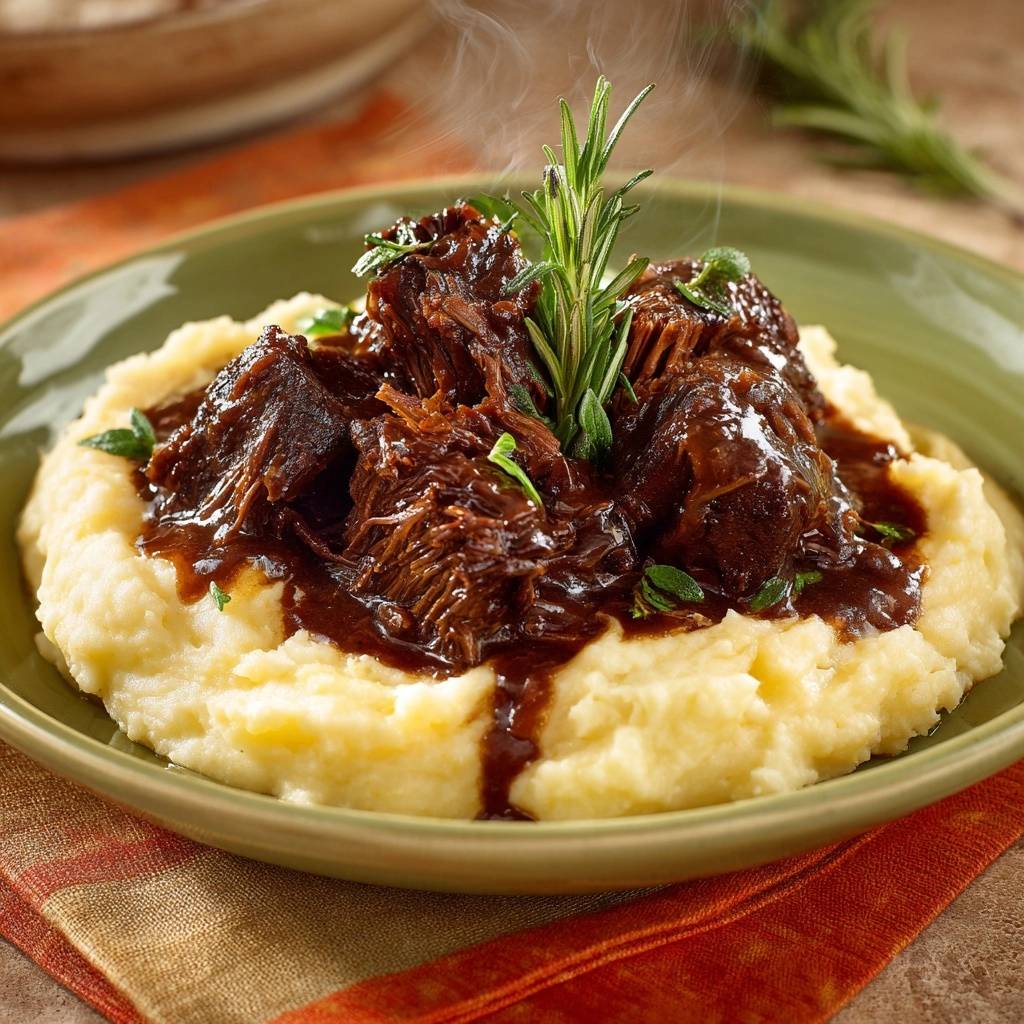
There is nothing more disappointing than spending hours in the kitchen only to pull a tray of rubbery, grey beef out of the oven. We have all been there, chewing through a tough pot roast that feels more like a chore than a meal. However, when you master the art of Slow Braised Beef Short Ribs, the meat doesn’t just break apart; it practically dissolves the moment it hits your tongue.
The secret to this transformation lies in the delicate balance between temperature and moisture. While most people think “low and slow” just means waiting a long time, the real victory comes from the moisture seal. By trapping every drop of steam inside the vessel, you create a pressurized environment that forces flavor into the fibers while melting away the tough bits. You are looking for a deep, mahogany crust on the outside and a succulent, juicy interior that requires nothing more than a dull fork to shred.
If you want to guarantee success, you must start with bone-in ribs and a heavy-duty pot. The bone acts as a thermal conductor, gently heating the meat from the inside out while the cast iron maintains a steady, unwavering temperature. Therefore, you avoid the aggressive boiling that turns beef into leather. One pro tip to remember: always pat your meat bone-dry with paper towels before it touches the oil. If the surface is wet, the meat will steam instead of sear, and you will lose that incredible savory crust that defines a world-class braise.
The Science of Breaking Down Connective Tissue
Short ribs are naturally packed with collagen, which is the tough connective tissue that makes certain cuts of beef feel like a workout for your jaw. During the braising process, a magical biological transition occurs where that chewy collagen slowly melts into silky gelatin. This process doesn’t happen instantly; it requires a sustained internal temperature that only a long, slow bath in flavorful liquid can provide.
Setting your oven to 300°F is the absolute thermal sweet spot for this recipe. If you go higher, the muscle fibers will contract violently, squeezing out all their moisture and leaving the meat dry. At 300°F, the heat is gentle enough to keep the fibers relaxed while still being hot enough to facilitate the collagen-to-gelatin breakdown. You are essentially “melting” the meat from the inside out over the course of three and a half hours.
It is also vital to distinguish between boiling and braising. If you submerge the meat entirely in liquid and crank up the heat, you are boiling it, which results in a stringy, flavorless texture. Braising uses a smaller amount of liquid and a tight lid to create a “micro-steam” environment. This method ensures the meat stays moist without losing its structural integrity or its concentrated beefy essence.
Why Bone-In Short Ribs Yield Better Flavor
Whenever you have the choice, always opt for bone-in short ribs for a long braise. The marrow inside the bone is a goldmine of flavor and healthy fats that seep into your sauce as the hours pass. Furthermore, the bone contains minerals and calcium that add a distinct richness and body to the final gravy that you simply cannot replicate with boneless cuts.
The bone also serves a functional purpose in the oven. It acts as a protective shield and a heat distributor, ensuring the center of the thickest rib cooks at the same rate as the exterior. This leads to a more uniform texture throughout the entire batch. Plus, there is a rustic, high-end restaurant aesthetic to a bone-in rib that makes the meal feel much more special.
Essential Components for Slow Braised Beef Short Ribs
Quality ingredients are the foundation of this dish, starting with the cut of the beef itself. Look for “English Cut” ribs, which are sliced parallel to the bone, rather than “Flanken Cut” which are thin strips used for Korean BBQ. You want thick, meaty chunks that can withstand a three-hour cook time without disappearing into the sauce. The marbling should be visible but not overwhelming.
Your choice of liquid is the next most important factor. While standard beef stock works in a pinch, using a high-quality beef bone broth provides a much higher gelatin content. This results in a sauce with a natural, lip-smacking viscosity. Additionally, using fresh garlic and whole sprigs of rosemary and thyme provides a bright, aromatic contrast to the heavy, savory notes of the beef.
Selecting the Right Acid: Pomegranate Juice
Acidity is the “secret weapon” in a braise because it helps break down the protein structures and balances the richness of the fat. Here, pomegranate juice and balsamic vinegar bring deep, complex fruit notes and a sophisticated, dark flavor profile that pairs perfectly with beef.
If you love how these short ribs turn out, you’ll also enjoy this slow-simmered beef and potato stew for another hearty meal.
Pomegranate juice offers a rich, tart complexity. It provides the necessary tannins to tenderize the meat while adding a subtle, fruity brightness that cuts through the heavy grease. The acid ensures the final dish doesn’t feel too “heavy” on the palate.
The Mirepoix: Building a Fragrant Flavor Base
The trio of onions, carrots, and celery—known as a mirepoix—is the aromatic backbone of the sauce. For a long braise, you want to dice these vegetables into roughly half-inch pieces. If they are too small, they will dissolve into mush; if they are too large, they won’t release their sugars quickly enough to caramelize with the meat.
As these vegetables sauté in the beef fat, they release a natural sweetness that balances the salty broth and tart pomegranate juice. This creates a “round” flavor that hits every part of your taste buds. Don’t rush this step; let the onions get translucent and the carrots slightly soft before you move on to the next phase of the recipe.
The Importance of Heavy-Duty Cookware
If you want professional results, a cast-iron Dutch oven is your best friend. These pots are heavy for a reason; the thick walls retain heat better than any other material, ensuring that the temperature inside stays constant even if your oven fluctuates. This steady heat is what prevents the meat from seizing up and becoming tough.
Thin-walled stainless steel or aluminum pots often have “hot spots” that can scorch the bottom of your sauce or cook the ribs unevenly. A Dutch oven also features a heavy lid that creates a better seal, which is crucial for maintaining the humidity required for a successful braise. If you don’t own one, a heavy, deep oven-safe sauté pan with a very tight lid is the next best option.
Step-by-Step: Achieving the Perfect Maillard Reaction
The Maillard reaction is the chemical process that occurs when you sear meat, creating that beautiful brown crust and deep savory flavor. To achieve this, you must get your oil shimmering hot before adding the beef. If the pan isn’t hot enough, the meat will just grey and leak juices, ruining your chances of a flavorful sauce later on.
Work in batches so you don’t overcrowd the pot. If you put too many ribs in at once, the temperature of the pan will drop, and the meat will start to steam in its own moisture. You are looking for a deep, dark mahogany color on every single side of the rib. This crust is where the majority of the “beefy” flavor in your final gravy actually comes from.
Deglazing and Extracting the Fond
After you remove the seared ribs and sauté your vegetables, you will notice dark, stuck-on bits at the bottom of the pot. This is called the “fond,” and it is concentrated flavor gold. When you pour in your pomegranate juice, use a wooden spoon to vigorously scrape those bits off the bottom so they dissolve into the liquid.
This process, known as deglazing, incorporates all that caramelized protein back into the sauce. You should then let the liquid simmer and reduce by about half. This concentrates the flavors and ensures your final sauce isn’t watery or thin. The balsamic vinegar added at this stage provides a final punch of acidity that brightens the entire pot.
The Moisture Seal: Preventing Dry, Chewy Meat
This is the most important technique for ensuring your beef never turns out dry. Even with a “tight” lid, steam can often escape through small gaps, causing the liquid level to drop and the top of the meat to dry out. To prevent this, take a piece of parchment paper or heavy-duty aluminum foil and press it down directly over the top of the pot before putting the lid on.
If acidity helps break down meat in a braise, the same principle makes this hearty beef and corn chili incredibly tender.
This creates a secondary “inner lid” that traps the moisture directly against the meat. It facilitates a process of micro-steaming, where the beef is constantly basted by its own evaporating juices. This simple trick is the difference between a “good” short rib and a “restaurant-quality” short rib that melts the moment you touch it with a fork.
Refining the Braising Liquid into a Glossy Jus
Once the ribs are finished, the liquid in the pot will be full of fat and vegetable bits. To get that professional, glossy finish, you must strain the liquid through a fine-mesh sieve into a separate saucepan. Discard the mushy vegetables; they have already given all their flavor to the sauce and will only make the final presentation look messy.
Simmer the strained liquid over medium heat for about 10 to 15 minutes. You are looking for “nappe” consistency, which is a fancy chef term meaning the sauce is thick enough to coat the back of a spoon. As the water evaporates, the gelatin from the bones will make the sauce shiny and rich. This concentrated “jus” is the crowning glory of the entire dish.
Troubleshooting Common Braising Obstacles
If your meat is still tough after three hours, do not panic and do not turn up the heat. It simply means the collagen hasn’t finished melting yet. Every cow is different, and some ribs just need an extra 30 minutes to reach that perfect state. Just put the lid back on and give it more time; patience is the only cure for tough braised meat.
If your sauce tastes too salty after the reduction, you can balance it out with a tiny splash of water or a pinch of brown sugar. If the sauce is too thin, you can continue to simmer it, or whisk in a small “slurry” of cornstarch and water. Finally, if there is too much oil floating on top, use a wide spoon to gently skim the fat off the surface before serving.
Optimal Pairings for Rich Beef Ribs
While buttery mashed potatoes are the classic choice for soaking up that incredible gravy, you can also serve these ribs over creamy polenta or wide egg noodles. Because the dish is so rich and fatty, it benefits greatly from a “bright” side dish. A simple gremolata made of lemon zest, parsley, and minced garlic sprinkled over the top adds a fresh pop of flavor.
You might also consider serving a crisp arugula salad with a sharp lemon vinaigrette on the side. The bitterness of the greens and the acidity of the dressing help cleanse your palate between bites of the decadent beef. Roasted root vegetables like parsnips or honey-glazed carrots also complement the natural sweetness of the braising liquid beautifully.
Make-Ahead Strategy and Storage Instructions
Braised meats are famous for tasting even better the next day. As the dish cools, the flavors have time to meld and penetrate deeper into the meat. If you are hosting a dinner party, consider making this a day in advance. Once it’s done, let it cool to room temperature, then store the ribs submerged in their liquid in the refrigerator.
When you are ready to serve, the fat will have solidified on the top, making it incredibly easy to remove and discard. To reheat, simply place the pot back on the stove over low heat or in a 300°F oven until the meat is warmed through. This gentle reheating ensures the beef stays tender and doesn’t dry out during the second round of cooking.
Freezing and Thawing for Future Meals
Short ribs freeze exceptionally well, provided you keep them in an airtight container. Always freeze the meat inside the sauce; this prevents freezer burn and keeps the beef from becoming grainy. They will stay fresh in the freezer for up to three months, making this a great option for meal prep.
What Complements Braised Beef Short Ribs?
After a rich, tender pot of slow-braised beef, you want sides that cut through the heft with brightness and crunch. Two recipes do exactly that.
- The Lemon Rosemary White Bean Soup brings acidity and herbal lift that balances the beef’s deep savor, while the creamy beans echo the ribs’ soft texture.
- For a crisp, cool contrast, the Southern Style Coleslaw adds tangy crunch that refreshes the palate between bites of braised meat.
To thaw, move the container to the refrigerator 24 hours before you plan to eat. Never try to thaw braised meat in the microwave, as the uneven heat will turn the tender fibers into rubber. Once thawed, reheat it slowly on the stovetop with a splash of extra broth if the sauce has become too thick.
Expert Tips for Professional Presentation
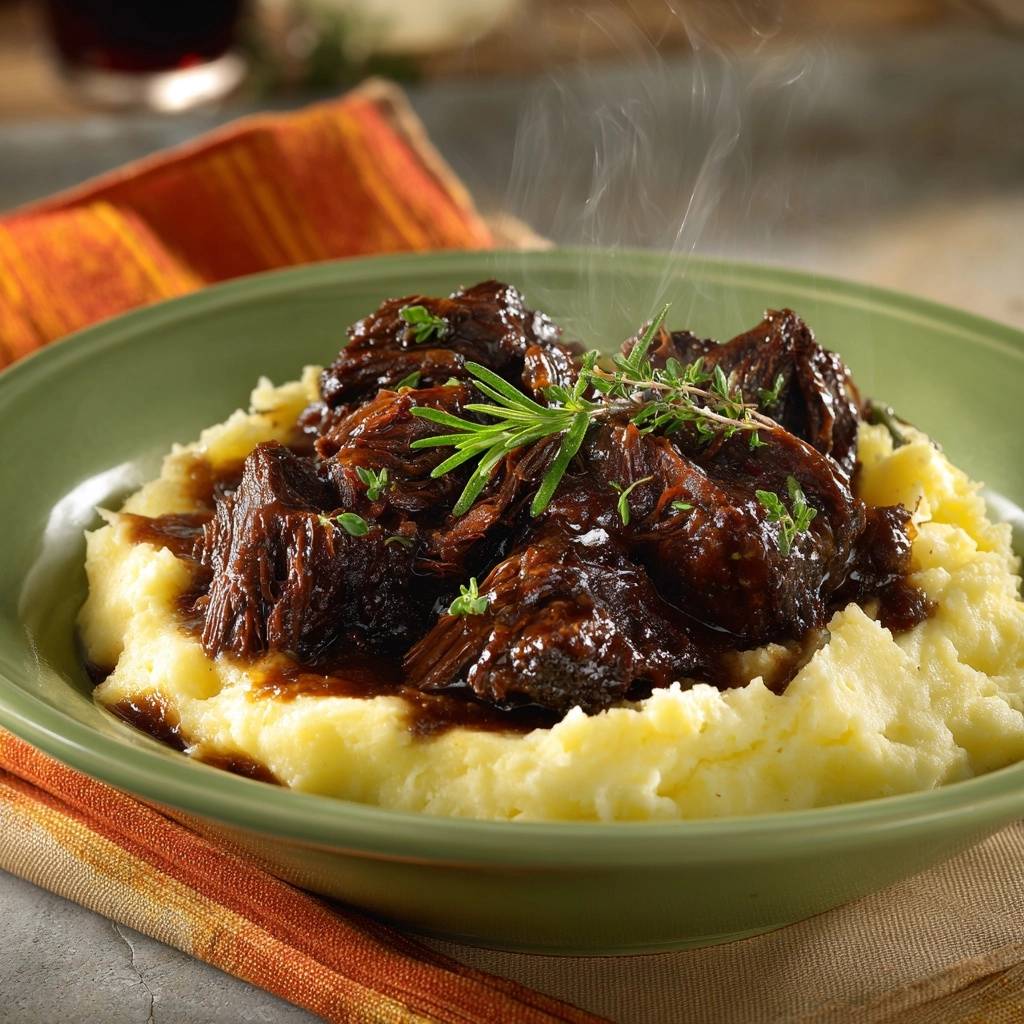
For a restaurant-quality look, focus on the “height” of the plate. Start with a large, smooth mound of mashed potatoes in the center. Place the short rib carefully on top, ensuring the bone is visible and pointing upward. This creates a focal point that looks much more impressive than laying the meat flat on the plate.
Finally, use a spoon to “nappe” the sauce over the meat, letting it drizzle down the sides into the potatoes. Garnish with a fresh sprig of thyme or rosemary to add a vibrant green contrast to the dark, rich colors of the beef. This simple attention to detail transforms a humble home-cooked meal into a sophisticated dining experience.
How do I store leftover short ribs?
Store your leftovers in an airtight container in the refrigerator for up to 4 days. It is vital to keep the ribs submerged in the braising liquid to prevent the meat from drying out. For longer storage, you can freeze the ribs in their sauce for up to 3 months. When reheating, use a low heat setting on the stovetop and add a splash of broth to loosen the sauce.
Why is my braised beef still tough after 3 hours?
If the meat is tough, it almost always means it needs more time, not more heat. Short ribs are full of connective tissue that only breaks down after a certain amount of time at a specific temperature. Do not increase the oven temperature, as this will dry out the muscle fibers. Simply put the lid back on and check the meat every 20 to 30 minutes until it yields easily to a fork.
Can I use a different juice?
Yes, unsweetened cranberry juice works in place of pomegranate juice. These liquids provide the necessary acidity and tannins to tenderize the meat and add depth to the sauce. If you prefer a more savory profile, you can use extra beef bone broth with an additional tablespoon of balsamic vinegar to provide the required tartness.
What is the best way to remove excess fat from the sauce?
The easiest method is to make the dish a day in advance and refrigerate it. The fat will rise to the top and harden into a solid white layer that you can easily lift off with a spoon. If you are serving it immediately, use a wide metal spoon to gently skim the oily bubbles off the surface of the liquid while it is simmering, or use a specialized fat separator cup.
Can I use a slow cooker instead of an oven?
While you can use a slow cooker, the results won’t be quite as refined. You must still sear the meat in a pan first to develop the flavor. Cook on “Low” for 7 to 8 hours. However, the oven method is preferred because the dry heat of the oven creates better caramelization on the surface of the meat and allows the sauce to reduce more effectively than the moist, enclosed heat of a slow cooker.
What should I do if my sauce is too thin?
If your sauce hasn’t reached that thick, glossy consistency after straining, continue to simmer it in a saucepan over medium-high heat. This evaporates the water and concentrates the natural gelatins. If you are in a hurry, you can whisk together one teaspoon of cornstarch with a tablespoon of cold water and stir it into the boiling sauce. It will thicken almost instantly, but be careful not to add too much or the sauce will become cloudy.
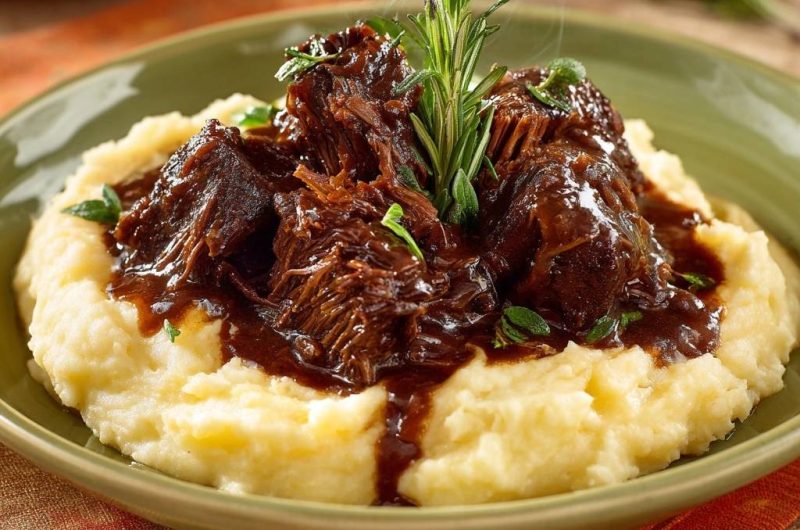
Beef Short Ribs
Course: Main CourseCuisine: AmericanDifficulty: medium4
servings20
minutes3
hours680
kcal200
MinutesA specialized braising method using temperature control and a moisture seal to break down tough connective tissue, resulting in succulent beef served with a rich mahogany gravy.
Ingredients
3 pounds beef short ribs, bone-in (cut into 2-inch chunks)
2 tablespoons vegetable oil
1 large yellow onion, diced
2 carrots, chopped
2 stalks celery, chopped
4 cloves garlic, minced
2 tablespoons tomato paste
2 cups beef bone broth
1 cup pomegranate juice (for acidity and depth)
1 tablespoon balsamic vinegar
3 sprigs fresh rosemary
3 sprigs fresh thyme
2 bay leaves
Salt and black pepper to taste
4 cups prepared buttery mashed potatoes for serving
Fresh rosemary and thyme for garnish
Directions
- Preheat your oven to 300°F (150°C). This low temperature is the absolute key to preventing the meat from seizing and becoming tough.
- Pat the ribs completely dry with paper towels. Season generously on all sides with salt and pepper.
- Heat oil in a large oven-safe Dutch oven over medium-high heat. Sear the ribs in batches to avoid crowding, cooking until a deep, dark brown crust forms on all sides. Remove ribs and set aside.
- In the same pot, add onion, carrots, and celery. Cook until softened and slightly browned, about 6-8 minutes. Stir in garlic and tomato paste, cooking for 2 minutes until the paste turns a deep brick red.
- Pour in the pomegranate juice and balsamic vinegar. Use a wooden spoon to scrape the bottom of the pan to release all the flavorful browned bits (fond). Let the liquid reduce by half.
- Add the beef broth and return the ribs to the pot. The liquid should cover about two-thirds of the meat. Tuck in the rosemary, thyme, and bay leaves.
- Cover the pot with a tight-fitting lid. To ensure a perfect seal, place a piece of parchment paper or heavy-duty foil between the pot and the lid before closing. This prevents steam from escaping, which is the main cause of dry, chewy braised meat.
- Transfer to the oven and braise for 3 to 3.5 hours. Do not open the lid during the process; maintaining constant humidity is vital for the “never dry” result.
- Once the meat is fork-tender and easily pulling away from the bone, carefully remove the ribs. Strain the braising liquid through a fine-mesh sieve into a saucepan, discarding the solids.
- Simmer the liquid over medium heat for 10-15 minutes until it reduces into a thick, glossy, dark mahogany gravy that coats the back of a spoon.
- To serve, place a generous mound of mashed potatoes on a plate. Top with the short ribs and drizzle the reduced sauce heavily over the meat and potatoes. Garnish with a fresh sprig of rosemary and thyme as shown in the image.
Notes
- The use of parchment paper or foil between the pot and lid is essential to prevent steam from escaping and ensures the meat remains moist.