Mastering Salted Peanut Butter Swirl Brownies
Stop settling for brownies that turn out like dry, airy chocolate cake. If you’ve ever pulled a tray from the oven only to find a light, spongy texture, you’ve fallen victim to the “cakey brownie” trap. We’re here to embrace a different philosophy: the anti-cakey movement, where density is king and the center is as rich as a chocolate truffle.
The magic of these Salted Peanut Butter Swirl Brownies lies in the aggressive contrast of flavors and textures. You get the deep, slightly bitter punch of premium cocoa, the salty richness of creamy peanut butter, and that sharp, crystalline hit of flaky sea salt on top. It’s a sophisticated dessert that prioritizes a heavy, fudgy mouthfeel over fluffiness.
Achieving this specific texture isn’t about luck; it’s about controlling the air you put into the batter. Most people reach for a whisk or an electric mixer, but that’s exactly where they go wrong. To get that professional, dense crumb, you have to put the whisk away and rely on a simple spatula to keep the fat-to-flour ratio perfectly intact.
If you enjoy this lower-heat trick, try the same careful baking approach for these peanut butter stuffed brownies.
The Science of Fudgy vs. Cakey Textures
Baking is chemistry, and the biggest variable in brownie texture is aeration. When you whisk eggs and sugar vigorously, you create millions of tiny air bubbles. In the heat of the oven, those bubbles expand, causing the brownies to rise and develop a crumb structure similar to a birthday cake.
However, this recipe focuses on a high lipid content from butter, melted chocolate, and peanut butter. These fats coat the flour proteins, which effectively inhibits gluten development. Because we aren’t adding chemical leaveners like baking powder, the result is a heavy, moisture-rich square that stays fudgy even after it cools.
By choosing a spatula over a whisk, you ensure the batter remains dense. You’re essentially creating a baked ganache rather than a cake. This method preserves the “fudgy” integrity, ensuring every bite is thick, chewy, and intensely chocolatey without any unwanted airiness.
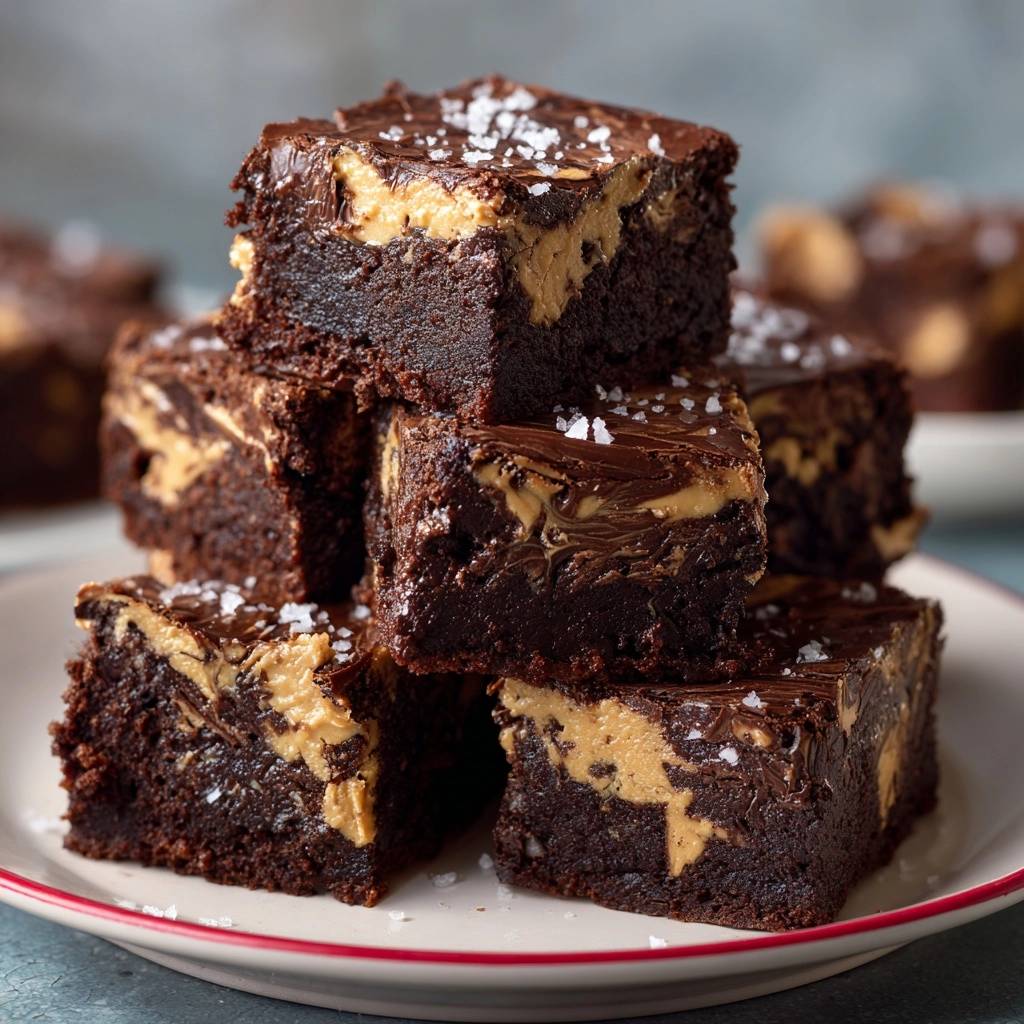
Why the No-Whisk Rule is Absolute
Mechanical action changes the DNA of your dessert. A whisk is designed to incorporate air, but a silicone spatula is designed to fold and combine. When you stir the melted butter and sugar by hand, you’re keeping the mixture “flat,” which is exactly what a world-class brownie requires.
Avoiding the “creaming” stage prevents the sugar from trapping air against the butter. Therefore, the brownies won’t puff up and then collapse. Instead, they’ll bake into a consistent, uniform slab with that coveted crackly top and a center that feels like a dense fudge bar.
The Role of Melted Chocolate in the Base
While cocoa powder provides a deep, roasted flavor, melted semi-sweet chocolate provides the structural “snap.” Cocoa powder is essentially a starch, which can make brownies feel dry if used alone. Adding 4 ounces of melted chocolate introduces cocoa butter back into the equation.
This cocoa butter is a saturated fat that stays solid at room temperature. Consequently, when the brownies cool, the melted chocolate re-solidifies within the crumb. This creates a signature chewiness and a “melt-in-your-mouth” quality that cocoa powder alone simply cannot replicate.
Essential Components for Salted Peanut Butter Swirl Brownies
Quality ingredients are the backbone of this recipe. Since there are so few components, each one needs to perform perfectly. For instance, using room temperature eggs is a non-negotiable step. Cold eggs will cause your melted butter to seize and clump, ruining the smooth emulsion you need for a glossy batter.
If you forgot to take your eggs out of the fridge, just place them in a bowl of warm water for five minutes. This small adjustment ensures the fats and proteins bond correctly without the need for over-mixing. Remember, the less you stir, the better the final texture will be.
Furthermore, the salt you choose matters just as much as the chocolate. We use standard salt in the batter to enhance the cocoa, but the flaky salt on top provides a sensory “pop.” It cuts through the richness of the peanut butter and keeps the sweetness from becoming overwhelming.
Selecting the Right Cocoa Powder and Chocolate
I recommend using a high-quality unsweetened cocoa powder for the base. If you want a darker, more intense flavor, Dutch-processed cocoa is a great choice because it’s treated with alkali to reduce acidity. It pairs beautifully with the semi-sweet chocolate chips.
For the 4 ounces of melted chocolate in the batter, look for something in the 60% to 70% cacao range. This percentage provides enough bitterness to balance the granulated sugar. Avoid using milk chocolate in the base, as the extra milk solids and sugar will make the brownies too soft and cloying.
The Importance of Creamy Peanut Butter Consistency
Not all peanut butters are created equal when it comes to swirling. Natural varieties that require stirring often have too much oil separation. This excess oil can bleed into the brownie batter, making the final product greasy rather than fudgy.
Standard creamy peanut butter works best because it contains stabilizers that hold its shape during the bake. To get those beautiful, thick ribbons, warm the peanut butter in the microwave for about 15 seconds. It should be pourable but still thick enough to hold a “trail” when drizzled.
Flaky Sea Salt: More Than a Garnish
Salt is a powerful flavor suppressor for bitterness and an enhancer for sweetness. When you sprinkle flaky sea salt like Maldon or Fleur de Sel on top, you’re creating a complex flavor profile. The large flakes don’t dissolve immediately, giving you a crunch that contrasts with the soft brownie.
Standard table salt is too fine for the topping and would just make the brownies taste “salty.” The flaky version provides targeted bursts of flavor. It highlights the nuttiness of the peanut butter and makes the chocolate taste even more intense.
Step-by-Step: Achieving the Perfect Dense Crumb
Success in brownie baking is all about timing and visual cues. You aren’t just following a list; you’re watching the batter transform from a grainy mixture into a glossy, heavy ribbon. Pay close attention to how the ingredients look as you incorporate them.
Phase 1: Preparing the Foundation and Pan
Start by lining your 8×8 inch pan with parchment paper. Leave an overhang on two sides to create a “sling,” which allows you to lift the entire block out once cooled. This prevents the brownies from breaking when you try to dig them out with a spatula.
Preheat your oven to 325°F rather than the standard 350°F. A slightly lower temperature ensures the edges don’t bake too quickly while the center is still raw. This leads to a perfectly level brownie without those annoying domed, crunchy edges.
Phase 2: Hand-Mixing the Batter
Combine your melted butter and sugar first. The mixture will look a bit grainy, and that’s perfectly fine. Once you stir in the melted chocolate and vanilla, the batter will begin to look smooth and dark. Add the eggs one at a time, stirring gently until the yellow just disappears.
When you sift in the dry ingredients, use a folding motion. You want to stop the very second you see no more white streaks of flour. The batter should be thick, heavy, and have a beautiful sheen. If it looks dull or “bready,” you’ve likely over-mixed it.
Phase 3: The Art of the Deep Swirl
Pour the batter into the pan and smooth the top. Drop your warmed peanut butter in large dollops across the surface. Don’t be shy with the placement; you want big pockets of flavor. Use a butter knife to swirl, but here’s the trick: dig deep.
If you only swirl the surface, the peanut butter will just sit on top. By pushing the knife down to the bottom of the pan, you ensure that every single bite has a vertical column of peanut butter. This creates the stunning cross-section look that makes these brownies so famous.
Troubleshooting Common Brownie Failures
Even the best bakers run into issues occasionally. Most brownie problems stem from either temperature control or timing. If your brownies didn’t turn out exactly like the photos, it’s usually a quick fix for the next batch.
Identifying an Overbaked Brownie
The biggest mistake people make is waiting for a toothpick to come out clean. If the toothpick is clean, your brownies are already overdone and will be dry once they cool. You want to see a few moist crumbs clinging to the tester.
Look for the “wobble.” When you gently shake the pan, the edges should be firm and set, but the center should have a very slight jiggle. Residual heat, also known as carry-over cooking, will finish the center while the brownies sit on the counter.
Fixing a Greasy or Separated Batter
If you see oil pooling on top of your batter, your butter was likely too hot when you added the eggs. This causes the emulsion to break. To prevent this, let your melted butter cool for a few minutes before mixing in the sugar and eggs.
If it happens anyway, try adding a teaspoon of room temperature milk and stirring very gently. This can sometimes help the fats re-emulsify. However, the best cure is prevention: always ensure your melted components are warm, not scalding.
The Critical Cooling and Setting Period
I know it’s tempting to cut into these while they’re warm, but you must wait. These brownies need at least two hours on the counter and another hour in the fridge. This isn’t just about temperature; it’s about molecular structure.
During this time, the fats from the butter and chocolate are re-solidifying. This “set period” is what creates those clean, sharp edges and the dense, truffle-like interior. If you cut them too early, they will be messy and lose that signature fudgy bite.
Storage and Make-Ahead Instructions
These brownies actually taste better the second day because the flavors have more time to meld. You can store them in an airtight container at room temperature for up to 4 days. For an even fudgier experience, keep them in the refrigerator.
If you want to make them far in advance, they hold up beautifully in the freezer. Just make sure they are completely cooled before wrapping. They are the perfect treat to keep on hand for unexpected guests or late-night cravings.
How to Freeze for Long-Term Freshness
To freeze, wrap individual squares tightly in plastic wrap, then place them in a heavy-duty freezer bag or wrap them again in aluminum foil. This double-layer protection prevents freezer burn and keeps the chocolate from absorbing other odors.
When you’re ready to eat one, let it thaw on the counter for about 30 minutes. Don’t microwave them from frozen, as this can make the peanut butter oily and ruin the texture of the brownie. A slow thaw preserves that perfect, dense crumb.
Expert Baking FAQ
Can I use crunchy peanut butter instead?
You certainly can, but it will change the aesthetic. Crunchy peanut butter adds a nice textural contrast, but the nut pieces can make it harder to get a smooth, artistic swirl on top. If you love the crunch, go for it, but stick to creamy if you want that classic “marbled” look.
Why did my peanut butter swirl sink to the bottom?
This usually happens if the peanut butter is too heavy or if the brownie batter is too thin. Ensure you are using the “No-Whisk Rule” to keep your batter thick. Also, make sure you aren’t over-heating the peanut butter; it should be pourable, not watery.
What is the best substitute for semi-sweet chocolate?
Bittersweet chocolate (around 70% cacao) is the best substitute. It will make the brownies slightly less sweet and more intense. Avoid using milk chocolate or white chocolate in the batter base, as they lack the cocoa solids needed to provide the proper structure and “snap.”
How do I get those perfectly clean square cuts?
The secret is the “Hot Knife” technique. Chill the brownies first so they are firm. Then, dip a long, sharp knife into a tall glass of hot water. Wipe it completely dry, make one long cut, and then clean and re-dip the knife before every single subsequent slice. This prevents the fudge from sticking to the blade.
Can I use a 9×9 inch pan instead?
Yes, but your brownies will be significantly thinner. Because the batter will spread more, you’ll need to reduce the baking time by about 5 minutes. Keep a close eye on them and use the “wobble test” to ensure you don’t accidentally overbake them into a dry cracker.
Why is my flaky salt melting into the top?
If you sprinkle the salt while the chocolate drizzle is extremely hot, it might dissolve. Wait about two minutes after drizzling the melted chocolate before adding the salt. The chocolate should still be wet enough for the salt to stick, but not so hot that it melts the crystals.
Salted Peanut Butter Brownies
Course: DessertCuisine: AmericanDifficulty: easy16
squares15
minutes25
minutes240
kcal40
MinutesThese brownies avoid the ‘cakey’ trap by using a high fat-to-flour ratio and a hand-stirred method to prevent air incorporation. Featuring a rich melted chocolate base and deep pockets of swirled peanut butter, they are finished with a chocolate drizzle and sea salt.
Ingredients
1/2 cup unsalted butter, melted
1 cup granulated sugar
2 large eggs, room temperature
1 teaspoon vanilla extract
4 oz semi-sweet chocolate, melted (for the batter)
1/2 cup unsweetened cocoa powder
1/2 cup all-purpose flour
1/4 teaspoon salt
1/2 cup creamy peanut butter
1/2 cup semi-sweet chocolate chips (for the topping)
1 teaspoon flaky sea salt
Directions
- Preheat your oven to 325°F (165°C). Line an 8×8 inch baking pan with parchment paper, leaving an overhang on the sides.
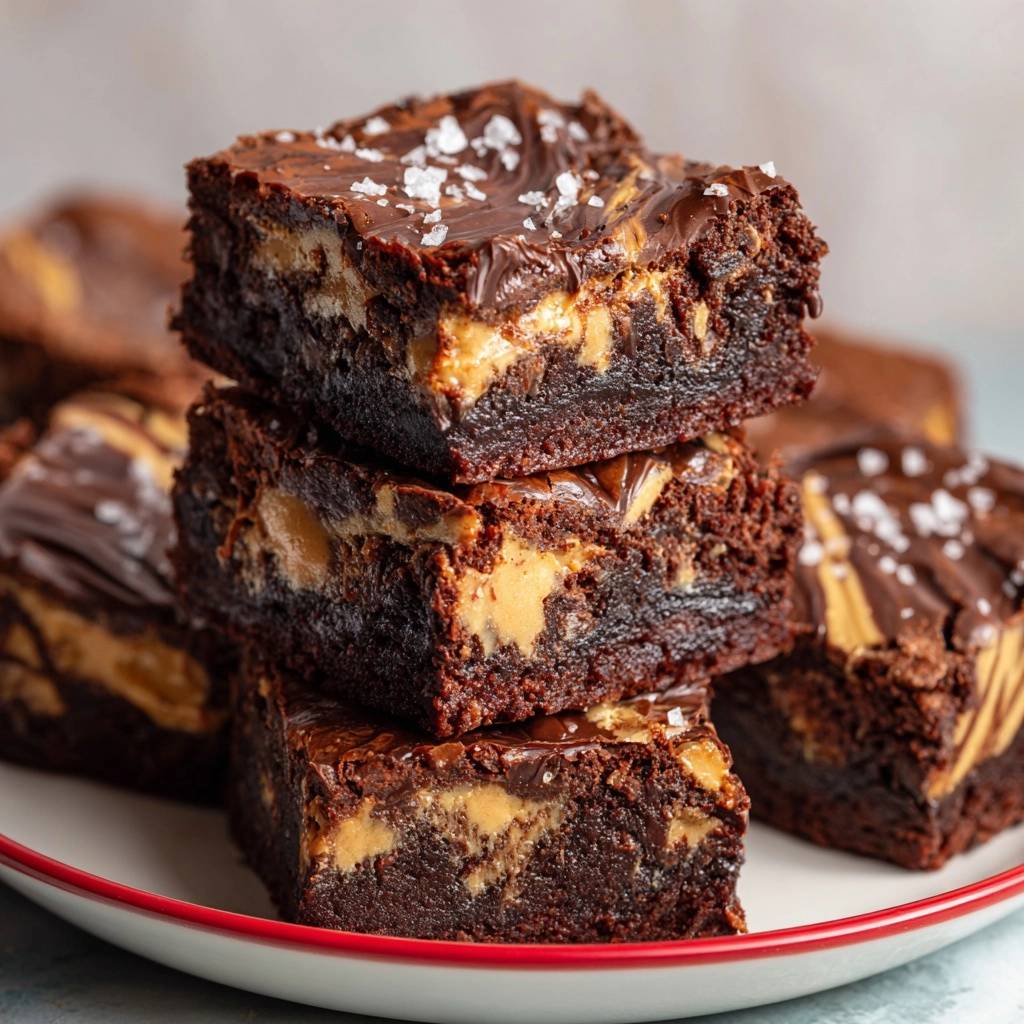
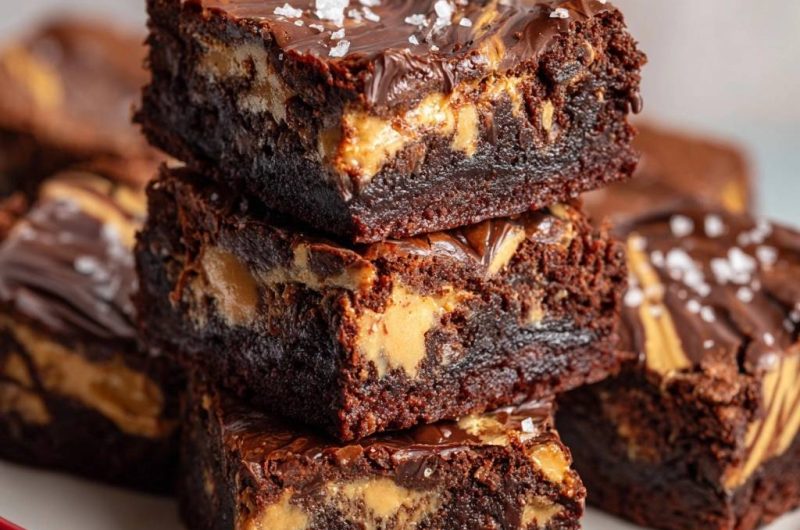
- In a medium bowl, combine the melted butter and sugar. Use a silicone spatula to stir by hand until combined. Do not use a whisk or electric mixer; keeping air out of the batter is essential for the fudgy texture shown in the image.
- Stir in the 4 oz of melted chocolate and vanilla extract.
- Add the eggs one at a time. Stir gently with the spatula just until the yellow streaks disappear. Do not overbeat.
- Sift in the cocoa powder, flour, and salt. Fold the dry ingredients into the wet mixture slowly until no streaks of flour remain. The batter should be thick and glossy.
- Pour the batter into the prepared pan and spread it evenly.
- Warm the peanut butter in the microwave for 15 seconds until pourable. Drop large dollops across the top of the batter. Use a knife to swirl the peanut butter deeply into the batter so you get the thick pockets of peanut butter visible in the cross-section of the photo.
- Bake for 22 to 25 minutes. The edges should be set, but the center should still have a slight wobble.
- While the brownies bake, melt the 1/2 cup of chocolate chips.
- Remove brownies from the oven. Immediately drizzle the melted chocolate over the top and use a clean knife to lightly swirl it into the warm peanut butter surface.
- Sprinkle generously with flaky sea salt while the chocolate topping is still wet.
- Allow the brownies to cool completely in the pan for at least 2 hours, then refrigerate for 1 hour before slicing. This “set period” is the final secret to achieving the clean, dense edges and fudgy interior seen in the image.
Notes
- The ‘No-Whisk Rule’ is essential for the fudgy texture. Cooling completely for 2 hours and refrigerating for 1 hour before slicing ensures clean edges and a set interior.