Mastering Decadent Dark Chocolate Truffles: The Fail-Safe Texture Method
Nothing ruins the excitement of making homemade candy faster than a grainy, oily, or broken ganache. Most home cooks struggle with the chocolate separating into a greasy mess or remaining too soft to handle, even after hours in the fridge. It’s frustrating to invest in high-quality ingredients only to end up with a puddle of chocolate that won’t hold its shape.
The secret to professional-grade Decadent Dark Chocolate Truffles lies in a specific temperature-control method I call the “Texture Lock-In.” By managing how the heat meets the cacao, you create a velvety, melt-in-your-mouth center that sets up firmly every single time. You don’t need a culinary degree to master this; you just need a little bit of patience and the right technique.
The most critical tip for success is the “five-minute rule.” Most people start stirring the moment the hot cream hits the chocolate, which shocks the fats and causes separation. However, letting the mixture sit untouched allows the chocolate to melt evenly from the inside out. This creates a stable emulsion that stays glossy and smooth rather than becoming gritty or dull.
The Chemistry of a Perfect Ganache
At its heart, a truffle is a simple emulsion of chocolate and heavy cream, but the science behind it is quite complex. When you combine these two, you’re asking fat molecules and water-based liquids to bond into a single, cohesive structure. If the ratio or the temperature is off, the emulsion breaks, and the cocoa butter leaks out as oil.
Using high-quality dark chocolate with at least 60% cacao is chemically necessary for this recipe to work. Dark chocolate contains a higher percentage of cocoa solids and cocoa butter than milk chocolate, which provides the structural integrity needed for the truffle to set. The cocoa solids act as the “skeleton” of your truffle, ensuring it doesn’t collapse at room temperature.
When the warm cream surrounds the finely chopped chocolate, it begins to gently melt the cocoa butter. Therefore, the fat molecules in the cream can wrap around the cocoa particles, creating a suspension that feels incredibly rich on the tongue. If you use chocolate with too much sugar or milk powder, the bond won’t be strong enough to create that signature “snap” and creamy finish.
Why Temperature Control Prevents Seizing
Cocoa butter is a temperamental fat with a very specific melting point. If you subject it to the intense heat of boiling cream, the fat molecules vibrate too quickly and detach from the solids, leading to an oily mess. This is why the “simmer-only” rule is your best friend in the kitchen.
By bringing the cream just to the point where small bubbles form at the edges, you reach roughly 175°F. This is the “sweet spot” for melting chocolate without scorching it. In addition, keeping the heat moderate ensures the vanilla extract doesn’t lose its aromatic punch, keeping the flavor profile deep and complex.
Essential Components for Decadent Dark Chocolate Truffles
Since this recipe only uses a handful of ingredients, the quality of each one is magnified. I always recommend using a high-quality chocolate bar rather than chocolate chips. Most chocolate chips contain stabilizers and less cocoa butter so they can hold their shape in the oven, but those same stabilizers can make a truffle feel waxy or prevent it from melting smoothly.
Look for “couverture” chocolate if you can find it, as it has a higher percentage of cocoa butter. However, a standard high-end baking bar from the grocery store works beautifully as long as you chop it into very small, uniform pieces. The smaller the shards, the faster and more evenly they will melt when the cream is poured over them.
Don’t skip the pinch of fine sea salt! While it might seem counterintuitive in a sweet treat, salt is a powerful flavor enhancer. It cuts through the richness of the heavy cream and brightens the inherent bitterness of the cacao, making the chocolate taste more like “itself.”
Selecting Your Cacao Percentage
The percentage on the label tells you how much of the bar is made of cocoa beans. A 60% bar is sweeter and softer, making for a very approachable truffle. If you move up to 70%, you’ll notice a deeper, more intense flavor and a firmer set that feels more “professional.”
I generally avoid 85% or higher for truffles unless you plan to add more sugar. At that level, the fat-to-sugar ratio is so high that the truffle can become quite brittle. For the perfect balance of sweetness and “decadent” mouthfeel, 60% to 70% is the gold standard.
Heavy Cream vs. Alternatives
For the “Fail-Safe” method to work, you must use heavy whipping cream with at least 36% milk fat. This high fat content is what allows the ganache to emulsify and eventually harden into a scoopable consistency. The fat acts as a stabilizer that holds the whole mixture together.
Low-fat milks or half-and-half simply don’t have enough “body” to create a firm truffle. If you try to use them, your ganache will likely remain a liquid sauce. Stick to the heavy stuff for that luxurious, dense texture that defines a true dark chocolate truffle.
Phase One: The Fail-Safe Texture Lock-In
The first phase is all about preparation and patience. You must chop the chocolate into pieces no larger than a pea. If you have big chunks mixed with tiny slivers, the tiny ones will overheat while the big ones stay hard, resulting in a lumpy ganache that requires reheating—a move that often leads to oil separation.
Once your chocolate is in the bowl and your cream is simmering, pour the liquid over the chocolate and walk away. This is the hardest part! You must let it sit untouched for exactly five minutes. During this time, the heat is slowly penetrating the center of each chocolate piece without the interference of air or friction.
Agitating the mixture too early introduces air bubbles and can cause the temperature to drop too quickly. By letting it rest, you ensure the chocolate is fully softened before you ever pick up a spatula. This patience is what guarantees that “velvet” texture that makes people think you bought these at a high-end boutique.
The Center-Out Stirring Technique
When the five minutes are up, don’t just start whisking wildly. Use a rubber spatula and start making small, tight circles right in the very center of the bowl. At first, it will look like a mess of brown liquid and dark clumps, but keep going.
As you stir in the center, you are creating a “nucleus” of emulsion. Gradually widen your circles until you’ve incorporated all the cream from the edges. You’ll see the mixture transform from a muddy liquid into a glossy, thick, and perfectly smooth ribbon of chocolate.
Phase Two: Chilling and Setting the Ganache
Now that your ganache is smooth, it needs time to “cure.” Cover the bowl with plastic wrap, pressing it directly onto the surface of the chocolate to prevent a skin from forming. It needs at least two hours in the refrigerator to reach the right consistency.
During this time, the cocoa butter is recrystallizing. This molecular change is what turns a liquid sauce into a solid candy. You’ll know it’s ready when you can press your finger into the center and it feels firm but gives slightly, much like the texture of cold butter.
If you try to scoop it too early, the truffles will be sticky and lose their round shape. If it becomes too hard to scoop, simply let it sit on the counter for 10 minutes to soften slightly. The goal is a “play-dough” consistency that is easy to manipulate.
Phase Three: Precision Shaping and Coating
Shaping truffles can be a messy business because the heat from your hands will naturally melt the chocolate. To combat this, I like to use a small melon baller or a teaspoon to portion out the mounds first. Place all the mounds on a parchment-lined tray before you start rolling.
If your hands are naturally warm, try running your wrists under cold water for a minute and drying them thoroughly. This lowers the temperature of your palms. Roll each mound quickly between your hands to form a ball, then immediately drop it into your coating of choice.
Working in small batches is the best way to maintain control. If the ganache starts to get too soft while you’re working, don’t fight it. Just pop the tray back in the fridge for 15 minutes and take a break. Cold ganache is much easier to roll into perfect spheres.
Textural Variety: Cocoa, Coconut, and Walnuts
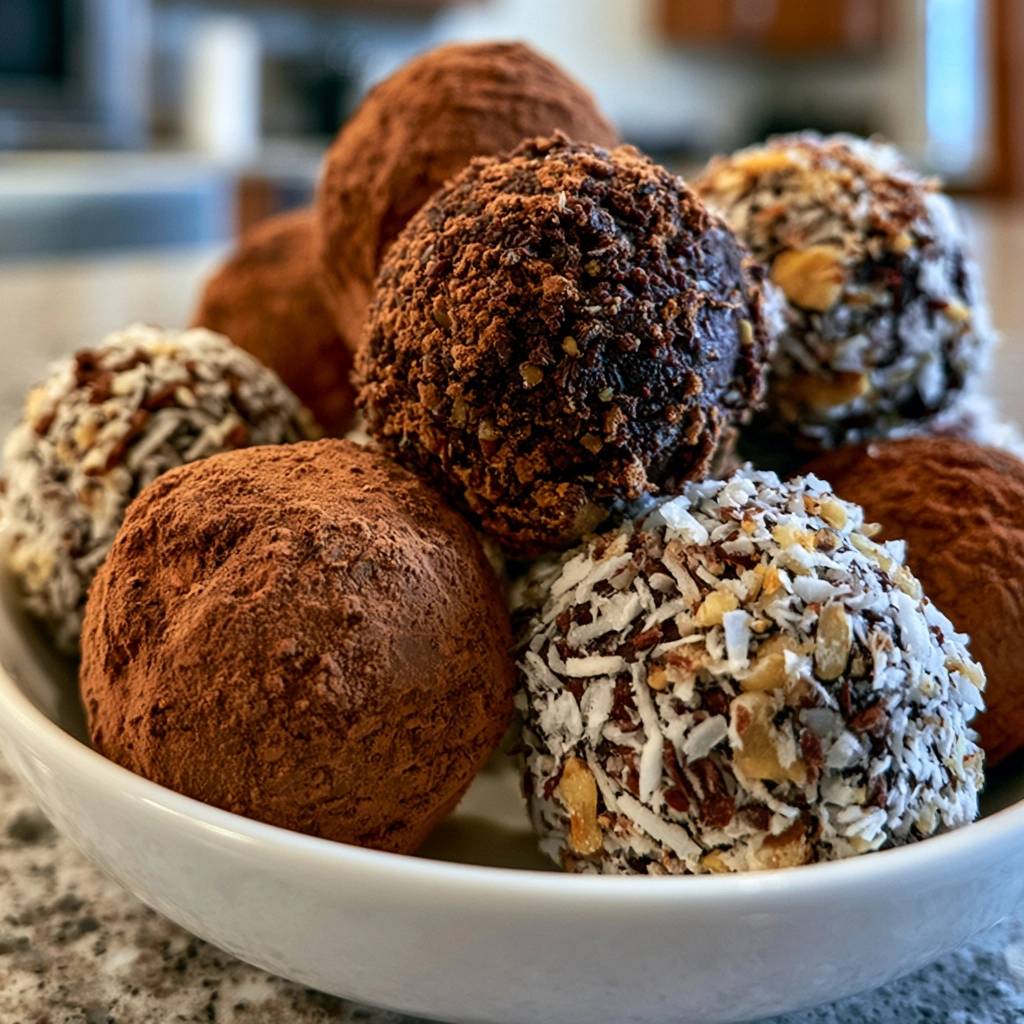
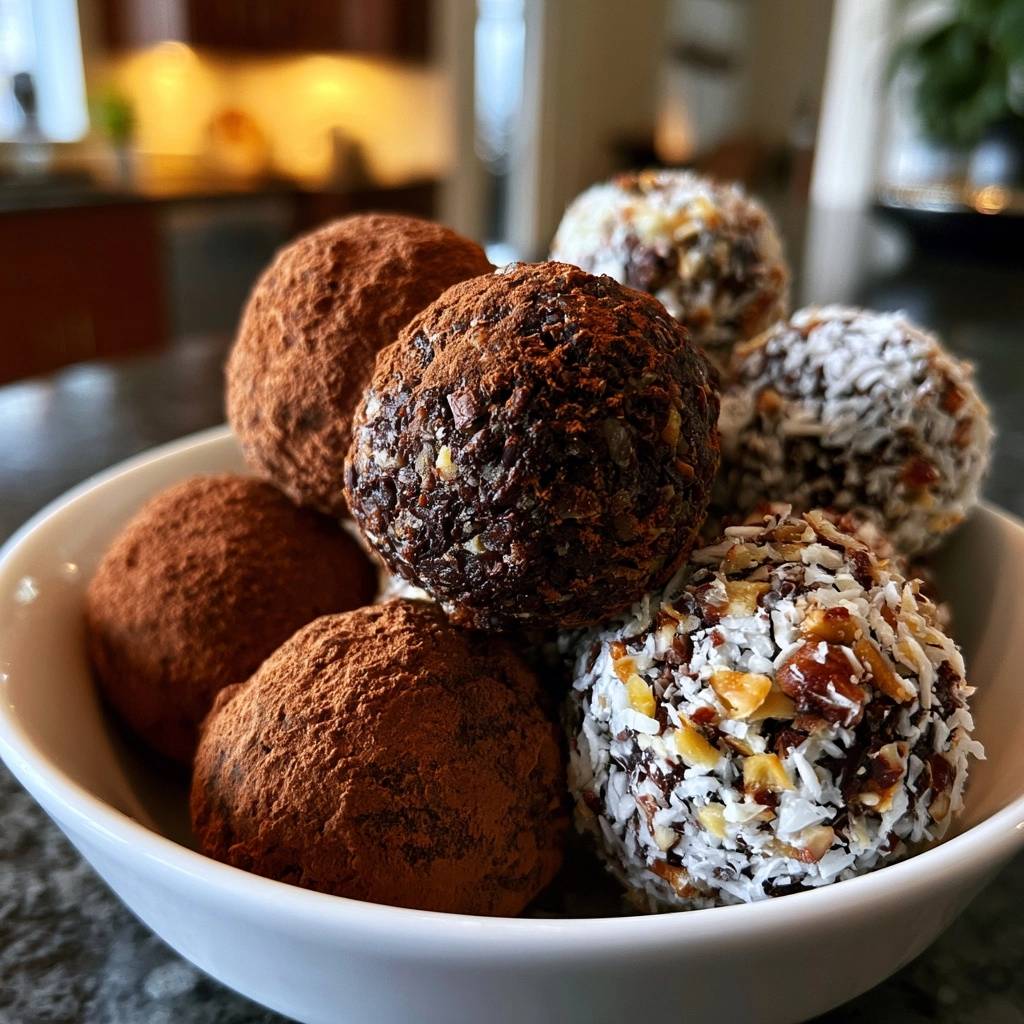
The coating serves two purposes: it adds flavor and prevents the truffles from sticking to each other. For a classic look, unsweetened cocoa powder provides a sophisticated, bitter contrast to the rich center. Make sure to sift the cocoa first to remove any lumps.
If you prefer a bit of crunch, finely crushed walnuts or shredded coconut are fantastic options. The key is to roll the truffle in the coating while the surface is still slightly “tacky” from the heat of your hands. This ensures the toppings stick firmly and don’t fall off when you take a bite.
Troubleshooting Common Ganache Obstacles
Even with the best intentions, things can sometimes go wrong. If you notice oil pooling on top of your ganache, don’t panic! This means the emulsion has “broken.” You can often fix this by adding a single teaspoon of warm (not hot) cream and stirring very gently until it comes back together.
If your ganache feels grainy, it’s usually because the cream was too hot and scorched the chocolate, or the chocolate wasn’t chopped finely enough. While you can’t always “un-grain” a ganache, you can still use it as a base for brownies or cake batter so the ingredients don’t go to waste.
If the mixture is too soft to roll even after two hours, it might be because the cream wasn’t measured accurately or the chocolate had a lower cacao percentage. In this case, you can try chilling it for another hour or whisking in a bit more melted (and slightly cooled) chocolate to stiffen the structure.
Fixing a Broken Emulsion
A broken emulsion looks curdled and greasy, but it’s a common hurdle. To rescue it, place the bowl over a pot of barely simmering water (a double boiler). Add a tiny splash of room-temperature cream and whisk slowly but constantly.
The gentle heat helps the fats reintegrate with the solids. As soon as the mixture looks glossy again, remove it from the heat immediately. Overworking a broken ganache can make it worse, so stop the moment it looks smooth and unified.
Storage Logistics for Maximum Freshness
Because these truffles contain fresh dairy, they shouldn’t sit out at room temperature for more than a few hours. For the best texture and safety, store them in an airtight container in the refrigerator. They will stay fresh and delicious for up to two weeks.
When you’re ready to serve them, take them out of the fridge about 15 to 20 minutes beforehand. This allows the cocoa butter to soften just enough to give you that signature “melt” when you take a bite. However, keep them away from direct sunlight or warm spots like the top of the oven.
If you notice a white film on the chocolate after a few days, don’t worry—that’s just “fat bloom.” It happens when the chocolate is exposed to temperature changes. It’s perfectly safe to eat and usually disappears if you lightly roll the truffle in fresh cocoa powder.
Expert Tips for Professional Results
If you want to take your truffles to the next level, try sifting your cocoa powder through a fine-mesh strainer. This creates a delicate, “dusty” finish that looks much more professional than clumpy powder. It also ensures a more even flavor in every bite.
Another pro tip is to use disposable food-prep gloves when rolling the balls. Not only does this keep your hands clean, but the smooth surface of the glove actually helps create a more perfectly spherical shape. It also provides a slight barrier between the heat of your skin and the chocolate.
For those who love a bit of extra crunch, try the “double-coat” method. Roll the truffle in crushed walnuts, press them in gently, and then give it a very light dusting of cocoa powder. This creates layers of texture and flavor that make the truffle feel like a gourmet gift.
Infusion Techniques for Advanced Makers
Once you’ve mastered the basic recipe, you can start experimenting with flavor infusions. You can steep ingredients like whole espresso beans, fresh mint leaves, or even a cinnamon stick in the heavy cream while it heats up. This adds a subtle layer of flavor without changing the chemistry of the ganache.
Simply strain the aromatics out of the cream before pouring it over the chopped chocolate. This allows you to customize your truffles for different seasons or occasions while still relying on the “Fail-Safe” method for that perfect, decadent texture.
How should I store these truffles and how long do they last?
You should store these truffles in an airtight container in the refrigerator to keep the fresh cream from spoiling. They will stay fresh for up to two weeks. While you can keep them at room temperature for a party, they shouldn’t sit out for more than 4 hours, as they will soften and eventually lose their shape. I don’t recommend freezing them, as the moisture in the freezer can cause the chocolate to “bloom” or develop a grainy texture upon thawing.
Why is my ganache oily and how can I fix it?
An oily ganache usually means the emulsion has broken, often because the cream was too hot or you stirred it too vigorously before it was ready. To fix this, add a teaspoon of warm cream to the bowl and stir very slowly with a spatula. The extra liquid and gentle movement help the fat molecules reconnect with the chocolate solids. If that doesn’t work, you can gently warm the mixture over a bowl of hot water while stirring until it becomes glossy again.
Can I use chocolate chips instead of bar chocolate?
While you can use chocolate chips in a pinch, I don’t recommend them for truffles. Chocolate chips contain stabilizers like soy lecithin that help them keep their shape when baked in cookies. These stabilizers can prevent the ganache from reaching that ultra-smooth, “melt-in-your-mouth” consistency. For the best results, use a high-quality baking bar or couverture chocolate and chop it finely by hand.
What can I use instead of heavy whipping cream?
For this specific “Fail-Safe” method, there isn’t a direct substitute that provides the same structural integrity. You need the 36% fat content found in heavy cream to ensure the truffles set firmly enough to roll. Using milk, half-and-half, or low-fat alternatives will result in a ganache that is too thin and runny. If you need a dairy alternative, full-fat canned coconut milk can work, but the setting time and final texture will be significantly different.
Why are my truffles melting in my hands while I roll them?
Chocolate has a melting point very close to human body temperature, so it’s natural for it to soften as you handle it. If this is happening, your ganache might not be chilled long enough, or your hands might be naturally very warm. Try chilling the ganache for another hour. You can also cool your hands by holding an ice pack or running them under cold water (dry them thoroughly!) before rolling. Using a small scoop to portion the balls first also minimizes the time the chocolate spends in contact with your skin.
Can I use cocoa powder with sugar for the coating?
It is best to use unsweetened cocoa powder for the coating. The truffle center is already quite rich and sweet, so the bitterness of the unsweetened cocoa provides a necessary balance. If you use a sweetened cocoa mix (like hot chocolate mix), the truffles may become cloyingly sweet and the coating might turn sticky or “weep” as the sugar draws moisture out of the ganache.
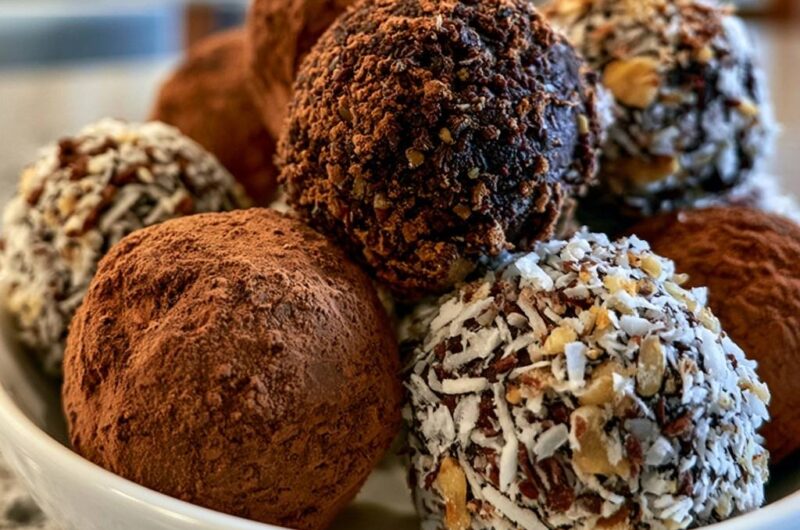
Decadent Dark Chocolate Truffles
Course: DessertCuisine: FrenchDifficulty: easy18
truffles20
minutes5
minutes120
Minutes115
kcalFrench
Ingredients
8 ounces high-quality dark chocolate (60 percent cacao or higher), finely chopped
1/2 cup heavy whipping cream
1/2 teaspoon pure vanilla extract
1 pinch fine sea salt
1/4 cup unsweetened cocoa powder (for coating)
1/4 cup shredded coconut (for coating)
1/4 cup finely crushed walnuts (for coating)
Directions
- Place the finely chopped chocolate in a medium heat-proof glass bowl. Ensure the chocolate is in very small, uniform pieces to prevent overheating.
- In a small saucepan over medium heat, bring the heavy cream to a gentle simmer. Watch for small bubbles forming around the edges. Do not let it reach a rolling boil, as scorched cream will cause the chocolate to seize.
- To achieve the Fail-Safe Texture Lock-In, pour the hot cream over the chocolate and let it sit untouched for exactly five minutes. This allows the chocolate to melt evenly from the residual heat without introducing air or friction too early, which prevents oil separation.
- Add the vanilla and salt. Using a rubber spatula, start stirring slowly in small circles in the center of the bowl, gradually working your way outward until the mixture is glossy and perfectly smooth.
- Cover the bowl and refrigerate for at least 2 hours, or until the ganache is firm enough to scoop.
- Use a small spoon or melon baller to scoop 1-inch mounds. Roll them quickly between your palms to form balls. If your hands are warm, rinse them in cold water and dry them first to keep the truffles from melting.
- Immediately roll the truffles in your choice of cocoa powder, shredded coconut, or crushed walnuts. The coating sticks best when the truffle surface is slightly tacky. Store in an airtight container in the refrigerator.
Notes
- If your hands are warm, rinse them in cold water and dry them before rolling to prevent the chocolate from melting.