The Ultimate Loaded Peanut Butter Cup Cheesecake Dip
We’ve all been there at a party, reaching for a promising dessert dip only to find it’s grainy, lumpy, or has that unpleasant powdered sugar crunch. It’s a total mood killer when you’re expecting a cloud-like treat but get something that feels like wet sand. Most people think the grit is just part of the deal with no-bake desserts, but I’m here to tell you that’s just not true.
This Loaded Peanut Butter Cup Cheesecake Dip solves the texture struggle once and for all. By using a specific temperature-matching technique and a slow-incorporation method, you get a silkiness that rivals professional pastry filling. It’s the ultimate party hack for anyone who demands a perfectly smooth, velvet finish that melts in your mouth.
The secret to this professional-grade texture isn’t a fancy tool; it’s all about how you handle the sugar and the fats. When you rush the mixing process, the sugar crystals don’t have time to dissolve into the cream cheese, leaving you with that “crunchy” feel. If you follow my lead on the sifting and the incremental mixing, you’ll create a dip that is salty, sweet, and incredibly aerated. Oh man, the first time you swipe a pretzel through this, you’ll see exactly what I mean!
The Science of a Smooth Cheesecake Base
Creating a stable emulsion between cream cheese and peanut butter is actually a bit of a chemistry project. Cream cheese is high in moisture and protein, while peanut butter is packed with dense lipids (fats). If these two aren’t at the exact same temperature when they meet, they’ll fight each other instead of bonding. This is called temperature shock, and it’s the number one cause of those tiny, stubborn white lumps in your dip.
You must ensure your cream cheese is truly at room temperature—not just “not cold,” but soft enough that a finger leaves an easy indent. When the cheese is soft, the proteins can stretch and wrap around the peanut butter fats. This creates a structural bond that stays smooth even after it’s chilled. If the cheese is too cold, it stays in tight clumps that no amount of high-speed whipping can ever fully break down.
Furthermore, the lipids in the peanut butter act as a stabilizer for the cream cheese. When you beat them together for a full three minutes, you’re forcing air into that fat structure. This aeration is what gives the dip its “cheesecake” feel rather than just feeling like a heavy bowl of sweetened peanut butter. You’re looking for the mixture to turn a pale, sandy tan color, which tells you enough air has been incorporated.
Why Sifting Powdered Sugar is Non-Negotiable
I know sifting feels like an extra chore, but it’s the hill I will die on for this recipe. Powdered sugar is notorious for forming tiny, hard clumps held together by cornstarch. These clumps are surprisingly resilient; even a powerful hand mixer often just bats them around rather than breaking them open. If those clumps make it into your dip, they stay there, creating “sugar pockets” that crunch between your teeth.
Sifting breaks the sugar down into a fine mist that can dissolve instantly upon contact with the moisture in the cream cheese. This ensures that every single grain of sugar is fully hydrated and integrated into the fat base. It’s the difference between an “okay” home cook’s dip and a professional pastry chef’s filling. Don’t skip it!
Essential Components for the Loaded Peanut Butter Cup Cheesecake Dip
When it comes to the ingredients, quality and type matter immensely for the final structural integrity. Firstly, you must use full-fat cream cheese. The “light” or “Neufchâtel” versions have a higher water content, which can cause the dip to weep or lose its shape after an hour on the snack table. You want that heavy fat content to keep the “billowy peaks” standing tall.
For the peanut butter, stick to the standard creamy commercial brands like Jif or Skippy. While I love natural, oil-separating peanut butters for toast, they are a nightmare for dessert dips. The oil separation can cause the entire cheesecake base to “break,” leaving you with a greasy puddle. A stabilized, creamy peanut butter ensures a consistent, predictable emulsion every time.
The same gentle heat approach works beautifully for this warm pepper jelly cream cheese dip.
You might wonder about using real whipped cream versus whipped topping. For a party dip, whipped topping is actually the superior choice because it contains stabilizers that real cream lacks. Real whipped cream tends to deflate and turn back into liquid within a few hours. The topping keeps this dip fluffy and “scoopable” for the entire duration of your event. Finally, don’t forget the salt and vanilla; they aren’t just background noise. The salt cuts through the heavy fats to make the peanut butter flavor pop, while the vanilla adds that classic “bakery” aroma.
Phase One: Achieving the Aerated Creaming Method
The first step is where you build the foundation of the entire dish. Place your softened cream cheese and peanut butter in the bowl and start your mixer on medium-high. You aren’t just mixing them; you’re whipping them. Watch for the color to change from a dark brown to a light, creamy tan. This visual cue tells you that you’ve successfully beaten enough air into the mixture.
However, don’t just let the mixer run and walk away. You need to stop at least twice to scrape the very bottom and the sides of the bowl with a spatula. Mixers often miss a small “plug” of dense cream cheese at the bottom. If you don’t manually fold that back into the center, you’ll end up with a few lumpy bites at the end. Aim for a texture that looks like thick, smooth frosting before you even think about adding sugar.
Phase Two: Incremental Sugar Integration
Patience is your best friend during the sugar phase. Instead of dumping the whole cup of sifted sugar in at once, add it in 1/4 cup increments. If you add it all at once, the sugar acts like a sponge and sucks all the moisture out of the cheese too quickly, which can lead to a grainy texture. By adding it slowly, you allow the sugar to dissolve gradually into the existing emulsion.
Start your mixer on the lowest speed for each addition so you don’t end up in a cloud of white dust. Once the sugar disappears, crank it up to medium for about 30 seconds. You’ll see the mixture transform from a matte paste into a glossy, velvet-like consistency. By the time the last 1/4 cup is in, the base should look incredibly shiny and smooth.
Phase Three: The Manual Folding Technique
This is the most critical part of the process: put the electric mixer away! If you use the mixer to add the whipped topping, you’ll beat out all the air you just worked so hard to incorporate. The high speed of the beaters will “deflate” the dip, turning it from a fluffy cloud into a runny, soup-like mess that won’t stay on a cracker.
Instead, use a rubber spatula to “fold.” This means cutting the spatula through the center of the bowl, scraping across the bottom, and lifting the mixture over the top. Rotate the bowl as you go. You’re looking to marry the heavy peanut butter base with the light whipped topping until no white streaks remain. It takes a little more elbow grease, but the thick, billowy texture is worth every second of effort.
Architecting the “Loaded” Visual Aesthetic
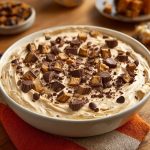
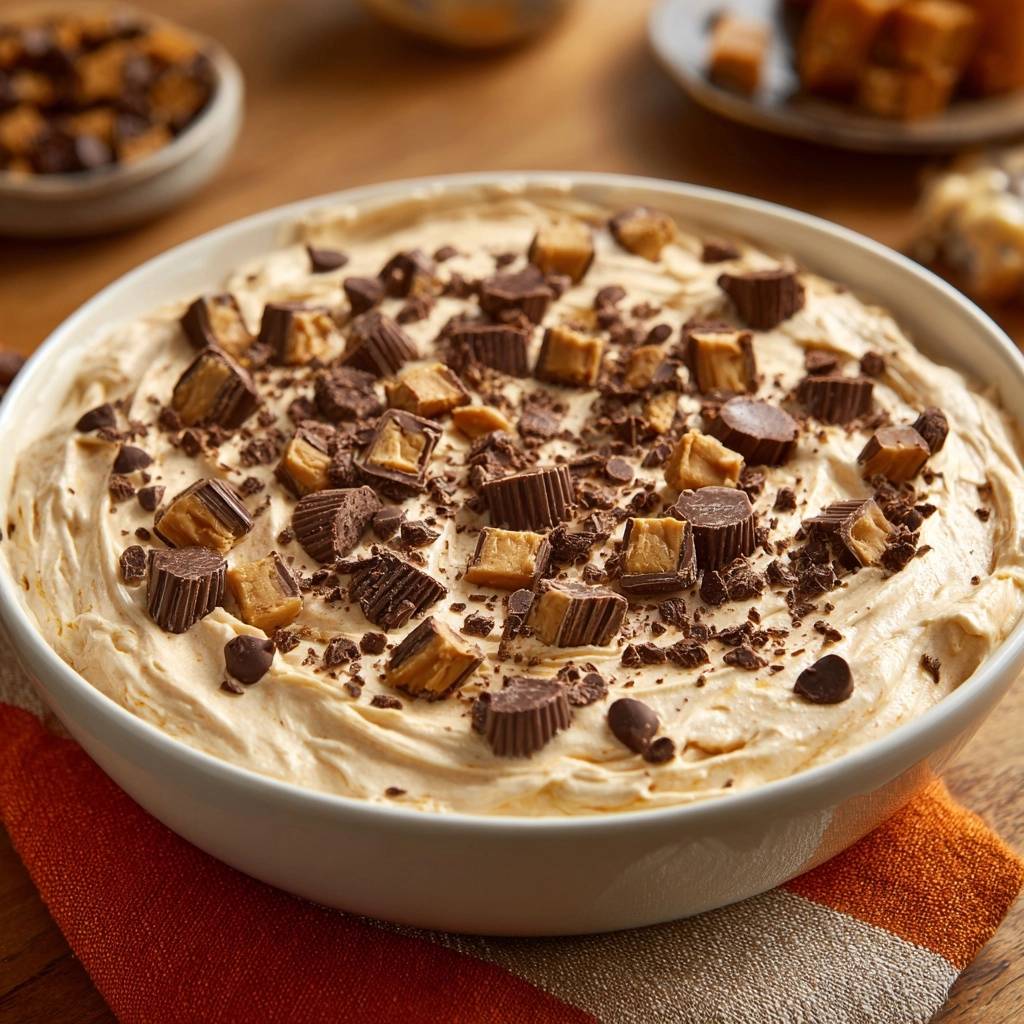
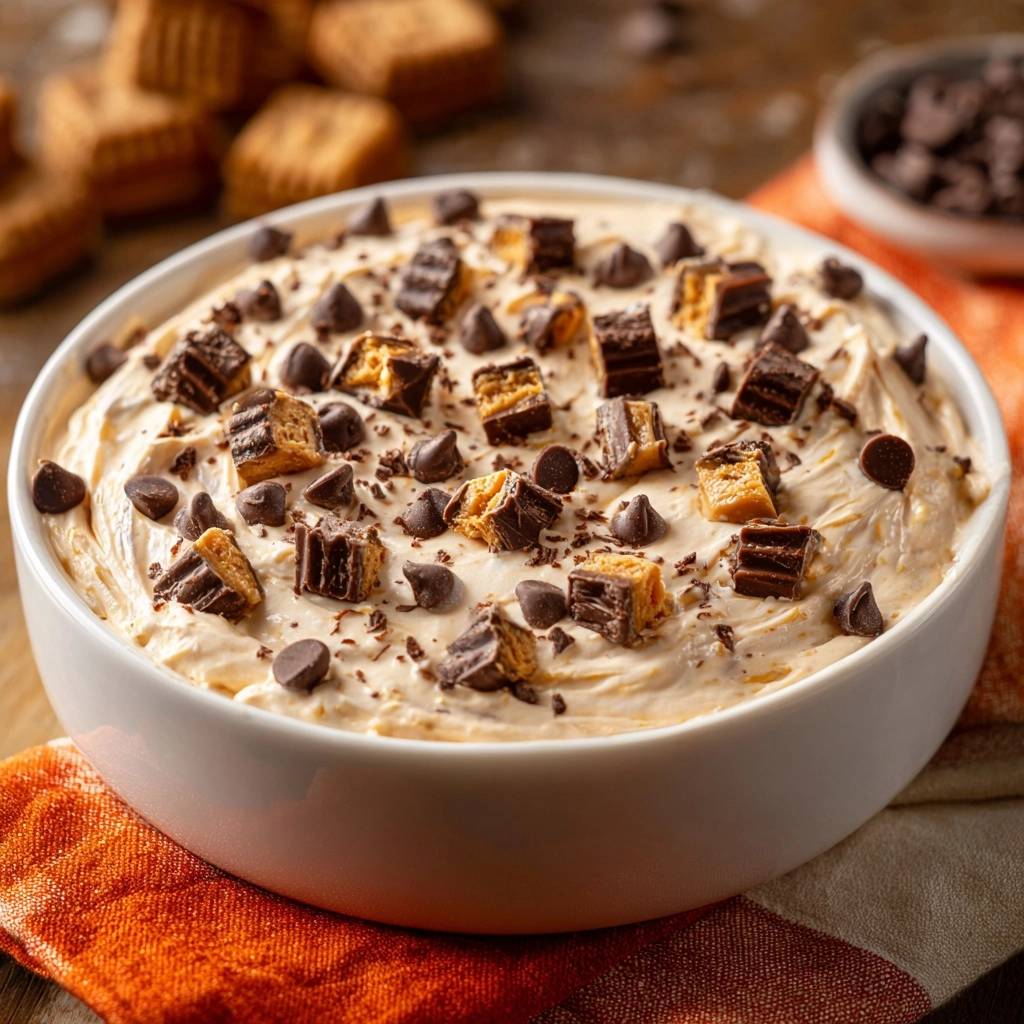
We eat with our eyes first, so presentation is key. Once you transfer the dip to your serving bowl, don’t just smooth it flat. Use the back of a large spoon to swirl the top, creating deep “valleys” and ridges. These little canyons are perfect for catching the chopped peanut butter cups and chocolate chips, ensuring every scoop is loaded with toppings.
When you’re chopping your mini peanut butter cups, aim for a “multi-size” strategy. You want some pieces to be large, chunky bites, while others should be almost like a fine dust. The dust-like particles will settle into the cream and flavor the base even more, while the large chunks provide that satisfying chocolate crunch. It makes the dip look like it came straight out of a high-end candy shop!
If you love the peanut butter base here, you can get a similar fix from this loaded peanut butter toffee dip.
Optimal Dippers for Salty and Sweet Balance
Choosing the right dippers is just as important as the dip itself. You want a mix of textures and flavors to keep things interesting. For a fresh, tart contrast, Granny Smith apple slices are unbeatable. The acidity of the green apple cuts right through the richness of the peanut butter. Bananas are also a classic choice, though they can get soft quickly, so serve them immediately.
On the salty side, pretzels are the gold standard. I prefer pretzel knots or thick rods because they have the structural integrity to handle a heavy scoop of dip without snapping. Ritz crackers are another fantastic option; their buttery, flaky texture pairs beautifully with the cheesecake base. If you want to go full dessert mode, offer graham crackers, chocolate wafers, or even vanilla wafers for a sweeter, crunchier experience.
Troubleshooting Common Texture Issues
If your dip feels too stiff or “heavy” after mixing, don’t panic. This usually happens if your peanut butter was particularly thick. You can fix this by gently folding in an extra 1/4 cup of whipped topping. Just remember to use that manual folding motion so you don’t lose the air. If the dip feels grainy, it’s likely the sugar didn’t dissolve; unfortunately, you can’t “un-grain” it, but letting it sit at room temperature for 20 minutes can sometimes help the sugar crystals hydrate.
Is the peanut butter flavor too faint for your liking? Resist the urge to just stir in more peanut butter at the end. Adding raw peanut butter to the finished dip can break the emulsion and make it oily. Instead, double down on the peanut butter cup toppings or sprinkle a little extra salt on top to make the existing peanut flavor stand out more prominently.
Make-Ahead Logistics and Storage Standards
You can absolutely make the base of this dip up to 24 hours in advance. In fact, letting it sit in the fridge for a few hours can help the flavors meld together beautifully. However, I strongly recommend withholding the “Loaded” toppings until right before you serve. If the chopped candy sits on the moist dip for too long, the chocolate can start to “sweat” and the peanut butter cups might lose their snap.
Store any leftovers in a strictly airtight container in the refrigerator for up to 3 to 4 days. Do not try to freeze this dip! The freezing and thawing process breaks the delicate bond between the cream cheese and the whipped topping. When it thaws, the water will separate from the fats, leaving you with a grainy, watery mess that is impossible to bring back to life.
Temperature Management for Service
One of the biggest mistakes people make is serving this dip straight from the fridge. Because peanut butter contains fats that solidify when cold, a fridge-cold dip will be very stiff and hard to scoop. You’ll end up breaking your pretzels or crackers trying to get a bite! It’s much better to let the bowl sit on the counter for about 15 to 20 minutes before your guests arrive.
This short rest allows the fats to soften just enough to restore that “dip-ability” while still keeping the cheesecake base cool and refreshing. You want it to be the consistency of a soft mousse. If the room is particularly warm, keep an eye on it; you don’t want it sitting out for more than two hours for food safety reasons.
Expert Tips for Large Crowd Catering
If you’re doubling this recipe for a big party, be careful with your mixer capacity. When you double the volume of sugar and cream cheese, it becomes much harder to incorporate air effectively. I recommend doubling the ingredients but still mixing the sugar in those small 1/4 cup increments. It takes longer, but it’s the only way to ensure the entire batch stays billowy and smooth.
What’s Next?
Try these delicious pairings:
- Crustless Spinach Feta Quiche: Fluffy Texture Mastery
- Ham & Cheese Croissant Bake: Flaky Brunch Perfection
Also, consider the bowl size. A deep, narrow bowl makes it hard for multiple people to dip at once. Use a wide, shallow decorative bowl instead. This increases the surface area, which means you can fit more of those delicious “Loaded” toppings on top, ensuring that the last person to the party gets just as many chocolate chunks as the first person!
Customizing the Chocolate-to-Peanut Ratio
While this recipe is perfectly balanced for most, you can easily tweak it to suit your personal taste. If you’re a dark chocolate lover, swap out the standard semi-sweet chips for 70% dark chocolate chunks and use dark chocolate peanut butter cups. The bitterness of the dark chocolate provides a sophisticated contrast to the sweet cheesecake base.
For those who want an even sweeter, more “caramelized” profile, you can whisk a tablespoon of honey or maple syrup into the cream cheese phase. This adds a floral depth that pairs incredibly well with the saltiness of the peanut butter. Just be careful not to add too much liquid, or you’ll risk thinning out the dip’s structure.
Frequently Asked Questions
Can I use natural peanut butter?
It is best to avoid natural peanut butters that require stirring. The natural oils in those products tend to separate easily, which can cause your cheesecake dip to become oily or “broken.” For the smoothest, most stable results, use a standard creamy commercial brand that stays emulsified at room temperature.
How long can this sit out at a party?
For both food safety and texture quality, you should not leave this dip out for more than two hours. Because it contains dairy (cream cheese), it needs to stay relatively cool. If your party is outdoors or in a very warm room, consider placing the serving bowl inside a larger bowl filled with ice to keep it chilled.
Can I substitute the whipped topping for real whipped cream?
You can, but be aware that the dip will be much less stable. Real whipped cream deflates quickly, so the dip may become runny after an hour or two. If you choose to use real cream, whip it to very stiff peaks before folding it in, and serve the dip immediately to ensure it stays fluffy.
Why is my dip runny?
A runny dip is usually caused by one of two things: over-mixing or warm ingredients. If you used an electric mixer to fold in the whipped topping, you likely beat the air out of it. Additionally, if your whipped topping wasn’t fully thawed but still cold, it can sometimes weep water as it melts into the base. Always fold by hand!
What is the best way to chop mini peanut butter cups without them melting?
Peanut butter cups have a very low melting point because of the peanut butter filling. To get clean cuts without a sticky mess, pop the candies in the freezer for 15 minutes before chopping. Use a very sharp, cold knife to quickly dice them into various sizes, then toss them onto the dip immediately.
Peanut Butter Cup Cheesecake
Course: DessertCuisine: AmericanDifficulty: easy8
servings15
minutes350
kcal15
MinutesThis recipe solves the common issue of grainy dessert dips by using a slow-incorporation method and room-temperature ingredients. The result is a professional-grade, velvety dip loaded with peanut butter flavor and chocolate chunks.
Ingredients
8 ounces cream cheese, softened to room temperature (essential for smoothness)
3/4 cup creamy peanut butter (increased for color and flavor depth)
1 cup powdered sugar, sifted
1 teaspoon vanilla extract
1/4 teaspoon salt (to balance sweetness)
8 ounces whipped topping, thawed
1 1/2 cups mini peanut butter cups, roughly chopped
1/4 cup semi-sweet chocolate chips, roughly chopped
Directions
- The Creaming Phase: The secret to avoiding a gritty texture starts with the cream cheese. It must be completely at room temperature. Place the softened cream cheese and peanut butter in a large mixing bowl. Beat on medium-high speed for at least 3 minutes. Scrape the sides of the bowl halfway through. The mixture should be pale, aerated, and show no visible lumps.
- The Sugar Integration: To ensure the sugar dissolves perfectly into the fats, add the sifted powdered sugar only 1/4 cup at a time. Beat on low speed after each addition until just combined, then increase to medium for 30 seconds. This prevents the sugar from clumping and ensures a velvet-smooth mouthfeel.
- Flavoring: Add the vanilla extract and salt. Beat for another 30 seconds until fully incorporated.
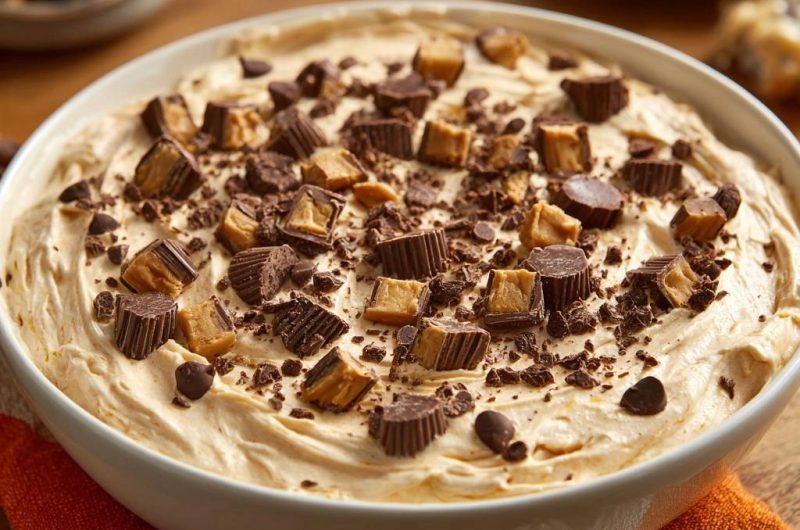
- The Folding Technique: Use a rubber spatula to gently fold in the whipped topping. Do not use the electric mixer for this step. Folding by hand preserves the air bubbles and prevents the dip from becoming runny or oily, maintaining the thick, billowy peaks seen in the image.
- The Mix-ins: Gently fold in 1/2 cup of the chopped peanut butter cups.
- Assembly: Transfer the dip to a wide serving bowl. Use the back of a spoon to create decorative swirls and “valleys” on the surface to catch the toppings.
- The Loaded Topping: Generously top the dip with the remaining 1 cup of chopped peanut butter cups and the chopped chocolate chips. Ensure the pieces are varied in size-some dust-like and some large chunks-to match the visual texture of the photo.
- Serving: Serve immediately with apple slices, pretzels, or graham crackers. For the best consistency, do not over-chill, as the peanut butter will firm up and lose its creamy spreadability.
Notes
- Ensure cream cheese is completely at room temperature to avoid lumps. Sifting the powdered sugar is mandatory for a non-gritty finish. Do not over-chill before serving to maintain spreadability.