Mastering Crispy Garlic Herb Roasted Potatoes
Nothing ruins a dinner faster than a side of limp, greasy potatoes that promised a crunch they couldn’t deliver. We’ve all been there, pulling a tray out of the oven only to find the bottoms are soggy and the edges are tough rather than crisp. If you’re chasing that elusive, glass-like crust that shatters when you bite into it, you’ve come to the right place.
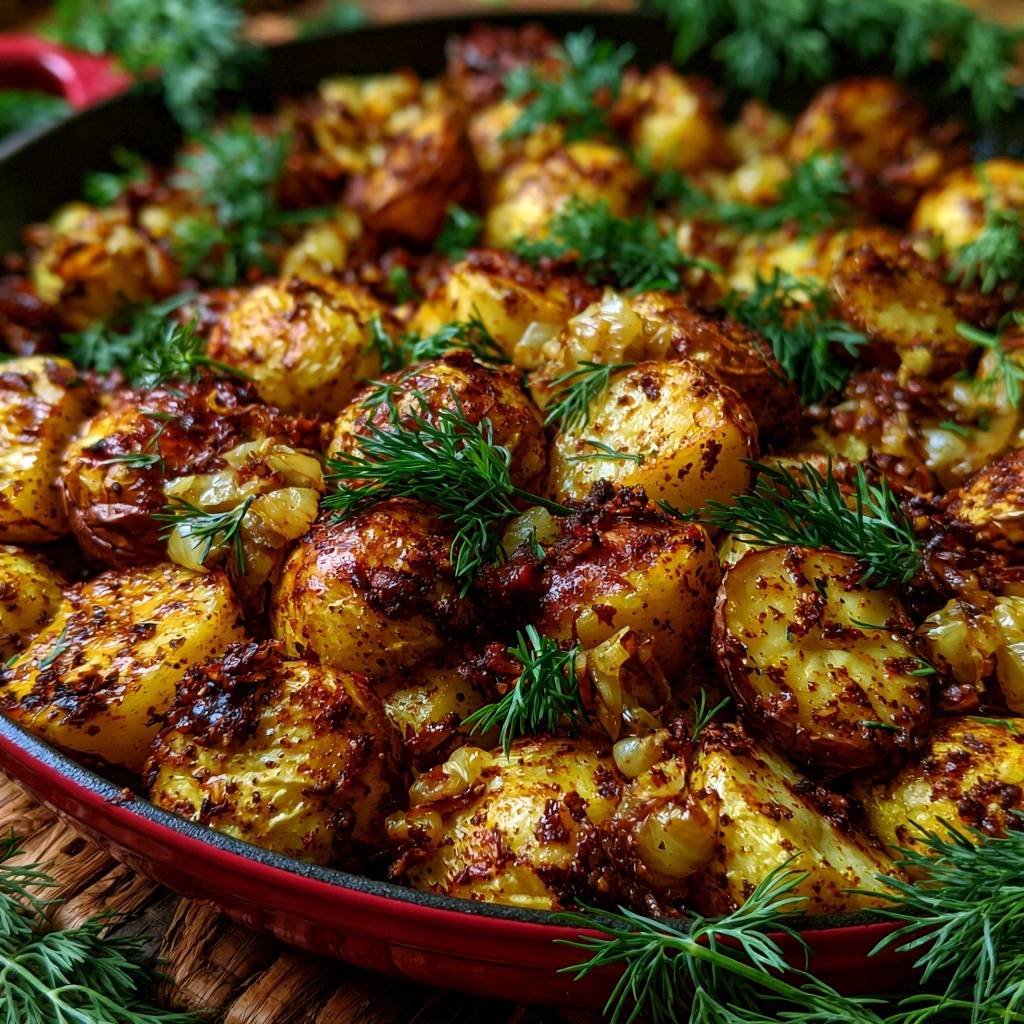
The secret to these Crispy Garlic Herb Roasted Potatoes isn’t just high heat; it’s a combination of chemistry and mechanical abrasion. By manipulating the starch on the surface of the potato, we create a thick, shaggy paste that fries into a craggy, golden armor in the oven. This method ensures a texture that stays loud and crunchy even after the potatoes hit the serving bowl.
I’ve found that the real magic happens before the potatoes ever touch a baking sheet. Adding a simple pinch of baking soda to your boiling water changes the pH level, breaking down the potato’s exterior pectin. This creates the “starchy slurry” necessary for that restaurant-style finish. Let’s dive into the science and technique behind the perfect roast potato.
The Chemistry of the Alkaline Par-Boil
Most home cooks simply toss raw potatoes into the oven, but that’s a recipe for uneven cooking. To get a truly superior crunch, you must start with an alkaline par-boil. Adding half a teaspoon of baking soda to your pot of water raises the pH level, which accelerates the breakdown of the potato’s cellular structure.
Specifically, the alkaline environment weakens the pectin, the “glue” that holds the potato cells together. As the exterior softens more quickly than the interior, it releases starches that form a thick, mashed-potato-like coating. This is the polar opposite of using vinegar in your water, which keeps the pectin strong and the potato firm.
Therefore, when you eventually shake the drained potatoes, this weakened surface transforms into a fuzzy, starchy layer. Once this layer meets hot oil in the oven, it dehydrates and fries into a complex, multi-layered crust. Without the baking soda, your potatoes will have a smooth, thin skin rather than a deep, blistered crunch.
Selecting the Best Spuds for Roasting
Not all potatoes are created equal when it comes to the roasting pan. For this recipe, you want a potato that can balance a high starch content with enough structural integrity to survive a vigorous shaking. While many reach for the classic Russet, I find that waxy or all-purpose varieties offer a much better eating experience.
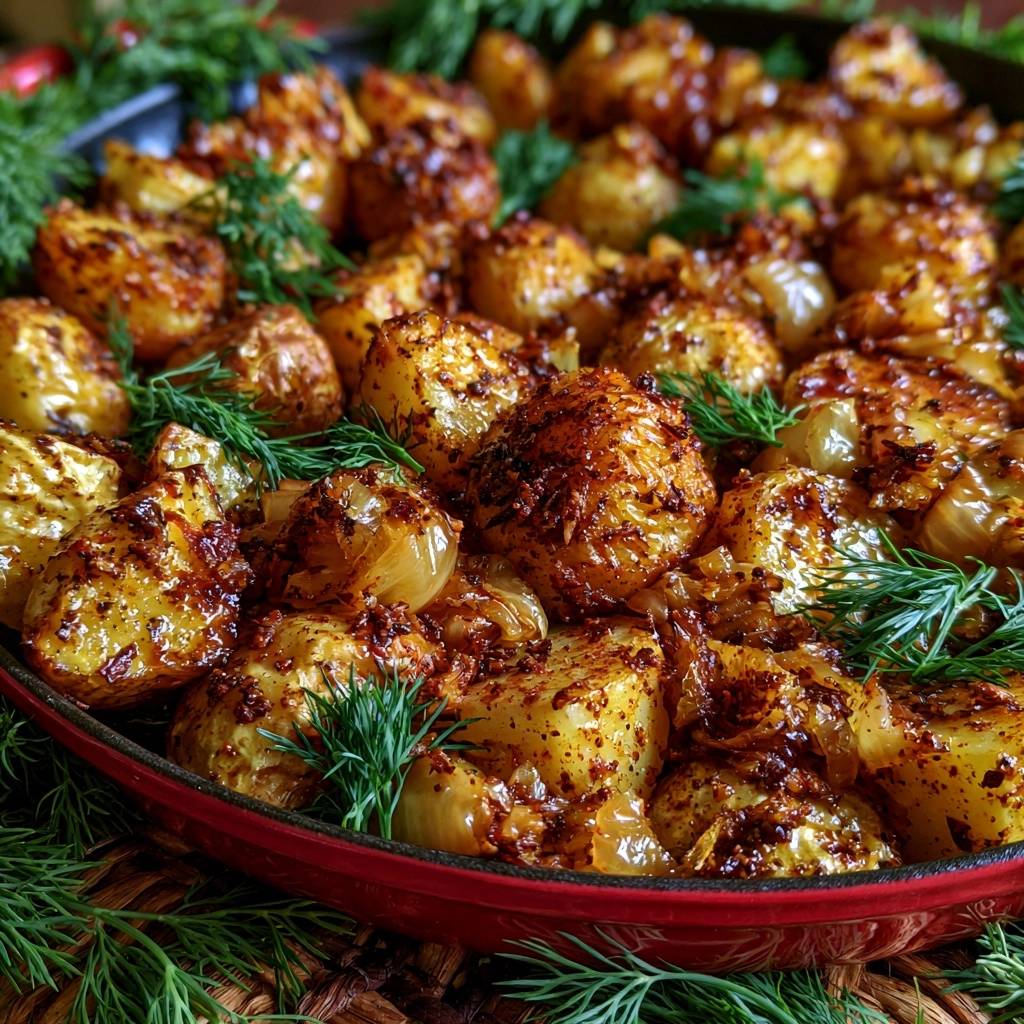
Yukon Gold and Red Bliss potatoes are the champions of the roasting world. They contain just enough sugar to caramelize beautifully at high temperatures without burning too quickly. Furthermore, their skins are thin enough to crisp up and become part of the crust rather than turning leathery or tough.
Why Yukon Golds Win for Creaminess
Yukon Golds are often the top choice for chefs because of their naturally buttery flavor and dense texture. When you roast them using the alkaline method, the interior stays incredibly moist and velvety. This creates a dramatic contrast between the aggressive, “shatter-crisp” exterior and the cloud-like center.
Red Bliss: The Aesthetic and Structural Choice
Red Bliss potatoes are fantastic if you want a dish that looks as good as it tastes. The vibrant red skin provides a beautiful visual pop against the green herbs and red paprika. Additionally, these potatoes hold their shape exceptionally well, making them ideal for the “roughing up” phase where softer potatoes might turn into a pile of mash.
Essential Components for the Herb Infusion
Flavor is just as important as texture, and that starts with high-quality aromatics. We use a combination of fresh garlic, diced onions, and a blend of smoked paprika and chili flakes. The smoked paprika is vital here; it provides a deep, mahogany color that makes the potatoes look professionally roasted before they even finish cooking.
Fresh herbs are non-negotiable for the finishing touch. While dried herbs can become bitter or dusty in a hot oven, fresh dill and parsley provide a bright, grassy finish. These herbs cut through the richness of the oil and the starch, lifting the entire flavor profile of the dish.
The Role of Fat: Olive Oil vs. Duck Fat
The fat you choose acts as the heat transfer medium that fries the potato’s surface. Extra virgin olive oil is a classic choice that offers a fruity, peppery backbone and a clean finish. It’s accessible and works perfectly for achieving a golden-brown crust at 425°F.
However, if you want to take the richness to another level, duck fat is a legendary alternative. It has a higher smoke point and a savory, umami-rich flavor that pairs perfectly with garlic. Whichever you choose, ensure you use enough to thoroughly coat every cranny of the scuffed potato surface.
Aromatics: Garlic, Onion, and Heat
We don’t just toss raw garlic onto the pan because it would burn to a bitter crisp during the 45-minute roast. Instead, we gently sauté the minced garlic and diced onions in the oil beforehand. This “blooms” the flavors and creates a seasoned oil that coats every inch of the potato.
Step-by-Step: Achieving the Scuffed Surface
Once your potatoes are par-boiled and drained, it’s time for the most important step: the “Rough Up.” You aren’t just drying the potatoes; you are intentionally damaging the surface. This mechanical abrasion is what separates “roasted potatoes” from “extra-crispy masterpieces.”
When you shake the potatoes in the pot, the softened exteriors knock against each other. This creates a thick, shaggy paste of mashed potato that clings to the outside of each chunk. This increased surface area means there are thousands of tiny “peaks” that will catch the oil and turn into crispy bits.
The Shaking Technique: Pot vs. Colander
I prefer returning the drained potatoes to the dry pot, covering it with a lid, and shaking it vigorously. You want to hear them thumping against the sides. After about 30 seconds, they should look “fuzzy” or shaggy, almost as if they’ve been lightly breaded in mashed potatoes.
Preheating the Sheet Pan for Immediate Searing
Never put your potatoes onto a cold baking sheet. I always slide my heavy-duty rimmed baking sheet into the oven while it preheats. When the potatoes hit that screaming hot metal, you should hear an immediate sizzle. This instant sear prevents the potatoes from sticking and starts the crisping process the second they enter the oven.
The Roasting Phase: Timing and Temperature Control
A temperature of 425°F is the sweet spot for roasting. It’s hot enough to evaporate moisture quickly and fry the surface, but not so hot that the garlic in the oil infusion burns. You’ll need about 35 to 40 minutes to achieve that deep, blistered mahogany color.
Patience is key during this phase, but so is movement. You must flip the potatoes every 15 minutes with a thin metal spatula. This ensures that every side gets direct contact with the hot pan and the oil, leading to an even, 360-degree crunch.
The Finishing Touch: Blooming Fresh Herbs
The biggest mistake people make is roasting their fresh herbs for the full 45 minutes. This turns delicate parsley and dill into flavorless black specks. Instead, we use the “Residual Heat” method. Toss the fresh herbs into the pan the moment it comes out of the oven.
The potatoes are still sizzling at this point, and that heat is just enough to “bloom” the volatile oils in the herbs. You’ll smell an immediate explosion of fresh dill and garlic. This technique keeps the herbs bright green and tasting fresh while ensuring they stick to the hot, oily surface of the potatoes.
Troubleshooting Common Roasting Obstacles
If your potatoes are sticking to the pan, you likely didn’t let the pan get hot enough before adding them, or you’re using a thin, flimsy baking sheet. A heavy-duty pan or a cast-iron skillet holds heat much better and provides a more reliable non-stick surface once the oil is hot.
Are your potatoes soft instead of crunchy? This usually happens because of overcrowding. If the potatoes are packed too tightly, they will steam each other rather than fry. Use two pans if you have to; every potato needs its own little island of space to get truly crispy.
Optimal Pairings for Garlic Herb Potatoes
These potatoes are so flavorful they can almost steal the show, so pair them with proteins that can stand up to the garlic and herbs. A simple roasted chicken or a seared steak is a classic choice. The crispy texture of the spuds provides a great counterpoint to tender, juicy meat.
In addition, consider serving them alongside something with a bit of acidity. A bright arugula salad with a lemon vinaigrette or a piece of grilled fish with a squeeze of fresh lime helps balance the richness of the olive oil. The acidity cuts through the starch and keeps your palate refreshed.
Storage and Reheating for Maximum Crunch
If you have leftovers, don’t even think about using the microwave. The microwave will turn that beautiful crust into a rubbery, sad mess. Instead, store them in an airtight container in the fridge for up to three days. They won’t stay crispy in the fridge, but you can easily revive them.
To get that crunch back, use an air fryer at 400°F for about 5 minutes, or pop them back into a hot oven for 10 minutes. This re-dehydrates the surface and brings that “shatter-crisp” texture back to life. I don’t recommend freezing these, as the freezing process breaks down the potato’s cell walls and makes them grainy when thawed.
Frequently Asked Questions
Can I use dried herbs instead of fresh?
You can, but the flavor won’t be as vibrant. If you must use dried herbs, add them to the oil and garlic mixture while it’s in the skillet. This allows the dried herbs to rehydrate and release their oils into the fat before they coat the potatoes. Use about one-third the amount of dried herbs compared to fresh.
Is the baking soda strictly necessary?
While you can technically make roasted potatoes without it, the baking soda is the secret to that specific “shatter-crisp” crust. It breaks down the surface starch in a way that plain water cannot. If you skip it, your potatoes will still be good, but they won’t have that deep, craggy, restaurant-style crunch.
How do I scale this for a large crowd?
The most important rule when scaling up is to avoid overcrowding the pan. If you are doubling the recipe to 6 pounds of potatoes, you must use two separate large baking sheets. If you pile them all onto one tray, they will steam and turn out mushy. Rotate the pans between the top and bottom racks halfway through cooking.
Can I prep these potatoes in advance?
Yes, this is a great time-saver. You can par-boil and “rough up” the potatoes up to 24 hours in advance. After they have cooled completely, store them in the refrigerator. When you’re ready to eat, proceed with the oil infusion and roasting steps. They might even get a little crispier because the fridge helps dry out the surface starch.
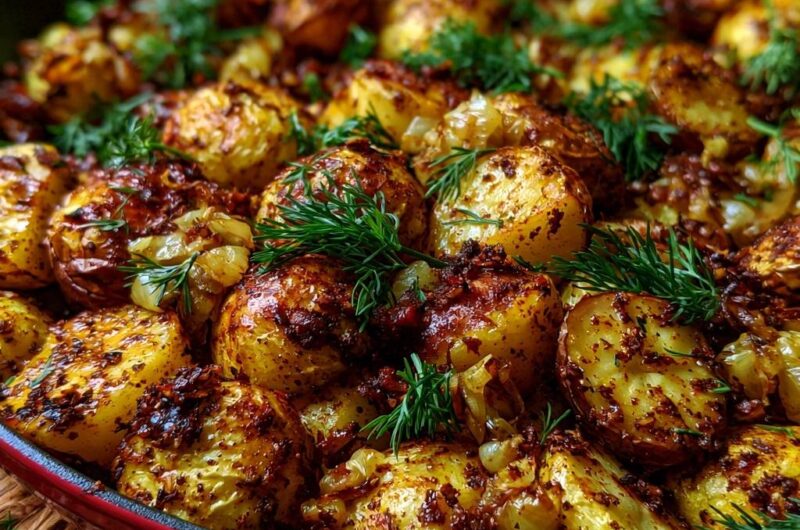
Crispy Garlic Herb Roasted Potatoes
Course: Side DishCuisine: AmericanDifficulty: easy6
servings15
minutes45
minutes60
Minutes230
kcalAmerican
Ingredients
3 pounds small Red Bliss or Yukon Gold potatoes, halved
1/2 teaspoon baking soda (added to boiling water)
1/3 cup extra virgin olive oil (or duck fat for extra crunch)
6 cloves garlic, minced
1 tablespoon smoked paprika
1 teaspoon chili flakes (optional, for the visible red flecks)
1.5 teaspoons sea salt
1/2 teaspoon cracked black pepper
1/2 cup yellow onion, finely diced
1 bunch fresh dill, sprigs kept whole or roughly torn
1 bunch fresh parsley, finely chopped
Directions
- Preheat your oven to 425°F (220°C). Place a large heavy-duty rimmed baking sheet or a large cast-iron skillet (as pictured) inside the oven to get screaming hot.
- Place the halved potatoes in a large pot and cover with cold water. Add the baking soda and a generous pinch of salt. Bring to a boil, then reduce to a simmer for 8-10 minutes until the exterior is tender but the potato is not falling apart.
- Drain the potatoes and let them sit in the colander for 2 minutes to allow steam to escape. Return them to the dry pot, cover with a lid, and shake vigorously for 30 seconds. The potatoes should look “fuzzy” with a thick coating of mashed potato paste on the surface.
- In a small skillet over medium heat, combine the olive oil, diced onions, and minced garlic. Cook for 3-4 minutes until the onions are translucent and the garlic is fragrant but not browned. Stir in the smoked paprika, chili flakes, salt, and pepper. Remove from heat.
- Pour the warm aromatic oil mixture over the scuffed potatoes in the pot. Toss thoroughly until the starchy paste has absorbed the oil and spices, creating a thick, red-tinted coating.
- Carefully remove the hot pan from the oven. Add a thin film of oil to the pan, then tip the potatoes in. Spread them into a single layer, ensuring they aren’t crowded.
- Roast for 35-40 minutes. Flip the potatoes with a metal spatula every 15 minutes to ensure all sides achieve that deep, blistered mahogany crust seen in the image.
- Once the potatoes are deeply browned and crisp, remove from the oven. Immediately toss with the fresh dill and parsley while still in the hot pan. The residual heat will bloom the herbs without wilting them into mush. Serve immediately.
Notes
- Using baking soda in the boiling water breaks down the potato’s pectin and draws starch to the surface. Shaking the potatoes after draining creates the ‘fuzzy’ exterior necessary for maximum crunch. For the best results, ensure the baking sheet is preheated before adding the potatoes.