Mastering Golden Crispy Potato Latkes: The Science of the Perfect Crunch
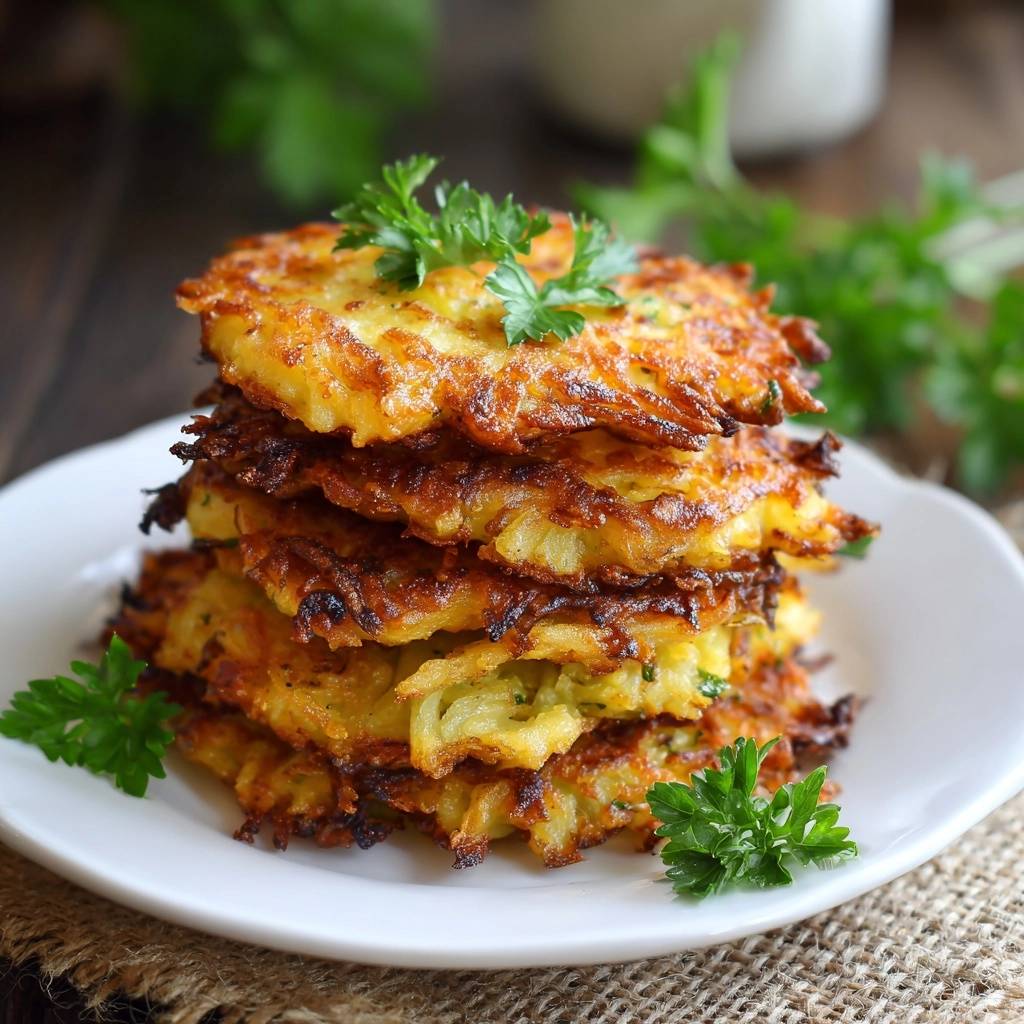
You’ve likely experienced the heartbreak of a soggy, limp potato pancake that looks more like a sad hash brown than a festive treat. It’s frustrating when you’re dreaming of that shatteringly crisp, lacy exterior but end up with a greasy mess that falls apart the moment it hits the plate. A truly great latke should stand tall, boasting a deep mahogany gold color and edges so crunchy they practically snap when you bite into them.
The secret to achieving this “skyscraper” texture isn’t just about how high you crank the heat; it’s about mastering moisture management and starch recovery. Most people fail because they leave too much water in the potatoes, which steams the pancake from the inside out. By using a specific “double-squeeze” technique and reclaiming the natural potato starch, you can create a binder that’s far superior to just dumping in extra flour.
For a perfect pairing, try our Golden Potato Pancakes: Your Secret to Crispy Perfection.
I’ve found that the real game-changer is the starch that settles at the bottom of your potato water. Don’t toss that white sludge! That’s pure, natural potato starch, and reincorporating it into your batter is what gives you that creamy, tender center while the outside stays incredibly crisp. It’s the difference between a heavy, doughy latke and one that feels light and airy despite being fried to perfection.
The Anatomy of a Non-Soggy Potato Pancake
To build a better latke, you have to understand that moisture is the ultimate enemy of the Maillard reaction. The Maillard reaction is the chemical process that creates that beautiful brown crust and savory flavor we all crave. If your potato mixture is wet, the energy from the hot oil goes into evaporating water rather than browning the surface, resulting in a pale, oily pancake.
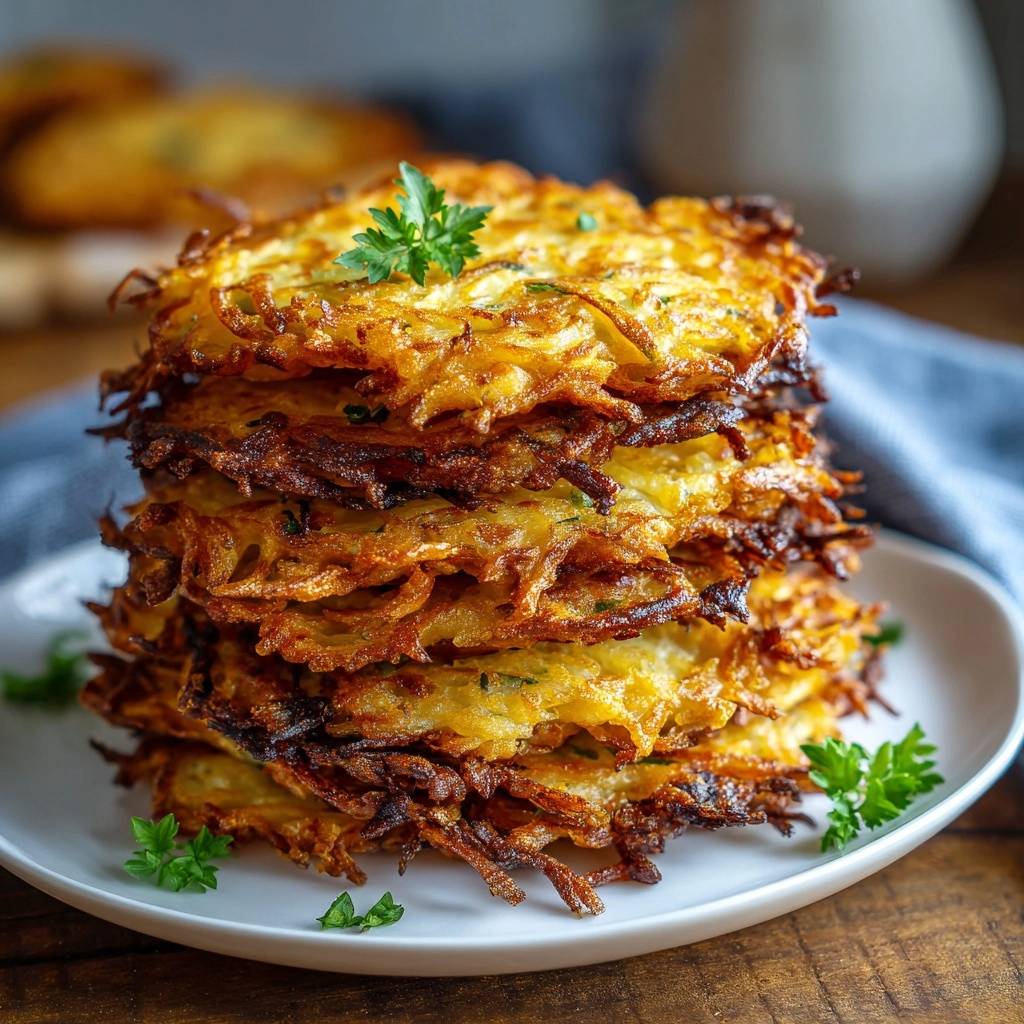
Structural integrity comes from the “lacy edges” that form when long strands of potato are allowed to crisp up individually. These jagged bits increase the surface area, which means more crunch in every single bite. By removing every possible drop of liquid, you ensure the oil can immediately begin searing the potato strands, locking in the shape and creating a structural lattice that won’t collapse.
Essential Components for Golden Crispy Potato Latkes
Choosing the right potato is the most important decision you’ll make before you even turn on the stove. You must use Russet potatoes because they have the highest starch content and the lowest moisture levels. If you try to use waxy potatoes like Yukon Gold or Red Bliss, your latkes will likely turn out gummy and won’t hold their shape in the pan.
The yellow onion isn’t just there for that classic savory aroma; it also provides a bit of natural sugar that aids in the browning process. However, onions are incredibly watery once grated. This is why we grate them right along with the potatoes and subject them to the same rigorous squeezing process. You want the flavor and the fiber of the onion, but none of the juice that would otherwise dilute your batter.
The Role of Chemical Leavening and Binders
While eggs and flour act as the primary glue holding your latkes together, adding a teaspoon of baking powder is a professional trick you shouldn’t skip. The baking powder creates tiny air pockets within the batter as it hits the heat. This aeration prevents the latke from becoming a dense, heavy puck and helps the exterior achieve a more delicate, crisp texture.
When it comes to the dry binder, all-purpose flour provides a neutral base, but many traditionalists swear by matzo meal for a slightly nuttier flavor and a heartier crunch. Whichever you choose, the goal is to use just enough to coat the strands. You should also ensure your eggs are lightly beaten before they hit the bowl so they distribute evenly without requiring you to overwork the mixture.
Selecting the Right Frying Medium
Temperature stability is key to a non-greasy finish, which is why you need an oil with a high smoke point. Canola, grapeseed, or peanut oil are all excellent choices because they can handle the 350°F to 375°F heat required for frying without breaking down or smoking. Avoid using butter or extra virgin olive oil, as they will burn long before the potatoes are cooked through.
Keeping the oil clean and free of animal fats ensures the flavor of the potato and onion shines through. It also results in a lighter mouthfeel. You want the latkes to taste like toasted potatoes, not like the oil they were cooked in. Always keep about a quarter-inch of oil in the pan to ensure the heat surrounds the edges of each pancake.
The Physics of the Grate and Squeeze
The way you grate your potatoes actually changes the final texture of the dish. Instead of using short, quick strokes, try to grate the potatoes lengthwise against the box grater. This produces long, elegant strands that tangle together in the pan, creating those signature lacy “fingers” that get extra crispy. Short shreds tend to pack together too tightly, leading to a denser interior.
Once grated, the salt starts working immediately through osmosis, drawing out the internal moisture of the potato cells. This is why you have to work quickly. The longer the salted potatoes sit, the more liquid they release, and the more likely they are to oxidize and turn a dull grey color. Forceful squeezing is the only way to interrupt this process and prep the potatoes for the frying pan.
Recovering Natural Potato Starch
When you squeeze the liquid out of your potatoes into a bowl, let it sit undisturbed for about five minutes. You’ll notice a layer of murky water on top and a thick, bright white sediment at the bottom. That sediment is pure potato starch. Carefully pour off the water and keep that “white gold” in the bowl.
This recovered starch is the ultimate secret weapon. It has a much stronger binding power than regular flour and creates a crispness that is uniquely “potato.” When you mix your dry potato shreds back into this starch, it coats every strand in a thin, invisible film that fries up into a shatteringly crisp shell. It’s a professional technique that makes a massive difference in the final result.
Step-by-Step: Engineering the Perfect Fry
Frying the perfect latke is a three-phase process that requires your full attention. You aren’t just cooking food; you’re managing heat and moisture in real-time. If you rush any of these steps, you’ll end up with pancakes that are either burnt on the outside or raw in the middle.
Phase 1: Moisture Extraction and Starch Settling
After grating your two pounds of potatoes and your onion, pile them into the center of a clean, lint-free kitchen towel. Gather the corners and twist the top until the bundle is tight. Now, use all your strength to squeeze the liquid into a large bowl. You’ll be surprised at how much water comes out—usually a cup or more. Set that bowl aside for five minutes to let the starch settle while you prep your other ingredients.
Phase 2: Incorporating the Batter
Once you’ve poured off the water and kept the starch, add your bone-dry potato and onion shreds back into the bowl. Toss in your beaten eggs, flour, baking powder, salt, pepper, and fresh parsley. Use your hands or a fork to mix everything together. You want the mixture to look “shaggy” and loose, not like a thick paste. Every strand should be lightly coated but still distinct.
Phase 3: Temperature Control and Pan Management
Heat your oil in a heavy skillet until a small tester piece of potato sizzles immediately. Drop 1/4-cup mounds into the oil, but don’t just leave them in balls. Use a fork to gently spread the edges outward. This creates the lacy bits that will become the crunchiest parts of the latke. Press down slightly with a spatula to ensure the center isn’t too thick to cook through.
Troubleshooting Common Latke Failures
If your latkes are falling apart in the pan, it usually means the oil wasn’t hot enough or you didn’t use enough binder. The oil should be shimmering; if it’s too cool, the egg won’t set quickly enough to hold the potato strands together. On the flip side, if they are dark brown on the outside but raw inside, your heat is too high. Lower the flame slightly so the interior has time to steam and soften while the exterior browns.
Crowding the pan is another common mistake. If you put too many latkes in at once, the oil temperature will drop drastically. This causes the potatoes to soak up the oil like a sponge rather than searing. Fry in small batches, and always give the oil a minute to come back up to temperature before starting the next round.
Optimal Tools for Frying Success
A cast-iron skillet is the gold standard for frying latkes because it holds heat better than stainless steel or non-stick pans. Once that heavy iron gets hot, it stays hot, even when you add cold potato batter. This consistent temperature is what gives you that even, mahogany-colored crust across the entire batch.
When you take the latkes out of the oil, do not put them on paper towels. Paper towels trap steam underneath the pancake, which will turn your crispy bottom soggy in seconds. Instead, use a wire cooling rack set over a baking sheet. This allows air to circulate around the entire latke, keeping it crisp on all sides while the excess oil drips away.
Flavor Variations and Herb Infusions
While the classic potato and onion combo is hard to beat, you can easily tweak the flavor profile. Adding finely chopped scallions or chives provides a brighter, fresher onion flavor. If you want a bit of warmth, a pinch of smoked paprika or ground cumin mixed into the flour can add a lovely depth without changing the chemistry of the batter.
Fresh herbs should always be added at the very last second to keep them from burning in the hot oil. The parsley in this recipe adds a pop of color and a grassy freshness that cuts through the richness. If you want to get creative, try adding a little bit of grated parsnip or carrot to the mix for a subtle sweetness, just make sure they are squeezed dry too!
Serving Suggestions and Traditional Pairings
Applesauce and sour cream are the traditional go-tos, but you can definitely elevate the presentation. A dollop of herbed labneh or a thick Greek yogurt mixed with lemon zest provides a sharp acidity that balances the fried potato perfectly. For a more savory brunch vibe, top a crispy latke with a poached egg and a slice of smoked fish.
If you want something unique, try a spiced pear compote instead of standard applesauce. The floral notes of the pear pair beautifully with the salty, savory potato. No matter what you choose, the goal is to provide a cool, creamy, or acidic element to contrast with the hot, crunchy pancake.
Make-Ahead Strategy and Reheating Protocols
Latkes are best served immediately, but you can absolutely make them ahead of time if you’re hosting a crowd. To store them, let them cool completely on the wire rack, then stack them with parchment paper in between and keep them in an airtight container in the fridge for up to two days. They also freeze beautifully for up to a month.
Never use a microwave to reheat a latke! It will turn the potato into a rubbery, sad mess. Instead, place the cold latkes on a baking sheet in a 400°F oven for about 8 to 10 minutes. This high heat will re-crisp the exterior and melt any residual oil, making them taste almost as good as the moment they left the frying pan. An air fryer also works wonders at 375°F for about 3 to 5 minutes.
Expert Tips for Large Batch Cooking
When cooking for a big group, your oil will eventually start to fill up with tiny burnt bits of potato and parsley. These bits can turn bitter and stick to your fresh latkes. Keep a small fine-mesh strainer nearby and carefully skim the oil between batches to keep it clean. This ensures the last latke tastes just as fresh as the first one.
If you find the potato mixture in your bowl is starting to get watery again as you reach the bottom, give it a quick squeeze or stir in a tiny bit more flour. The potatoes will continue to release moisture as they sit, so working in smaller sub-batches can help maintain that perfect “shaggy” consistency throughout the entire cooking process.
Frequently Asked Questions
Can I use a food processor instead of a box grater?
Yes, you can use the grating attachment on a food processor to save time. However, the texture will be slightly different. A box grater tends to create longer, more irregular strands which result in better “lacy” edges. If you use a processor, try not to press down too hard so you don’t end up with short, mushy shreds.
Why did my potato mixture turn grey or brown?
This is caused by oxidation, which happens when the starch in the potatoes is exposed to air. It doesn’t affect the taste, but it looks less appetizing. To prevent this, work quickly once the potatoes are peeled and grated. You can also submerge the grated potatoes in cold water if you aren’t ready to fry them immediately, just make sure to squeeze them extra hard afterward.
Can I make these latkes gluten-free?
Absolutely. You can substitute the all-purpose flour with an equal amount of potato starch or a gluten-free 1-to-1 baking flour. Since the recipe already relies heavily on the natural potato starch we recover from the liquid, gluten-free versions often turn out just as crispy as the original.
How do I keep the first batch warm while I finish the rest?
The best way to keep them warm is to place a wire rack on a baking sheet and put it in a 200°F oven. As you finish each batch, transfer the latkes to the rack. The low heat will keep them warm and the air circulation will prevent them from getting soggy while you finish frying the remaining batter.
What is the best oil temperature for frying latkes?
You should aim for an oil temperature between 350°F and 375°F. If you have an instant-read thermometer, use it! If the oil drops below 325°F, the latkes will become greasy. If it goes above 400°F, the outside will burn before the inside is cooked. Maintaining this “sweet spot” is the key to that perfect golden-brown finish.
How long can I store leftovers in the freezer?
You can freeze fried latkes for up to one month. To do this properly, freeze them in a single layer on a baking sheet first so they don’t stick together. Once they are frozen solid, transfer them to a heavy-duty freezer bag. Reheat them directly from frozen in a 400°F oven until they are sizzling and hot all the way through.
Potato Latkes
Course: AppetizerCuisine: JewishDifficulty: medium4
servings20
minutes15
minutes210
kcal35
MinutesA foolproof recipe for potato latkes that avoids sogginess by using moisture management and reincorporating natural potato starch. These pancakes feature a light, tender center and a deep golden, crunchy crust.
Ingredients
2 pounds Russet potatoes, peeled
1 medium yellow onion
2 large eggs, lightly beaten
3 tablespoons all-purpose flour (or matzo meal)
1 teaspoon baking powder (for extra lift and crispness)
1.5 teaspoons kosher salt
1/2 teaspoon black pepper
1/4 cup fresh parsley, finely chopped (plus extra for garnish)
High-smoke point vegetable oil for frying (canola or grapeseed)
Directions
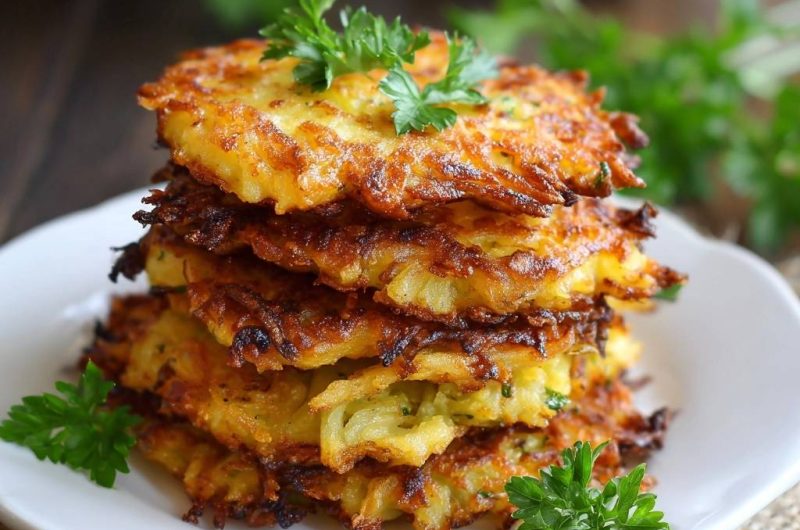
- Grate the potatoes and onion using the large holes of a box grater. To achieve the long, lacy strands seen in the image, grate the potatoes lengthwise.
- The Moisture Secret: Place the grated mixture into a clean kitchen towel or cheesecloth. Twist the top and squeeze forcefully over a large bowl to collect the liquid. Let the liquid sit in the bowl for 5 minutes.
- Carefully pour off the watery liquid from the bowl, but keep the thick, white paste (the natural potato starch) at the bottom.
- Add the squeezed-dry potato and onion mixture into the bowl with the starch. Add the beaten eggs, flour, baking powder, salt, pepper, and chopped parsley. Mix thoroughly until the strands are evenly coated and the flour is no longer visible.
- Heat 1/4 inch of oil in a large, heavy-bottomed skillet (cast iron is preferred) over medium-high heat. The oil is ready when a small piece of potato sizzles vigorously and turns golden within 30 seconds.
- Carefully drop 1/4-cup mounds of the mixture into the hot oil. Use a fork to spread the edges slightly to create those signature crispy, jagged “lacy” bits. Press down gently with a spatula to flatten.
- Fry for 3 to 4 minutes per side. Do not crowd the pan; fry in batches to maintain oil temperature. Flip only once the bottom is a deep, mahogany gold and the edges are dark and crisp.
- Transfer the finished latkes to a wire cooling rack set over a baking sheet. This prevents the bottom from steaming and becoming soggy on a flat surface. Serve immediately, stacked high and garnished with fresh parsley sprigs.
Notes
- Use a wire cooling rack instead of paper towels to prevent the bottoms from steaming and becoming soggy. Grate potatoes lengthwise for longer, lacier strands.