Mastering Garlic Herb Parmesan Crisps: The Anti-Soggy Method
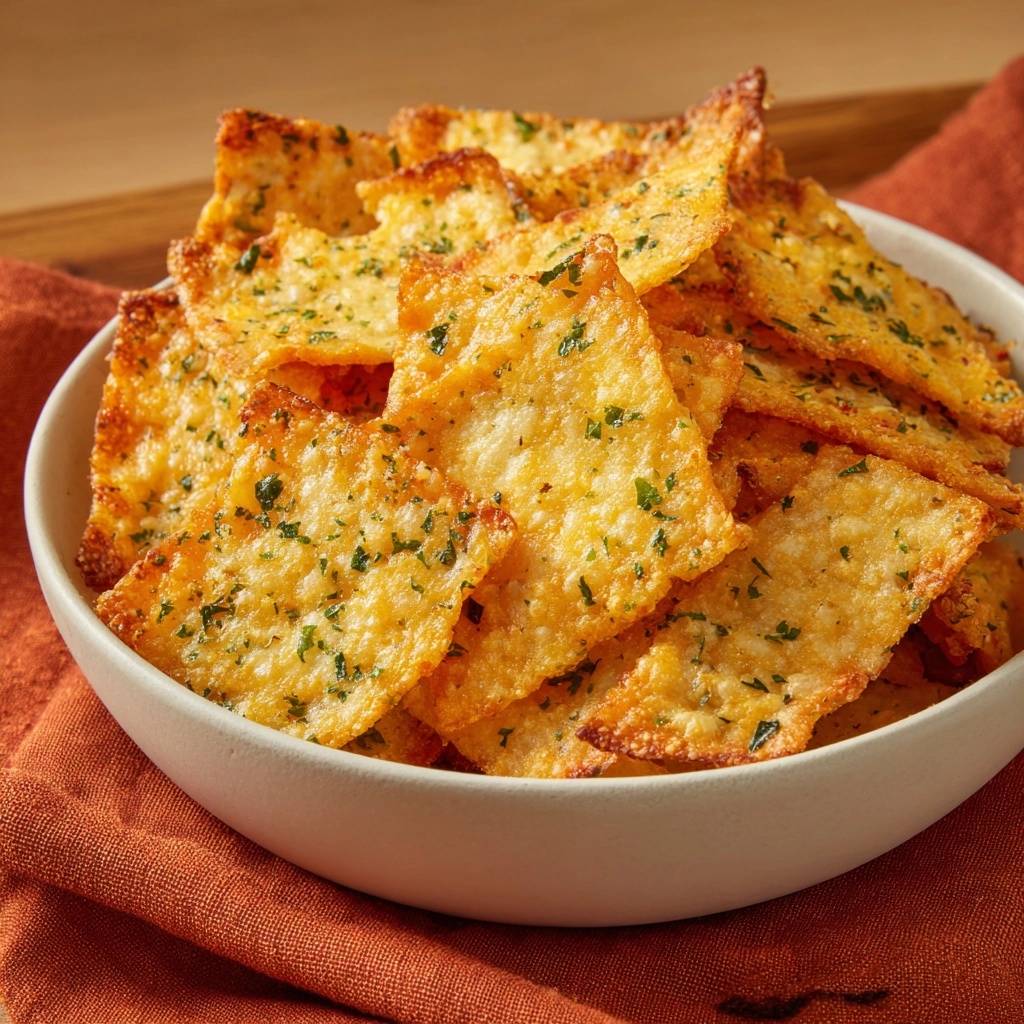
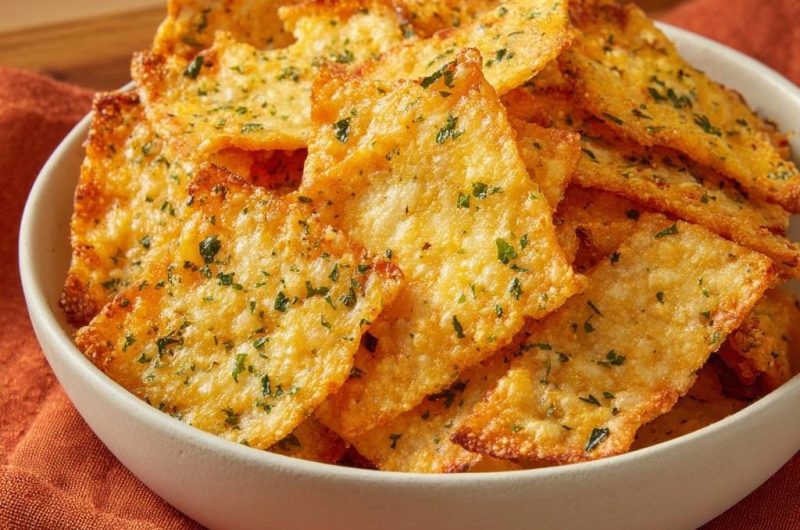
Imagine biting into a snack that offers a sharp, salty snap followed by a shatteringly crisp texture that melts away on your tongue. These Garlic Herb Parmesan Crisps aren’t those greasy, chewy puddles of oil you might have encountered in other recipes. Instead, they’re sophisticated, golden-brown rectangles that provide a satisfying crunch without the heavy weight of traditional crackers.
Most people struggle with homemade cheese crisps because the fat separates from the protein, leaving the final product sitting in a pool of grease. However, by mastering moisture control and using a specific cooling technique, you can achieve a professional-grade snack every time. The secret lies in the structural integrity of the cheese and the surface you bake it on.
I’ve found that the absolute key to success is using aged cheese and a silicone mat. While parchment paper works in a pinch, a silicone mat provides the necessary insulation to prevent the bottom of the cheese from scorching before the top has fully dehydrated. This balance is what creates that uniform, lacy structure that holds its shape perfectly.
The Chemistry of a Perfect Cheese Crisp
Creating the perfect crisp is actually a lesson in food science. When you heat cheese, the protein network (casein) begins to relax and the fat melts. In high-moisture cheeses, this process happens too quickly, resulting in a rubbery texture. Aged Parmesan has a much lower water content, which allows the proteins to brown and harden into a rigid structure as the fat renders out.
Therefore, the “oil pooling” phenomenon is your biggest enemy. If the oil has nowhere to go or if the heat is too low, the cheese essentially “boils” in its own fat rather than crisping. By using a high temperature of 400°F, we force the moisture to evaporate rapidly, leaving behind a delicate, crunchy lattice of toasted protein and savory flavor.
Why Aged Parmesan Outperforms Young Cheeses
When you’re at the grocery store, look for Parmesan aged at least 12 to 24 months. As Parmesan ages, it loses moisture and develops tiny, crunchy white spots called tyrosine crystals. These crystals aren’t just delicious; they indicate a low-moisture environment that is ideal for baking into crisps.
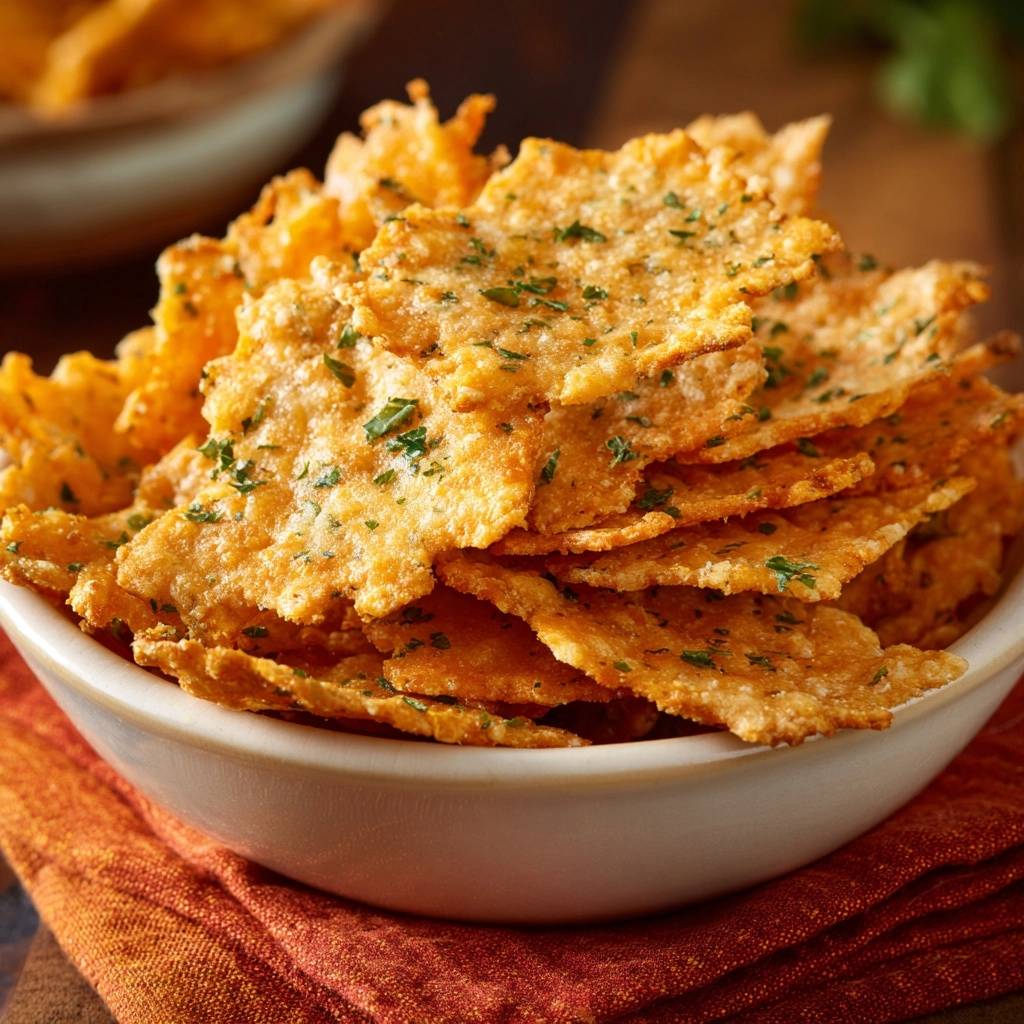
In addition, the breakdown of fats and proteins during the aging process creates a more stable structure. Younger cheeses like mozzarella or mild provolone have too much elasticity. If you try to use them for this recipe, you’ll likely end up with a gummy disk rather than a crisp that snaps cleanly in half.
Moisture Control and the Anti-Soggy Secret
Humidity in your kitchen can actually play a role in how your crisps turn out. If it’s a particularly muggy day, the cheese might take an extra minute to fully set. However, the most important factor is the surface area of your cheese. Finely grated cheese creates more contact points, allowing for faster evaporation.
Furthermore, the “anti-soggy” secret is all about the post-bake transition. If you leave the crisps on the pan for too long, the residual oil will re-absorb into the cheese as it cools. You must move them to a wire rack to ensure air circulates around the entire crisp, locking in that brittle, crunchy texture immediately.
Essential Components for Garlic Herb Parmesan Crisps
Quality is everything when you only have a handful of ingredients. Since the cheese is the star of the show, you can’t hide behind fillers. I always recommend grating your own cheese from a block. It takes an extra five minutes, but the difference in the final “shatter” of the crisp is night and day.
In addition to the cheese, the spice blend provides a necessary aromatic lift. Garlic and onion powder offer a savory depth that complements the saltiness of the Parmesan. However, we treat the fresh parsley differently because its high water content and delicate leaves make it prone to burning if added too early.
Selecting Your Cheese: Grated vs. Shredded
Please, whatever you do, avoid the pre-shredded bags of cheese found in the dairy aisle. Those products are coated in anti-caking agents like cellulose (literally wood pulp) to keep the shreds from sticking together. These starches interfere with the melting process and will result in a gummy, floury mouthfeel.
Instead, use a microplane or the smallest holes on your box grater. You want a light, fluffy pile of cheese that looks like fallen snow. This fine texture ensures that the cheese melts into a singular, cohesive sheet rather than individual, oily clumps that refuse to bond together.
The Spice Blend: Balancing Garlic and Herbs
The ratio of garlic powder to onion powder is carefully balanced to provide a “pizzeria” aroma without being overwhelming. I love using cracked black pepper here because the heat of the oven toasts the peppercorns, releasing a floral spice that cuts right through the rich dairy fat.
If you find the flavor too intense, you can reduce the garlic powder slightly. However, remember that the cheese itself is very bold. You need a strong seasoning blend to ensure the spices don’t get lost in the savory “umami” punch of the aged Parmesan.
Critical Equipment for Professional Results
You don’t need a kitchen full of gadgets, but two specific items are non-negotiable for this recipe. A standard aluminum cookie sheet is fine, but what you put on top of it determines whether your crisps stick or slide right off. Heat conductivity is the name of the game here.
I’ve tried making these on greased pans, and it’s a disaster. The cheese bonds to the metal, and you’ll spend more time scrubbing the pan than eating. Investing in the right liners will save your sanity and your snack.
Silicone Mats vs. Premium Parchment Paper
A silicone baking mat is the gold standard for cheese crisps. It provides a completely non-porous surface that allows the rendered fat to bubble around the cheese without sticking. The thickness of the mat also helps distribute heat evenly, preventing “hot spots” that might burn one corner of your rectangle.
If you don’t have a mat, premium parchment paper is your next best bet. Just ensure it’s high-quality and laid completely flat. Any wrinkles in the paper will cause the molten cheese to pool in the creases, leading to uneven thickness and potential soggy spots in the center of your crisps.
For the same reason you skip the parchment paper trick here, these crispy parmesan cheese crisps rely on a nonstick surface for flawless results.
The Role of the Wire Cooling Rack
Do not skip the wire cooling rack! This is the most common mistake home cooks make. When you pull the crisps out of the oven, they are still releasing steam. If they sit on a flat surface, that steam gets trapped underneath, turning your crispy bottom into a soft, limp mess.
By elevating the individual rectangles, you allow “bottom-up” airflow. This cools the cheese rapidly from both sides, which is what creates that signature “snap.” It only takes a few minutes on the rack to reach peak crunchiness, so be patient!
Step-by-Step: Achieving the Uniform Rectangular Shape
To get those beautiful, straight edges, we don’t bake individual piles of cheese. Instead, we bake one large, thin sheet and cut it while it’s still warm. This method ensures every crisp is the same size and has those sharp, professional-looking corners.
Start by preheating your oven to 400°F. Make sure your rack is in the center position. If it’s too high, the top will burn before the cheese fully melts; if it’s too low, the bottom will brown too quickly. Balance is key for an even, golden color.
Preparing the Oven and Baking Surface
Once your oven is ready, line your sheet with the silicone mat. In a small bowl, toss your finely grated cheese with the garlic powder, onion powder, and black pepper. Make sure the spices are distributed perfectly so you don’t end up with a “garlic bomb” in one bite and plain cheese in the next.
Avoid adding the parsley at this stage. Fresh herbs contain a lot of chlorophyll, which turns bitter and brown when exposed to high heat for several minutes. We’ll add that later to keep the color vibrant and the flavor fresh.
The “Thin Layer” Technique for Maximum Crunch
Spread the cheese mixture onto the mat in a large rectangle. You want the layer to be thin—so thin that you can almost see the color of the mat peeking through the cheese lattice. Use the back of a spoon to gently push the cheese into the corners and fill any large gaps.
If the layer is too thick, the center won’t crisp up, and you’ll end up with a chewy texture. If it’s too thin, the crisps will be too fragile to pick up. Aim for a uniform thickness of about 1/8th of an inch for the best results.
The Two-Stage Baking and Seasoning Process
This recipe uses a two-stage approach to ensure the cheese is perfectly cooked while the herbs stay bright. The first stage is all about structural development. You’re looking for the cheese to transform from individual shreds into a bubbling, molten sea of gold.
Watch the oven closely during the first 5 to 6 minutes. The cheese will bubble vigorously as the moisture escapes. This is exactly what you want! Once the bubbling starts to slow down and the edges look set, it’s time for the second stage.
Timing the First Bake: The Bubbling Phase
The “bubbling phase” is the most critical visual cue. When the cheese is bubbling hard, it means the water is being driven out. Once those bubbles start to get smaller and move more slowly, the cheese is nearing its final crisp state. Don’t walk away from the oven during this window!
If you pull it out too early, the crisps will be soft. If you wait too long, the cheese will turn a dark mahogany color and taste burnt. You’re looking for a beautiful medium-golden hue across the entire sheet.
Preserving Herb Color and Flavor
Quickly remove the pan from the oven and sprinkle the fresh parsley over the molten cheese. The heat of the cheese will immediately “flash-fry” the parsley, adhering it to the surface. Return the pan to the oven for just one more minute.
This final minute allows the parsley to set without losing its bright green color. It also gives the cheese that final push to reach a deep, toasted gold. The result is a stunning contrast between the green herbs and the golden Parmesan.
Precision Cutting and the 60-Second Rule
Timing is everything once the pan leaves the oven. You have a very narrow window—usually about 60 to 90 seconds—where the cheese is firm enough to hold a shape but soft enough to cut without shattering. This is the “Goldilocks” zone for perfect rectangles.
If you try to cut it immediately, the molten cheese will just stick to your knife. If you wait three minutes, the sheet will be too brittle and will crack into random shards. Set a timer for 60 seconds the moment the pan hits the counter.
Using a Pizza Cutter for Clean Edges
A pizza cutter is the best tool for this job. Its rolling motion applies even pressure without “dragging” the cheese, which helps keep the edges clean. Simply roll the cutter through the sheet to create long strips, then cut across to form your rectangles.
If you want perfectly straight lines, you can even use a metal ruler as a guide. Just be careful, as the pan and the cheese are still very hot! Work quickly and confidently to finish all your cuts before the cheese hardens completely.
The Transition to the Cooling Rack
As soon as you’ve finished cutting, use a thin spatula to lift the individual crisps and move them to the wire rack. They might still feel a little flexible at this point, but don’t worry. They will firm up within seconds of being elevated.
Make sure they are in a single layer on the rack. If you stack them while they are even slightly warm, the residual heat will create moisture between the layers, and you’ll lose that hard-earned crunch. Once they are cool to the touch, they are ready to serve.
Troubleshooting Common Texture Issues
Even with the best instructions, sometimes things go sideways. If your crisps have a “greasy bottom,” it usually means they didn’t spend enough time on the wire rack or the oven temperature was a bit too low. Next time, try increasing the heat by 10 degrees or leaving them on the rack longer.
If the edges are burnt but the center is soft, your cheese layer was likely uneven. Make sure the thickness is consistent from the center to the perimeter. You can also try rotating the pan halfway through the baking process to account for any oven hot spots.
Fixing Chewy or Rubbery Centers
A chewy center is almost always caused by a layer of cheese that was too thick. If this happens, you can actually put the individual crisps back in the oven at a lower temperature (around 300°F) for a few minutes to “dry them out.”
However, the best fix is prevention. Next time, use the back of your spoon to spread the cheese even thinner. You should be able to see the texture of the mat through the cheese before it goes into the oven. That “lace-like” appearance is the key to a uniform crunch.
Preventing Bitter or Burnt Garlic Notes
Garlic powder is very sensitive to heat. If your crisps taste bitter, it’s likely the garlic scorched. To prevent this, ensure the garlic powder is thoroughly mixed into the cheese. The fat in the Parmesan acts as a heat shield, protecting the spices from the direct heat of the oven.
Also, check your oven’s calibration. If it runs hot, the garlic will burn before the cheese is done. Using a standalone oven thermometer can help you ensure you’re baking at exactly 400°F for the best flavor profile.
If you enjoy the crispy, cheesy texture of these crisps, try making these cheesy garlic bread sticks for a similar crunch.
Creative Flavor Variations and Swaps
Once you’ve mastered the basic technique, you can start experimenting with different flavor profiles. The technical structure remains the same as long as you keep the base of aged Parmesan. Just remember to avoid high-moisture additions like fresh fruit or wet sauces.
You can easily swap the parsley for other hardy herbs like rosemary or thyme. Just remember to chop them very finely so they adhere well to the molten cheese during that final minute of baking.
Smoked Paprika and Chili Flakes
For a “Spicy Garlic” version, add a half-teaspoon of smoked paprika and a pinch of red chili flakes to the cheese mixture. The paprika gives the crisps a beautiful reddish hue, while the chili flakes provide a slow-building heat.
The oils in the chili flakes will mingle with the cheese fat as it melts, distributing the spice evenly throughout the crisp. This version is particularly good when paired with a cooling dip or served alongside a hearty bowl of chili.
Lemon Zest and Thyme Integration
If you want something a bit brighter, try adding the zest of one lemon and a teaspoon of fresh thyme. Add the lemon zest at the very end with the herbs. If you bake citrus zest for too long, it can become acrid and lose its fresh, zesty punch.
This “Bright Herb” variation is incredibly sophisticated. It pairs beautifully with seafood dishes or can be used as a garnish for a summer salad. The acidity of the lemon cuts through the richness of the Parmesan perfectly.
What to Serve with Your Crisps
These garlic herb Parmesan crisps are light, crunchy, and packed with savory flavor. Pair them with a cool, creamy side and a soft, cheesy bread for a rounded meal.
- Balance the crisp texture with a rich, chilled Loaded Creamy Potato Salad — the tangy dressing and tender potatoes contrast nicely with the crunchy Parmesan.
- Double down on the cheese theme by adding warm Cheesy Cheddar Biscuits with Flaky Layers, whose buttery, flaky crumb is great for sopping up any extra dressing or sauce.
Optimal Pairings for Savory Cheese Crisps
These crisps are versatile enough to be eaten on their own, but they really shine when used as a component in a larger meal. Because they are so sturdy, they make excellent “dippers” for thicker spreads that would normally break a standard potato chip.
Think about texture contrasts when serving. The hard, brittle snap of the crisp is the perfect foil for creamy, soft, or liquid dishes. They add a punch of salt and fat that elevates almost anything they touch.
Elevating Soups and Salads
Forget soggy croutons! Use these Parmesan crisps as a garnish for a Caesar salad or a bowl of creamy tomato bisque. You can serve them on the side or perch one right on top of the soup bowl for a beautiful presentation.
Because they are low-carb and gluten-free, they are a great way to add crunch to a meal without using bread. They stay crispy much longer than bread-based croutons, even when they come into contact with a bit of dressing or soup.
The Ultimate Low-Carb Appetizer Spread
If you’re hosting a party, these are the ultimate vessel for appetizers. Use them to scoop up roasted vegetable dips, hummus, or even a fresh olive tapenade. They provide a much more flavorful base than a plain cracker.
You can also use them as a base for “canapés.” Top a crisp with a small dollop of pesto and a sun-dried tomato for a quick, elegant bite. Just be sure to top them right before serving so they don’t lose their crunch over time.
Storage and Re-Crisping Guidelines
If you have leftovers (which is rare!), you need to store them correctly to maintain that “snap.” The biggest threat to a cheese crisp is humidity. Even the moisture in the air can cause them to soften over 24 to 48 hours.
Always let them cool completely to room temperature before putting them away. If there is even a hint of warmth left, they will create condensation in the container, and you’ll wake up to rubbery cheese the next morning.
The Airtight Container Strategy
Store your crisps in a rigid, airtight container. I like to place a piece of parchment paper between layers to prevent them from sticking together, though if they are properly cooled, this shouldn’t be
Parmesan Crisps
Course: AppetizerCuisine: AmericanDifficulty: easy4
servings10
minutes7
minutes110
kcal17
MinutesA foolproof method for creating thin, crispy Parmesan snacks using aged cheese and moisture control techniques to prevent sogginess.
Ingredients
2 cups freshly grated aged Parmesan cheese (finely grated)
1 tablespoon fresh parsley, finely chopped
1 teaspoon garlic powder
Half teaspoon onion powder
Quarter teaspoon cracked black pepper
Directions
- Preheat your oven to 400 degrees Fahrenheit. Line a large baking sheet with a high-quality silicone baking mat or premium parchment paper. This is crucial because the cheese needs a non-porous surface to crisp up without absorbing excess grease.
- In a small bowl, toss the finely grated Parmesan with the garlic powder, onion powder, and pepper until the seasonings are evenly distributed. Do not add the parsley yet; fresh herbs can burn and turn bitter if baked for the full duration.
- To achieve the uniform rectangular shape seen in the image, spread the cheese mixture onto the prepared baking sheet in a single, thin, even layer, forming a large rectangle. Use the back of a spoon to ensure there are no gaps, but keep the layer thin enough to see the mat slightly through the cheese.
- Bake for 5 to 6 minutes. Watch closely. You are looking for the cheese to be completely melted and bubbling vigorously.
- Remove the pan briefly and quickly sprinkle the finely chopped fresh parsley evenly over the molten cheese. Return to the oven for 1 additional minute until the edges turn a deep golden brown and the bubbling slows down.
- Remove the pan from the oven and let the sheet of cheese sit on the hot baking sheet for exactly 60 seconds. While the cheese is still warm and pliable but starting to set, use a pizza cutter or a sharp knife to slice the sheet into uniform rectangles.
- Transfer the individual crisps to a wire cooling rack immediately after cutting. Elevating them allows air to circulate underneath, which prevents steam from building up and making the bottoms soft. Once completely cool, they will be perfectly rigid, square-edged, and crisp.
Notes
- Use a silicone mat for best results. Ensure the cheese is sliced while warm and moved to a wire rack immediately to maintain the ‘anti-soggy’ bottom.