Mastering Old-Fashioned Chicken and Dumplings with a Golden Crust
Old-Fashioned Chicken and Dumplings is the culinary equivalent of a warm hug on a rainy Tuesday. It’s a dish that carries the weight of tradition, promising comfort in every spoonful of rich gravy and tender poultry. However, many home cooks are haunted by the “soggy bottom” syndrome, where dumplings turn into gummy, leaden lumps that dissolve into the broth.
The secret to avoiding that mushy mess lies in a specific textural contrast that most recipes ignore. Instead of just boiling dough in liquid, we use a hybrid steaming and baking method. This approach ensures the centers are light and airy while the tops develop a beautiful, biscuit-like crust. It transforms a humble stew into a sophisticated meal with layers of texture.
I’ve found that the real trick to success is the “shaggy dough” technique. When you mix your dumpling batter, stop the second the flour disappears. If you overwork the dough, you develop too much gluten, which leads to rubbery dumplings. Keep it messy, keep it light, and let the oven do the heavy lifting for that perfect finish.
The Anatomy of a Perfect Poultry Stew Base
A great dumpling is only as good as the liquid it sits in. We start with a classic mirepoix—a mix of carrots, celery, and onion—to build a sweet, aromatic foundation. These vegetables shouldn’t just be boiled; they need to sweat in the pan until they are soft and fragrant, releasing their natural sugars into the base.
Using a heavy Dutch oven is non-negotiable for this recipe. The thick walls distribute heat evenly, preventing the bottom of your stew from scorching while the dumplings bake on top. This consistent heat helps the vegetables break down into the sauce, creating a velvety consistency that coats the back of a spoon.
Selecting the Right Cut: Why Thighs Triumph
While many people reach for chicken breasts, they often turn stringy and dry during the simmering process. Chicken thighs are the undisputed champions of this dish because they contain more connective tissue and fat. As the stew simmers, that tissue breaks down into gelatin, which naturally thickens the gravy and adds a luxurious mouthfeel.
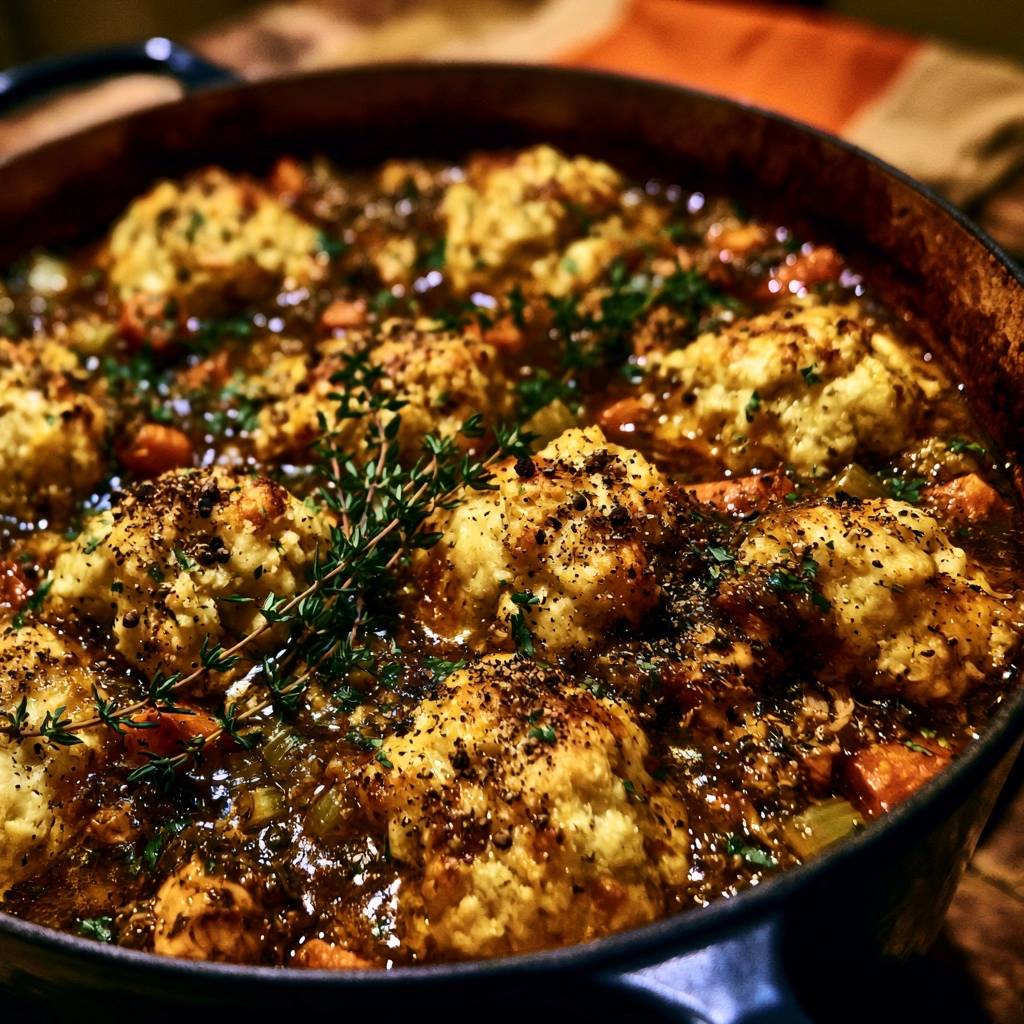
Thighs are also incredibly forgiving. You can simmer them for an hour, and they will remain juicy and tender. This resilience is vital because the chicken needs to withstand both the initial sear and the final 25-minute bake in the oven without losing its integrity.
Building Color with Tomato Paste and Roux
Most chicken and dumplings look pale and unappetizing, but we fix that with a tablespoon of tomato paste. It might seem unconventional, but the paste adds a deep, golden hue and a subtle hit of acidity that cuts through the richness. You won’t taste “tomato,” but you will notice a much more complex, savory flavor profile.
After adding the paste, we stir in a bit of flour to create a roux. You must cook this mixture for at least two minutes until it smells slightly nutty. This “toasts” the flour, removing that raw, pasty taste and ensuring your gravy is smooth and flavorful rather than grainy.
Essential Components for Old-Fashioned Chicken and Dumplings
Success starts in the pantry with high-quality staples. I always recommend using low-sodium chicken broth so you have total control over the salt levels. Since the liquid reduces as it bakes, regular broth can often become way too salty by the time the timer dings. You can always add salt, but you can’t take it away!
Fresh herbs make a massive difference here. While we use dried thyme in the stew for a concentrated earthy flavor, finishing the dish with fresh thyme sprigs adds a bright, floral note. That hit of freshness right at the end wakes up the heavy creaminess of the dish and makes the flavors pop.
The Leavening Science of Fluffy Dumplings
The magic of a fluffy dumpling comes down to chemistry. We use a generous amount of baking powder to ensure the dough rises the moment it hits the heat. When the wet dough meets the simmering stew, the baking powder reacts, creating tiny bubbles of carbon dioxide that get trapped in the flour structure.
Salt is equally important in the dough. Beyond seasoning, it helps strengthen the gluten just enough so the dumpling doesn’t fall apart in the liquid. Without the right balance of leavening and seasoning, your dumplings will be flat, dense, and flavorless.
Fat Ratios: Melted Butter vs. Shortening
Many old-school recipes call for shortening, but melted butter is the superior choice for flavor and texture. Butter contains a small amount of water, which turns into steam as it bakes, helping the dumplings puff up. It also provides a “short” texture, meaning the dumplings will be tender and easy to bite through.
Using melted butter instead of cold butter chunks also makes the mixing process much easier. It distributes the fat evenly throughout the flour, ensuring every single bite of the dumpling is rich and buttery. This prevents those hard, floury pockets that can ruin the eating experience.
Step-by-Step: Searing and Simmering the Base
Start by searing your chicken pieces in a hot Dutch oven with a splash of oil. You are looking for a deep, golden-brown crust on the meat. This creates “fond”—those little brown bits stuck to the bottom of the pot. That fond is concentrated flavor, and it’s the secret to a professional-tasting stew.
Once the vegetables are soft and the flour is toasted, slowly whisk in your broth. Use your whisk to scrape up all those browned bits from the bottom. As the liquid comes to a boil, you’ll see it transform from a thin watery broth into a glossy, rich gravy. Let it simmer until it’s thick enough to support the weight of the dough.
The Secret to the Anti-Soggy Dumpling Technique
The “Drop and Scoop” method is where most people go wrong. Use a small cookie scoop to ensure every dumpling is the same size, which guarantees they all cook at the same rate. Drop them gently onto the surface of the simmering liquid, leaving about an inch of space between each one.
If you crowd the pot, the dumplings will merge into one giant, doughy sheet. They need room for the heat to circulate around them. This spacing allows the sides of the dumplings to set properly, preventing them from becoming a singular mass of mush.
The Two-Phase Baking Process
This is the game-changer. First, we bake with the lid on for 15 minutes. This creates a pressurized steam chamber that cooks the dumplings from the inside out, making them light and airy. If you skipped this, the centers would stay raw and doughy while the outsides overcooked.
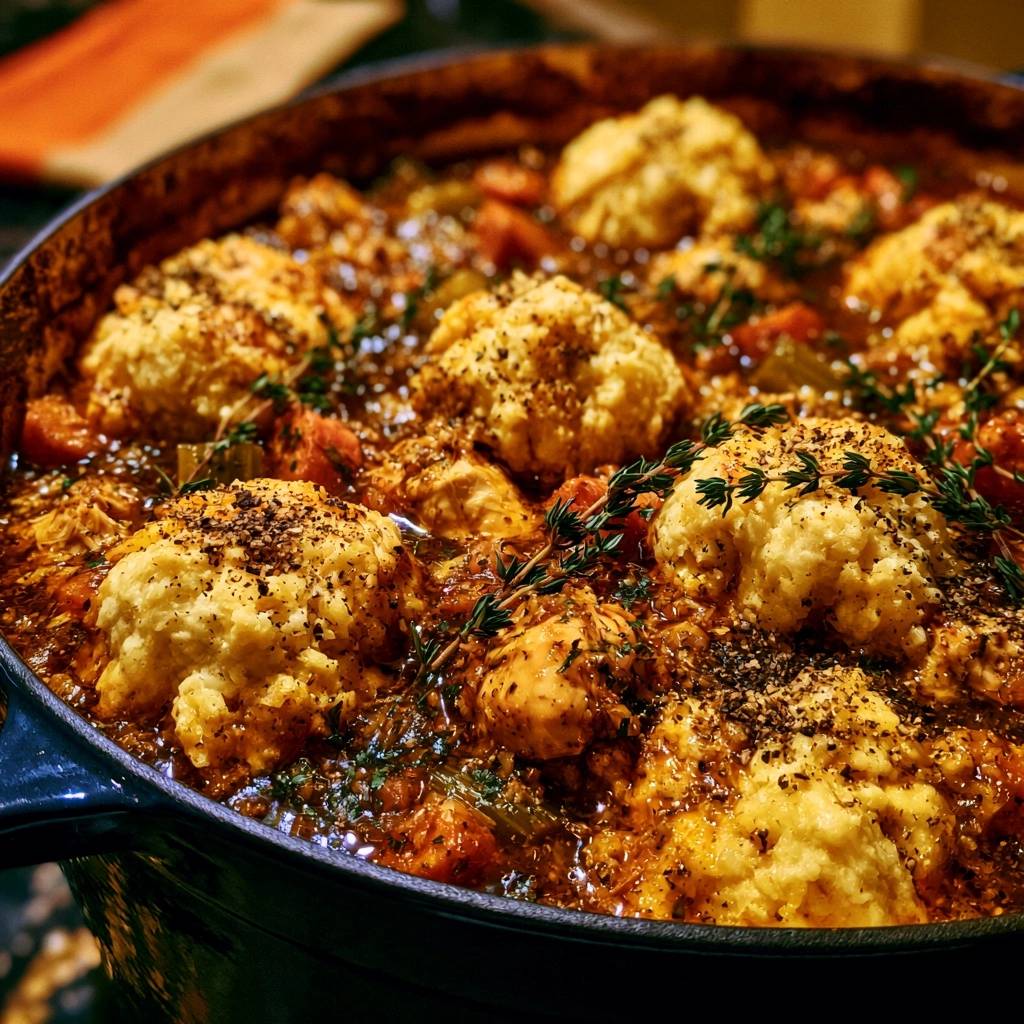
The second phase involves removing the lid for the final 5 to 10 minutes. This exposes the tops of the dumplings to the dry heat of the oven. This triggers the Maillard reaction, browning the tops and creating a slight crunch. This contrast between the crispy top and the soft, gravy-soaked bottom is what makes this recipe world-class.
Identifying the Perfect Internal Texture
You’ll know the dumplings are done when they look puffed and feel firm to a light touch. If you poke one with a toothpick, it should come out clean, much like a cake. The interior should look white and bread-like, with no signs of translucent, raw dough.
The gravy should be bubbling vigorously around the edges, and the chicken should be fork-tender. If the dumplings still feel a bit squishy, give them another three minutes uncovered. That final blast of dry heat is your insurance policy against a soggy dinner.
Troubleshooting Common Textural Issues
If your dumplings disintegrate into the broth, your liquid was likely too thin or not hot enough when you dropped the dough. The stew must be at a gentle simmer to “set” the bottom of the dumpling immediately. If the liquid is cold, the dough will simply dissolve before it has a chance to cook.
Another common issue is hard, rock-like dumplings. This usually happens because the baking powder is expired or the dough was handled too much. Always check the date on your leavening agents. If you’ve been stirring the dough for more than thirty seconds, you’ve probably over-mixed it. Stop as soon as the streaks of flour are gone.
Why Your Gravy Might Be Too Thin
A watery base is usually the result of not cooking the roux long enough or adding too much broth too quickly. If you find your stew is too thin before adding the dumplings, let it simmer uncovered for an extra five minutes to reduce. The dumplings will also release a little starch as they cook, which helps thicken the sauce further.
If it’s still too thin after baking, don’t panic. You can remove the dumplings and simmer the sauce on the stovetop for a few minutes to tighten it up. However, if you followed the flour measurements correctly, the oven time usually results in a perfect, rib-sticking consistency.
Preventing Dense or Heavy Dough
The “shaggy dough” concept is your best friend here. The dough should look a bit lumpy and uneven. If it looks perfectly smooth like pizza dough, you’ve gone too far. Use a fork to gently fold the milk and butter into the flour. This keeps the air pockets intact, which is what makes the dumplings float and stay fluffy.
Also, make sure your milk and butter aren’t boiling hot when they hit the flour. If the fat is too hot, it can “cook” the flour prematurely, leading to a dense texture. Let the melted butter cool for a minute or two before mixing it into the dry ingredients for the best results.
Make-Ahead Strategies and Storage Logistics
Chicken and dumplings are notorious for absorbing liquid as they sit. If you have leftovers, the dumplings will soak up the gravy like a sponge, turning into very soft pillows by the next day. To prevent this, I recommend storing the dumplings in a separate container from the stew if you know you won’t finish it all.
To reheat, place the stew in a pan and add a splash of water or broth to loosen the gravy. Once the stew is hot, place the dumplings on top and cover the pan for a few minutes to steam them through. Avoid the microwave if possible, as it can make the dumplings rubbery and tough.
Expert Tips for Enhanced Flavor Profiles
If the dish feels a bit too heavy, add a teaspoon of apple cider vinegar or a squeeze of lemon juice to the stew right before serving. This tiny hit of acid brightens the whole pot and balances the fat from the butter and chicken thighs. It’s a trick professional chefs use to make flavors “sing.”
Don’t be shy with the black pepper. This dish thrives on a bit of spice to cut through the creaminess. I like to add a heavy dusting of freshly cracked pepper over the dumplings before they go into the oven so it bakes right into the crust. It adds a beautiful speckled look and a warm, lingering heat.
Frequently Asked Questions
Can I use store-bought biscuit dough instead?
You can, but the results won’t be the same. Store-bought dough is designed to be baked in dry heat and often contains oils that make it very heavy when steamed. It tends to stay doughy in the middle and can become quite salty. Homemade dough takes only five minutes and provides a much lighter, more authentic texture.
How do I make this in a slow cooker?
To adapt this for a slow cooker, cook the chicken and vegetable base on low for 6 hours. About 45 minutes before serving, turn the heat to high and drop your dumpling dough on top. However, you will miss out on the golden, crispy crust. To fix this, you can transfer the slow cooker insert (if oven-safe) to a 400°F oven for 10 minutes at the very end.
Is it possible to overcook the chicken?
Because we are using chicken thighs, it is very difficult to overcook the meat. The fat and connective tissue keep the meat moist even during the long simmer and bake. If you were using chicken breasts, they would likely become dry and chalky after 55 minutes of cooking, which is why thighs are the superior choice for this specific recipe.
What are the best side dishes for this meal?
Since this is a very rich and carb-heavy meal, I recommend serving it with something bright and crisp. A simple green salad with a sharp lemon vinaigrette is perfect. Roasted green beans or steamed broccoli with a bit of garlic also work well to provide a nutritional balance and a different texture to the soft, comforting stew.
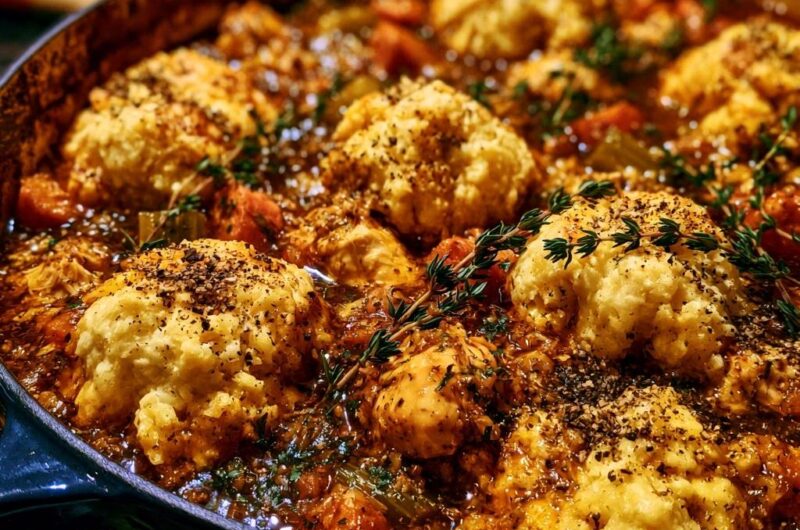
Old-Fashioned Chicken and Dumplings
Course: Main CourseCuisine: AmericanDifficulty: easy6
servings20
minutes55
minutes75
Minutes510
kcalAmerican
Ingredients
2 lbs boneless skinless chicken thighs, cut into bite-sized pieces
3 large carrots, sliced into rounds
3 stalks celery, chopped
1 large yellow onion, diced
2 tablespoons tomato paste (for the deep color shown)
1/4 cup all-purpose flour (for the roux)
4 cups low-sodium chicken broth
1 teaspoon dried thyme
1 tablespoon cracked black pepper (plus extra for topping)
2 cups all-purpose flour (for dumplings)
1 tablespoon baking powder
1/2 teaspoon salt
3/4 cup whole milk
4 tablespoons melted butter
Fresh thyme sprigs for garnish
Directions
- Preheat your oven to 400°F (200°C). In a large oven-safe Dutch oven over medium-high heat, sear the chicken pieces in a tablespoon of oil until deeply browned. Add the carrots, celery, and onion, cooking for 5 minutes until softened.
- Stir in the tomato paste and 1/4 cup of flour. Cook for 2 minutes to toast the flour, then slowly whisk in the chicken broth. Add the dried thyme and black pepper. Bring to a boil, then reduce to a simmer until the sauce thickens into a rich gravy. The chicken is done when it reaches 165°F (74°C) in the thickest part.
- In a medium bowl, whisk together the 2 cups of flour, baking powder, and salt. Stir in the milk and melted butter just until a shaggy dough forms. Do not overmix.
- Use a cookie scoop to drop rounded tablespoons of dough directly onto the surface of the simmering stew. Space them out to allow for expansion.
- Place the lid on the Dutch oven and transfer it to the preheated oven. Bake for 15 minutes.
- Remove the lid and bake for an additional 5-10 minutes. This final “uncovered” step is critical to achieving the golden, textured crust seen in the image and preventing a soggy top.
- Remove from the oven. The dumplings should be puffed, golden, and firm. Garnish heavily with fresh thyme sprigs and additional cracked black pepper before serving.
Notes
- The secret to the deep color and rich flavor is the addition of tomato paste and searing the chicken until deeply browned. Finishing the dish uncovered in the oven is the critical step to achieving a golden, textured crust.