Mastering Shredded Chicken and Sweet Potato Soup
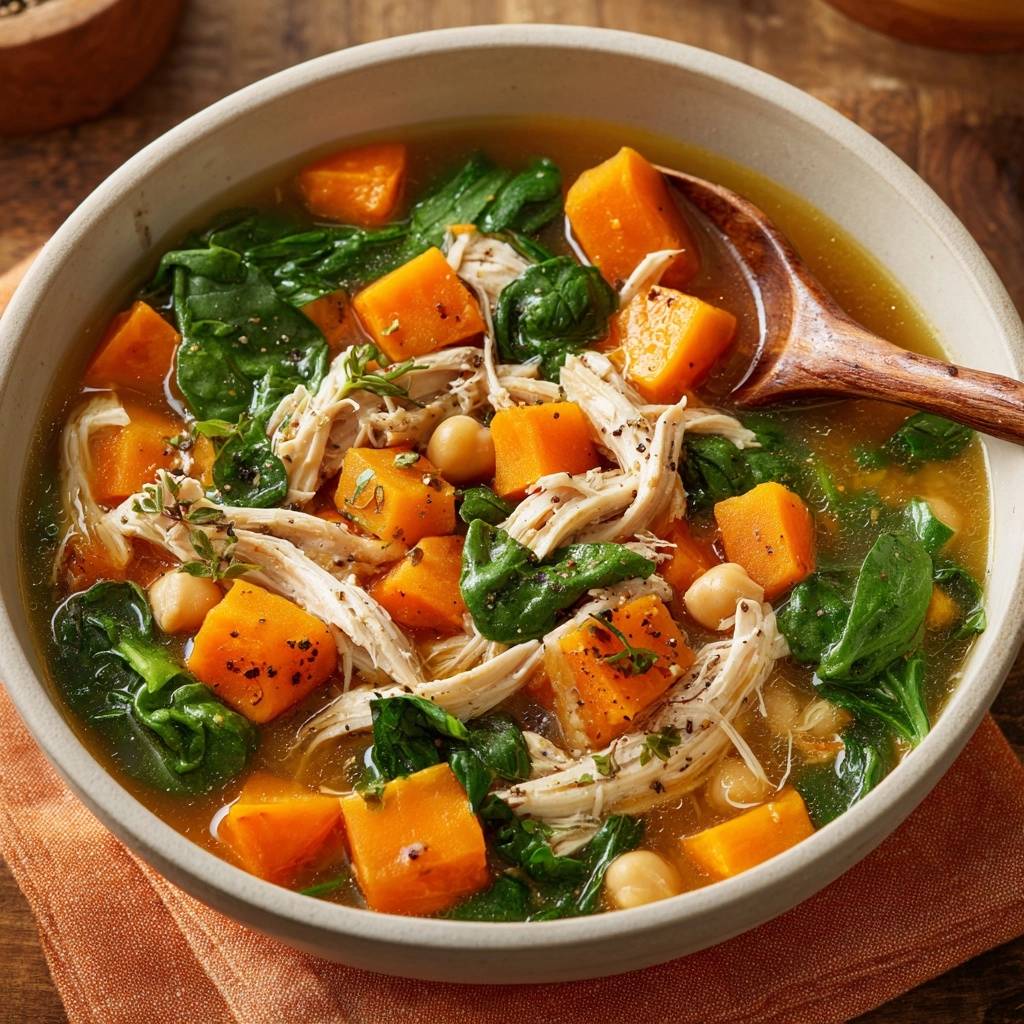
Most of us have been there: you sit down for a cozy bowl of vegetable soup, only to find the carrots have turned to mush and the potatoes have dissolved into a grainy paste. It’s a disappointing experience that turns a healthy meal into baby food. This Shredded Chicken and Sweet Potato Soup changes that narrative by focusing on structural integrity and vibrant colors.
The secret lies in the “Skyscraper” approach to building a soup. Instead of tossing everything into a pot and hoping for the best, we treat each ingredient with respect. By using a specific staggered simmering method, we ensure the sweet potatoes stay tender but firm, providing a satisfying bite that contrasts beautifully with the succulent, hand-shredded chicken.
I’ve found that the real trick to a professional-grade broth isn’t just the stock you buy; it’s the sear on the meat. Searing the chicken breasts first creates a deep, caramelized base that infuses the entire pot with a savory richness you simply can’t get from boiling alone. This recipe delivers high protein and complex carbohydrates, giving you sustained energy without that heavy, weighed-down feeling of cream-based chowders.
The Science of Texture in Poultry Soups
Understanding the thermal properties of your ingredients is the first step toward becoming a better cook. Chicken breast is lean and prone to drying out if it’s boiled for thirty minutes straight. When chicken is overcooked, the muscle fibers tighten and squeeze out moisture, leaving you with stringy, woody meat that’s hard to swallow.
Sweet potatoes present the opposite problem. They are full of pectin, the “glue” that holds plant cells together. As they heat up, that pectin breaks down. If you boil them alongside the chicken from the start, they lose their structural integrity and collapse into the broth. This makes the soup cloudy and ruins the mouthfeel.
Staggered cooking is our solution. By poaching the chicken just until it’s done, removing it, and then adding the potatoes, we control the exact window of doneness for both. This technique maintains distinct textures in a single-pot meal, ensuring every spoonful has a variety of sensations rather than a uniform softness.
Essential Components for a Balanced Broth
Quality ingredients are the backbone of this dish. I always recommend using a low-sodium chicken broth. This isn’t just about health; it’s about control. Standard broths can be salt bombs, and as the liquid reduces during simmering, that saltiness intensifies. Starting with low-sodium allows you to season the chicken and the final soup to your exact preference.
The chickpeas are a brilliant addition here. They act as a secondary protein and provide a nutty, slightly creamy texture that complements the sweetness of the tubers. When selecting your sweet potatoes, look for firm, unblemished skins. Avoid any that feel soft or have “eyes” starting to sprout, as these will have a higher sugar-to-starch ratio and may fall apart faster.
For the greens, baby spinach is the gold standard. Mature spinach leaves have thick, fibrous stems that can be unpleasant in a delicate soup. Baby spinach is tender enough to wilt in seconds, providing a pop of bright green color and a hit of iron without requiring any extra “cooking” time that might turn it gray.
Aromatic Foundations: Thyme and Garlic Powder
We use dried thyme during the simmering phase because it’s hardy. The heat helps extract its earthy, minty oils over time, deeply flavoring the broth. However, we save the fresh thyme for the very end. Fresh herbs contain volatile oils that disappear with heat; adding them as a garnish ensures you get that hit of floral aroma as you lift the spoon to your mouth.
You might wonder why we use garlic powder instead of fresh minced garlic for the sear. Fresh garlic has a very low smoke point and burns easily at the high temperatures needed to brown chicken. Garlic powder seasons the meat evenly and creates a flavorful crust without the risk of bitter, burnt bits at the bottom of your pot.
Step-by-Step: Searing for Deep Flavor Extraction
The first phase of this recipe is all about the Maillard reaction. This is the chemical reaction between amino acids and reducing sugars that gives browned food its distinctive flavor. When you sear the seasoned chicken in olive oil, you aren’t just cooking the meat; you’re creating “fond.”
Fond is the collection of browned bits stuck to the bottom of the pot. When you eventually pour in the chicken broth, those bits deglaze and dissolve into the liquid. This is what gives the broth its rich, golden-amber hue. Make sure your oil is shimmering but not smoking before you drop the chicken in to get that perfect crust.
The Staggered Simmer: Timing Your Vegetables
Once the chicken is seared and the broth is added, the real precision begins. Simmer the chicken alone for about 10 to 12 minutes. At this point, the chicken should be just cooked through. Remove it immediately. If you leave it in while the potatoes cook, you’ll end up with that dry, stringy texture we’re trying to avoid.
Now, drop in your one-inch sweet potato cubes. Because the broth is already hot and seasoned, the potatoes will begin cooking instantly. Keep the pot uncovered. This allows you to keep a close eye on them. You are looking for “fork-tender” status, which usually takes 8 to 10 minutes.
The fork-tender test is specific: when you pierce a cube with a fork, there should be a tiny bit of resistance in the very center, but the fork should slide out easily. If the potato slides off the fork or crumbles, it’s overdone. If the fork gets stuck, give it another two minutes. This precision is what separates a home cook from a chef.
Manual Shredding vs. Mechanical Methods
While some people use a stand mixer to shred chicken, I’m a firm believer in the two-fork method for soup. Using forks allows you to create long, thin strips that act like little nets, catching the broth and bits of thyme. Mechanical shredding often results in a “pulled” texture that can feel mushy when submerged in liquid.
Pro tip: shred the chicken while it’s still warm. As the meat cools, the proteins tighten up, making it harder to pull apart. Shredding it while warm also allows the meat to reabsorb a little bit of the juices that settled while it rested on the plate.
This same tip about shredding while warm ensures beautifully tender meat in this cozy chicken, spinach, and squash soup.
The Residual Heat Technique for Vibrant Greens
The most common mistake in soup making is boiling the greens. High heat destroys chlorophyll, the pigment that makes spinach green. It also breaks down the cell walls so much that the leaves become slimy. To keep your soup looking like a restaurant-quality dish, turn the heat completely OFF before adding the spinach.
Fold the baby spinach into the hot broth gently. The residual heat of the liquid is more than enough to wilt the leaves in about 60 seconds. They will stay a brilliant, electric green and maintain a slight “snap” to their texture. This simple change in timing makes a massive difference in the final presentation.
Troubleshooting Common Soup Pitfalls
If you find that your broth has reduced too much and the soup looks more like a stew, don’t just add plain water. This will dilute the flavor. Instead, add a splash more broth or even a little bit of hot water mixed with a pinch of salt and garlic powder to maintain the flavor profile.
Did you accidentally overcook the potatoes? Don’t panic. Take a ladle and scoop out about half a cup of the overcooked potatoes and chickpeas. Mash them into a paste and stir them back into the broth. This will thicken the soup into a rich, chowder-like consistency, turning a mistake into a deliberate “thick and hearty” style.
Always wait until the very end to do your final salt check. As the soup simmers, water evaporates and flavors concentrate. If you salt perfectly at the beginning, it might be too salty by the time it hits the bowl. Taste it after the spinach has wilted, then add your final pinch of salt and cracked pepper.
Flavor Variations and Ingredient Swaps
This recipe is a fantastic canvas for modifications. If you prefer a heartier green, you can use kale instead of spinach. However, kale is much tougher, so you’ll need to add it at the same time as the chickpeas and simmer it for about 3 to 5 minutes to soften the fibers.
For those who like a bit of brightness, a squeeze of fresh lemon juice or a teaspoon of apple cider vinegar added right before serving can “wake up” the earthy flavors of the sweet potato. If you want some heat, add a pinch of red pepper flakes during the searing process to infuse the oil with spice.
Legume Alternatives for Added Fiber
While chickpeas offer a great bite, you can easily swap them for cannellini beans if you want a softer, creamier texture. If you choose to use lentils, make sure to use pre-cooked canned lentils that have been rinsed. Adding dry lentils would require a much longer simmer time and would soak up too much of your precious broth.
Optimal Storage and Reheating Protocols
This soup is a meal-prepper’s dream because the flavors actually meld and improve overnight. However, because sweet potatoes continue to soften as they sit in liquid, you want to cool the soup as quickly as possible before putting it in the fridge. Transfer it to shallow containers rather than one deep pot to speed up the cooling process.
Store it in an airtight container for up to 3 or 4 days. When reheating, do it on the stove over medium-low heat. Avoid a rolling boil, which will turn those perfectly cooked potatoes into mush. If you plan on freezing this soup, I recommend freezing the base without the spinach. Add fresh spinach only when you reheat the thawed soup to keep that vibrant color.
Expert Tips for Professional Presentation
We eat with our eyes first. To make this soup look as good as it tastes, use a wide, shallow bowl. This allows the colorful ingredients—the orange potatoes, green spinach, and golden chicken—to stay visible on the surface rather than sinking to the bottom of a deep mug.
Don’t underestimate “the final crack” of black pepper. Freshly cracked pepper has a floral, spicy aroma that pre-ground pepper lacks. Place a single sprig of fresh thyme right in the center of the bowl. It signals to your guests (or just yourself!) that this meal was made with care and attention to detail.
Frequently Asked Questions
Can I use chicken thighs instead of breasts?
Yes, you can definitely use boneless, skinless chicken thighs. Thighs have a higher fat content and more connective tissue, which makes them very flavorful and hard to overcook. However, they may need an extra 5 minutes of simmering time to become tender enough to shred easily. The broth will also be slightly richer due to the extra fat.
How do I keep the sweet potatoes from turning the broth cloudy?
Cloudy broth is usually caused by excess starch or a boil that is too aggressive. To prevent this, rinse your cubed sweet potatoes under cold water until the water runs clear before adding them to the pot. Additionally, ensure the soup stays at a gentle simmer (small bubbles) rather than a rolling boil, which can physically break the potatoes apart.
Is this recipe suitable for meal prep?
It is excellent for meal prep! If you know you will be reheating the soup several times, I suggest undercooking the sweet potatoes by about 2 minutes. They will finish softening during the reheating process. This prevents them from becoming too soft by the third or fourth day of your meal plan.
What can I use if I don’t have chicken broth?
If you’re out of broth, you can use water mixed with a high-quality chicken bouillon base. To make it taste more “homemade,” simmer the water with a piece of celery, half an onion, and a bay leaf for 10 minutes before starting the recipe. This fortifies the liquid so it doesn’t taste thin or flat.
How do I make this soup thicker without adding flour?
The best way to add body without flour or cornstarch is to use the ingredients already in the pot. Take a half-cup of the cooked sweet potatoes and chickpeas and mash them against the side of the pot with a spoon, then stir them back in. The natural starches will thicken the broth beautifully while keeping the recipe gluten-free.

Shredded Chicken and Sweet Potato Soup
Course: Main CourseCuisine: AmericanDifficulty: easy4
servings15
minutes25
minutes340
kcal40
MinutesThis recipe solves the problem of mushy vegetables by using a specific timing technique. By searing the chicken first and adding sweet potatoes later in the process, you achieve a rich broth with firm textures and bright greens.
Ingredients
1.5 lbs boneless skinless chicken breasts
3 cups sweet potatoes, peeled and cut into 1-inch cubes
1 can (15 oz) chickpeas, drained and rinsed
4 cups fresh baby spinach
6 cups low sodium chicken broth
2 tablespoons olive oil
1 teaspoon dried thyme (plus fresh sprigs for garnish)
1 teaspoon garlic powder
1/2 teaspoon cracked black pepper (plus more for finishing)
Salt to taste
Directions
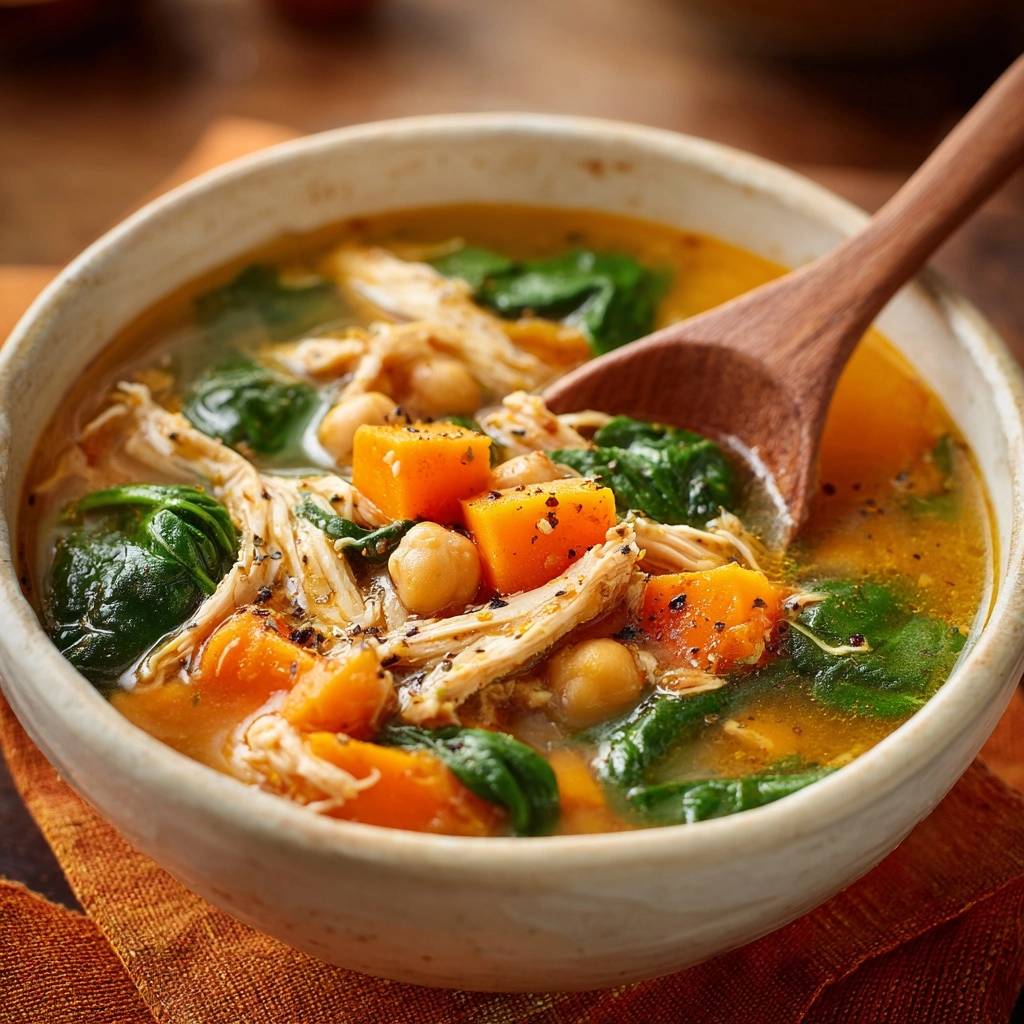
- Heat olive oil in a large pot over medium-high heat. Season chicken breasts generously with salt, garlic powder, and half of the black pepper. Sear the chicken for 3-4 minutes per side until a deep golden crust forms. This browning step is essential for the rich color of the broth seen in the image.
- Pour in the chicken broth and dried thyme. Bring to a gentle simmer. To solve the mushy veggie problem, do not add the potatoes yet. Cover and simmer the chicken alone for 10-12 minutes until just cooked through.
- Remove the chicken to a plate. Now, add the sweet potato cubes to the simmering broth. By waiting until now, you control the exact window of doneness. Simmer the potatoes uncovered for exactly 8 to 10 minutes until a fork can pierce them with slight resistance.
- While potatoes simmer, use two forks to shred the chicken into long, thin bite-sized strips.
- Add the shredded chicken and the drained chickpeas back into the pot. Stir for 2 minutes to heat through and allow the flavors to meld.
- Turn off the heat completely. This is the secret to perfect greens. Fold in the fresh baby spinach and let the residual heat wilt it for 60 seconds. This prevents the spinach from becoming slimy or brown, keeping it the bright green color shown in the bowl.
- Serve immediately in deep bowls. Top with a final crack of black pepper and a sprig of fresh thyme to match the visual presentation.
Notes
- To keep the spinach bright green and prevent it from becoming slimy, always add it after turning off the heat and let the residual heat do the work.