Mastering Sticky Glazed Baked Chicken Thighs with Crispy Skin
Stop settling for rubbery, pale chicken skin hidden under a layer of soggy sauce. Most home cooks make the mistake of saucing their chicken too early, which effectively steams the skin instead of crisping it. This recipe fixes that frustration by using a specific two-stage high-heat method to render the fat and lock in juices.
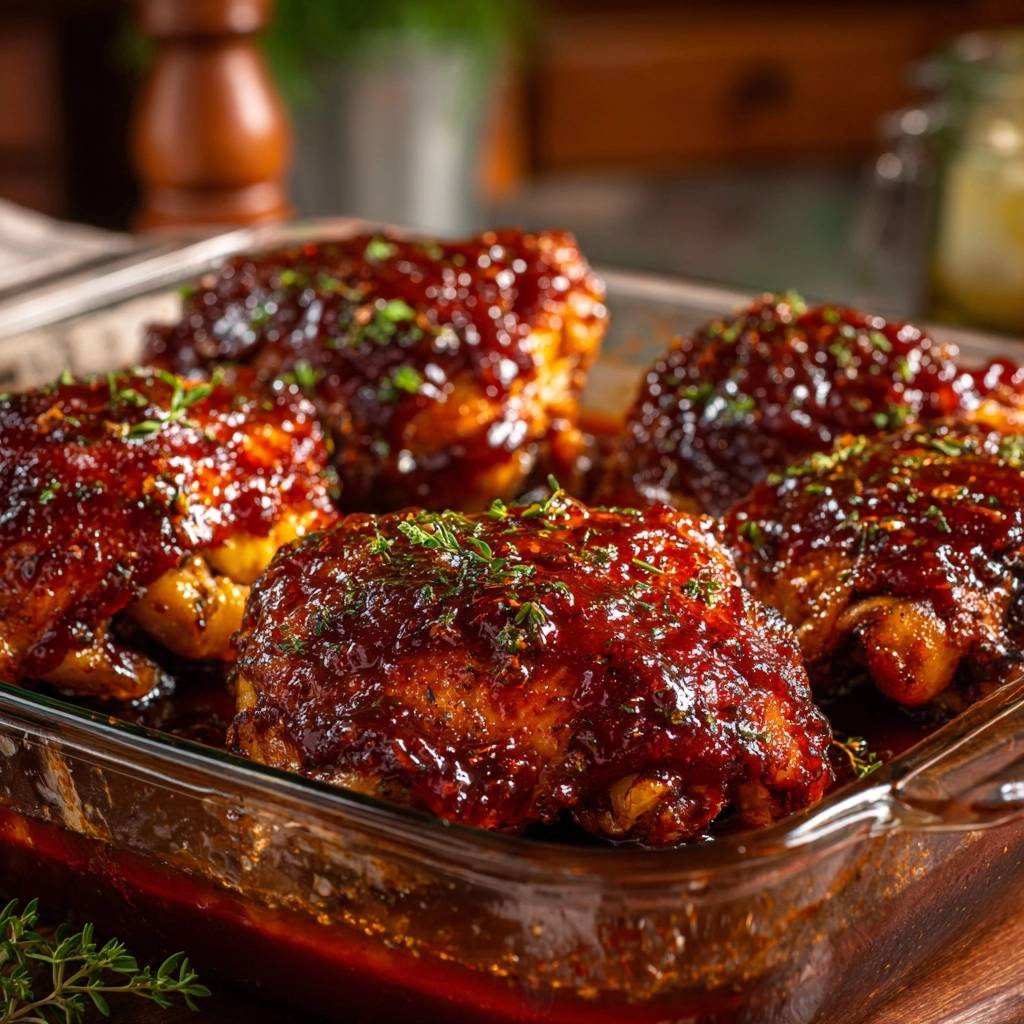
The result is a stunning sensory contrast between the crackling, salty skin and a viscous, sweet-tangy glaze that clings to every curve. By choosing bone-in, skin-on thighs, you ensure the meat stays incredibly succulent even under the intense heat required for that perfect finish. It is the ultimate “better than takeout” dinner that feels like a gourmet win.
The real secret to success here is the “Flash-Glaze” technique. Instead of slow-cooking the chicken in liquid, we roast it dry first to achieve a golden crunch. Only in the final minutes do we apply the glaze, allowing the sugars to caramelize into a deep mahogany finish without burning or softening the skin you worked so hard to crisp.
The Physics of Rendering Fat for Maximum Crunch
Achieving a shatter-crisp skin requires understanding how moisture behaves in a hot oven. When you roast at 425°F, the high temperature forces the subcutaneous fat to melt and escape the skin. If there is water on the surface, that water must evaporate before the fat can render, which often leads to overcooked meat and flabby skin.
Therefore, patting the chicken extremely dry with paper towels is the most critical step in this entire process. You want the heat to hit the fat immediately to trigger the Maillard reaction, which creates those complex, savory flavors and that beautiful brown color. Any lingering moisture will create a “steam zone” that ruins the texture.
While a metal roasting pan is a great heat conductor, a glass baking dish works exceptionally well for this recipe because it holds steady heat. However, you must ensure the thighs are not crowded. If they touch, the steam trapped between them will prevent the sides from crisping, leaving you with pale patches instead of a uniform crunch.
Essential Components for Sticky Glazed Baked Chicken Thighs
Quality ingredients make a massive difference when the flavor profile is this focused. I always recommend using Kosher salt because its larger grains allow for better surface area coverage and a more controlled seasoning. It draws out just enough moisture from the skin to help it crisp up during the initial roast.
Smoked paprika is another heavy hitter in this spice blend. It provides a deep, earthy red hue and a “just-off-the-grill” flavor profile without you ever having to step outside to a barbecue. When combined with garlic powder, it creates a savory base that perfectly balances the sweetness of the upcoming glaze.
Selecting the Right Poultry Cut
While you might be tempted to swap in chicken breasts, bone-in, skin-on thighs are the undisputed champions for this high-heat application. The bone acts as a thermal conductor, helping the meat cook evenly from the inside out while protecting it from drying out. Thighs also have a higher fat content, which means they remain juicy and tender even at the high temperatures needed to caramelize the glaze.
Furthermore, the skin on a thigh is thicker and more resilient than on a breast. This allows it to withstand the 45-minute roasting process without disintegrating. You get a much more satisfying “snap” when you bite into a well-rendered thigh, making it the superior choice for anyone seeking that perfect sticky-crispy balance.
The Glaze Chemistry: Sugar, Acid, and Umami
A perfect glaze is a three-part harmony of sugar, acid, and body. In this recipe, the brown sugar provides the “stick” and the beautiful shine. As it heats, it transforms into a tacky coating that grips the chicken. Without enough sugar, the sauce would simply slide off into the bottom of the pan.
Apple cider vinegar is the essential counterpoint here, as it cuts through the cloying sweetness and the richness of the chicken fat. It adds a bright tang that wakes up the palate. If you want to experiment, high-quality alternatives like pomegranate molasses or a splash of lemon juice can offer a sophisticated twist while maintaining that necessary acidity.
Phase One: Preparing the Surface and Dry Rub
Before the chicken ever sees the oven, you need to prep the surface to encourage “dry brining.” After patting the meat dry, rub a small amount of olive oil both over and under the skin. This helps the spice rub adhere and ensures the fat renders efficiently. The oil acts as a heat bridge, intensifying the oven’s energy against the skin.
Apply your spice blend generously, ensuring every nook and cranny is covered. When you place the thighs in the dish, remember the “no-crowding” rule. You want at least an inch of space between each piece. This allows the hot air to circulate 360 degrees, ensuring the sides of the thighs are just as golden as the tops.
Phase Two: The Initial High-Heat Roast
The first 30 to 35 minutes are all about the transformation of texture. During this phase, you should hear the sound of rendering fat sizzling in the pan. You will notice the skin pulling tight across the meat and the color shifting from a pale translucent pink to a vibrant, matte golden brown.
Resist the urge to check on them constantly or, worse, add the sauce too early. If you apply the glaze now, the moisture in the sauce will soak into the skin, turning it rubbery. We are looking for the skin to be fully cooked and firm to the touch before we even think about reaching for the glaze brush.
Phase Three: The Flash-Glaze and Caramelization Secret
Once the chicken is crisp, it is time for the “painting” stage. Remove the dish from the oven and brush on a thick, even layer of your glaze. You want to be generous here, coating the entire top surface. Return the dish to the oven for the final 8 to 10 minutes, keeping a close eye on the progress.
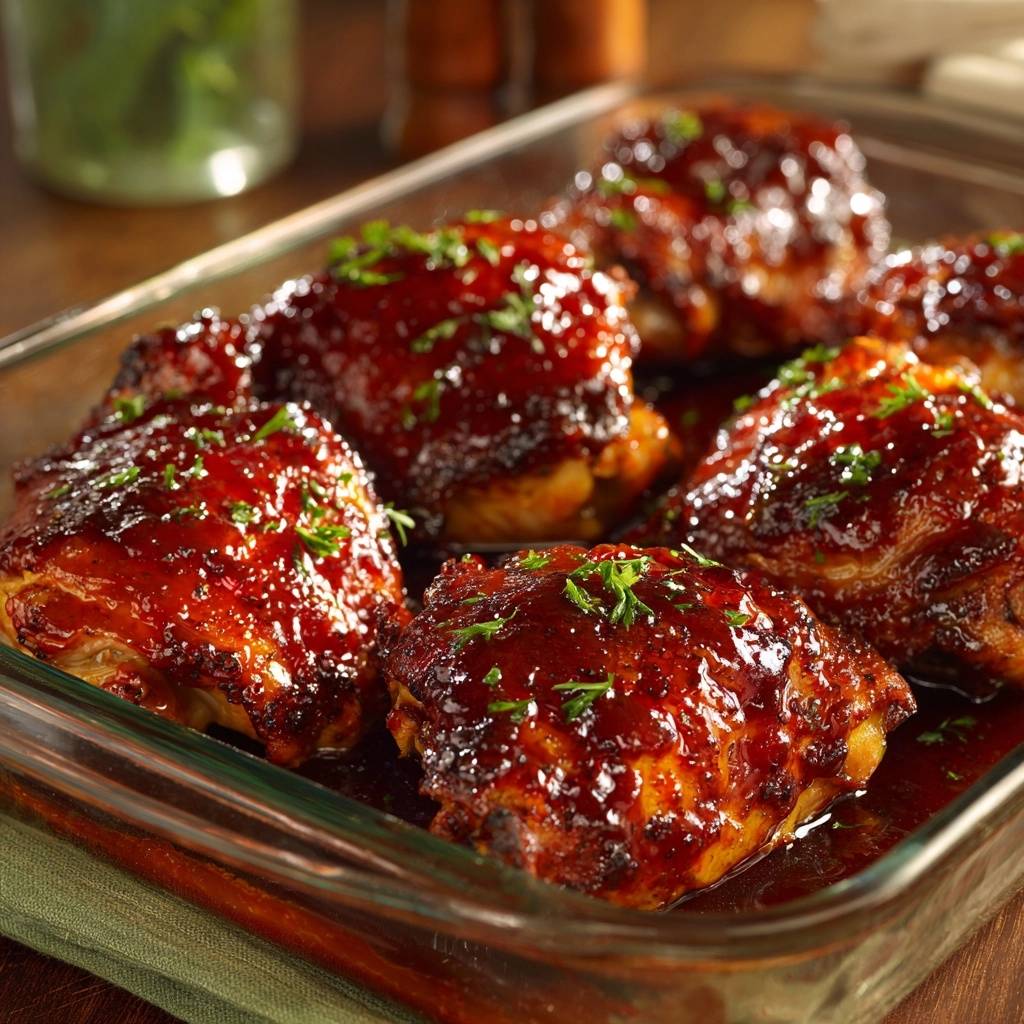
The glaze will begin to bubble and darken almost immediately. You are looking for a deep mahogany color and a sticky, tacky texture. Be careful not to let it go too long, as the high sugar content can move from caramelized to scorched in a matter of seconds. When the glaze looks like it is “fused” to the skin, it is ready.
Avoiding Common Sticky Chicken Pitfalls
If you find your glaze is too thin and running off the chicken, you can simmer the sauce on the stove for a few minutes before brushing it on to reduce the water content. Additionally, if your skin isn’t getting crisp, your oven might be running cool. Using an oven thermometer can help you verify you are actually hitting that 425°F sweet spot.
Finally, the most non-negotiable step is the 5-minute rest after cooking. Oh man, I know it smells incredible, but waiting is key! This allows the internal juices to redistribute so they don’t flood out when you bite in. More importantly, it gives the glaze a chance to “set” and become truly sticky rather than runny.
Flavor Variations and Regional Glaze Swaps
Once you master the technique, you can play with the flavors. For a “Hot Honey and Garlic” version, swap the barbecue sauce for honey and add a teaspoon of red pepper flakes and fresh minced garlic. It provides a wonderful sweet-heat kick that pairs beautifully with the crispy skin.
You can use the same hot honey and garlic glaze to create a completely different dish with this sticky herb glazed chicken.
If you want something more sophisticated, try a “Balsamic and Fig” glaze. Use a fig jam base with balsamic vinegar for a tart, dark finish that feels very high-end. For a fruit-forward profile, an “Apricot and Ginger” glaze using apricot preserves and fresh grated ginger offers a bright, zesty alternative that is perfect for spring.
Pairings for Glazed Chicken Thighs
The sticky glaze and crispy skin on these chicken thighs pair well with cool, crunchy, or tangy items.
- The cool, creamy texture of a Crunchy Creamy Southern Style Coleslaw is a natural match for the sticky glaze, while the vinegar cuts through the richness.
- For a simpler crunch with a spicy kick, the Rainbow Pepper Pickles bring acidity and color that brightens up the whole meal.
Side Dishes to Balance the Sweet Heat
Because these chicken thighs are so rich and flavorful, you want side dishes that provide a bit of balance. Acidic or bitter components are your best friend here. A simple side of lemon-garlic broccolini is fantastic because the slight bitterness of the greens and the punch of lemon cut right through the sugary glaze.
A sharp arugula salad with a light vinaigrette also works wonders. The peppery bite of the arugula cleanses the palate between savory mouthfuls of chicken. If you want something heartier, fluffy basmati rice is the perfect vessel to soak up any extra glaze that drips onto the plate, ensuring not a single drop of that “liquid gold” goes to waste.
For a more traditional pairing, roasted root vegetables like carrots or parsnips can be tossed in the same oven. Just be sure to start them earlier so they are tender by the time the chicken is finished. The natural sweetness of roasted carrots complements the smoky paprika in the chicken rub beautifully.
Safe Storage and Reheating for Retaining Texture
If you have leftovers, store them in an airtight container in the refrigerator for up to three days. However, be warned: the microwave is the enemy of crispy chicken. It will turn that beautiful glaze into a sticky mess and make the skin soggy. To revive the texture, the oven or an air fryer is the only way to go.
Reheat the thighs at 375°F for about 10 minutes. This temperature is high enough to re-crystallize the sugars in the glaze and re-crisp the skin without drying out the meat. If using an air fryer, 5 to 7 minutes at 360°F usually does the trick. Always ensure the internal temperature reaches 165°F before serving for food safety.
Expert Troubleshooting and Technical FAQ
Why is my chicken skin still rubbery?
Rubbery skin is almost always caused by trapped moisture. If you didn’t pat the chicken dry enough, or if you crowded the pan, the skin steamed instead of roasting. Next time, use more paper towels and ensure there is plenty of space between the thighs. Also, check your oven temperature with a thermometer to ensure it is truly hitting 425°F.
Can I use boneless thighs for this recipe?
You can, but you will need to adjust the timing. Boneless thighs cook much faster, usually in about 20-25 minutes total. The risk is that the meat might dry out before the skin has a chance to get truly crispy. If using boneless, I recommend still using skin-on cuts and reducing the initial roast time to 15 minutes before glazing.
How do I prevent the glaze from burning in the pan?
The sugars in the glaze can burn when they drip onto the hot baking dish. To prevent smoke, you can line your dish with parchment paper. Alternatively, you can carefully pour a few tablespoons of water into the bottom of the dish (making sure it doesn’t touch the chicken) to keep the drippings from scorching.
For anyone working with brown sugar glazes that tend to burn, this same method is the secret to a perfect glaze with no scorching.
What is the best way to tell if the chicken is done?
While the visual cues of golden skin and bubbling glaze are great, an instant-read thermometer is the most reliable method. Chicken thighs are best when they reach an internal temperature of 165°F to 175°F. Unlike breasts, thighs are very forgiving and actually taste better and more tender when cooked toward the higher end of that range.
Can I prep the glaze in advance?
Absolutely! You can whisk the glaze ingredients together and store them in a jar in the fridge for up to a week. Just make sure to bring the glaze to room temperature before brushing it onto the hot chicken. If it is too cold, it might lower the surface temperature of the skin and interfere with the final caramelization process.
Baked Chicken Thighs
Course: Main CourseCuisine: AmericanDifficulty: medium4
servings10
minutes45
minutes440
kcal55
MinutesA specialized chicken recipe that avoids soggy skin by using a high-heat rendering process followed by a flash-glaze technique for a thick, caramelized finish.
Ingredients
4 large bone-in, skin-on chicken thighs
1 tablespoon olive oil
1 teaspoon kosher salt
1/2 teaspoon cracked black pepper
1 teaspoon garlic powder
1/2 teaspoon smoked paprika
1/2 cup thick barbecue sauce or honey-balsamic glaze
2 tablespoons brown sugar
1 tablespoon apple cider vinegar
Fresh thyme and parsley, finely chopped for garnish
Directions
- Preheat your oven to 425°F (218°C). High heat is the first step to preventing soggy skin.
- Pat the chicken thighs extremely dry with paper towels. Moisture is the enemy of crispiness.
- In a small bowl, mix the salt, pepper, garlic powder, and smoked paprika. Rub the chicken thighs with olive oil, then coat thoroughly with the spice seasoning.
- Place the thighs in a glass baking dish, skin side up. Ensure they are not crowded to allow for proper air circulation.
- Bake for 30-35 minutes without any sauce. This allows the skin to fully render its fat and become golden and crisp. The chicken is done when it reaches 165°F (74°C) in the thickest part.
- While the chicken bakes, whisk the barbecue sauce, brown sugar, and apple cider vinegar in a small bowl until smooth.
- Remove the dish from the oven. Using a brush, apply a thick layer of the glaze over the top of each thigh.
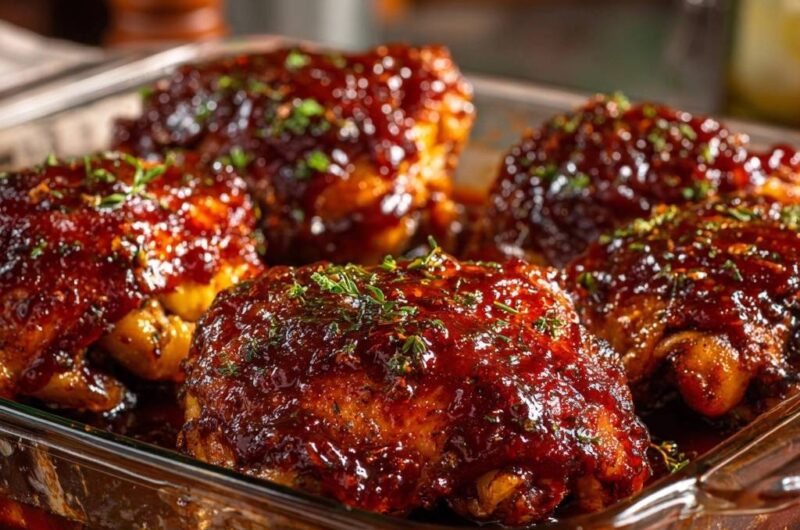
- Return to the oven for a final 8-10 minutes. The high sugar content in the glaze will bubble and caramelize quickly on the pre-crisped skin, creating the deep mahogany, sticky finish seen in the image.
- Remove from the oven and let the chicken rest for 5 minutes. This allows the juices to redistribute and the glaze to set. Garnish generously with fresh thyme and parsley before serving.
Notes
- The secret to the texture is waiting until the final 10 minutes to apply the sauce, preventing the skin from steaming and becoming rubbery.