Mastering the Cheesy Potato Casserole with a Crisp Topping
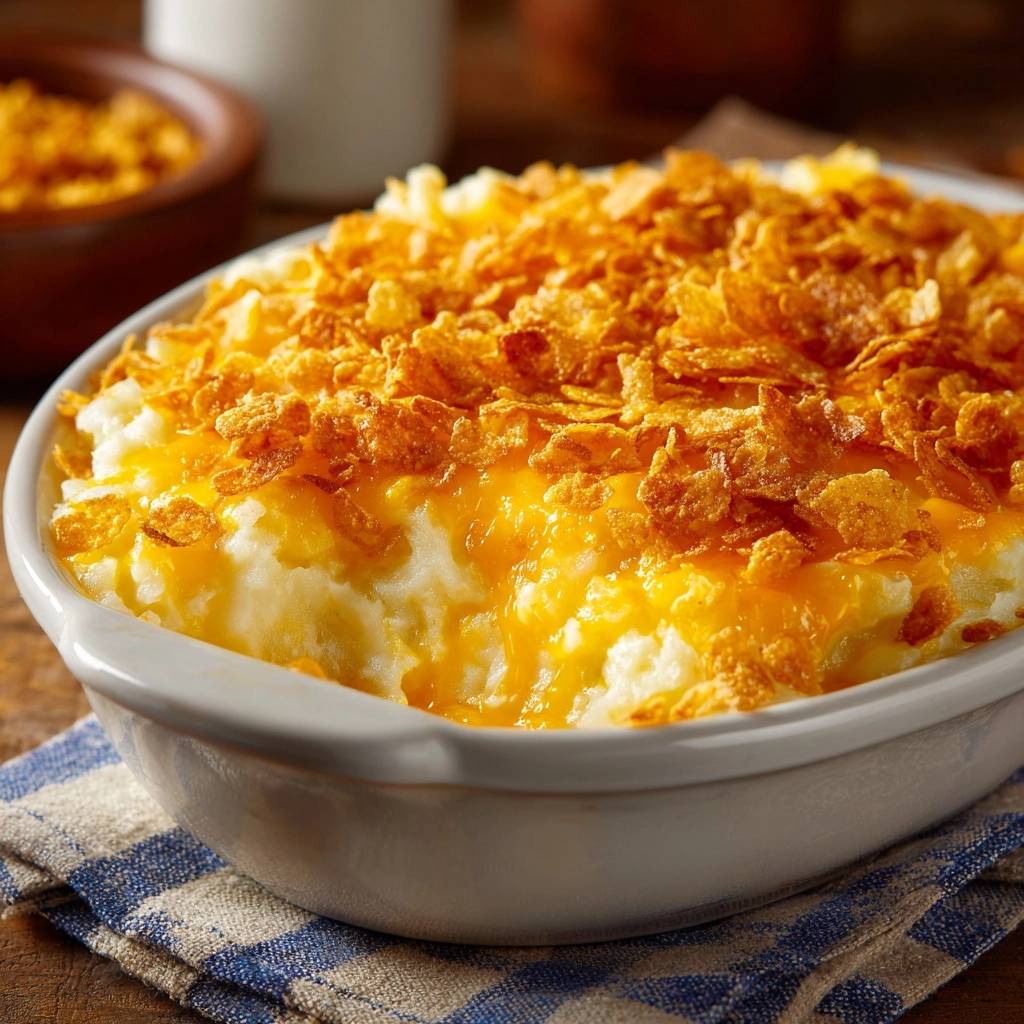
We’ve all been there. You pull a beautiful potato casserole out of the oven only to find the topping has turned into a soft, greasy mess instead of a satisfying crunch. It’s a heartbreaking moment when you’re expecting a golden shatter and get a soggy disappointment instead.
The secret to a perfect potato bake isn’t just the cheese; it’s the moisture barrier. By properly prepping your topping and controlling the internal steam, you can achieve that iconic texture every single time. This recipe fixes the mushy topping problem forever by focusing on the science of the crunch.
I’ve found that the biggest mistake most cooks make is ignoring the hidden water inside the potatoes. If you don’t physically remove that moisture before mixing, your casserole will steam from the inside out. The secret is a simple “squeeze dry” method that ensures your sauce stays thick and your topping stays crispy.
The Science of Preventing a Soggy Potato Bake
When you bake a dense dish like this, the heat turns the liquid inside the potatoes into steam. In a standard casserole, that steam rises and gets trapped under the topping, turning your cornflakes into a damp sponge. Therefore, you must create a way for that moisture to escape while protecting the cereal from absorbing any rising vapors.
The “Moisture Barrier” technique involves coating every single piece of crushed cornflake in melted butter before it ever touches the potatoes. Since oil and water don’t mix, the butter acts as a hydrophobic shield. This prevents the steam from penetrating the cereal, keeping it brittle and loud when you bite into it.
Furthermore, the starch in the potatoes acts as a thickening agent for the sour cream and soup. However, if there’s too much water, the starch becomes over-saturated and loses its ability to bind. By controlling the water content, you ensure the fats and proteins in the cheese create a velvety sauce rather than a watery pool.
Why Thawed Potatoes Require Mechanical Drying
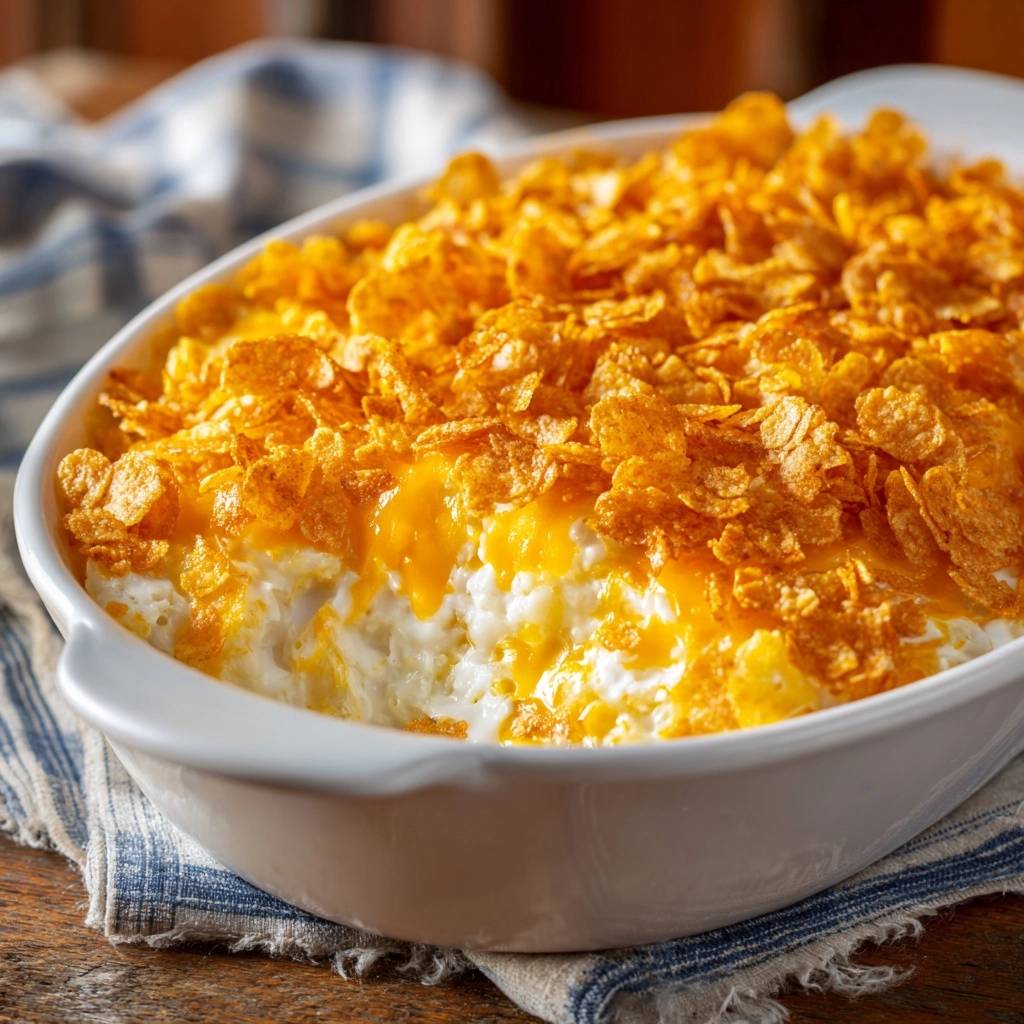
Potatoes have a complex cellular structure that holds a surprising amount of water. When potatoes are frozen, the water inside them expands and breaks the cell walls. Once they thaw, all that liquid is released and sits on the surface of the shreds or cubes.
You can’t just drain them in a colander; you need to use the “squeeze method.” Place your thawed potatoes between several layers of lint-free paper towels or a clean kitchen towel. Press down firmly to wring out the excess liquid until the towels are damp and the potatoes feel tacky to the touch.
Essential Components for the Creamy Base
Quality ingredients make a massive difference in how the fats emulsify during the bake. I always recommend using sharp cheddar cheese because it has a lower moisture-to-protein ratio than mild cheddar. This means it melts into a smooth, punchy sauce without breaking into an oily mess at high temperatures.
If you enjoy the savory richness of this dish, you will want to try this loaded cheesy hashbrown casserole for a crispy twist.
Sour cream provides the necessary acidity to cut through the heavy fats of the butter and cheese. It adds a subtle tang that balances the richness, ensuring the dish doesn’t feel too heavy on the palate. In addition, the thick consistency of sour cream helps hold the potatoes together during the serving process.
Using unsalted butter allows you to control the seasoning perfectly. Since the condensed soup and cheese already contain significant sodium, unsalted butter prevents the dish from becoming overly salty. Always melt the butter completely so it incorporates evenly into the sour cream base.
Choosing the Right Condensed Soup Base
Cream of chicken soup is the traditional choice because it offers a savory, umami-rich backbone that complements the potatoes. It acts as the primary binder, providing the viscosity needed to coat every potato shred. However, if you prefer a different flavor, cream of mushroom or cream of celery works just as well.
The key is the consistency of the soup. It should be thick enough to hold its shape but smooth enough to whisk. If you find the soup is too gelatinous, whisk it vigorously on its own before adding the other wet ingredients to break up any clumps.
The Role of Aromatics: Garlic and Onion Powder
While fresh onions and garlic are great in many dishes, powders are superior for this specific casserole. Fresh aromatics release water as they cook, which can contribute to the very sogginess we’re trying to avoid. Powders provide a concentrated punch of flavor without adding any extra liquid to the mix.
Using powders also ensures that the flavor is distributed evenly throughout the entire dish. You won’t end up with a big bite of onion in one scoop and nothing in the next. The fine texture of the spices blends seamlessly into the emulsified sauce for a consistent taste in every mouthful.
Step-by-Step: Building the Perfect Cheesy Potato Casserole
Building this dish is all about the order of operations. You want to create a stable emulsion before you ever introduce the potatoes. This ensures that every piece of potato is shielded by the sauce, which prevents them from drying out or becoming tough in the oven’s dry heat.
Phase 1: Preparing the Potato Foundation
Start by preheating your oven to 350 degrees F and greasing a 9 by 13 inch baking dish thoroughly. Once your potatoes are squeezed dry, place them in a large bowl. Use a folding motion with a rubber spatula rather than aggressive stirring to keep the potato structure intact.
If you’re using shredded potatoes, they can be quite fragile once thawed. Folding gently prevents them from turning into a mashed potato consistency. You want distinct pieces of potato held together by the sauce, which provides a much better mouthfeel and structural integrity when served.
Phase 2: Creating the Emulsified Sauce
In a separate bowl, whisk together the sour cream, condensed soup, and the half-cup of melted butter. Add your onion powder, garlic powder, and black pepper during this stage. Whisk until the mixture is completely smooth and looks like a thick, pale yellow cream.
This emulsion is the “glue” of your casserole. If you see streaks of butter or clumps of soup, keep whisking. A perfectly smooth sauce ensures that the fats don’t separate during the 45-minute bake, which is the main cause of a greasy finished product.
Phase 3: The Layering Logic
After folding the potatoes and 1.5 cups of cheese into the sauce, spread the mixture into your prepared dish. Now, here is a vital trick: sprinkle the remaining half-cup of cheese over the potatoes *before* you add the cornflakes. This creates a secondary glue layer.
This middle cheese layer acts as a heat buffer. It protects the creamy potato center from the direct heat of the topping while helping the cornflakes stick to the base. Without this layer, the topping often slides off the potatoes when you try to scoop it onto a plate.
The Butter-Coating Technique for Maximum Crunch
The “Fat-First” method is the absolute game-changer for this recipe. Most people just sprinkle dry cornflakes on top and drizzle butter over them, but that leaves dry spots that soak up steam. Instead, toss your lightly crushed cornflakes in a bowl with two tablespoons of melted butter first.
By tossing them beforehand, you ensure every single flake is encapsulated in fat. This creates a waterproof barrier that keeps the cereal crunchy even as the potatoes bubble underneath. It’s the difference between a topping that tastes like wet cardboard and one that has a loud, satisfying snap.
Don’t crush the cornflakes into a fine powder. You want small, irregular shards that create nooks and crannies for the butter to settle into. These larger pieces provide more surface area for browning, which results in a much deeper, toasted flavor after the bake.
Optimizing Oven Airflow and Heat Distribution
Baking at 350 degrees F is the sweet spot for this dish. It’s hot enough to caramelize the sugars in the cornflakes and bubble the cheese, but not so hot that the dairy in the sour cream curdles. Consistency is key, so make sure your oven rack is in the center position.
You must bake this casserole uncovered. Covering the dish with foil traps all the steam inside, which will immediately ruin your butter-coated topping. Leaving it open allows the excess moisture from the potatoes to evaporate into the oven, concentrating the flavors and crisping the exterior.
If you notice the cornflakes are browning too quickly, you can move the dish to a lower rack. However, if you’ve followed the butter-coating method, the flakes should be able to withstand the full 40 to 45 minutes of heat without burning. You’re looking for a deep mahogany gold color.
Troubleshooting Common Casserole Failures
If your casserole comes out runny, it almost always means the potatoes weren’t dried enough. However, you can sometimes save a runny dish by letting it sit for an extra 15 minutes. The starches will continue to absorb liquid as the temperature drops slightly, firming up the sauce.
If the edges are browning too fast while the center is still cold, your oven might have hot spots. You can rotate the dish halfway through the baking time to ensure even heat distribution. You’ll know the center is done when the sauce is bubbling vigorously around the edges and the middle feels firm when pressed.
Fixing an Overly Greasy Texture
A greasy texture usually happens if the cheese “breaks,” meaning the fat separates from the solids. This often occurs if you use pre-shredded cheese that is coated in too much potato starch or if the oven is too hot. To fix this, you can gently blot the surface with a paper towel before adding the topping.
In the future, try grating your own cheese from a block. Freshly grated cheese melts much more smoothly and has a better fat-to-moisture ratio. Additionally, ensure your sour cream is full-fat, as low-fat versions are more prone to breaking and weeping liquid under high heat.
Make-Ahead Strategies and Storage Logistics
This is a fantastic dish for holiday prep because you can assemble the potato and sauce base up to 24 hours in advance. Simply cover the dish tightly with plastic wrap and store it in the fridge. However, do not add the cornflake topping until you are ready to put it in the oven.
If you add the topping too early, the cereal will absorb moisture from the sauce while sitting in the fridge. When you’re ready to bake, take the dish out of the fridge for 30 minutes to take the chill off. Then, prepare the buttered cornflakes, sprinkle them on, and bake as directed.
Freezing the Casserole for Future Use
You can freeze the potato base quite successfully. Assemble the mixture in a freezer-safe foil pan, wrap it twice in heavy-duty foil, and freeze for up to three months. For the best results, thaw the base completely in the refrigerator before baking.
Never freeze the cornflake topping. It will become chewy and lose its structural integrity in the freezer. Always make a fresh batch of buttered cornflakes to add right before the final bake. This ensures the contrast between the creamy interior and crunchy exterior remains perfect.
Pairing Suggestions for a Balanced Meal
Because this casserole is incredibly rich and savory, it pairs best with proteins that have a bit of a char or a bright sauce. Roasted poultry or grilled lamb chops are excellent choices. The saltiness of the cheddar complements the natural sweetness of roasted meats beautifully.
To balance the plate, serve a side of acidic greens or a crisp salad. A simple arugula salad with a lemon vinaigrette or charred broccoli with a squeeze of lime helps cut through the dairy. These bright, sharp flavors prevent the meal from feeling overly heavy or one-dimensional.
The same principle applies when swapping potatoes for cauliflower, so try this creamy roasted cauliflower gratin for a lighter take.
Resting the Dish: The Final Structural Step
The hardest part of this recipe is waiting once it comes out of the oven. However, resting the dish for at least 10 minutes is a mandatory step. During this time, “carryover cooking” continues to set the center of the casserole without the risk of burning the top.
As the casserole cools slightly, the proteins in the cheese and the starches in the potatoes bond together. This creates a stable structure that allows you to serve clean, beautiful scoops. If you cut into it immediately, the sauce will be runny and the topping will slide off into the bottom of the dish.
How should I store and reheat leftovers?
Store any leftovers in an airtight container in the refrigerator for up to 4 days. To reheat and maintain the crunch, avoid the microwave if possible. Instead, place a portion in a small oven-safe dish and bake at 350 degrees F for 10-15 minutes. This helps the butter in the topping crisp back up, whereas a microwave will make the cornflakes chewy and soft.
What’s Next?
Try these delicious pairings:
- Minty Fruit Salsa with Crispy Pita Chips
- Mastering Loaded Chicken Club Baked Potatoes with Shatter-Crisp Skin
Why is my casserole watery at the bottom?
A watery bottom is almost always caused by excess moisture in the potatoes. Even if they look dry, frozen potatoes hold a lot of liquid. You must use the “squeeze method” with a towel to physically force the water out. Additionally, using low-fat sour cream or milk can contribute to a thinner sauce; stick to full-fat ingredients for the best structural results.
Can I use fresh potatoes instead of frozen?
Yes, you can use fresh potatoes, but you must par-boil them first. Peel and shred or cube the potatoes, then boil them in salted water for about 5-8 minutes until they are just barely tender but still firm. Drain them and pat them extremely dry. If you use raw potatoes without par-boiling, they won’t cook through in the 45-minute bake time and will release too much starch and water into the sauce.
What can I use if I don’t have cornflakes?
If you’re out of cornflakes, crushed Ritz crackers or panko breadcrumbs are the best substitutes. Use the same “Fat-First” technique by tossing them in melted butter before topping the casserole. Panko will give you a lighter, airier crunch, while Ritz crackers add a buttery, salty richness. Avoid using standard fine breadcrumbs, as they tend to absorb moisture too quickly and become sandy rather than crunchy.
Can I make this recipe without the condensed soup?
You can substitute the condensed soup with a thick homemade bechamel sauce. Melt 3 tablespoons of butter, whisk in 3 tablespoons of flour to make a roux, and slowly add 1 cup of whole milk or heavy cream. Cook until very thick, then season with salt, pepper, and a dash of chicken bouillon for flavor. This provides the same binding power and creamy texture as the canned version.
Cheesy Potato Casserole
Course: Side DishCuisine: AmericanDifficulty: easy12
servings20
minutes45
minutes320
kcal75
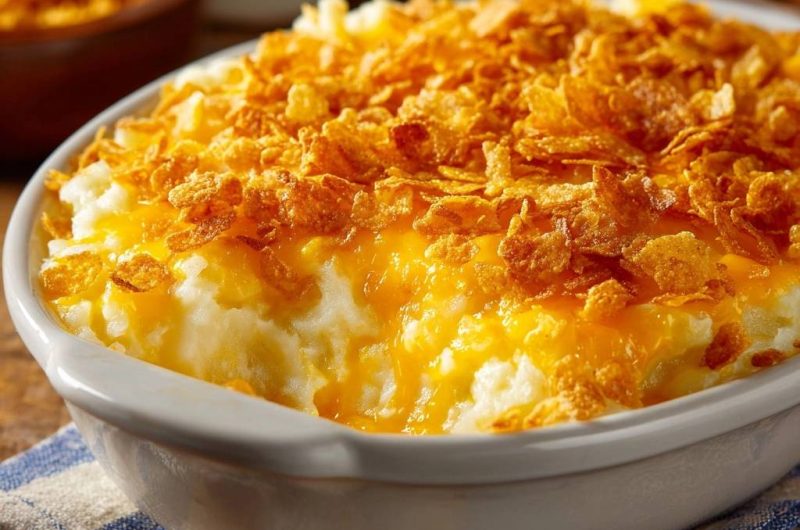
MinutesA rich and creamy potato bake featuring shredded potatoes, sharp cheddar, and a specialized cornflake topping designed to stay crunchy by preventing steam absorption.
Ingredients
32 ounces frozen shredded or cubed potatoes, thawed and patted dry
2 cups sharp cheddar cheese, shredded
1 cup sour cream
1 can (10.5 oz) condensed cream of chicken soup
1/2 cup unsalted butter, melted
1/2 teaspoon onion powder
1/2 teaspoon garlic powder
1/4 teaspoon black pepper
2 cups cornflakes cereal, lightly crushed
2 tablespoons additional melted butter for topping
Directions
- Preheat your oven to 350 degrees F. Grease a 9 by 13 inch baking dish.
- Crucial Step: Place the thawed potatoes between paper towels and squeeze out any excess moisture. Removing this water is the first step in preventing a soggy casserole.
- In a large mixing bowl, combine the sour cream, cream of chicken soup, 1/2 cup melted butter, onion powder, garlic powder, and black pepper. Whisk until completely smooth.
- Fold in the dried potatoes and 1.5 cups of the shredded cheddar cheese. Ensure the potatoes are well coated.
- Spread the mixture evenly into the prepared baking dish. Sprinkle the remaining 1/2 cup of cheese over the top in an even layer.
- To solve the soggy topping issue, do not just dump the cereal on top. Place the cornflakes in a bowl and toss them thoroughly with the 2 tablespoons of melted butter first. This coats each flake in a fat barrier that prevents the steam from the potatoes from softening the cereal during the bake.
- Spread the buttered cornflakes over the cheese layer.
- Bake uncovered for 40 to 45 minutes. Baking uncovered is essential as it allows excess moisture to escape, ensuring the topping stays crisp while the cheese underneath becomes perfectly bubbly and molten. The chicken is done when it reaches 165°F (74°C) in the thickest part.
- Let the casserole sit for 10 minutes before serving. This allows the starch to settle and the sauce to thicken, ensuring a clean scoop rather than a runny mess.
Notes
- The secret to the crunch is twofold: squeezing moisture out of the thawed potatoes and coating the cornflakes in melted butter before adding them to the dish. Always bake uncovered to allow steam to escape.