Mastering the Creamy Chicken and Mushroom Orzo Bake
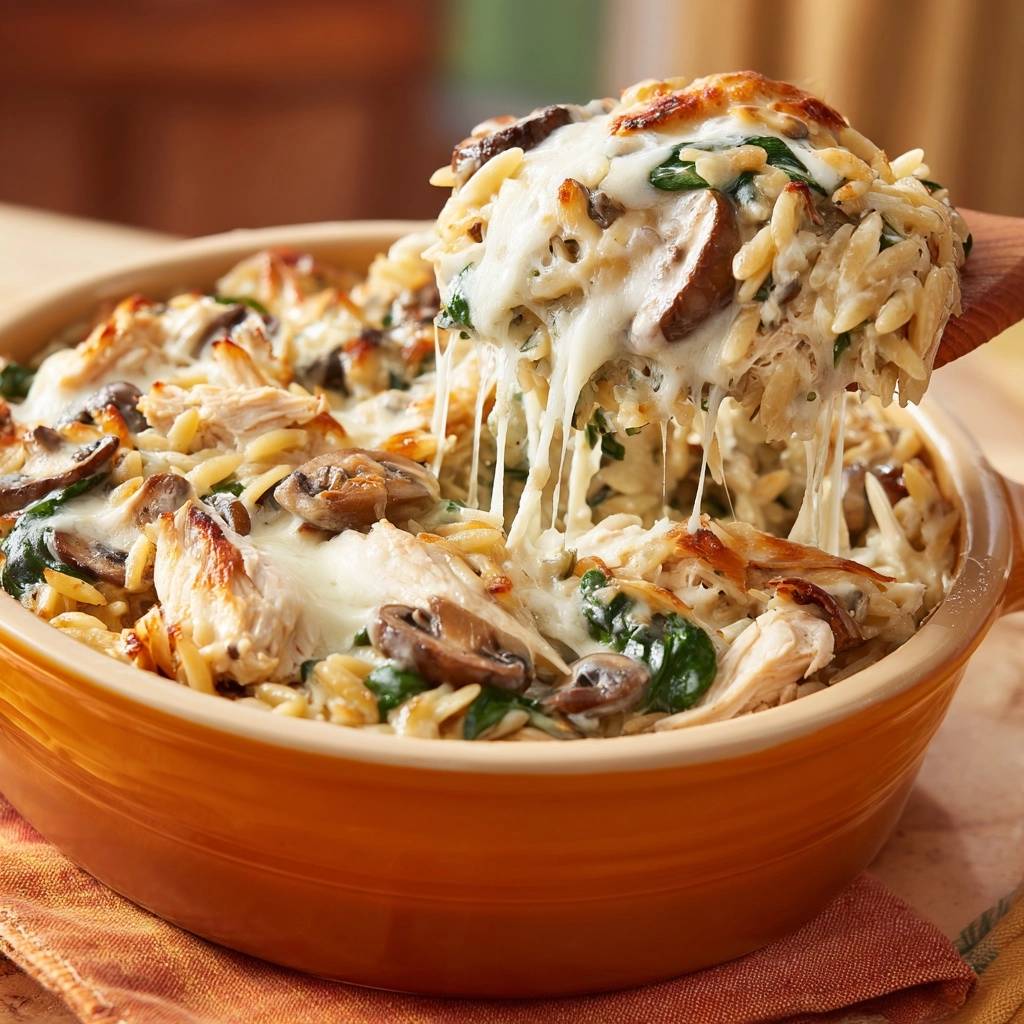
Most people shy away from pasta bakes because they’ve been burned by a tray of gummy, overcooked noodles that lost their soul in the oven. You know the texture I’m talking about—that soft, mushy consistency where you can’t tell where the pasta ends and the sauce begins. This Creamy Chicken and Mushroom Orzo Bake changes that narrative by treating the orzo like a fine risotto rather than a standard boiled pasta.
The beauty of this dish lies in the contrast between the golden, seared chicken breasts and the earthy, caramelized cremini mushrooms. By using a specific liquid-to-pasta ratio and a high-heat baking method, we create a sauce that is silky and rich without being heavy. It’s the kind of meal that feels like a fancy bistro dinner but comes together in one skillet, making it a perfect candidate for your weeknight rotation.
The real secret to success here is the “starch barrier” we create before any liquid ever touches the pan. I’ve found that toasting the dry orzo in olive oil until it smells nutty and looks golden brown is the only way to ensure every grain stays distinct and al dente. This simple five-minute step prevents the pasta from absorbing moisture too aggressively, which is exactly how you avoid that dreaded mushy texture.
The Secret to Non-Mushy Orzo Texture
Orzo is a unique pasta shape that behaves differently than penne or rigatoni because of its small size and high surface-area-to-volume ratio. Because it’s so tiny, it releases starch quickly, which can turn a sauce into a thick paste if you aren’t careful. To master this dish, you have to understand the science of the Maillard reaction as it applies to dry pasta.
When you toss the dry orzo into the hot skillet with the mushroom drippings, the heat toasts the exterior of each grain. This creates a protective coating that slows down the hydration process once the chicken broth and heavy cream are added. Instead of the pasta immediately soaking up the liquid and swelling, it cooks gradually, maintaining a firm “bite” even after twenty minutes in a hot oven.
Furthermore, this toasting adds a layer of flavor you just can’t get from boiling. It introduces a toasted, popcorn-like aroma that complements the woodsy flavor of the mushrooms. If you skip this step, the orzo will likely clump together. By taking the time to stir the dry grains until they turn a pale amber color, you’re guaranteeing a professional, restaurant-quality texture every single time.
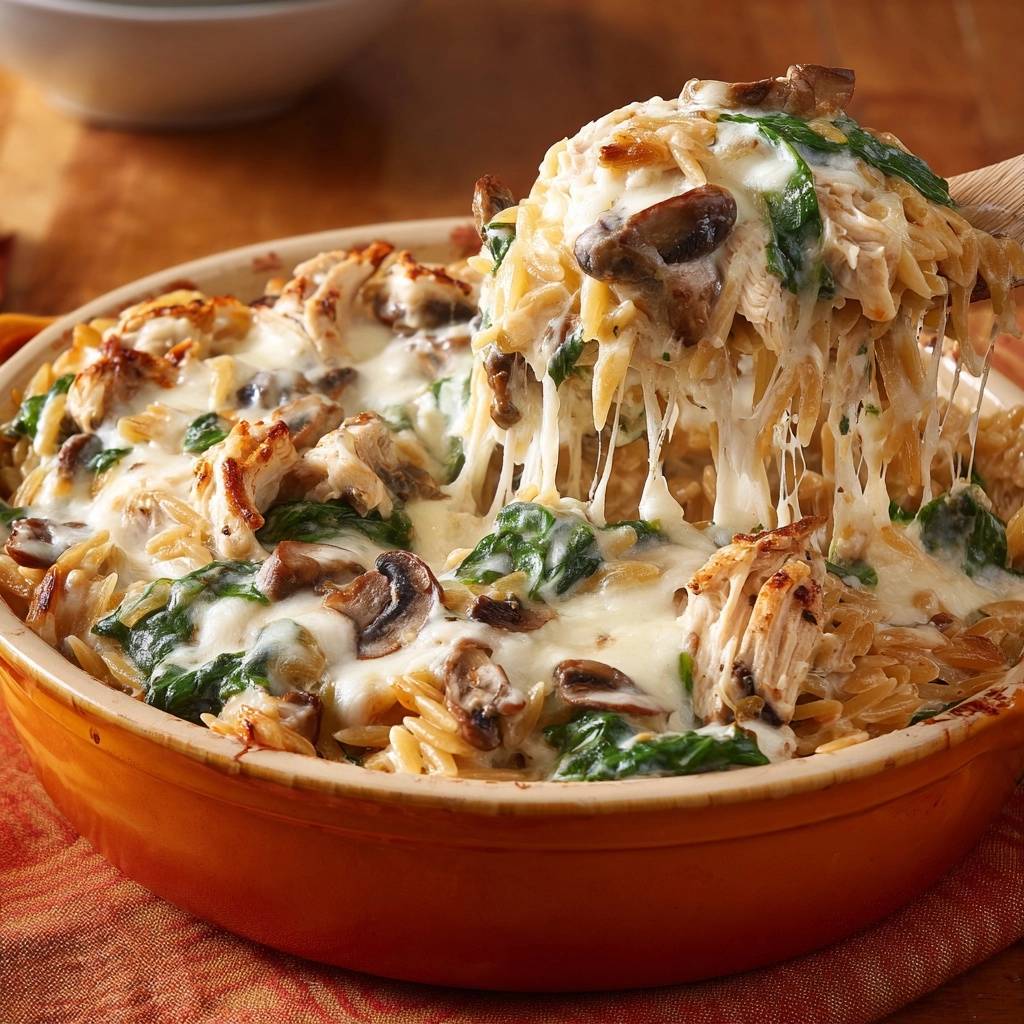
Essential Components for the Creamy Mushroom Base
Quality ingredients are the backbone of this bake, starting with the chicken. While I use boneless skinless chicken breasts for a leaner profile, you can easily swap in chicken thighs if you prefer a juicier, higher-fat meat. The key is the sear; you want a deep brown crust on the outside to lock in the moisture before the chicken finishes cooking inside the bubbling sauce.
For the mushrooms, I always reach for Cremini, often labeled as Baby Bellas. They have a much lower water content and a significantly deeper flavor than standard white button mushrooms. When they hit the hot oil, they develop a meaty texture that stands up well to the creamy sauce. If you use white mushrooms, they tend to disappear into the dish, whereas Creminis hold their own against the bold garlic and shallots.
The liquid ratio is perhaps the most critical part of the recipe. We use a 2:1 ratio of liquid (broth and cream) to dry pasta. This might look like too much liquid when you first pour it in, but don’t panic. The orzo needs that volume to hydrate properly in the oven. Using low-sodium chicken broth is a smart move here, as it allows you to control the saltiness, especially since we are adding salty Parmesan and Mozzarella later on.
Speaking of cheese, the combination of Mozzarella and Parmesan is intentional. Mozzarella provides that iconic, stretchy cheese pull and a mild creaminess that everyone loves. Parmesan, on the other hand, acts as a seasoning agent. It adds a sharp, salty punch and helps thicken the sauce naturally as it melts into the heavy cream. Always grate your Parmesan fresh if you can; the pre-shredded stuff is coated in potato starch which can make your sauce feel gritty.
Selecting and Preparing Fresh Spinach and Aromatics
Shallots are the unsung heroes of this dish, offering a delicate sweetness that onions simply can’t match. They melt into the sauce without leaving behind large, crunchy chunks. When preparing your aromatics, make sure the garlic is minced finely so it distributes evenly, providing a fragrant backbone to every spoonful without being overwhelming.
When it comes to the spinach, freshness is everything. Baby spinach is preferred because the stems are tender and don’t need to be removed. A quick tip for the mushrooms: never soak them in water to clean them. Mushrooms act like sponges and will absorb the water, preventing them from browning. Instead, use a damp paper towel to wipe away any dirt. This ensures they sear perfectly in the pan.
Step-by-Step: Searing Chicken and Building Flavor
The first step to a flavorful bake is the “fond”—those little brown bits stuck to the bottom of your skillet after searing the chicken. Season your chicken generously with salt, pepper, and onion powder before it hits the pan. You want the oil to be shimmering but not smoking. Let the chicken sit undisturbed for at least five minutes to develop a dark golden crust.
Once the chicken is seared, remove it to a plate to rest. This resting period is vital because it allows the juices to redistribute. If you cut the chicken immediately, all that flavor will run out onto the cutting board, leaving you with dry meat in your bake. While the chicken rests, those browned bits in the pan are waiting to be deglazed and incorporated into your orzo.
Developing the Mushroom and Orzo Foundation
After removing the chicken, add the remaining oil and drop in your sliced mushrooms. The biggest mistake here is crowding the pan or stirring too much. Spread them out in a single layer and let them sit. You’ll hear them sizzle, and eventually, they will release their moisture and start to brown. This is where the “earthy” flavor of the dish is born.
Once the mushrooms are golden, stir in the shallots and garlic for just a minute. Then, add the dry orzo. You’ll notice the pasta picking up the leftover fats and flavors from the chicken and mushrooms. Keep the pasta moving so it doesn’t burn. When the orzo smells like toasted nuts and looks slightly translucent at the edges, you’re ready to add your liquids and deglaze the pan.
The Assembly: Integrating Greens and Dairy
Pour in the chicken broth and heavy cream, using a wooden spoon to scrape up every bit of that flavorful fond from the bottom. As the liquid comes to a simmer, stir in the Parmesan. It will melt quickly, creating a light, velvety base. Now, fold in your shredded chicken and the fresh baby spinach. It will look like a lot of spinach at first, but it wilts down to almost nothing in seconds.
Before the dish goes into the oven, check the consistency. The sauce should be thin enough to pour but starting to look slightly creamy. If you’re using an oven-safe skillet, you’re all set. If not, carefully pour the mixture into a baking dish. Make sure the orzo is submerged so it cooks evenly. If the grains are sitting on top of the liquid, they will stay crunchy and hard.
Baking for the Perfect Golden Crust
Set your oven to 400°F. This high temperature is necessary to achieve those beautiful toasted brown spots on the mozzarella. While the cheese melts and browns, the orzo is busy absorbing the seasoned cream and broth. The 15 to 20-minute bake time is the “sweet spot” where the pasta reaches perfect tenderness without losing its shape.
If you enjoy this toasted finish, try the same technique with this one-pan sausage and green bean orzo.
When you pull the dish out, the sauce might still look a little loose around the edges. Do not put it back in! This is the most important part: let the dish rest for 5 to 10 minutes on the counter. During this time, the orzo will finish soaking up the remaining liquid, and the sauce will thicken into a rich, cohesive glaze. This resting period is the difference between a watery bake and a creamy masterpiece.
Troubleshooting Common Orzo Bake Issues
If you find your sauce is too thin after the resting period, it usually means the liquid wasn’t simmering hot enough when it went into the oven. Next time, ensure the broth and cream are bubbling before you add the cheese and chicken. You can also try adding an extra tablespoon of Parmesan to help bind the sauce together during the final minutes of baking.
On the flip side, if the orzo is still crunchy, it likely wasn’t fully submerged in the liquid. To fix this mid-bake, you can add a splash more broth and cover the dish with foil for the last 5 minutes. This creates steam that will soften the stubborn grains. If the chicken feels dry, try slicing it into thicker chunks next time; smaller pieces cook faster and can dry out during the oven phase.
Flavor Variations and Ingredient Swaps
This recipe is incredibly versatile. If you aren’t a fan of spinach, kale makes a wonderful substitute, though you should sauté it slightly longer with the mushrooms to soften the leaves. For a pop of sweetness and color, frozen peas can be stirred in right before the cheese topping. They don’t need any extra cook time and add a nice “snap” to the texture.
You can also play with the herb profile. While thyme is a classic pairing for mushrooms, fresh rosemary or sage can provide a deeper, more autumnal flavor. If you want to change the protein, leftover roasted turkey works beautifully here. For a vegetarian version, simply omit the chicken and use vegetable broth; the mushrooms provide plenty of “meatiness” to keep the dish satisfying.
Optimal Side Dish Pairings
Because this bake is rich and creamy, it pairs best with sides that offer a bit of acidity or crunch. A simple arugula salad tossed in a bright lemon vinaigrette is my go-to choice. The peppery greens cut right through the heavy cream and cheese, refreshing your palate between bites. It keeps the meal from feeling too heavy.
Roasted balsamic Brussels sprouts or steamed broccoli with a squeeze of lime are also excellent options. If you want to lean into the comfort food vibe, a piece of crusty sourdough bread is perfect for swiping up any leftover sauce on your plate. Just stay away from very starchy sides like potatoes, as the orzo already provides plenty of hearty carbohydrates.
Make-Ahead Instructions and Storage
You can prepare this dish up to 24 hours in advance, but there is a trick to it. Sauté the chicken, mushrooms, and aromatics, then mix them with the dry, toasted orzo. Store the liquid components (broth and cream) separately. When you’re ready to eat, combine them and bake. This prevents the pasta from sitting in the liquid and getting soggy overnight.
Leftovers store well in an airtight container in the refrigerator for up to three days. When reheating, the orzo will have absorbed almost all the sauce. To bring back that creamy texture, add a tablespoon or two of broth or water before microwaving or heating on the stovetop. This loosens the sauce and prevents the pasta from becoming a solid block.
Expert Tips for Professional Results
For the absolute best results, use room temperature heavy cream. Cold cream can sometimes cause the sauce to break or curdle when it hits the hot skillet. Also, invest in a heavy-bottomed cast iron skillet. It holds heat much better than thin stainless steel, ensuring your chicken gets a better sear and your orzo bakes evenly without hot spots.
Finally, don’t be afraid of the “fond.” If the bottom of your pan looks dark after searing the chicken, that’s flavor, not a mess. As soon as you pour in the broth, those bits will dissolve and turn your sauce a beautiful golden-brown color. That depth of flavor is what separates a home-cooked meal from a chef-level dish.
How do I prevent the orzo from getting mushy?
The most effective way to prevent mushy orzo is to toast the dry pasta in olive oil for 2-3 minutes before adding any liquid. This creates a starch barrier on the outside of the grain. Additionally, ensure you follow the 2:1 liquid-to-pasta ratio strictly and allow the dish to rest for 10 minutes after baking so the sauce can set naturally without overcooking the pasta.
Can I use a different type of pasta?
You can use other small pasta shapes like ditalini or even arborio rice (though rice will require more liquid and a longer cook time). However, larger shapes like penne or fusilli will not work with this specific liquid ratio and bake time. If you change the pasta shape, you will likely need to boil the pasta separately first, which changes the entire “one-pan” nature of the recipe.
How should I store and reheat leftovers?
Store leftovers in an airtight container in the fridge for up to 3 days. To reheat, place a portion in a bowl and add a splash of chicken broth or water. Cover and microwave for 1-2 minutes, stirring halfway through. The extra liquid is necessary because the orzo continues to absorb moisture as it sits, and the added broth restores the original creamy consistency.
Why is my sauce watery after taking it out of the oven?
It is completely normal for the sauce to look a bit loose when it first comes out of the oven. The orzo is very hot and will continue to “drink” the liquid as it cools down. Give the dish a full 10-minute rest on the counter. If it is still watery after that, it may be because the mushrooms weren’t seared long enough to release their internal moisture before the liquid was added.
Can I substitute the heavy cream?
You can use half-and-half for a lighter version, though the sauce will be slightly thinner. I do not recommend using skim or 1% milk, as the high heat of the 400°F oven can cause low-fat milk to curdle and separate. If you need a dairy-free option, full-fat canned coconut milk is the best substitute for maintaining that thick, velvety mouthfeel.
What is the best way to shred the chicken?
After searing the chicken and letting it rest for 5 minutes, use two forks to pull the meat apart along the natural grain. Alternatively, you can slice the breasts into thin strips or bite-sized cubes. The key is to ensure the pieces are uniform in size so they distribute evenly throughout the orzo, ensuring you get a bit of chicken in every single bite.
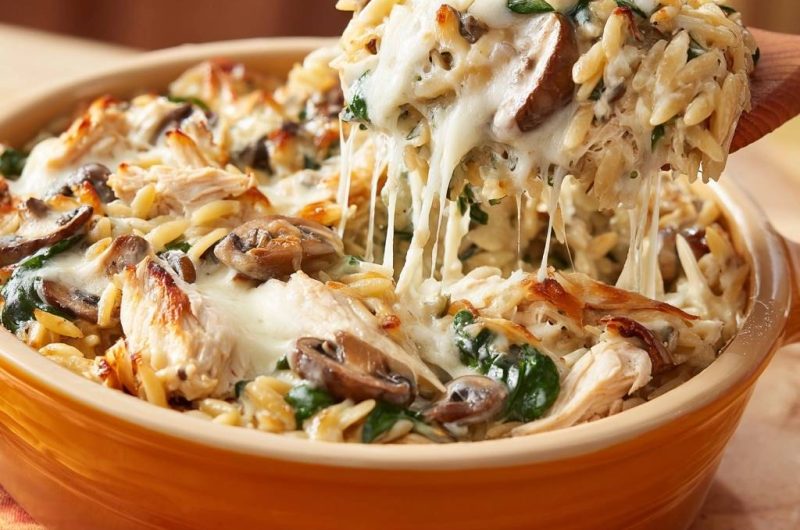
Chicken Mushroom Orzo Bake
Course: Main CourseCuisine: AmericanDifficulty: medium6
servings15
minutes35
minutes485
kcal50
MinutesThis one-pan meal features seared chicken, earthy cremini mushrooms, and fresh spinach tossed with toasted orzo in a silky Parmesan cream sauce, topped with melted mozzarella.
Ingredients
1.5 pounds boneless skinless chicken breasts
1.5 cups dry orzo pasta
10 ounces cremini mushrooms, sliced
4 cups fresh baby spinach
2 cups low sodium chicken broth
1 cup heavy cream
1/2 cup grated Parmesan cheese
2 cups shredded mozzarella cheese
3 cloves garlic, minced
1 small shallot, finely diced
3 tablespoons olive oil, divided
1 teaspoon dried thyme
1/2 teaspoon onion powder
Salt and black pepper to taste
Directions
- Preheat your oven to 400°F (200°C).
- Season the chicken breasts with salt, pepper, and onion powder. Heat 1 tablespoon of olive oil in a large oven-safe skillet over medium-high heat. Sear the chicken for 5-6 minutes per side until golden brown and cooked through. Remove from the pan, let rest for 5 minutes, then shred or slice into bite-sized pieces.
- In the same skillet, add the remaining 2 tablespoons of olive oil. Add the sliced mushrooms in a single layer. Sear them without stirring for 3 minutes to develop a deep golden crust. Add the shallots and garlic, sautéing for 1 minute until fragrant.
- Add the dry orzo directly to the pan with the mushrooms. Toast the dry pasta for 2-3 minutes, stirring frequently, until it smells nutty and looks golden. This toasting creates a starch barrier that prevents the pasta from becoming mushy.
- Pour in the chicken broth, heavy cream, and dried thyme. Bring to a simmer, scraping the bottom of the pan to release the flavorful browned bits (fond). Stir in the Parmesan cheese until melted.
- Fold the shredded chicken and fresh baby spinach into the liquid. The spinach will wilt down quickly.
- If your skillet is not deep enough or oven-safe, transfer the mixture to a 9×13 inch baking dish. Ensure the orzo is evenly distributed and submerged in the liquid.
- Top the dish with the shredded mozzarella cheese. Bake for 15 to 20 minutes until the cheese is bubbly and shows golden-brown toasted spots as seen in the image.
- Remove from the oven. The sauce may look slightly loose, but the orzo will finish absorbing the remaining liquid as it rests for 5-10 minutes. This ensures a perfect, creamy consistency without the pasta becoming gummy.
Notes
- Toasting the dry orzo for 2 to 3 minutes creates a starch barrier that prevents the pasta from becoming gummy. Let the dish rest for 5 to 10 minutes after baking to allow the sauce to reach the perfect consistency.