Mastering the Crispy Cauliflower Crust Margherita Pizza
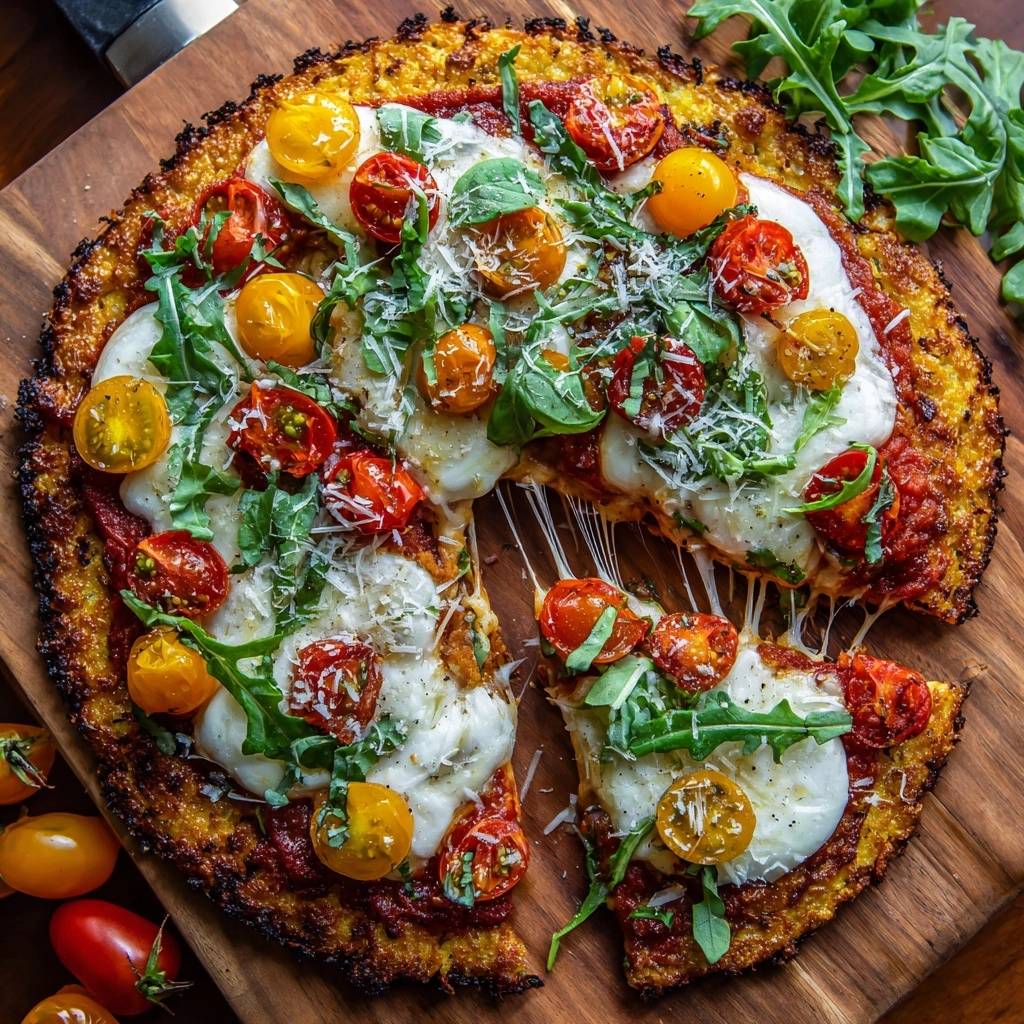
Most people approach cauliflower pizza with a mix of hope and hesitation. You want that low-carb lifestyle, but you’re tired of eating a “pizza” that requires a fork and knife because the middle is a soggy, weeping mess. I’ve been there, staring at a limp slice that looks nothing like the sturdy, golden triangles you see in professional photos.
The secret to a crust you can actually hold in your hand isn’t a mystery; it’s a matter of physics. By focusing on aggressive moisture removal and high-heat par-baking, we can create a base with deep golden, caramelized edges and a firm center. This recipe transforms the humble vegetable into a structural masterpiece that stands up to heavy toppings without folding under pressure.
If you want that satisfying crunch, the most important tip I can give you is to ignore the clock and trust your hands. The cauliflower must be bone-dry before it ever touches an egg. When you think you’ve squeezed out all the water, squeeze it one more time. That extra effort is the difference between a mushy failure and a crispy, handheld success.
The Science of Moisture in Cauliflower Crust
Cauliflower is roughly 92% water, which is the primary enemy of a crispy crust. When you apply heat to cauliflower, the cellular walls break down and release all that internal liquid. If you simply mix raw or lightly steamed cauliflower into a dough, that water stays trapped, steaming the crust from the inside out as it bakes.
Ricing the cauliflower is just the first step in breaking those cells open. However, the real work happens during the cooling phase. As the steamed rice cools, the steam condenses back into liquid, making it easier to extract. If you skip the cooling period, you’ll burn your hands and leave too much moisture behind, leading to a limp, pale texture.
During the par-baking process, we rely on rapid evaporation. By using a high temperature of 425°F, we force any residual moisture to turn into steam and escape before the proteins in the egg and cheese set. This creates a dense, tight crumb rather than a porous, wet one. Without this deliberate dehydration, your pizza will never achieve that “snap” we all crave.
The Double-Squeeze Technique for Maximum Crispness
To get the best results, you need a clean kitchen towel or a sturdy piece of cheesecloth. After steaming and cooling your cauliflower, pile it into the center of the cloth. Gather the corners and twist the top until the bundle is tight. Now, use all your strength to squeeze. You’ll be shocked at how much green-tinged water pours out.
Don’t stop after the first round. Open the towel, fluff the cauliflower pulp with your fingers to reposition the damp bits, and then twist and squeeze again. You should aim to remove at least 1/2 to 3/4 cup of liquid. When you’re finished, the cauliflower should look like dry, crumbly almond flour rather than a wet mash.
Essential Components for a Firm Pizza Base
Every ingredient in this crust serves a structural purpose. The egg is your primary protein binder; as it cooks, it creates a web that holds the cauliflower granules together. Without it, the crust would simply crumble into a pile of warm salad. I always use a lightly beaten egg to ensure it incorporates evenly into the dry pulp.
The choice of cheese is equally vital. You must use low-moisture shredded mozzarella for the dough itself. Fresh mozzarella contains too much water and will ruin your hard work. The mozzarella provides the “stretch” and chew, while the grated parmesan adds a salty punch and helps the crust harden as it cools.
For flavor, we use dried oregano and garlic powder. Since this crust is vegetable-based, it needs a heavy hit of seasoning to mimic the savory profile of traditional bread. These dry spices are preferred over fresh herbs in the base because they don’t add any additional hydration to the dough mixture.
Selecting the Right Cauliflower and Cheeses
A fresh, heavy head of cauliflower is usually the best starting point. Look for tight florets without brown spots. If you’re in a rush, pre-riced bags from the produce section work well, but be wary of frozen riced cauliflower. Frozen versions often have even more water due to the blanching and freezing process.
If you do use frozen cauliflower, you must thaw it completely and perform a “triple squeeze.” The parmesan-mozzarella blend is non-negotiable because the parmesan acts as a drying agent. It has a lower fat-to-protein ratio than mozzarella, which helps the crust stay rigid even when it’s hot out of the oven.
Step-by-Step: Engineering the Perfect Crust
When you mix your dry cauliflower pulp with the egg and cheeses, the dough should feel cohesive, almost like a soft cookie dough. If it feels slimy, you didn’t squeeze enough water out. When you press it onto the parchment paper, aim for a consistent 1/4 inch thickness. This is the “Goldilocks” zone for cauliflower pizza.
If the dough is too thin, the edges will burn before the center sets. If it’s too thick, the middle will stay soft and doughy. Use your fingers to build a slight rim around the edge. This creates a dam for your sauce and gives you that classic pizza aesthetic. Brushing this rim with olive oil is the secret to getting those dark, caramelized edges.
The tactile experience of shaping the dough is quite satisfying. It won’t have the elasticity of wheat dough because there’s no gluten, so you have to “pat” it into shape rather than stretching it. Ensure there are no holes in the base, or the sauce will seep through and stick to the parchment paper.
The Role of High-Heat Par-Baking
You must bake the crust alone before adding a single drop of sauce. This is called par-baking, and it’s the only way to ensure the bottom is cooked through. If you put toppings on raw cauliflower dough, the moisture from the sauce and cheese will soak into the crust, making it impossible to crisp up.
Using a preheated pizza stone or an inverted baking sheet creates an immediate sear. When the parchment hits that hot surface, the bottom of the crust begins to dehydrate and brown instantly. This thermal shock is what gives the pizza its structural integrity, allowing you to eventually pick it up with one hand.
Assembling the Margherita Toppings
Once your crust is a deep golden brown, it’s time for the Margherita toppings. Since we’ve worked so hard to remove moisture, don’t add it back with a watery sauce. Use a thick pizza sauce or even a tomato paste-based spread. A thin, even layer is all you need to provide that bright, acidic contrast to the nutty crust.
For the cheese, fresh mozzarella pearls or torn buffalo mozzarella are traditional. However, because these are high-moisture cheeses, place them strategically. Don’t carpet the entire pizza in cheese; leave space for steam to escape. Halved cherry tomatoes add bursts of sweetness without the heavy water content of large tomato slices.
Achieving the Caramelized Golden Edge
The beautiful dark edges you see in professional photos are the result of the Maillard reaction. The proteins in the cheese and egg react with the natural sugars in the cauliflower under high heat. Brushing the edges with olive oil intensifies this process, creating a savory, toasted flavor profile that mimics a wood-fired oven.
If you’re after that same golden-brown crispiness in a sweet treat, try these sunny pineapple crumble bars.
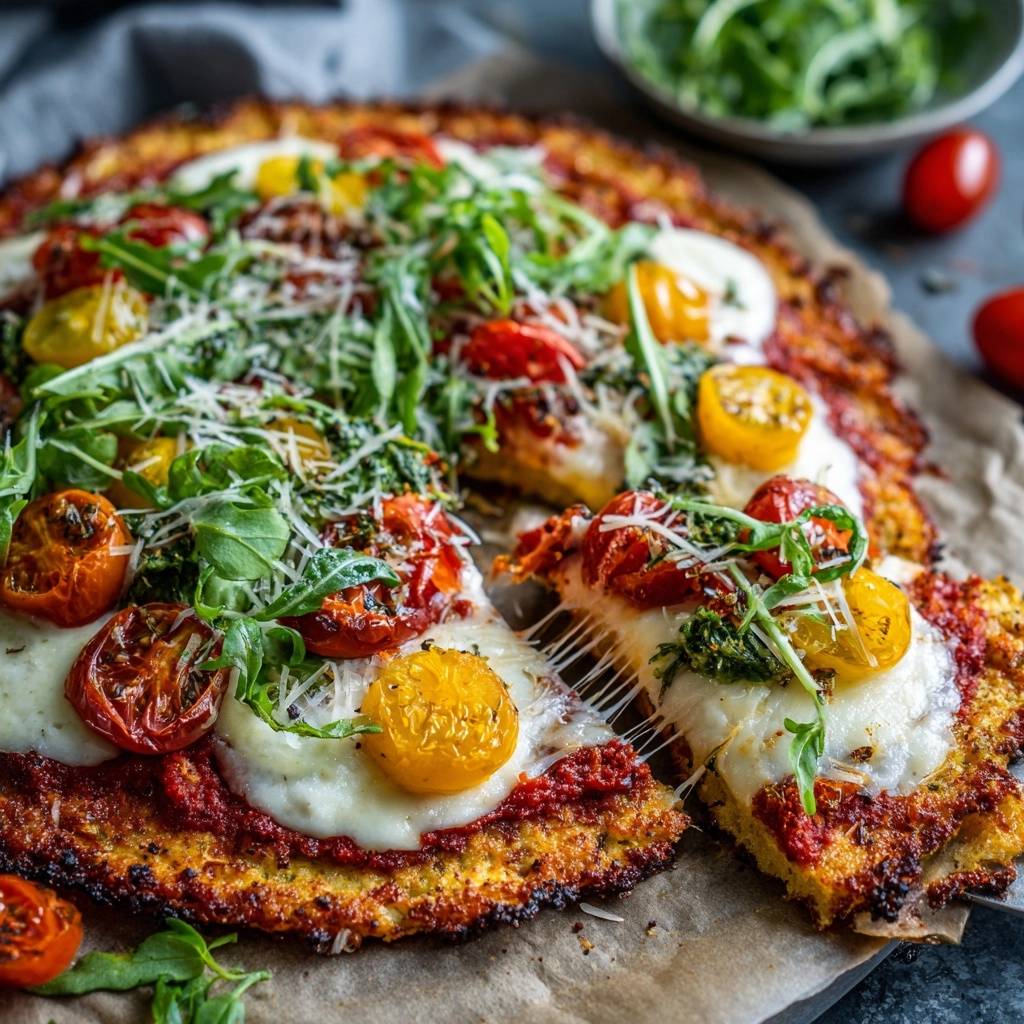
For the final touch, I love to use the broiler for the last 60 seconds of cooking. This toasts the mozzarella pearls until they have those gorgeous brown spots and ensures the cherry tomatoes are just beginning to blister. Keep a close eye on it, though, as the transition from “perfectly toasted” to “burnt” happens in a heartbeat.
Troubleshooting Your Cauliflower Pizza
If your crust sticks to the parchment paper, it’s usually because the paper is low quality or the crust wasn’t fully cooked. Always use high-quality greaseproof parchment. If you find the edges are browning too fast while the center is still soft, lower the oven temperature by 25 degrees and bake it for a few minutes longer.
Another common issue is a “foul” smell. This happens if the cauliflower is over-steamed before being squeezed. Stick to the 5-minute steaming limit. If the crust feels floppy when you first pull it out, don’t panic. It needs a few minutes of resting time to firm up as the cheese and egg proteins stabilize.
Why Your Crust Might Still Be Soft
Oven calibration is a frequent culprit. Many home ovens run 20 degrees cooler than the dial suggests. If your crust is consistently soft, try using an oven thermometer to verify the heat. Also, different varieties of cauliflower can have varying sugar contents, which affects how quickly they brown and set.
The most overlooked step is the resting period. You must let the pizza sit for at least 2 minutes before slicing. During this time, the melted cheese in the base acts like a cooling glue. If you cut into it immediately, the steam will escape all at once, and the structural integrity will collapse.
Flavor Variations and Herb Infusions
Once you master the base, you can get creative. If you like heat, add a teaspoon of red pepper flakes directly into the dough. You can also swap the arugula for baby spinach, though I recommend tossing the greens in a little lemon juice and olive oil first to give them a bright, peppery pop.
The type of tomato you use changes the vibe significantly. San Marzano tomatoes offer a deep, earthy sweetness, while grape tomatoes provide a more acidic, fresh bite. Just remember the golden rule: whatever you add, make sure it isn’t dripping with water. Pat your toppings dry with a paper towel if necessary.
Make-Ahead Strategies and Storage
You can absolutely make these crusts in advance. Par-bake the crusts as directed, let them cool completely, and then wrap them tightly in plastic wrap. They stay fresh in the fridge for 3 days or in the freezer for up to a month. This makes weeknight dinners incredibly fast since the hard work is already done.
When you’re ready to eat, don’t reach for the microwave. Microwaves are the enemy of crispy cauliflower. Instead, reheat the pizza in a hot oven or a toaster oven at 400°F until the cheese is bubbly again. This restores the crunch and prevents the crust from becoming rubbery.
Expert Tips for Pizza Success
To check for doneness, use the “flick test.” Gently flick the center of the par-baked crust with your finger. It should feel firm and sound hollow, not soft or damp. Also, always use fresh basil for the garnish. Dried basil can’t compete with the aromatic oils of fresh leaves, which should be added after the pizza leaves the oven.
When it comes to slicing, a pizza rocker is often better than a traditional wheel. A wheel can sometimes “drag” the cauliflower crust if it isn’t perfectly crisp. A rocker blade cuts straight down, preserving the beautiful arrangement of your mozzarella pearls and tomatoes without tearing the base.
Can I use a different vegetable base?
You can use broccoli or zucchini, but cauliflower is the gold standard for a reason. Broccoli has a much stronger flavor that can overpower the toppings, and zucchini contains even more water than cauliflower, making it twice as hard to get crispy. Cauliflower provides the most neutral, bread-like canvas for your pizza.
How do I prevent the toppings from sliding off?
The key is the sauce-to-crust ratio. Because cauliflower crust is denser than flour-based dough, it can’t absorb excess liquid. Use about half the amount of sauce you would put on a traditional pizza. If the toppings are sliding, you likely used too much sauce or a cheese that was too oily.
Is a pizza stone absolutely necessary?
While a pizza stone is great for heat retention, an inverted baking sheet is a fantastic hack. Simply flip a heavy-duty baking sheet upside down and let it preheat in the oven. This provides a large, flat, hot surface that mimics the effects of a stone, ensuring the bottom of your crust gets that essential sear.
What is the best way to reheat leftovers?
The absolute best way to revive a leftover slice is in a cast-iron skillet. Place the cold pizza in a dry skillet over medium heat. Cover it with a lid for 2 minutes to melt the cheese, then remove the lid for another minute to let the bottom crisp back up. It will taste even crunchier than it did the first time.
Crispy Cauliflower Crust Margherita Pizza
Course: Main CourseCuisine: AmericanDifficulty: medium2
servings20
minutes30
minutes340
kcal50
MinutesA low-carb alternative to traditional pizza that solves the soggy bottom problem through moisture removal and high-heat par-baking. The result is a firm, golden-brown crust topped with classic Margherita ingredients like fresh mozzarella, basil, and tomatoes.
Ingredients
1 large head cauliflower, riced (about 4 cups)
1 large egg, lightly beaten
1/2 cup shredded mozzarella cheese (low-moisture)
1/4 cup grated parmesan cheese, plus extra for garnish
1/2 teaspoon dried oregano
1/2 teaspoon garlic powder
1/4 teaspoon salt
1/2 cup thick pizza sauce or tomato paste-based spread
6 ounces fresh mozzarella pearls or torn buffalo mozzarella
1 cup red and yellow cherry tomatoes, halved
1/2 cup fresh arugula
Fresh basil leaves for garnish
1 tablespoon olive oil (for brushing edges)
Directions
- Preheat your oven to 425°F (220°C). Line a baking sheet with parchment paper. For maximum crispness, preheat a pizza stone or a second inverted baking sheet inside the oven.
- Steam the riced cauliflower for 5 minutes until tender. Let it cool for at least 10 minutes until safe to handle.
- Solve the soggy bottom: Place the cooled cauliflower in a clean kitchen towel or cheesecloth. Twist and squeeze with all your strength to remove the liquid. Open the towel, fluff the cauliflower, and squeeze a second time. You must remove at least 1/2 to 3/4 cup of liquid. You should be left with a dry, crumbly cauliflower pulp.
- In a medium bowl, combine the dry cauliflower, egg, shredded mozzarella, parmesan, oregano, garlic powder, and salt. Mix until a cohesive dough forms.
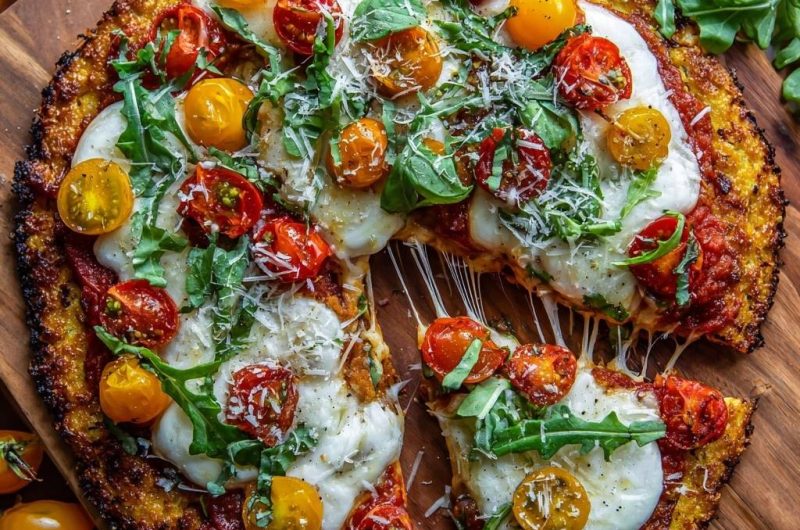
- Transfer the dough to the parchment paper. Press it into a 10-inch circle, keeping it about 1/4 inch thick. Use your fingers to slightly raise the very edge to create a “rim.” Brush the outer 1/2 inch of the crust with olive oil to achieve the dark, caramelized crust shown in the image.
- Slide the parchment onto the preheated pizza stone or baking sheet. Bake the crust alone for 18 to 22 minutes. The crust is ready when the center is firm and the edges are a deep, dark golden brown.
- Remove from the oven. Spread a thin layer of pizza sauce over the crust. Top with the mozzarella pearls and the halved cherry tomatoes.
- Return to the oven for 5 to 7 minutes, or until the cheese is melted and bubbly. For the toasted cheese look in the photo, you may broil on high for the final 60 seconds.
- Remove from the oven and let sit for 2 minutes to set. Top with fresh arugula, basil leaves, and a final dusting of grated parmesan before slicing. The crust will be firm enough to pick up by hand.
Notes
- The secret to success is the double-squeeze method using a kitchen towel to remove as much liquid as possible from the steamed cauliflower. Preheating a pizza stone or inverted baking sheet ensures the bottom gets maximum heat for a crispy finish.