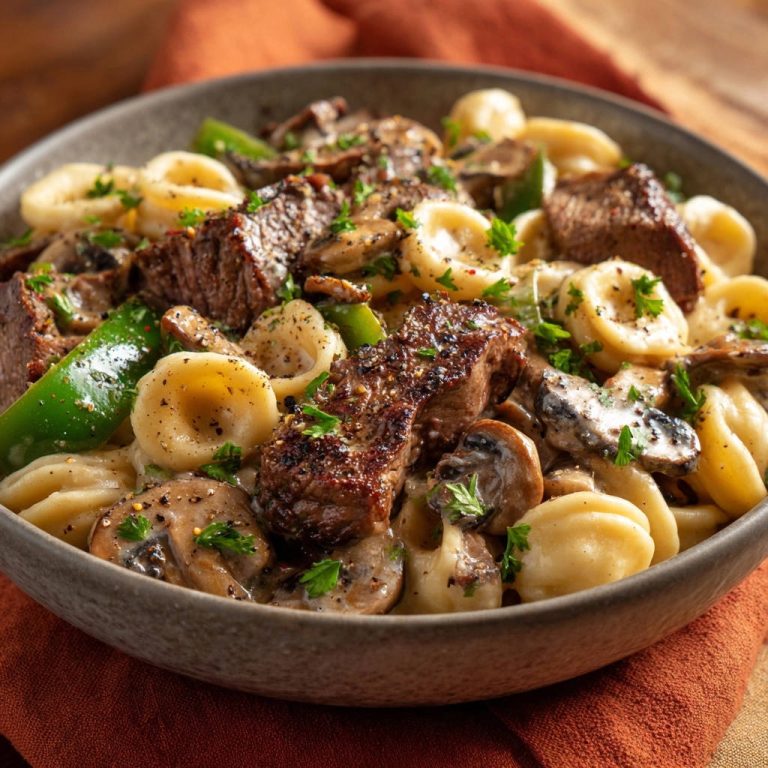
The Ultimate Creamy Mushroom Chicken Casserole with a Guaranteed Crispy Topping
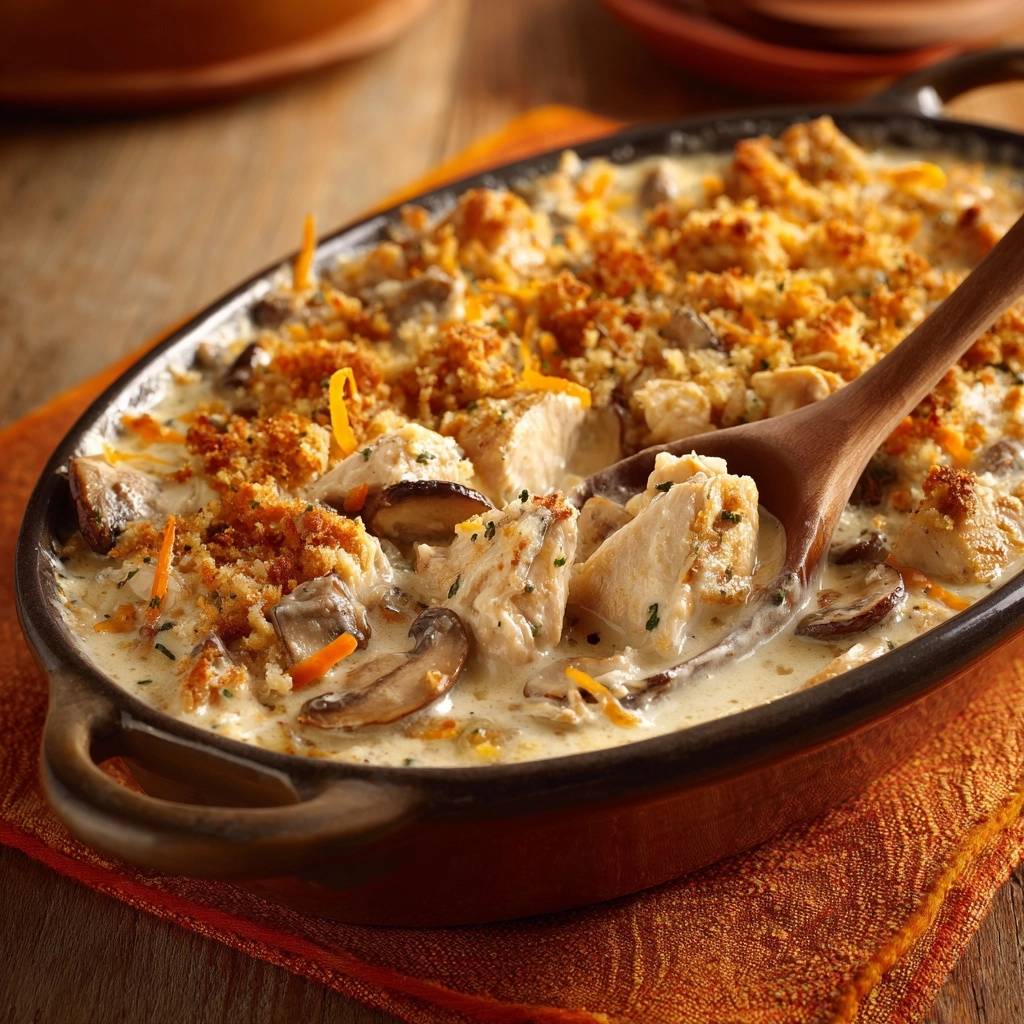
Most chicken casseroles suffer from a fatal flaw: the dreaded mushy topping. You know the one—a layer of breadcrumbs that absorbs the steam from the sauce until it has the texture of wet cardboard. It’s a disappointing end to a dish that should be pure comfort. This recipe changes that narrative by focusing on a specific sensory contrast. You get a velvet-textured mushroom cream sauce paired with a “shattered-glass” panko crunch that actually holds its integrity.
The secret lies in moving away from the “dump and bake” method. By ditching condensed “cream of” soups and building a scratch-made roux, you control the moisture and the flavor profile. This isn’t just a meal; it’s a study in textures. The heavy cream provides a luxurious mouthfeel, while the earthy mushrooms add a meaty depth that makes the whole skillet feel incredibly substantial. It’s the kind of dinner that feels fancy but comes together in one pan.
If you want that perfect result, you have to toast your breadcrumbs in butter before they ever touch the casserole. Most people skip this, thinking the oven will do the work, but the oven’s heat is often too indirect to crisp the crumbs before the chicken overcooks. Pre-toasting creates a hydrophobic fat barrier. This simple five-minute step ensures every bite has a distinct, audible crunch that lasts even if you go back for seconds.
Essential Components for the Creamy Mushroom Chicken Casserole
To build a foundation of flavor, you need 1.5 pounds of chicken breast and a full pound of cremini mushrooms. While white button mushrooms are common, cremini (often labeled as baby bellas) are far superior for this dish. They are essentially younger versions of Portobellos, meaning they have a lower water content and a much deeper, savory profile. When they hit the hot oil, they develop a beautiful sear rather than just boiling in their own juices.
The sauce relies on the interplay between heavy cream and chicken broth. Using only broth would make the dish too thin, while using only cream might feel overly heavy. The 2 tablespoons of all-purpose flour are non-negotiable here. This flour acts as the thickening agent, binding the fats from the cream and butter with the liquid from the broth. Without it, your casserole will likely break, leaving a puddle of oil at the bottom of the pan.
Quality matters when you’re working with so few ingredients. Freshly minced garlic provides a sharp bite that cuts through the richness of the dairy. If you use the jarred, pre-minced variety, you lose that essential aromatic punch. Similarly, using a sharp cheddar cheese adds a necessary tang that balances the earthy thyme and the sweet creaminess of the base sauce.
Selecting the Right Poultry and Produce
When prepping your chicken, aim for large bite-sized chunks rather than a small dice. Since the chicken undergoes a double-heat process—first searing in the skillet and then finishing in the oven—larger pieces stay juicy. Small cubes tend to dry out and become stringy by the time the sauce is bubbling. Pat the meat dry with paper towels before seasoning; moisture on the surface is the enemy of a good sear.
For the mushrooms, consistency is your best friend. Slice them uniformly so they cook at the same rate. If some slices are paper-thin and others are thick wedges, the thin ones will burn before the thick ones release their moisture. Remember that mushrooms act like sponges. Don’t soak them in water to clean them; instead, wipe them with a damp cloth to keep them ready for browning.
The Pantry Staples: Herbs, Fats, and Liquids
Dried thyme is a powerhouse in this recipe, but it needs to be “bloomed” to reach its full potential. By adding it to the pan with the garlic and mushrooms, the heat wakes up the essential oils in the herb. This infuses the entire fat base with a woody, floral aroma that permeates the chicken. It’s a much more effective method than simply sprinkling it on top at the end.
I always recommend using unsalted butter for the topping. Sharp cheddar cheese and chicken broth both carry a significant amount of salt. By using unsalted butter, you maintain total control over the seasoning. You can always add a pinch of salt at the end, but you can’t take it away once it’s stirred into that rich, reduced sauce.
The Science of the Anti-Soggy Panko Barrier
The “Fat-Barrier” theory is what sets this recipe apart from every other casserole in your recipe box. In a traditional bake, you sprinkle raw breadcrumbs over a wet sauce and put it in the oven. As the sauce heats up, it releases steam. The dry, porous breadcrumbs act like tiny sponges, soaking up that steam and turning into a soft, mushy layer. It’s a texture nightmare that ruins the dish’s potential.
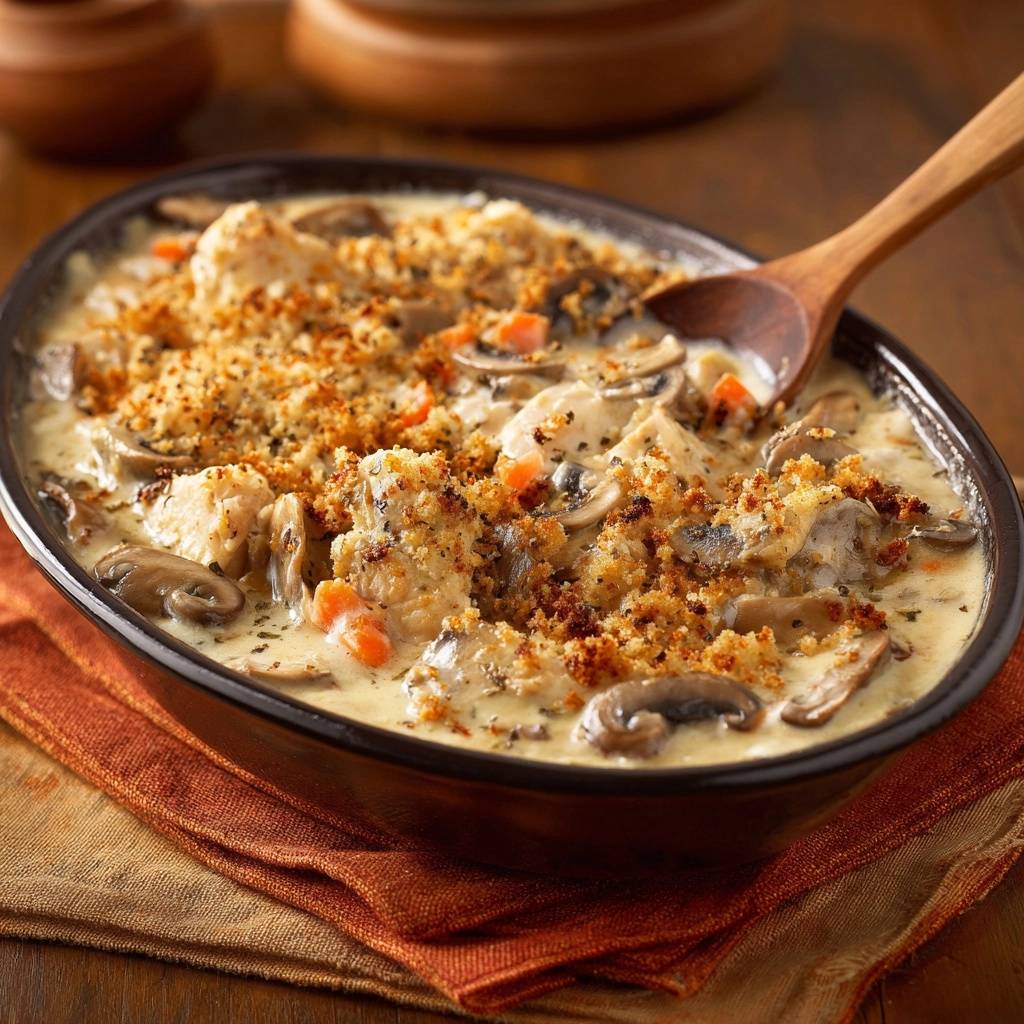
By pre-toasting the panko in butter, you are essentially “waterproofing” the breadcrumbs. The melted butter coats every single jagged edge of the panko. Because fat is hydrophobic, it repels the moisture rising from the cream sauce. This creates a protective shield. Even as the casserole bubbles in the oven, the crumbs stay dry and crisp because the steam can’t penetrate the oily coating.
Furthermore, panko is naturally airier and larger than standard breadcrumbs. This increased surface area means more room for that butter coating to settle. When you bite into the finished dish, you get a distinct crackle. This contrast against the silky, mushroom-laden sauce is what makes the meal feel balanced. It’s a professional chef’s trick that takes almost no extra effort but yields a massive payoff in quality.
Phase One: Searing Chicken and Developing Fond
Start by heating your olive oil until it’s shimmering but not smoking. When you drop the chicken in, you should hear a loud sizzle immediately. This is the Maillard reaction in action, creating a golden-brown crust that locks in flavor. Don’t worry about cooking the chicken all the way through yet; you just want that exterior color. This step usually takes about 3 to 4 minutes of undisturbed contact with the pan.
As the chicken browns, it will leave behind little brown bits on the bottom of the skillet. This is called “fond,” and it is concentrated flavor gold. Whatever you do, don’t wash the pan! These bits will eventually be deglazed by the chicken broth, becoming the savory backbone of your mushroom sauce. If you crowd the pan with too much chicken at once, the temperature will drop, and the meat will steam in its own juices instead of searing.
Phase Two: Building the Rich Mushroom Cream Base
Once the chicken is out, toss in the mushrooms. They will initially soak up all the remaining oil, but don’t panic and add more. As they cook, they will release their liquid. Keep sautéing until that liquid evaporates and the mushrooms start to turn a deep, chestnut brown. This is where the “umami” flavor is born. Only after they are browned should you add the garlic and thyme for a quick minute of aromatics.
Now, use the “Singer” method: sprinkle the flour directly over the mushrooms. Stir it constantly for about a minute to coat the vegetables. This cooks out the “raw” flour taste while creating a paste that will thicken your liquids. Slowly pour in the broth and cream, whisking as you go. You’ll see the sauce transform from a thin liquid into a glossy, thick gravy that clings to the back of a spoon. Stir in half the cheese now to add a sharp, salty finish.
Phase Three: The Pre-Toast Topping Technique
While your sauce is simmering, grab a separate small frying pan. Melt the butter over medium heat and dump in the panko. This part requires your full attention. Panko can go from perfectly golden to burnt in a matter of seconds. Use a spatula to keep the crumbs moving constantly. You want an even, toasted-marshmallow color across the entire batch.
For a perfect pairing, try our Creamy Chicken & Rice Bake: The Crispy Top Secret!.
The beauty of this step is that the color you see in the frying pan is the final color of your dish. Since the casserole only spends about 15 minutes in the oven, it’s not in there long enough to brown raw crumbs effectively. By pre-toasting, you ensure a deep, rich color and a flavor that tastes toasted and nutty rather than just dry. Once they’re golden, pull them off the heat immediately.
Assembling and Baking for Maximum Texture
Now it’s time to bring it all together. Return the chicken and its juices to the mushroom sauce. Give it a gentle stir to make sure every piece of poultry is submerged in that creamy goodness. Sprinkle the remaining half-cup of cheddar over the top. This acts as a “glue” that will hold the crispy topping in place while adding a gooey layer between the crunch and the cream.
Spread your toasted panko evenly over the cheese. Slide the whole skillet into a 375°F oven. This temperature is high enough to melt the cheese and get the sauce bubbling vigorously without breaking the cream emulsion. You’re looking for the sauce to creep up the sides of the pan, signaling that everything is piping hot. After 12 to 15 minutes, the chicken will be perfectly tender and the topping will be set.
Flavor Variations and Ingredient Swaps
If you prefer a richer, more forgiving meat, swap the chicken breasts for boneless, skinless chicken thighs. Thighs have a higher fat content, which makes them nearly impossible to overcook in the oven. For a more sophisticated flavor, you can add sliced leeks along with the mushrooms. Leeks offer a mild, onion-like sweetness that pairs beautifully with the heavy cream and thyme.
For those needing a gluten-free version, use a 1-to-1 gluten-free flour blend for the sauce and gluten-free panko for the topping. The crunch factor remains surprisingly high with gluten-free crumbs. If you want to skip the dairy, coconut cream can work, though it will change the flavor profile significantly. In that case, adding a bit of Dijon mustard can help bridge the flavor gap and add some much-needed acidity.
Make-Ahead Strategies and Storage Logistics
You can easily prep the chicken and the mushroom sauce a day in advance. Store the sauce and chicken mixture in an airtight container in the fridge. However, do not add the panko topping until you are ready to bake. Even with the butter-toasting trick, sitting on a wet sauce overnight will eventually soften the crumbs. When you’re ready for dinner, just spread the mixture in a skillet, top with cheese and freshly toasted panko, and bake.
Leftovers will keep in the refrigerator for up to three days. To reheat, avoid the microwave if you want to save the topping. Instead, place a portion in a small oven-safe dish and pop it under the broiler for 2-3 minutes. This will heat the chicken through while reviving the crispness of the breadcrumbs. I don’t recommend freezing this dish, as the heavy cream sauce can become grainy and separate once thawed.
Optimal Side Dish Pairings
Because this casserole is so rich and creamy, you want side dishes that provide a sharp contrast. A bright arugula salad with a lemon-shallot vinaigrette is my top choice. The peppery greens and the acid from the lemon cut right through the heavy cream. It cleanses your palate between bites, making the whole meal feel much lighter than it actually is.
Roasted balsamic Brussels sprouts or steamed green beans with plenty of garlic are also excellent options. These fiber-rich vegetables add a nice snap to the plate. I generally suggest avoiding heavy starches like mashed potatoes or pasta. The casserole already has a thick, flour-based sauce and a breadcrumb topping, so adding more heavy carbs can make the meal feel a bit overwhelming.
Troubleshooting Your Chicken Casserole
If your sauce ends up too thin, don’t panic. You can let the skillet simmer on the stovetop for a few extra minutes before adding the topping to allow for more evaporation. Alternatively, mix a teaspoon of cornstarch with a tablespoon of cold water and stir it into the bubbling sauce. It will thicken up almost instantly. Just make sure the sauce comes to a boil to activate the starch.
Dry chicken is usually the result of over-searing. Remember, the chicken only needs to be golden on the outside during the first phase. It will spend another 15 minutes in a hot oven, which is plenty of time to reach the safe internal temperature of 165°F. If your mushrooms feel rubbery, it’s likely because the heat wasn’t high enough. Mushrooms need high heat to brown; otherwise, they just slowly leak water and toughen up.
Lastly, if your cheese separates into an oily mess, it’s often due to using pre-shredded cheese from a bag. Those products are coated in cellulose (a wood pulp derivative) to prevent clumping, which interferes with smooth melting. Always buy a block of sharp cheddar and grate it yourself. It melts into the sauce much more elegantly and provides a better “glue” for your crispy panko topping.
How do I store leftovers and will they stay crispy?
Store any leftovers in an airtight container in the refrigerator for up to 3 days. While the butter-toasting method helps the panko stay crisp longer than usual, it will eventually soften in the fridge. To bring back that “shattered-glass” crunch, reheat the casserole in the oven or under a broiler rather than using a microwave. Do not freeze this dish, as the heavy cream and mushroom sauce will likely separate and become grainy upon thawing.
Why is my casserole sauce watery instead of creamy?
A watery sauce usually happens for two reasons: either the mushrooms weren’t cooked long enough to release and evaporate their moisture, or the flour wasn’t measured correctly. Mushrooms are about 90% water, so they must be sautéed until deep brown to ensure that liquid doesn’t leak into your sauce later. Also, ensure you use the full 2 tablespoons of flour to create a proper roux, which is essential for binding the heavy cream and broth into a thick, cohesive sauce.
Can I use a different type of mushroom or meat?
Absolutely. While cremini mushrooms offer the best flavor-to-price ratio, shiitakes or oyster mushrooms add a wonderful gourmet flair. For the meat, boneless skinless chicken thighs are a fantastic substitution for breasts; they are more fat-heavy and stay incredibly moist during the baking process. If you use thighs, you may want to trim a bit of the excess fat to keep the sauce from becoming too greasy.
What can I use if I don’t have panko breadcrumbs?
If you don’t have panko, you can use crushed Ritz crackers or even crushed cornflakes for a similar crunch. Standard fine breadcrumbs will work in a pinch, but they won’t provide the same dramatic texture as panko. Regardless of what you use, the butter-toasting step remains the most important part of the process to prevent the topping from becoming soggy.
Why did my cheese turn out oily or clumpy?
This usually happens if you use pre-shredded cheese from a bag. Those products are treated with anti-caking agents like cellulose, which prevents the cheese from melting into a smooth sauce and often results in a greasy film. For the best results, buy a block of high-quality sharp cheddar and grate it yourself. The natural fats in block cheese emulsify much better with the heavy cream and flour base.
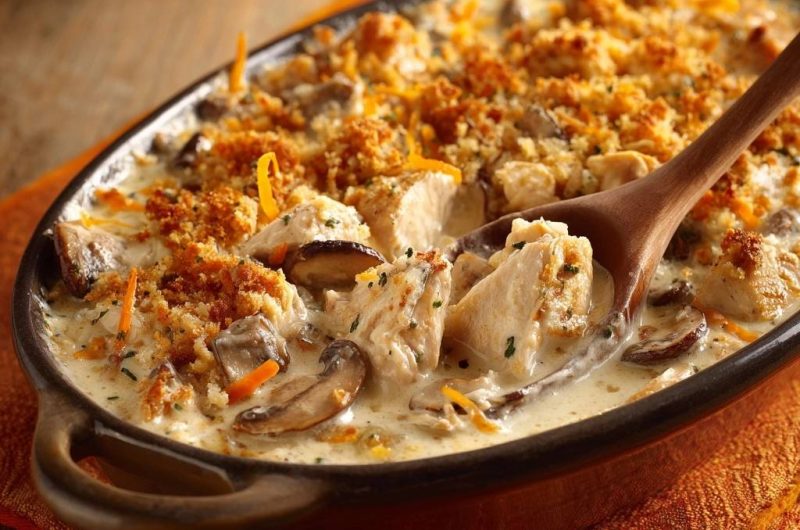
Chicken Casserole
Course: Main CourseCuisine: AmericanDifficulty: medium6
servings15
minutes25
minutes440
kcal40
MinutesThis comforting dish combines tender chicken chunks and savory cremini mushrooms in a velvety cream sauce, topped with sharp cheddar and pre-toasted panko breadcrumbs for maximum crunch.
Ingredients
1.5 lbs chicken breast, cut into large bite-sized chunks
1 lb cremini mushrooms, sliced
2 tablespoons all-purpose flour (essential for sauce thickening)
1.5 cups heavy cream
1/2 cup chicken broth
2 cups panko breadcrumbs
4 tablespoons unsalted butter
1 cup shredded sharp cheddar cheese
2 cloves garlic, minced
1 teaspoon dried thyme
1 tablespoon fresh parsley, chopped (for garnish)
Salt and black pepper to taste
2 tablespoons olive oil
Directions
- Preheat your oven to 375°F (190°C).
- Heat olive oil in a large oven-safe skillet or Dutch oven over medium-high heat. Season chicken chunks with salt and pepper. Brown them for 3 to 4 minutes until golden on the outside (they will finish cooking in the oven). Remove chicken and set aside.
- In the same pan, add the sliced mushrooms. Sauté until they release their moisture and turn deep golden brown. Add the minced garlic and thyme, cooking for 1 minute until fragrant.
- Sprinkle the 2 tablespoons of flour over the mushrooms and stir for 1 minute to cook out the raw flour taste.
- Slowly whisk in the chicken broth and heavy cream. Bring to a gentle simmer, stirring constantly until the sauce begins to thicken. Stir in half of the shredded cheese until melted. Return the chicken and any accumulated juices to the pan. The chicken is done when it reaches 165°F (74°C) in the thickest part.
- The Crunch Secret: In a separate small frying pan, melt the butter over medium heat. Add the panko breadcrumbs and toss constantly for 3 minutes until they are an even golden brown. This pre-toasting creates a fat-barrier that prevents the crumbs from absorbing moisture during the bake.
- Top the chicken mixture with the remaining shredded cheese, then spread the toasted breadcrumbs evenly over the top.
- Transfer the skillet to the oven and bake for 12-15 minutes. The sauce should be bubbling around the edges, and the topping should be deeply browned.
- Garnish with fresh parsley and serve immediately to enjoy the contrast between the silky cream sauce and the crispy topping.
Notes
- The secret to the crunchy topping is pre-toasting the panko in butter to create a moisture barrier before baking.