Mastering the Hearty Tuscan White Bean Soup
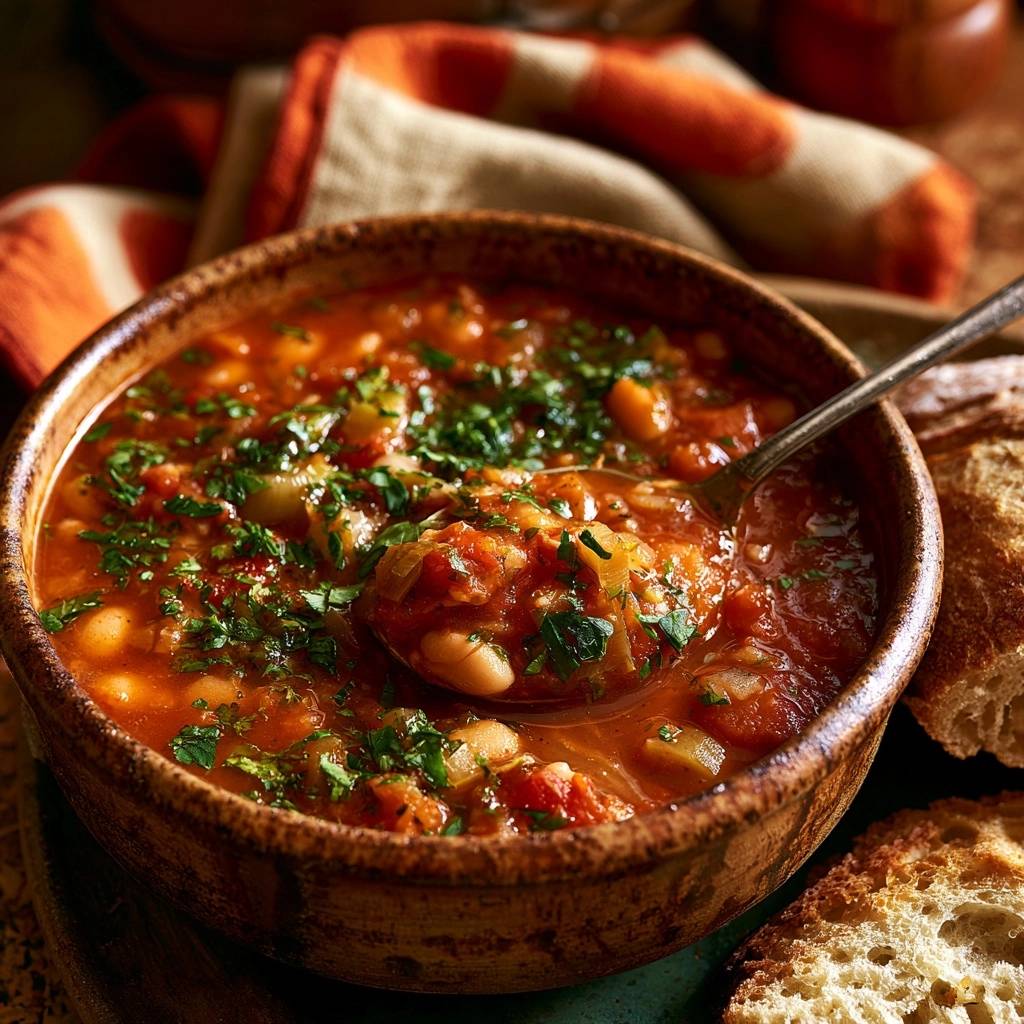
Most home cooks have experienced the disappointment of a bean soup that looks more like flavored water than a meal. You expect a thick, rustic bowl of comfort, but instead, the beans just sink to the bottom of a thin, translucent broth. This Hearty Tuscan White Bean Soup solves that problem by focusing on building layers of flavor and a naturally thick texture that feels like a warm hug in a bowl.
The secret to this recipe lies in the marriage of fire-roasted tomatoes and a specific mashing technique. By combining the smoky acidity of the tomatoes with the creamy interior of the beans, you create a base that is vibrant, rich, and incredibly satisfying. It’s the kind of meal that makes you want to tear off a huge hunk of bread and dive right in.
I’ve found that the real trick to professional-level soup is the “pincé” method with your tomato paste. Instead of just stirring it into the liquid, you must sauté it with your aromatics until it turns a dark, brick-red color. This simple step removes the metallic tang of the paste and replaces it with a deep, savory umami that defines the entire dish.
The Anatomy of a Thick Tuscan Broth
To achieve that signature Mediterranean thickness, you need the right building blocks. Cannellini beans are the undisputed stars here because they possess a much creamier texture and thinner skin than Great Northern or Navy beans. When they break down slightly, they release a silky starch that acts as a natural thickener for the entire pot.
Fire-roasted crushed tomatoes are another non-negotiable ingredient for this specific profile. Unlike standard canned tomatoes, fire-roasted varieties are charred over an open flame before canning, which adds a subtle smokiness and a beautiful charred fleck to the broth. This depth of flavor makes the soup taste like it has been simmering on a wood-fired stove for hours rather than just thirty minutes.
Tomato paste serves as your secret weapon for both color and body. It acts as a concentrated flavor bomb that bridges the gap between the vegetable broth and the fresh aromatics. Using a high-quality vegetable broth is also essential; look for one that is dark and savory rather than pale and watery to ensure your base has enough backbone to support the heavy beans.
Selecting the Right White Bean
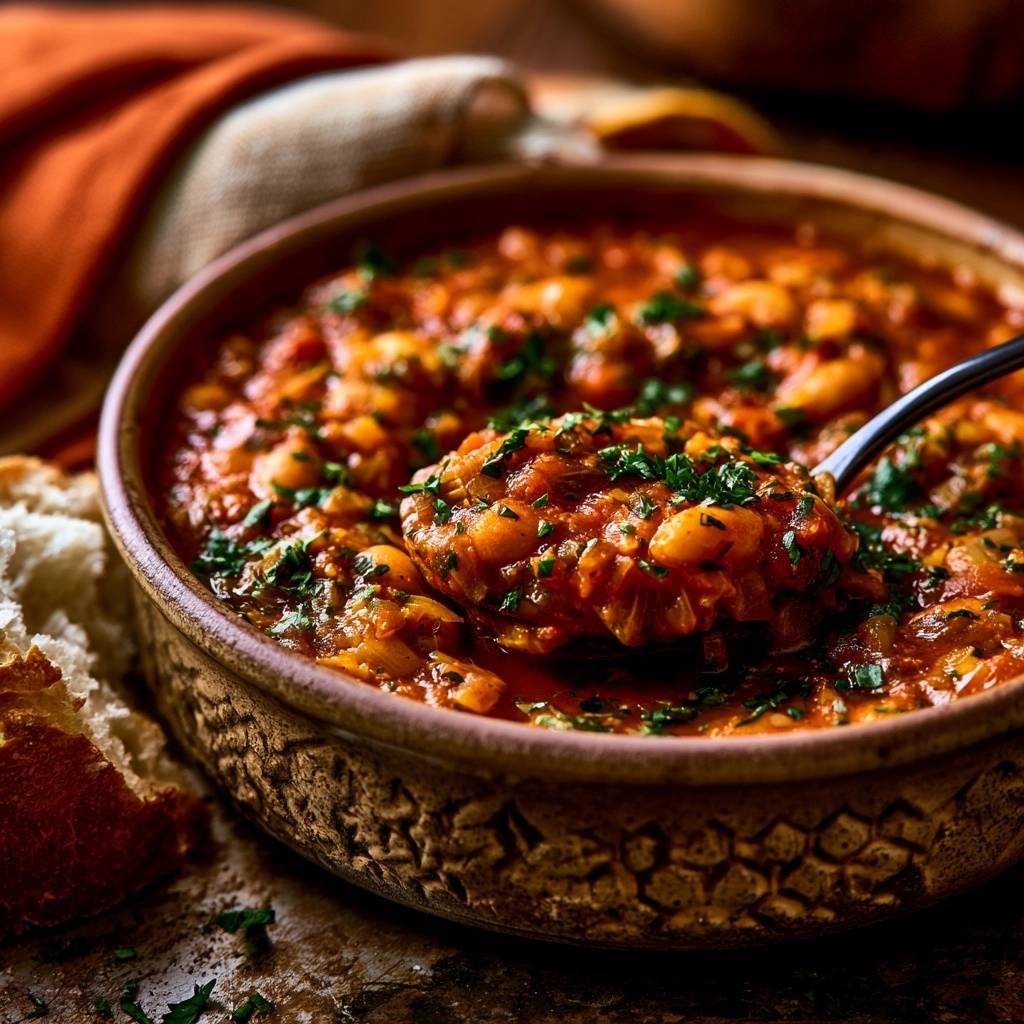
While purists might argue for soaking dried beans overnight, high-quality canned Cannellini beans are actually the secret to making this a weeknight-friendly meal. Canned beans are consistently tender, which is exactly what you want when you are planning to mash a portion of them for thickness. They save you hours of prep without sacrificing the final texture.
Before adding them to the pot, make sure you rinse and drain them thoroughly. The liquid in the can is often loaded with excess sodium and can have a slightly metallic taste. Rinsing them under cold water gives you a clean slate, allowing the beans to soak up the flavors of the fire-roasted tomatoes and oregano instead.
Aromatics: The Flavor Foundation
Every great Italian soup starts with a solid foundation of aromatics, often called a soffritto. In this version, we use a focused blend of finely diced yellow onion and celery. We intentionally leave out carrots to keep the color of the soup a vibrant, deep red, ensuring the tomato base remains the visual highlight of the dish.
The way you cut your vegetables matters just as much as the vegetables themselves. A fine dice ensures that the onion and celery soften completely and almost melt into the broth. This creates a consistent mouthfeel where you get the flavor of the aromatics in every spoonful without any large, crunchy chunks distracting from the creamy beans.
The Science of Natural Thickening Techniques
If you want a soup that clings to your spoon, you have to understand starch gelatinization. Instead of reaching for flour or cornstarch, which can make a soup taste cloudy or pasty, we use the beans themselves. By crushing about one-third of the beans against the side of the pot, you release amylose starch directly into the simmering liquid.
This released starch binds with the olive oil and the tomato solids to create a beautiful emulsion. It transforms a thin broth into a luxurious, velvety sauce that coats the remaining whole beans. This method preserves the clean, bright flavors of the vegetables while providing the heavy, stew-like consistency that makes Tuscan cooking so famous.
Phase One: Building the Aromatic Base
Start by heating your olive oil in a heavy-bottomed pot over medium heat. When you add the onion and celery, you are looking for the Maillard reaction to begin. This isn’t about a hard sear; you want to hear a gentle sizzle as the vegetables release their moisture and start to soften.
Sauté them for about 6 to 8 minutes. You’ll know they are ready when the onions become translucent and the edges just barely start to turn a pale golden color. The aroma in your kitchen should be sweet and fragrant, signaling that the natural sugars in the vegetables have started to caramelize and develop depth.
Phase Two: Caramelizing the Tomato Paste
Once your vegetables are soft, stir in the minced garlic and the tomato paste. This is a critical moment in the recipe. You want to cook the paste for about two minutes, stirring constantly so the garlic doesn’t burn. Watch for the color to shift from a bright, candy-apple red to a dark, rusty brick red.
This process, known as “pincé,” is what separates a mediocre soup from a professional one. It toasts the sugars in the tomato paste, removing the raw acidity and creating a complex, savory base. If the paste starts to stick to the bottom of the pot, don’t worry; those browned bits will dissolve into the broth and add even more flavor.
Phase Three: Simmering and Texturizing the Soup
After the paste has darkened, pour in your fire-roasted tomatoes, vegetable broth, and spices. Bring everything to a boil, then immediately drop the heat to a steady simmer. Add your rinsed beans and get ready for the transformation. Take a potato masher and firmly press down on a portion of the beans right in the pot.
It is vital to simmer the soup uncovered during this stage. Simmering without a lid allows some of the water to evaporate, which concentrates the flavors and helps the broth reduce. Over the next 15 to 20 minutes, you will see the liquid thicken and the ingredients begin to sit “proud” of the broth, creating that chunky, hearty appearance we’re after.
Avoiding Common Thin Soup Mistakes
One of the biggest mistakes is using too much broth. It is tempting to fill the pot to the top, but a 3-cup ratio for two cans of beans is the sweet spot for a thick result. If you add too much liquid, the beans will be swimming in a sea of broth rather than being the stars of the show.
Another pitfall is rushing the sauté. If you don’t cook the onions and celery long enough, they will stay crunchy and taste raw, which ruins the cohesive texture of the soup. Finally, don’t over-rinse the beans to the point of scrubbing them; you want to remove the canning liquid, but a little bit of residual surface starch actually helps the thickening process.
Flavor Variations and Dietary Swaps
This soup is a fantastic canvas for customization. If you want to add some greens, stir in a few handfuls of chopped Lacinato kale or fresh spinach during the last five minutes of simmering. The heat of the soup will wilt the greens perfectly while keeping their vibrant color intact.
For those who love a bit of heat, you can increase the red pepper flakes to a full teaspoon for a “Fra Diavolo” style kick. If you prefer woodier, earthy notes, try adding a sprig of fresh rosemary or thyme to the pot while it simmers. Just remember to pull out the woody stems before you serve the soup to your guests.
Essential Equipment for Hearty Soups
A heavy-bottomed pot or an enameled cast iron Dutch oven is the best tool for this job. These pots distribute heat evenly, which prevents the beans from scorching on the bottom during the simmering phase. They also retain heat beautifully, keeping the soup hot on the table for second helpings.
A sturdy potato masher is also a must-have. While you could use a large fork, a masher allows you to quickly and evenly crush the beans against the side of the pot without splashing hot liquid. It gives you much better control over the final texture, ensuring you don’t accidentally turn the whole pot into a puree.
Serving Suggestions and Rustic Pairings
This soup is practically begging for a “sop” factor. Serve it in deep ceramic bowls with thick, toasted slices of sourdough or a crusty baguette. The bread acts as a sponge for the thickened tomato broth, making sure not a single drop goes to waste. It’s the ultimate rustic experience.
To finish the dish like a pro, add a “crude” drizzle of your best extra virgin olive oil over each bowl right before serving. A final crack of fresh black pepper and a sprinkle of fresh parsley add a pop of brightness that cuts through the richness of the beans. A simple side of bitter arugula salad with a lemon vinaigrette provides a perfect contrast.
Make-Ahead Strategy and Storage Guide
Like many stews, this soup actually tastes better the next day. As it sits in the fridge, the starches continue to hydrate and the flavors of the garlic, oregano, and tomatoes meld together. If you are making this ahead of time, let it cool completely at room temperature before transferring it to an airtight container.
You can store this soup in the refrigerator for up to four days. It also freezes exceptionally well for up to three months. When you are ready to reheat it, you might notice it has become very thick, almost like a dip. Simply add a small splash of water or broth when warming it up on the stove to loosen it back to your desired consistency.
Expert Troubleshooting
Can I use a blender instead of a masher to thicken the soup?
Yes, you can use an immersion blender, but you must be very careful. Only pulse it two or three times in one spot. If you blend too much, you will lose the rustic, chunky texture and end up with a smooth puree. The masher is generally safer for maintaining that classic Tuscan look.
My soup tastes a bit too salty; how can I fix it?
If you accidentally over-salted, don’t panic. You can add a peeled, halved potato to the pot and simmer it for ten minutes; the potato will absorb some of the excess salt. Alternatively, a small squeeze of fresh lemon juice can help balance the saltiness by adding a bright hit of acidity.
Can I use water instead of vegetable broth?
You can use water in a pinch, but you will need to compensate for the lost flavor. I recommend doubling the amount of onion, garlic, and dried oregano. You will also need to be more aggressive with your salt and pepper seasoning to ensure the base doesn’t taste flat or bland.
Why are my beans falling apart and getting mushy?
This usually happens if the soup is boiled too vigorously or if you over-mashed the beans. Once you add the beans, keep the heat at a gentle simmer—just a few bubbles breaking the surface. If you mash more than one-third of the beans, the soup will lose its structural integrity and feel more like a mash than a soup.
How do I store leftovers and does this freeze well?
Store leftovers in an airtight container in the fridge for up to 4 days. This soup freezes beautifully because the beans hold their shape well. Freeze in individual portions for up to 3 months. When reheating, add a tablespoon of water to help the thickened broth return to its original silky state.
Hearty Tuscan White Bean Soup
Course: SoupCuisine: ItalianDifficulty: easy4
servings10
minutes30
minutes40
Minutes325
kcalItalian
Ingredients
2 cans (15 oz each) Cannellini beans, rinsed and drained
2 tablespoons extra virgin olive oil
1 medium yellow onion, finely diced
2 large stalks celery, diced (for texture and color)
3 cloves garlic, minced
1 can (14.5 oz) fire-roasted crushed tomatoes
1 tablespoon tomato paste (for deep color and thickness)
3 cups high-quality vegetable broth
1 teaspoon dried oregano
1/2 teaspoon red pepper flakes (optional, for subtle warmth)
1/2 teaspoon salt (plus more to taste)
1/2 teaspoon black pepper
1/2 cup fresh Italian parsley, roughly chopped
Crusty sourdough or rustic baguette for serving
Directions
- Heat the olive oil in a large heavy-bottomed pot or Dutch oven over medium heat. Add the diced onion and celery. Sauté for 6-8 minutes until the vegetables are softened and the onions are beginning to turn golden.
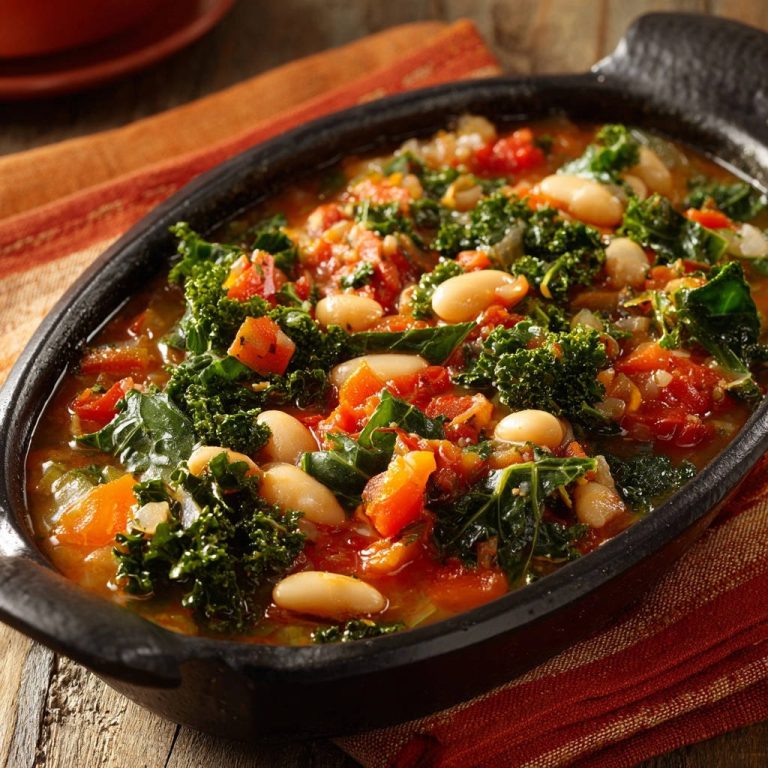
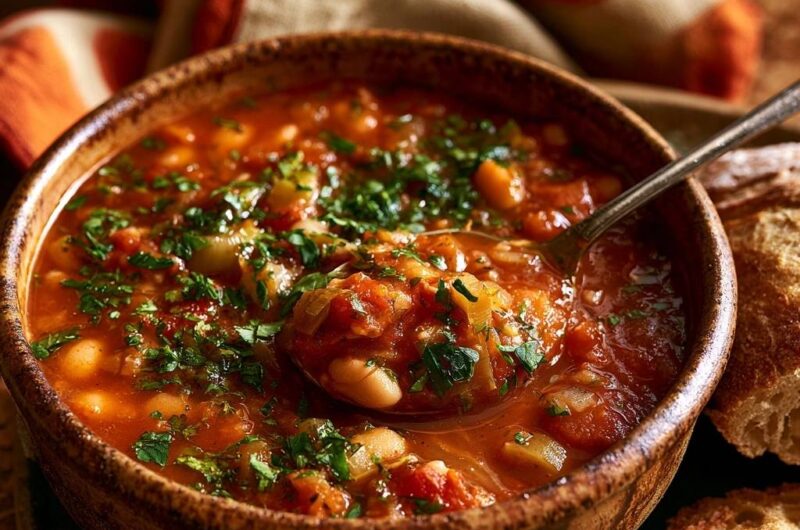
- Stir in the garlic and tomato paste. Cook for 2 minutes, stirring constantly, until the paste turns a deep brick red. This step is essential for the rich, dark base seen in the photo.
- Pour in the fire-roasted crushed tomatoes, vegetable broth, oregano, red pepper flakes, salt, and pepper. Bring the mixture to a boil, then reduce heat to a steady simmer.
- Add the drained white beans to the pot.
- To solve the watery soup problem, take a potato masher or a large fork and crush about one-third of the beans directly against the side of the pot. Stir these mashed beans into the liquid. This creates an instant natural thickener that gives the broth a professional, hearty consistency without needing flour.
- Let the soup simmer uncovered for 15-20 minutes. This reduction time is key to achieving the thick, stew-like appearance where the ingredients sit proud of the liquid.
- Taste and adjust seasoning. Stir in half of the fresh parsley.
- Ladle into deep ceramic bowls. Garnish generously with the remaining fresh parsley and a final drizzle of olive oil. Serve immediately with thick, toasted slices of crusty bread to soak up the thickened broth.
Notes
- To achieve the professional, thick consistency seen in photos, do not skip the step of mashing a portion of the beans. Simmering uncovered is also essential for the reduction of the broth.