Mastering the Loaded Spinach and Bacon Egg Bake

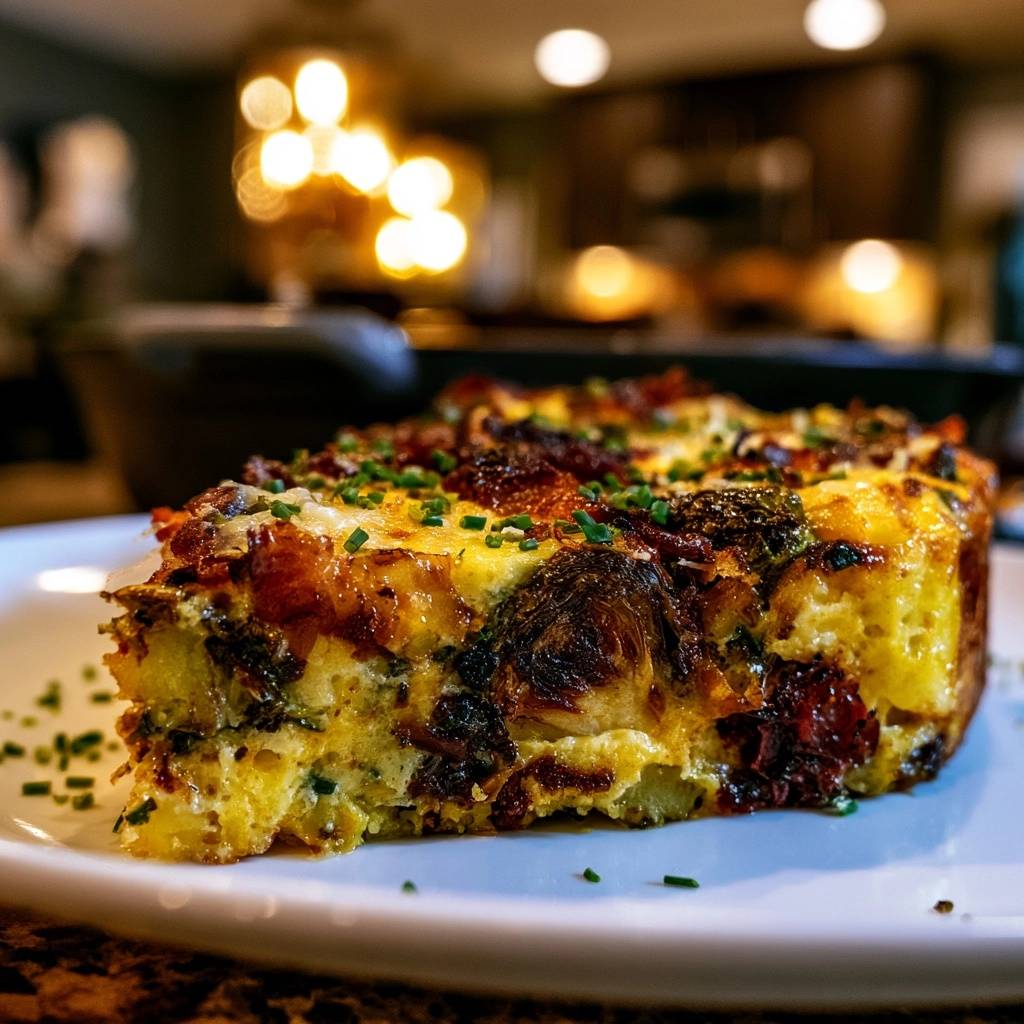
Stop settling for watery, spongy egg casseroles that weep on the plate. Most home cooks struggle with breakfast bakes that look beautiful in the oven but deflate into a soggy mess the moment they hit the cooling rack. This Loaded Spinach and Bacon Egg Bake solves that problem by focusing on structural integrity and moisture management.
The secret to a bakery-style texture isn’t just adding more cheese; it’s about controlling the water content of your vegetables. By hard-roasting your aromatics to caramelize them and using a specific dairy-to-egg ratio, you ensure a dense, velvety slice that holds its shape perfectly. You’ll get a rich, custard-like mouthfeel that feels more like a crustless quiche than a standard scramble.
I’ve found that the absolute key to success here is the “mechanical strain.” Even after sautéing, spinach and mushrooms hold onto hidden reservoirs of liquid that can ruin the egg matrix. If you don’t physically squeeze that moisture out, it will release during the baking process, creating those unappealing pockets of green water at the bottom of your dish.
The Science of Moisture Management in Egg Dishes
Mushrooms and spinach are essentially water balloons held together by thin cellular walls. When you heat them, those walls collapse, releasing moisture into your bake. If this happens while the eggs are setting, the water disrupts the protein bonds, leading to a “weeping” effect known as syneresis.
To prevent this, we use a two-step approach: evaporation and extraction. Sautéing the vegetables over high heat evaporates the initial surface moisture and begins the caramelization process. However, the heat alone isn’t enough to remove the deep-seated liquid within the spinach fibers, which is why we follow up with a firm press in a sieve.
By removing this liquid, you protect the protein matrix of the eggs. This allows the eggs to coagulate into a solid, uniform structure. The result is a slice that stands tall on the plate with a clean, vertical edge rather than a slumped, porous texture.
Why Squeezing Spinach is Non-Negotiable
Fresh spinach contains about 90% water. When you chop four cups of fresh leaves, it looks like a mountain, but it shrinks to a fraction of that size once wilted. That missing volume is the liquid that usually ends up at the bottom of your baking dish.
This green liquid doesn’t just affect the texture; it can also discolor the entire bake, giving the eggs a muddy, unappealing tint. Squeezing the spinach until it’s nearly dry ensures the colors stay vibrant. You want the golden yellow of the eggs and the sharp white of the melted cheddar to pop, not be drowned in vegetable runoff.
The Role of Fat in Structural Stability
Fat is the secret weapon for a velvety custard. While eggs provide the structure, heavy cream and cheddar cheese act as “interfering agents” that prevent the egg proteins from bonding too tightly. Without enough fat, cooked eggs become rubbery and tough.
The 10-egg to 1/2 cup cream ratio is the sweet spot for stability. This specific balance creates enough richness to coat the palate but maintains enough protein strength to support the heavy “load” of bacon and mushrooms. It’s the difference between a flimsy omelet and a professional-grade breakfast bake.
Essential Components for the Loaded Spinach and Bacon Egg Bake
Quality ingredients make a massive difference when the flavor profile is this focused. I always recommend thick-cut bacon for this recipe. Thin strips tend to disappear into the egg mixture, whereas thick-cut pieces retain a chewy, salty bite that contrasts beautifully with the soft eggs.
Smoked paprika is another essential player here. Unlike sweet paprika, which mostly adds color, the smoked variety provides a deep, wood-fired aroma that mimics the flavor of the bacon throughout the entire dish. It bridges the gap between the earthy mushrooms and the sharp cheese.
Don’t overlook the salt and pepper. Eggs are notorious for absorbing seasoning, so don’t be afraid to be generous. The salt doesn’t just add flavor; it actually helps the egg proteins denature and bond more effectively during the cooking process.
Selecting the Right Sharp Cheddar
If you can, grate your own cheese from a block. Pre-shredded cheeses are coated in potato starch or cellulose to prevent clumping in the bag. These additives can prevent the cheese from melting smoothly into the eggs, sometimes resulting in a grainy or “plastic” mouthfeel.
A sharp or extra-sharp cheddar provides the necessary acidic punch to cut through the richness of the heavy cream. As the bake cooks, the fats in the cheddar will slightly separate and create a lacy, golden crust on the surface. This provides a much-needed textural contrast to the soft interior.
Fresh vs. Frozen Spinach: A Texture Analysis
Fresh spinach is the gold standard because it retains a bit of “leafy” integrity even after sautéing. However, if you’re in a pinch, frozen spinach can work. The catch is that frozen spinach is blanched before freezing, which breaks down the cell walls even further.
If you use frozen, you must thaw it completely and squeeze it even harder than fresh. I recommend wrapping it in a clean kitchen towel and wringing it out until no more water drips. You’ll need about 10 ounces of frozen spinach to equal the four cups of fresh called for in this recipe.
Step-by-Step: Executing the Moisture-Lock Method
Success with this dish comes down to how you handle the transition from the skillet to the oven. You aren’t just cooking the vegetables; you’re preparing them to be suspended in a delicate egg custard. This requires a bit of patience during the prep phase.
Start by getting your oven to a true 375°F. I like using a metal baking dish for a crisper edge, but glass works perfectly well if you prefer a more even, gentle heat. Just make sure you grease the corners thoroughly, as the cheese likes to “glue” itself to the sides.
When you pour the mixture in, do it slowly. You want the bacon and vegetables to be evenly distributed. If you dump it all at once, the heavy ingredients might settle in one corner, leaving you with some slices that are all egg and others that are overly salty.
Phase 1: Hard-Roasting the Aromatics
When you hit the skillet with the onions and mushrooms, listen for the sizzle. You want to achieve the Maillard reaction—that beautiful browning that signals deep flavor. Don’t crowd the pan, or the mushrooms will steam instead of sear.
Wait until the mushrooms look deeply bronzed and the onions are translucent with golden edges. This browning adds a savory, “umami” depth that balances the richness of the eggs. Once the spinach goes in, it only needs about two minutes to collapse before you pull the pan off the heat.
Phase 2: The Mechanical Strain
Transfer your hot vegetable mix into a fine-mesh sieve set over a bowl. Use the back of a sturdy spatula to press down firmly. You’ll be surprised—and maybe a little grossed out—by how much dark green liquid comes out.
Keep pressing until the mixture looks “dry-to-the-touch” and clumped together. This step is the single most important part of the recipe. If you skip this, your egg bake will have a spongy, wet bottom that falls apart when you try to serve it.
Phase 3: Aerating the Custard Base
When whisking your eggs and cream, aim for a “slightly frothy” appearance. You aren’t trying to make a soufflé, but a little bit of air incorporation helps the bake lift and expand during the first 15 minutes in the oven.
Once the eggs are frothy, fold in your squeezed vegetables and a cup of the cheese. Folding ensures the ingredients are suspended throughout the custard. If you just stir vigorously, you’ll knock out the air you just worked so hard to incorporate.
Optimizing Heat: The Baking and Resting Protocol
The way you bake this dish determines whether the edges are tough or tender. Metal pans conduct heat quickly, creating a darker, crustier exterior. Glass or ceramic pans take longer to heat up but hold that heat more steadily, which is great for a softer, more uniform bake.
Keep an eye on the oven around the 30-minute mark. Every oven is different, and eggs can go from “perfect” to “overcooked” in just a few minutes. You’re looking for a specific visual cue in the center of the dish to know when to pull it out.
Remember that the dish will continue to cook for several minutes after it leaves the oven. This is called carry-over cooking. If the center is completely solid when you take it out, it will likely be overdone and rubbery by the time you eat it.
Identifying the Perfect Jiggle
To test for doneness, give the pan a gentle shake. You don’t want to see a “liquid wobble,” which looks like waves moving under the surface. That means the eggs are still raw in the middle and won’t set properly.
Instead, look for a “firm jiggle.” The center should move slightly as one cohesive unit, similar to a set gelatin or a cheesecake. The edges should be puffed and golden brown, pulling away slightly from the sides of the pan.
The Importance of the 10-Minute Rest
I know it’s tempting to slice into the bake immediately, especially with the smell of bacon filling the kitchen. However, the resting period is vital for the thermodynamics of the dish. As it sits, the protein strands tighten and the melted fats begin to solidify.
This 10-minute window allows the steam to settle, ensuring that when you cut into it, you get a clean, vertical slice. If you cut it too early, the steam will escape rapidly, and the slice will likely crumble or collapse on the plate.
Troubleshooting Common Egg Bake Failures
Even with a great recipe, things can go wrong. If your egg bake has a sunken center, it usually means it was pulled out too early or the eggs were over-whisked, causing them to rise and then collapse. Next time, try a slightly longer bake at a lower temperature.
If you notice a metallic taste, it might be your baking dish reacting with the eggs, especially if you’re using an unlined aluminum pan. Switching to a high-quality non-stick metal pan or a ceramic dish usually solves this issue immediately.
A rubbery texture is almost always the result of overcooking. If your oven runs hot, the outer edges of the eggs will toughen before the center is set. Using an oven thermometer can help you calibrate the temperature for a more delicate finish.
Fixing a Rubbery Texture
If you find your egg bakes are consistently tough, try lowering the oven temperature to 350°F and extending the cook time. This gentler heat allows the proteins to set slowly, resulting in a much softer, creamier interior.
Also, ensure you aren’t over-mixing the eggs after adding the heavy cream. You want them combined, but you don’t need to beat them into a frenzy. Too much agitation can lead to a denser, more resilient protein structure that feels “bouncy” rather than velvety.
Preventing the Bottom from Burning
If the bottom of your bake is browning too quickly while the top stays pale, your oven rack might be too low. Move the rack to the center position to ensure even airflow around the entire dish.
For those using thin metal pans, you can place the baking dish on top of a flat cookie sheet. This creates a small air gap that acts as a heat shield, protecting the bottom of the eggs from the direct intensity of the lower heating element.
Make-Ahead Strategies and Storage Logistics
This egg bake is a meal-prep dream because it actually holds its structure quite well when cold. You can bake it on a Sunday, slice it into squares, and have a high-protein breakfast ready for the entire week.
To store, let the bake cool completely to room temperature first. If you put a hot egg bake in a sealed container, the steam will condense on the lid and drip back down, making the bacon soggy and the eggs mushy. Once cool, wrap individual slices in parchment paper before placing them in an airtight container.
In the refrigerator, these slices will stay fresh and delicious for up to four days. The flavors actually deepen over time as the smoked paprika and bacon fats meld with the eggs, making the leftovers arguably better than the first day.
Reheating for Maximum Texture Retention
Please, step away from the microwave! Microwaving eggs often turns them rubbery and makes the bacon limp. For the best results, use a toaster oven or an air fryer set to 350°F for about 5-7 minutes.
This dry heat method recrisps the bacon on top and firms up the egg base without making it tough. If you must use a microwave, use 50% power in short 30-second bursts to avoid “exploding” the delicate egg proteins.
Freezing and Thawing Guidelines
Yes, you can freeze this! The key is to flash-freeze the slices individually on a baking sheet for an hour before transferring them to a freezer-safe bag. This prevents them from sticking together in one giant block.
When you’re ready to eat, thaw the slice in the refrigerator overnight. Don’t try to reheat it directly from frozen, as the outside will overcook before the center thaws, leading to a watery mess. Once thawed, follow the toaster oven reheating instructions above.
Customizing the Loaded Spinach and Bacon Egg Bake
Once you master the moisture-lock technique, you can swap ingredients easily. If you want a more sophisticated flavor, try replacing the sharp cheddar with Gruyère or Swiss cheese. The nutty notes of Gruyère pair exceptionally well with the earthy mushrooms.
You can also add roasted red peppers or sun-dried tomatoes. Just remember the golden rule: if the ingredient has moisture, sauté and squeeze it first. For sun-dried tomatoes, pat them dry with a paper towel to remove excess oil before folding them in.
For a bit of heat, a teaspoon of red pepper flakes or a diced jalapeño (sautéed with the onions) can add a nice kick. Just be careful not to overdo the watery additions, or you’ll be back to square one with a soggy bottom.
Vegetarian and Dairy-Free Adaptations
To make this vegetarian, simply omit the bacon and add a teaspoon of liquid smoke or extra smoked paprika to maintain that savory depth. You might also add some smoked provolone to keep the “smoky” vibe alive.
For a dairy-free version, replace the heavy cream with a full-fat coconut milk (the canned kind) or a heavy plant-based cream. Use a dairy-free cheddar shred that you know melts well. The fat content is the most important part, so don’t use thin almond or rice milks, as they won’t provide the necessary “custard” lift.
Expert Tips for Professional Presentation
To get that restaurant-grade look, save half of your bacon and chives for the very end. Adding them after the bake is finished ensures the bacon stays incredibly crunchy and the chives stay bright green and fragrant.
When mincing your chives, use a very sharp knife and avoid “sawing” back and forth. A clean, downward chop prevents bruising the delicate herb, which keeps the flavor sharp and the appearance professional. Scatter them evenly across the top just before serving for a pop of color.
Finally, use a serrated knife to cut the bake. The small teeth will saw through the crispy bacon bits without squishing the soft egg layers underneath. This ensures every guest gets a perfect, beautiful square that looks as good as it tastes.
Frequently Asked Questions
Can I use turkey bacon instead of pork?
You can, but keep in mind that turkey bacon is much leaner than beef bacon. You may need to add an extra tablespoon of olive oil to the skillet when sautéing your vegetables to make up for the lack of rendered fat. Also, turkey bacon can become very tough if overcooked, so watch it closely.
Why did my egg bake turn green?
This usually happens when the liquid from the spinach isn’t squeezed out thoroughly. The chlorophyll in the spinach juice leaks into the egg mixture during baking, tinting the entire dish. To prevent this, ensure you use the sieve and spatula method to remove as much liquid as possible before mixing.
Can I add bread cubes to this recipe?
Adding bread turns this into a “strata.” If you want to add bread, you’ll need to increase the liquid ratio. For every 2 cups of bread cubes, add 2 more eggs and another 1/4 cup of cream. You should also let the mixture sit for at least 30 minutes before baking so the bread can fully absorb the custard.
What is the best pan size for a thicker slice?
This recipe is designed for a 9×9 inch square pan, which yields a nice, thick slice about 1.5 inches high. If you use a larger 7×11 or 9×13 pan, the bake will be much thinner and will cook faster (likely 20-25 minutes). For the best “velvety” texture, stick with the 9×9 inch size.
Can I prep the vegetables the night before?
Absolutely! You can sauté and squeeze the vegetables, crumble the bacon, and shred the cheese a day in advance. Store them in separate containers in the fridge. In the morning, just whisk the eggs and cream, fold everything in, and bake. I don’t recommend mixing the eggs with the vegetables overnight, as the salt can start to break down the egg structure prematurely.

Loaded Spinach and Bacon Egg Bake
Course: BreakfastCuisine: AmericanDifficulty: easy6
servings15
minutes45
minutes60
Minutes310
kcalAmerican
Ingredients
10 large eggs
1/2 cup heavy cream
1/2 teaspoon salt
1/2 teaspoon smoked paprika
1/4 teaspoon black pepper
4 cups fresh spinach, roughly chopped (will shrink significantly)
1.5 cups cremini mushrooms, sliced
1/2 cup yellow onion, diced
1.5 cups sharp cheddar cheese, shredded
8 slices thick-cut bacon, cooked until very crispy and crumbled
2 tablespoons fresh chives, finely minced
2 tablespoons olive oil
Directions
- Preheat your oven to 375°F (190°C). Generously grease a 9×9 inch metal or glass baking dish with butter or non-stick spray.
- The Moisture-Lock Step: Heat olive oil in a large skillet over medium-high heat. Add the onions and mushrooms. Sauté for 6-8 minutes until the mushrooms are deeply browned and have released all their liquid. Add the spinach and cook for another 2 minutes until completely wilted.
- The Squeeze: Transfer the cooked vegetables to a fine-mesh sieve and press down firmly with a spatula to squeeze out every drop of excess green liquid. This is the only way to prevent a soggy base.
- In a large mixing bowl, whisk the eggs, heavy cream, salt, pepper, and smoked paprika until completely combined and slightly frothy.
- Fold the squeezed vegetable mixture and 1 cup of the shredded cheese directly into the egg mixture. This ensures the vegetables are suspended throughout the slice rather than sinking to the bottom.
- Pour the mixture into the prepared baking dish. Top with the remaining 1/2 cup of cheese and half of the crumbled bacon.
- Bake for 30 to 35 minutes. The bake is done when the edges are golden brown and the center has a very slight, firm jiggle (it will carry-over cook).
- The Finish: Remove from the oven and immediately top with the remaining crispy bacon and fresh chives.
- The Set: Let the dish rest for at least 10 minutes before slicing. This resting period allows the protein structure to firm up, ensuring a clean, vertical cut and a dense, velvety mouthfeel.
Notes
- The secret to the texture is squeezing the excess liquid from the cooked spinach and mushrooms using a fine-mesh sieve. Let the dish rest for 10 minutes after baking to ensure clean slices and a firm set.