The Ultimate Golden Raspberry Crumble: Achieving a Crisp, Anti-Soggy Texture
Golden raspberries are the hidden gems of the berry world, offering a mellow, honey-like sweetness that puts traditional red varieties to shame. However, their delicate structure and high sugar content make them notoriously difficult to bake without turning your dessert into a soupy mess. Most home cooks struggle with the dreaded “soggy bottom,” where the fruit juices migrate upward and turn a promising crust into a damp, flavorless paste.
This guide tackles the chemistry of the bake to ensure your crumble remains structurally sound and incredibly crisp. We aren’t just tossing fruit in a pan; we’re managing moisture levels and fat temperatures to create a professional-grade dessert. By understanding how heat interacts with these specific drupelets, you’ll master a texture that stays crunchy for hours.
The secret to this recipe’s success lies in a dual-action approach: a precise cornstarch slurry to bind the fruit and a thermal-shock chilling method for the topping. I’ve found that skipping the chilling phase is the number one reason crumbles fail, as the butter melts into the fruit before the flour can set. Follow these technical steps, and you’ll achieve a jammy, thick filling topped with distinct, sandy nuggets of shortbread-style bliss.
Why Golden Raspberries Require a Specific Approach
Golden raspberries aren’t just red raspberries with a color deficiency; they possess a unique chemical makeup. They generally have a lower acidity profile and a higher natural sugar concentration, which means they break down much faster under heat. If you use a standard red raspberry recipe, the result is often cloyingly sweet and structurally weak.
Because they lack the sharp tartness of their red cousins, golden raspberries need a boost of citrus to help the natural pectin set. Without this adjustment, the fruit won’t achieve that “jammy” consistency we crave. Instead, it will release its water content all at once, flooding the bottom of your baking dish and steaming the crust from below.
Furthermore, the yellow drupelets are softer and more prone to bruising. This means you have to be incredibly gentle during the mixing phase. If you macerate the berries too much before they hit the oven, you’ll lose the beautiful definition of the fruit, resulting in a flat, one-dimensional filling rather than a vibrant, textured center.
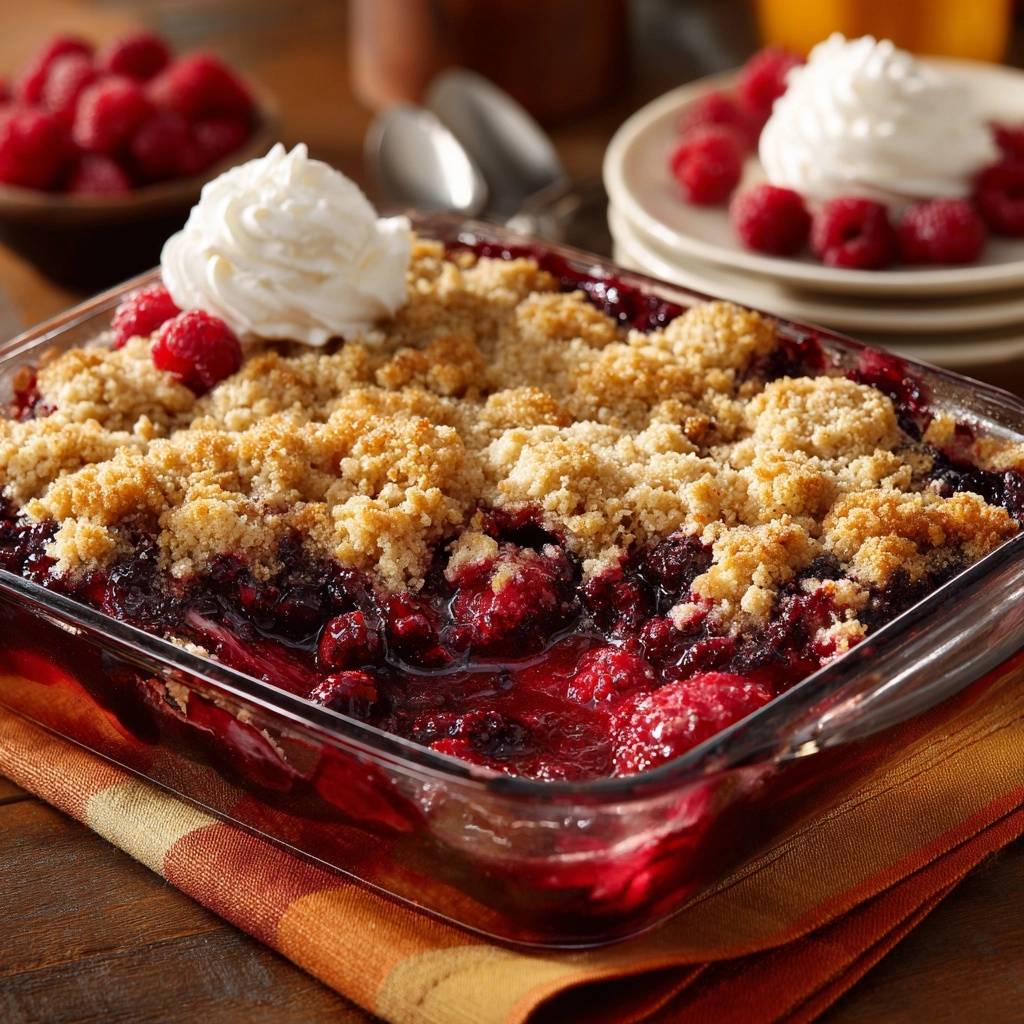
Essential Components for the Perfect Fruit Base
For an 8×8 inch dish, six cups of fruit is the absolute golden ratio. This volume ensures the fruit layer is thick enough to bubble up against the sides without being so deep that the center stays cold. It creates a balanced fruit-to-crust ratio where every bite contains both a crunch and a burst of warm berry.
Fresh berries are always the preferred choice for this crumble because they hold their shape better during the 40-minute bake. However, if you must use frozen berries, do not thaw them first. Thawing causes the cell walls to collapse prematurely, leading to a watery disaster. Simply toss them while frozen and increase your cornstarch by about 15% to account for the extra ice crystals.
The quality of your sugar also matters here. While we use granulated sugar for the filling to keep the fruit flavor clean, the brown sugar in the topping adds the necessary moisture and molasses depth. This contrast ensures the filling tastes like pure raspberry while the topping provides a rich, caramelized finish.
The Role of Cornstarch in Moisture Control
Cornstarch is the heavy lifter in this recipe, acting as the primary thickening agent. It begins to gelatinize between 144°F and 162°F, which is exactly when the raspberries start to release their juices. By coating the berries in cornstarch early, you ensure that as soon as the liquid escapes, it’s immediately trapped in a thick, translucent suspension.
I prefer cornstarch over flour for fruit fillings because it creates a clear, glossy sheen that looks beautiful through a glass dish. Flour can often leave the filling looking cloudy or tasting slightly pasty. Cornstarch provides a “clean” mouthfeel that lets the delicate floral notes of the golden raspberries shine through without interference.
Make sure your cornstarch is fresh, as it can lose its thickening power over time. If your crumbles are consistently runny despite following the measurements, your starch might be past its prime. Always whisk it thoroughly with the sugar before adding it to the berries to prevent any chalky clumps from forming in the final dish.
Balancing Acidity with Lemon and Vanilla
Lemon juice is a mandatory addition, not an optional flavor booster. The acid in the lemon lowers the pH of the fruit mixture, which is essential for the cornstarch and natural pectin to bond effectively. It also cuts through the intense sweetness of the golden berries, providing a bright “pop” that wakes up the palate.
Vanilla extract serves as the bridge between the tart fruit and the buttery topping. It adds a layer of aromatic warmth that complements the honey notes of the golden raspberries. Use a high-quality pure vanilla extract rather than imitation, as the flavor will intensify and mellow beautifully during the long bake.
If fresh berries give you the best texture here, you’ll love how they work in this glazed lemon blueberry loaf too.
When adding these liquids, drizzle them over the sugar-coated berries rather than dumping them in one spot. This ensures every berry gets a light coating of flavor and acid. You want a thin, even film of “slurry” surrounding each fruit piece to guarantee consistent thickening across the entire baking dish.
Engineering the Shortbread-Style Sandy Topping
This isn’t your grandmother’s oat-filled “crisp.” We are aiming for a sophisticated, sandy texture that mimics a high-end shortbread cookie. By focusing on a specific flour-to-butter ratio, we create a topping that is sturdy enough to hold its shape but tender enough to melt in your mouth.
The goal is to create “sandy nuggets”—clumps of dough that vary in size from tiny grains to pea-sized pieces. These variations in size are what give the crumble its visual appeal and textural complexity. The smaller grains fill the gaps, while the larger nuggets provide a satisfying, crunchy bite that stands up to the soft fruit below.
To achieve this, you must work the butter into the dry ingredients until no loose flour remains. If you see a lot of white powder at the bottom of your bowl, the topping will taste dry and dusty. Keep working it until the mixture looks like damp sand and holds together when you squeeze a handful of it in your palm.
Why We Omit Oats for This Specific Texture
Oats are a wonderful ingredient, but they bring a rustic, chewy texture that can distract from the elegance of golden raspberries. For this specific “Golden” crumble, we want a refined aesthetic. Omitting the oats allows the buttery, vanilla-scented flour mixture to take center stage, creating a more cohesive dessert experience.
Without oats, the topping becomes more like a deconstructed tart shell. It provides a clean, crisp snap that contrasts perfectly with the jammy interior. This choice also makes the dessert feel lighter and more sophisticated, perfect for a dinner party where you want a “cleaner” presentation than a traditional country-style cobbler.
If you find yourself missing the crunch, don’t reach for the oats. Instead, focus on creating larger clumps of the flour and butter mixture. These “nuggets” will bake up into hard, crunchy bits that provide all the texture you need without the fibrous chew of grain.
The Importance of Cold, Cubed Unsalted Butter
Temperature is everything when it comes to a successful crumble topping. You must use cold, cubed unsalted butter straight from the refrigerator. When cold fat hits a hot 375°F oven, the tiny amount of water inside the butter evaporates instantly, creating steam pockets that puff up the flour and create a light, crisp texture.
If your butter is too soft or room temperature, it will simply oily-melt into the flour and the fruit. This results in a greasy, heavy topping that sinks into the berries rather than sitting proudly on top. You want the butter to remain in distinct pieces within the dough until the very moment it enters the oven.
I always recommend unsalted butter so you can control the seasoning yourself. A quarter teaspoon of fine sea salt is enough to sharpen the flavors without making the dessert taste savory. If you only have salted butter, omit the extra salt from the recipe to keep the balance correct.
Step-by-Step: Preparing the Golden Raspberry Filling
When you’re ready to mix the filling, grab your largest bowl. You need plenty of room to move the berries around without squashing them. Sprinkle the sugar, cornstarch, and lemon juice over the top, then use a large rubber spatula to gently fold the mixture from the bottom up.
You aren’t looking for a perfectly smooth sauce at this stage. You just want to see that every berry is dusted with the white cornstarch and sugar mixture. It might look a little dry or powdery at first, but don’t worry—the fruit will start releasing its juices the second it feels the heat of the oven.
Once tossed, transfer the berries to your 8×8 dish immediately. Don’t let them sit in the bowl for too long, or the sugar will start to draw out the juice prematurely, making the cornstarch clump up. Spread them into an even layer, making sure the corners of the dish are well-filled so the topping has a level surface to rest on.
The same contrast works beautifully with these flaky cranberry hand pies, especially when served with a cold scoop of vanilla ice cream.
The Chilling Phase: A Secret for Maximum Crunch
This is the step that separates amateur bakers from the pros. Once you’ve mixed your crumble topping, place the entire bowl in the freezer for exactly 10 minutes. This “thermal shock” ensures the butter is as cold as possible before it encounters the heat of the oven.
Chilling the topping allows the flour to hydrate slightly while the fat firms up. This creates a much more durable “barrier” between the fruit and the air. When you sprinkle the frozen clumps over the berries, they stay on the surface longer, allowing the crust to bake and harden before the fruit juices start to bubble up and soak into it.
I’ve found that this 10-minute window is the perfect amount of time. It’s long enough to reset the butter’s temperature after you’ve handled it with your warm hands, but not so long that the dough becomes a solid block. It’s a small effort that yields a massive payoff in the final “crunch” factor.
Baking Parameters for a Deep Golden Finish
We bake this crumble at 375°F for a very specific reason. A lower temperature, like 350°F, would take too long to brown the topping, causing the raspberries to overcook and turn into a watery mush. A higher temperature would burn the sugar in the crust before the cornstarch in the center has a chance to reach its thickening point.
You are looking for two specific visual cues to know when it’s done. First, the topping should be a deep, even golden brown—not just pale tan. Second, you must see the fruit juices bubbling vigorously at the edges of the dish. If the juice is just sitting there, the cornstarch hasn’t “activated” yet, and your filling will be runny.
If the topping is browning too quickly but the fruit isn’t bubbling, loosely tent a piece of foil over the top. This reflects some of the direct heat away from the crust while allowing the internal temperature of the fruit to continue rising. Usually, 35 to 40 minutes is the sweet spot for a standard glass baking dish.
The Science of the 20-Minute Rest Period
I know it’s tempting to scoop into that bubbling dish the second it leaves the oven, but you must wait. The resting period is a functional part of the cooking process. As the crumble cools from 212°F down to a serving temperature, the starches undergo a process called retrogradation, where they firm up and set the liquid into a thick jam.
If you cut into it immediately, the hot juice will simply run to the bottom of the hole you’ve created, leaving the rest of the crumble high and dry. Waiting 20 minutes allows the filling to stabilize. This is how you get that “clean scoop” look where the fruit stays exactly where you put it on the plate.
During this time, the topping also finishes crisping up. As the steam escapes, the crust hardens further, ensuring that first bite has the maximum possible contrast between the crunchy shortbread and the velvety raspberries. Trust the process—the wait is worth the texture.
Troubleshooting Common Crumble Failures
If your topping turned out too powdery or dry, you likely didn’t incorporate the butter well enough. Next time, use your fingers to really “smush” the butter into the flour until the mixture looks like wet sand. You shouldn’t see any white, dry flour streaks in the bowl before you put it in the freezer.
If the fruit is too tart, it’s usually because the berries weren’t fully ripe. Golden raspberries should be a deep honey-yellow, almost orange, when they are at their peak. If yours are pale yellow, they will be much more acidic. In that case, you can increase the granulated sugar in the filling by an extra two tablespoons to balance the bite.
A runny filling is almost always caused by underbaking. Remember, the cornstarch needs to reach a boil to work its magic. If you don’t see those big, slow bubbles popping at the edges of the pan, the starch hasn’t reached the necessary temperature to thicken the juices. Always bake until you see the “lava” effect at the sides.
Flavor Variations and Ingredient Swaps
While vanilla is the classic choice, golden raspberries pair beautifully with almond extract. Swapping the vanilla for a half-teaspoon of almond extract gives the dessert a sophisticated, marzipan-like aroma that highlights the stone-fruit qualities of the berries. It’s a simple change that makes the dish feel very high-end.
Sweeten Your Morning
If you loved that golden raspberry crumble, try these breakfast-friendly twists that share its love for fruit and fluffy texture.
- Start your day with Fluffy Blueberry Pancakes, where the tart berries echo the crumble’s fruity note.
- For a heartier take, Fluffy Oatmeal Pancakes bring a warm, toasty backbone that pairs well with any leftover crumble topping.
For a deeper, more complex sweetness, try using coconut sugar in the topping instead of light brown sugar. Coconut sugar has a natural toasted caramel flavor that pairs perfectly with the buttery crust. It also has a slightly coarser texture, which can actually enhance the “sandy” feel of the crumble nuggets.
If you want to add a bit of spice, a pinch of ground cardamom in the flour mixture is a game-changer. Cardamom has a citrusy, floral note that mimics the natural scent of golden raspberries. Just be careful not to overdo it; a little goes a long way, and you don’t want to mask the delicate flavor of the fruit itself.
Equipment: Why Glass or Ceramic Matters
When baking fruit desserts, the material of your pan is just as important as the ingredients. I strongly recommend using a glass or ceramic 8×8 dish. These materials heat up more slowly and retain heat more evenly than metal. This prevents the edges of the fruit from scorching before the center is cooked through.
Glass is particularly helpful because it allows you to see exactly what’s happening at the bottom of the dish. You can check if the fruit juices have turned from a thin liquid into a thick, bubbling syrup. Metal pans can sometimes cause the sugar to caramelize too quickly at the contact points, leading to a burnt taste at the base.
Ceramic is also a great choice because it looks beautiful for table service. Since this crumble needs to rest for 20 minutes, a heavy ceramic dish will keep the dessert at the perfect warm serving temperature for much longer than a thin aluminum pan would. It’s the ideal vessel for a “bake and serve” family meal.
Make-Ahead Strategies and Storage Logistics
You can easily prep the components of this crumble 24 hours in advance. Store the fruit mixture and the topping in separate airtight containers in the refrigerator. Do not combine them until the very moment you are ready to preheat the oven. If the topping sits on the wet fruit overnight, it will absorb moisture and lose its ability to crisp up.
When you’re ready to bake, just give the fruit a quick stir to redistribute the cornstarch, dump it in the dish, and sprinkle the cold topping over it. Since the ingredients are starting out colder than usual, you might need to add 5 minutes to the total baking time. Just keep an eye on those bubbles!
Leftovers should be stored in the refrigerator, but be warned: the topping will soften over time as it sits on the moist fruit. To restore the crunch, reheat individual portions in a 350°F oven or toaster oven for about 10 minutes. Avoid the microwave, as it will turn the crust rubbery and the berries into a liquid mess.
Serving Suggestions for a Sophisticated Presentation
Presentation is all about contrast. The best way to serve this is warm—not hot—with a cold element on top. A generous swirl of lightly sweetened whipped cream is the classic choice. The airy texture of the cream cuts through the density of the crumble and the richness of the butter.
To make it look like it came from a professional kitchen, save a handful of fresh, uncooked golden raspberries for the garnish. Placing a few raw berries on top of the baked crumble provides a fresh textural contrast and a pop of bright color that tells the diner exactly what’s inside. It makes the dish look vibrant and intentional.
If you want to get fancy, a sprig of fresh mint or a very light dusting of powdered sugar can add that final touch of elegance. Serve it in shallow bowls rather than flat plates to catch every drop of that delicious jammy sauce. Oh man, when that cold cream starts to melt into the warm berry juice, it’s absolute heaven!
Whipped Cream vs. Mascarpone: Choosing a Topping
While whipped cream is the standard, don’t overlook the power of mascarpone. Whisking a dollop of mascarpone into your heavy cream before whipping adds a subtle tang and a much thicker, velvetier mouthfeel. This extra richness is incredible against the light, floral sweetness of the golden berries.
If you prefer something even more tart, a spoonful of creme fraiche is a brilliant alternative. The slight fermentation of
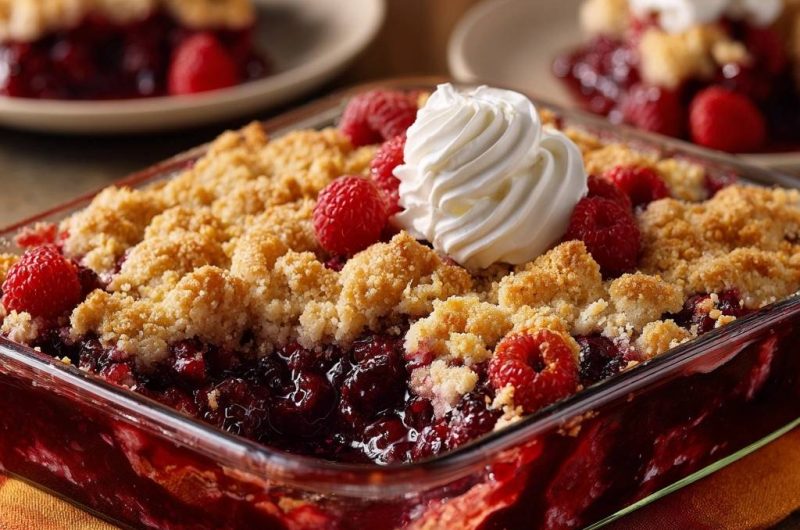
Raspberry Crumble
Course: DessertCuisine: AmericanDifficulty: easy6
servings15
minutes40
minutes385
kcal55
MinutesThis recipe solves the common problem of watery fruit crumbles. By using cornstarch to bind the juices and chilling the butter-rich topping before baking, you achieve a thick fruit base and a crunchy, golden crust every time.
Ingredients
6 cups fresh raspberries (plus extra for garnish)
3/4 cup granulated sugar
3 tablespoons cornstarch
1 tablespoon lemon juice
1 teaspoon vanilla extract
1 1/4 cups all-purpose flour
1/2 cup packed light brown sugar
1/2 cup cold unsalted butter, cubed
1/4 teaspoon salt
Whipped cream for serving
Directions
- Preheat your oven to 375 degrees F (190 degrees C).
- In a large bowl, gently toss the raspberries with the granulated sugar, lemon juice, vanilla, and cornstarch. The cornstarch is the secret to the anti-soggy bottom as it binds the juices into a thick, jam-like sauce rather than letting them soak the topping.
- Transfer the fruit mixture into an 8×8 inch glass baking dish, spreading it into an even layer.
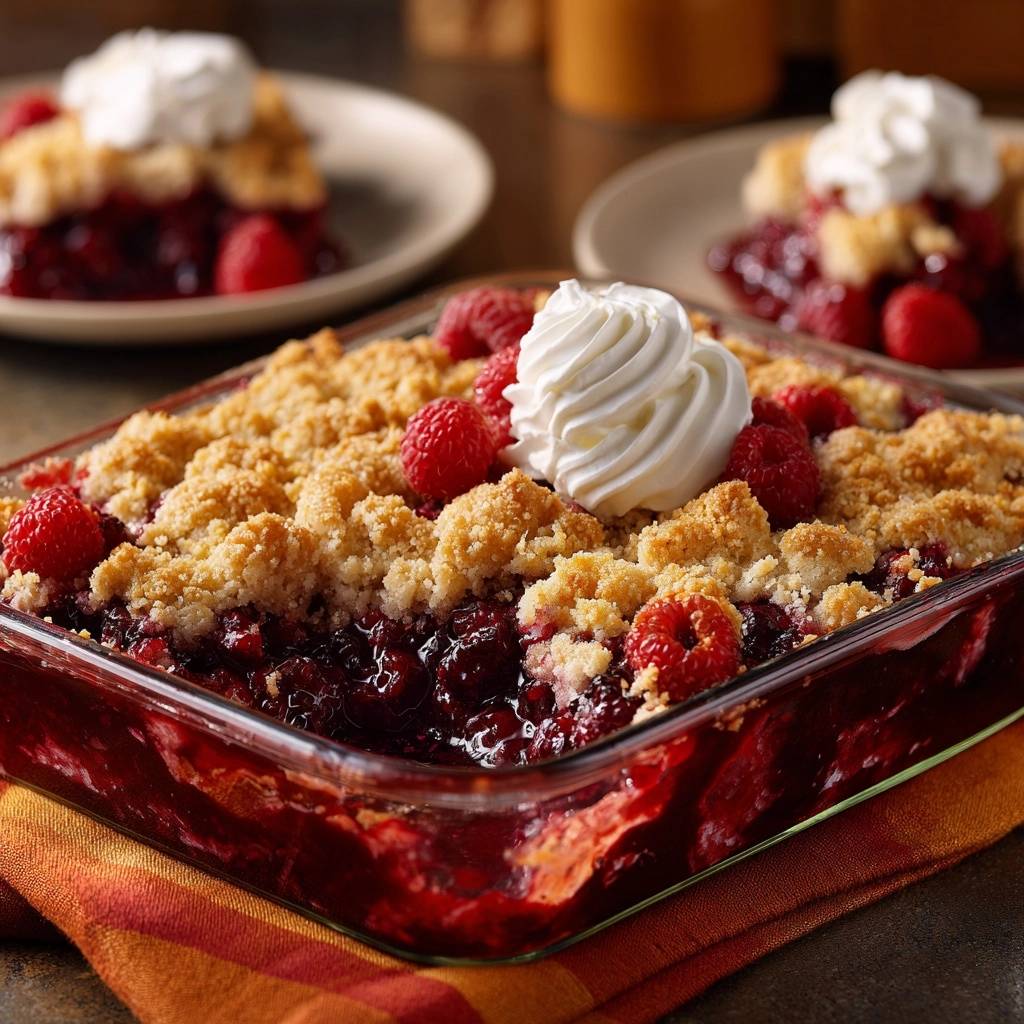
- In a separate bowl, whisk together the flour, brown sugar, and salt. (Note: Oats are omitted to match the smooth, shortbread-style sandy crumble shown in the image).
- Use a pastry cutter or your fingers to work the cold cubed butter into the flour mixture until it forms distinct, pea-sized clumps and larger sandy nuggets.
- To solve the texture issue, place the crumble topping in the freezer for 10 minutes before adding it to the fruit. This ensures the butter doesn’t melt too quickly, creating a distinct, crunchy barrier.
- Sprinkle the chilled topping evenly over the berries, leaving some larger clumps intact for texture.
- Bake for 35 to 40 minutes until the fruit is bubbling vigorously at the edges and the topping is a deep, even golden brown.
- Let the crumble rest for at least 20 minutes before serving. This resting period is crucial for the cornstarch to fully set the fruit filling into the thick consistency seen in the image.
- Garnish with a few fresh, uncooked raspberries and a generous swirl of whipped cream before serving.
Notes
- Oats are omitted for a sandy, shortbread-style texture. Resting the crumble for 20 minutes after baking is essential for the filling to set properly.