Mastering the Zesty Dill Pickle Snack Mix
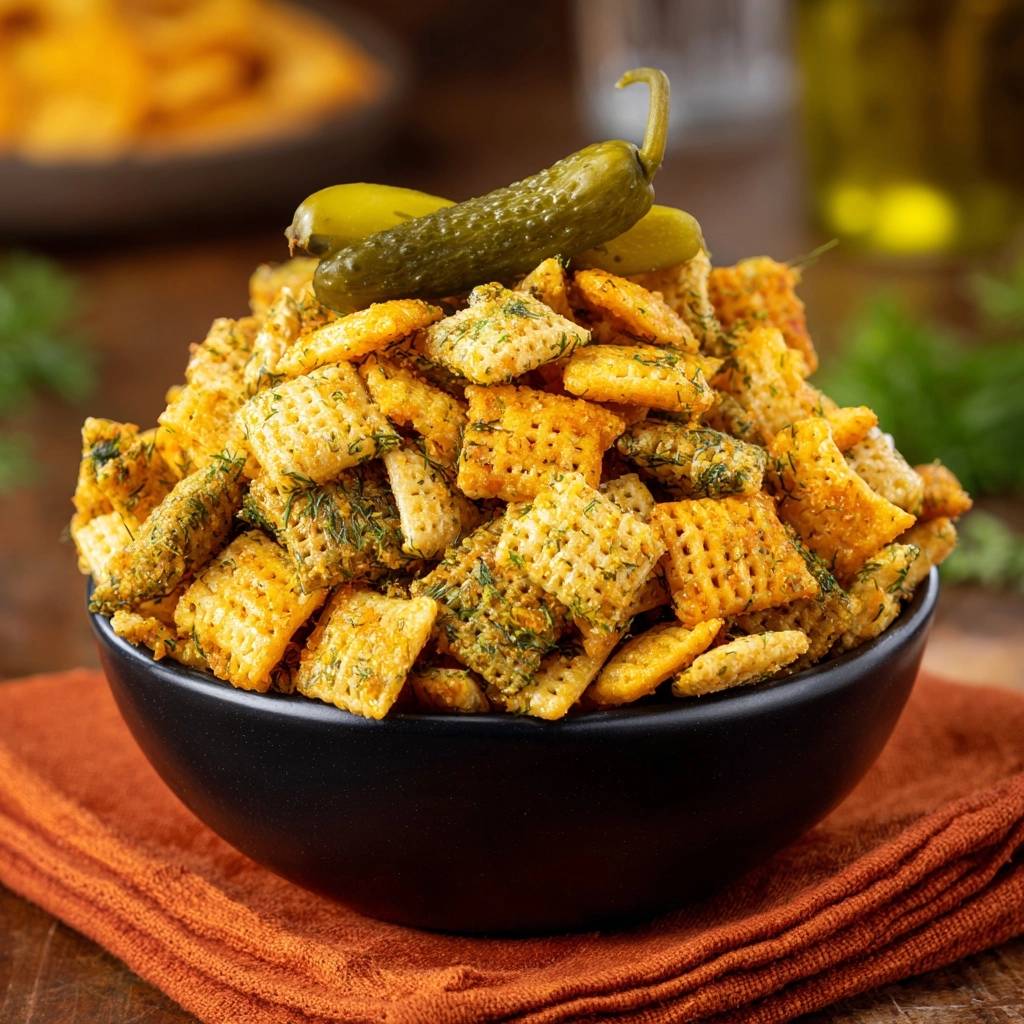
Imagine reaching into a bowl and pulling out a cereal square that shatters with a loud, satisfying crunch, releasing a punchy explosion of vinegar and herb. Most homemade snack mixes end up as a disappointing, greasy pile of mush at the bottom of the bowl because they’re drowned in liquid. This Zesty Dill Pickle Snack Mix changes the game by focusing on a specific dehydration method that locks in flavor without sacrificing the structural integrity of the cereal.
The secret lies in the balance of high-acid pickle brine and a dry-rub finish that creates a savory crust on every single piece. We aren’t just making a snack; we’re engineering a texture that stays crisp for days. By moving away from high-heat roasting and embracing a low-temperature approach, you ensure the delicate rice squares don’t scorch while the moisture completely evaporates.
If you’ve ever wondered why store-bought mixes have that addictive, powdery coating, it’s all about the layering. I’ve found that adding the liquid in stages is the absolute best way to prevent “wet spots” that lead to sogginess. This technique ensures the seasoning sticks to the outside while the inside of the cereal remains airy and light.
The Science of Shatteringly Crisp Cereal
Rice cereal squares are essentially tiny, edible sponges designed to soak up whatever they touch. When you introduce moisture like pickle juice or melted butter, the starch molecules begin to soften immediately. If you blast them with high heat, the outside browns before the internal moisture can escape, trapping steam inside and leaving you with a chewy, soft snack.
Setting your oven to 250°F is the “Goldilocks” zone for this recipe. At this temperature, you’re performing a controlled dehydration rather than a traditional bake. This allows the water content in the pickle juice to turn into vapor slowly, leaving behind the concentrated vinegar solids and salt that provide that signature zing.
The fat from the butter acts as a barrier, but it also needs time to set. As the mix sits in the low heat, the butter and the starches in the cereal form a crisp, lacquered shell. This transformation is what creates that “shatter” effect when you take a bite, rather than a dense, oily crunch.
Essential Components for Maximum Dill Flavor
Quality ingredients are paramount when the flavor profile is this focused. I always recommend using unsalted butter because the ranch seasoning and pickle brine already pack a significant sodium punch. Using unsalted butter gives you total control over the seasoning levels so the snack doesn’t become unpleasantly salty.
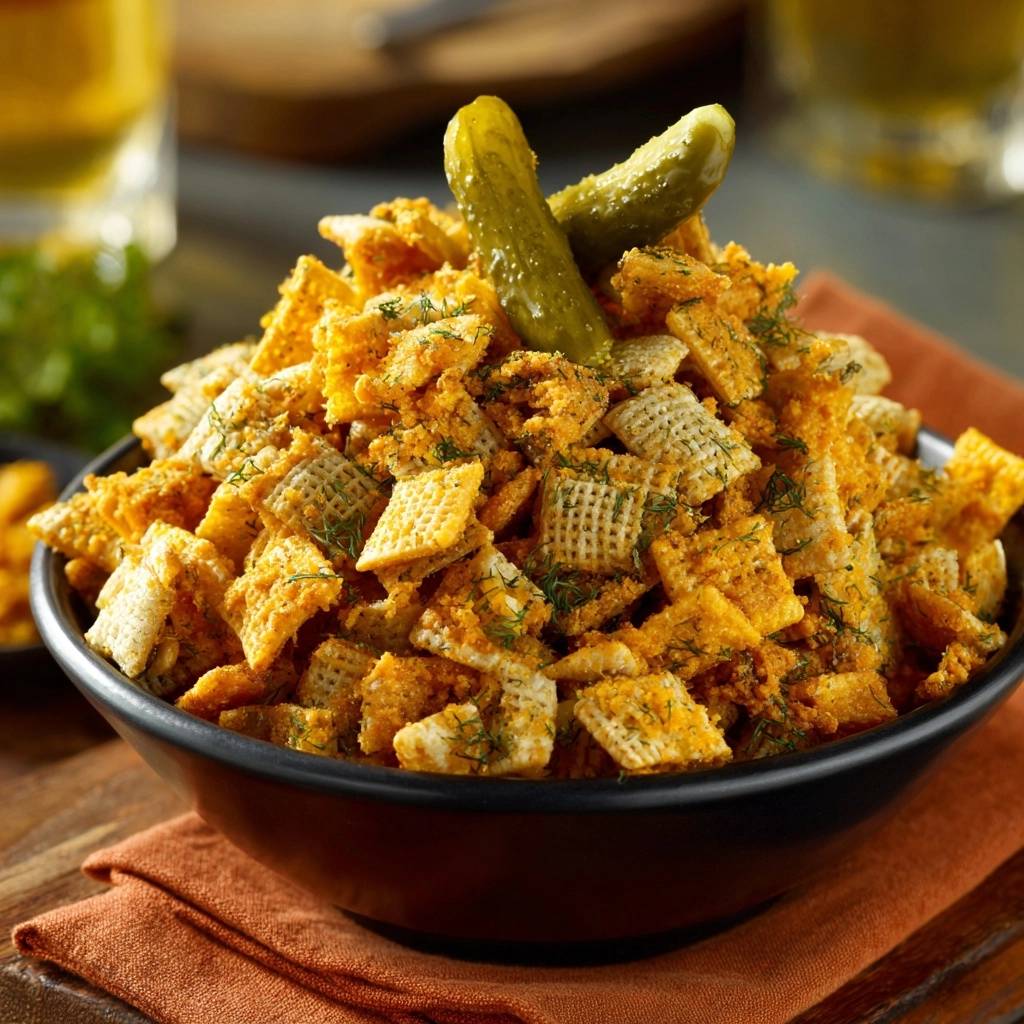
The choice of Parmesan cheese might surprise you, but the fine, “shaker-style” cheese is actually superior here to the fresh, long shreds. The powdery texture of the grated Parmesan acts as a binding agent. It fills the tiny crevices of the cereal squares, helping the dried dill and garlic powder adhere to the surface instead of falling to the bottom of the pan.
The Role of Dry vs. Fresh Herbs
Dried dill weed is the workhorse of this recipe because it provides a deep, earthy base that can withstand the 45-minute bake time. It infuses the butter as it cooks, ensuring the flavor penetrates the cereal. However, dried herbs can sometimes lose their “green” brightness in the oven.
That’s why adding fresh, finely chopped dill at the very end is a non-negotiable step. The residual heat from the pans will wake up the oils in the fresh dill without cooking it into a brown, oxidized mess. This combination gives you both the concentrated flavor of the dried herb and the grassy, aromatic punch of the fresh version.
The same principle of even coating works beautifully for these garlic herb Parmesan crisps.
Choosing the Right Pickle Juice
Not all pickle brines are created equal, and the one you choose will define the “zing” of your mix. For a sharp, aggressive tang, use a standard white vinegar-based dill pickle brine. These are usually found in the shelf-stable aisle and provide a clean, acidic finish that cuts through the richness of the butter.
If you prefer a more complex, funky flavor, you can use brine from refrigerated, fermented pickles. However, keep in mind that fermented brines are often cloudier and may require an extra whisking to emulsify with the butter. Whichever you choose, make sure it’s a “dill” variety rather than “sweet” to keep the savory profile intact.
Step-by-Step: Preparing the Zesty Dill Pickle Snack Mix
Making this mix is a three-phase process that prioritizes even distribution. You want every single square to taste exactly the same, which requires a bit of patience during the coating stages. We move from emulsification to layered drizzling, and finally, the critical dehydration phase.
Think of yourself as a coach guiding the ingredients to work together. You’re looking for a transformation where the cereal goes from plain and dry to tacky and seasoned, and finally to a dry, crisp masterpiece. Don’t rush the tossing process; gentle movements with a large spatula will keep the cereal squares from breaking.
Phase 1: Emulsifying the Liquid Base
Butter and pickle juice don’t naturally want to stay together. If you just pour them over the cereal separately, you’ll end up with some pieces that are purely greasy and others that are unpleasantly sour. You must whisk them in a small jar or bowl until they form a pale, opaque liquid.
This emulsion ensures that the fat and the acid hit the cereal at the same time. When you see the mixture look creamy and unified, it’s ready. If you see beads of yellow butter floating on top of the clear juice, keep whisking or the coating will be inconsistent.
Phase 2: The Three-Stage Drizzle Technique
This is the most important part of the “Anti-Soggy” method. Instead of dumping all the liquid on at once, drizzle only one-third of the butter mixture over the cereal. Toss it thoroughly, then repeat the process two more times. This prevents any single area from becoming oversaturated.
By the third drizzle, the cereal should look slightly damp and shiny but not dripping. This tacky surface is exactly what you need for the dry seasonings to stick. If you notice the cereal clumping together, keep tossing until the pieces move freely again.
Phase 3: Achieving Even Seasoning Distribution
When applying the dry rub, think of it like a light snowfall. Sprinkle the mixture of Parmesan, ranch, and spices from high above the bowl while tossing with your other hand. This “snowfall” method prevents the spices from clumping into salty pockets.
The same oven-drying trick works well to keep the cheese from sticking when you make a batch of crispy Parmesan crisps.
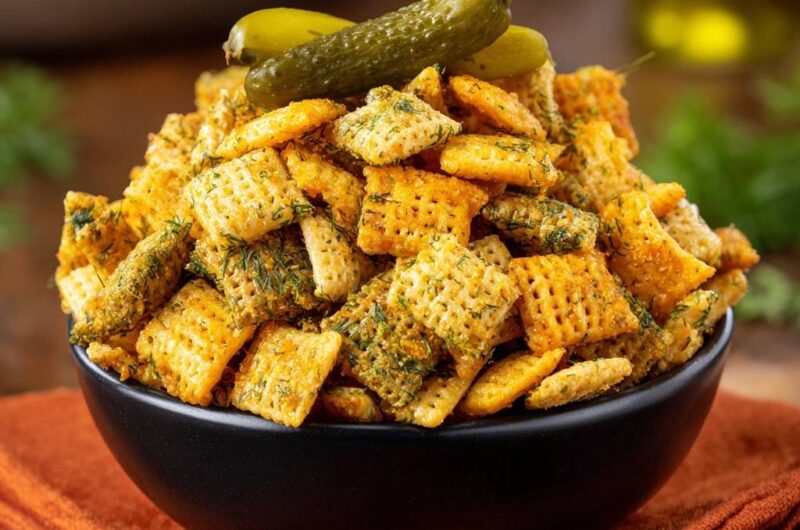
The smoked paprika is a secret weapon here. While it adds a very subtle hint of woodsy flavor, its primary job is visual. It provides a beautiful golden-orange hue that contrasts perfectly with the green flecks of dill, making the snack mix look as vibrant as it tastes.
Oven Management and Airflow Strategies
Airflow is the enemy of sogginess. If you pile all nine cups of cereal onto one baking sheet, the pieces in the middle will steam rather than dry out. You must use two large rimmed baking sheets to ensure the cereal is in a single, thin layer.
This “Low and Slow” philosophy is what separates a professional-grade snack mix from a soggy home version. By giving the air enough room to circulate around each square, you’re ensuring that the moisture is pulled away from the cereal and out of the oven entirely.
The 15-Minute Stir Schedule
It might seem tedious to set a timer and stir every 15 minutes, but it’s vital for a uniform crunch. Stirring redistributes the fats that naturally settle toward the bottom of the cereal squares. It also ensures that the pieces in the corners of the pan don’t get darker than the ones in the center.
When you stir, use a flat spatula to flip the cereal over entirely. You’ll notice that as the 45 minutes progress, the cereal feels lighter and sounds “clinkier” against the pan. That sound is the best indicator that you’re successfully removing the moisture.
Troubleshooting Common Snack Mix Issues
If your mix comes out of the oven and still feels a bit soft, don’t panic. The cereal actually does a significant amount of its “crisping” as it cools down to room temperature. However, if it’s still chewy after cooling, it likely needed another 10 minutes in the oven or your kitchen is particularly humid.
Too much salt is another common complaint. This usually happens if you use salted butter or a ranch brand with high sodium content. To fix this in future batches, you can increase the amount of plain cereal or omit the Parmesan cheese, which carries its own saltiness.
If your herbs look black or burnt, your oven might be running hot. Every oven is different, so it’s worth checking yours with an internal thermometer. If the herbs are browning too quickly, drop the temperature to 225°F and extend the drying time by 15 minutes to compensate.
Flavor Variations and Texture Swaps
While rice cereal is the classic base, you can easily swap in other textures. Pretzels, rye chips, or even bagel chips work beautifully with the dill profile. Just remember that denser items like pretzels won’t soak up the brine as easily as cereal, so you may need to toss them more vigorously.
What to Serve Alongside
This zesty dill pickle snack mix is bold and briny, so pair it with cool, crunchy sides or a warm bowl of something hearty.
- For more pickle crunch, try these Rainbow Pepper Pickles — the crisp brine and sweet heat are a natural match for the snack mix.
- A bowl of Hearty Chickpea Pasta Soup balances the salty, tangy snack with gentle tomato broth and tender pasta.
For those who want a “Spicy Dill” version, double the smoked paprika and add a half-teaspoon of cayenne pepper to the dry rub. The heat pairs perfectly with the vinegar tang. Just be careful not to add hot sauce to the liquid base, as the extra water content can mess with the crispness levels.
Storage Solutions to Maintain Crunch
The “Cooling Rule” is the most important part of storage. Never, ever put warm snack mix into a container. The residual heat will create condensation on the inside of the lid, and within an hour, your hard work will be ruined by moisture. Let it sit on the pans for at least 30 minutes.
Once completely cool, store the mix in a glass jar or a high-quality airtight plastic container. It will stay perfectly fresh and crunchy for up to a week at room temperature. I don’t recommend freezing this mix, as the thawing process introduces moisture that the cereal squares simply can’t handle.
Expert Tips for Serving and Presentation
To give this snack a professional look, serve it in a wide wooden bowl and top it with a handful of whole cornichons or baby gherkins. The visual of the whole pickles tells your guests exactly what flavor profile to expect. Plus, the extra vinegary bite from a whole pickle is a great palate cleanser between handfuls of the mix.
When it comes to pairings, think about drinks that have a sharp, clean finish. A crisp ginger ale or a sparkling botanical water with hints of cucumber or lemon will complement the dill beautifully. These drinks mirror the acidity of the snack mix without overwhelming the palate.
Frequently Asked Questions
Can I use a microwave for this recipe?
I strongly advise against using a microwave. Microwaves heat the water molecules inside the cereal rapidly, which often results in a “tough” or chewy texture rather than a crisp one. The oven’s dry heat is essential for the dehydration process that makes this recipe successful.
How do I make this vegan-friendly?
You can easily adapt this by using a high-quality plant-based butter stick. For the Parmesan, use a vegan nutritional yeast-based “parm” or simply increase the garlic and onion powder. Most dry ranch packets contain dairy, so look for a specific vegan-certified ranch seasoning or make your own using dried herbs and onion flakes.
Can I use bottled dill juice instead of jar brine?
Yes, you can use bottled pickle juice, but check the ingredient label first. Some bottled versions are highly concentrated or contain yellow dyes and preservatives that can alter the flavor. Brine straight from a jar of high-quality pickles usually has the most authentic, balanced flavor.
Why is my mix greasy instead of crisp?
Greasy snack mix is usually caused by one of two things: not stirring enough or overcrowding the pan. If the cereal sits in a pool of butter without being moved, it absorbs the fat rather than letting the moisture evaporate. Ensure you are using two pans and sticking to the 15-minute stir schedule to keep the fat moving and drying.
Can I use different types of cereal?
Absolutely. While rice squares are the crunchiest, corn or wheat squares work well too. Just be aware that wheat squares are denser and may require a slightly longer bake time to achieve the same level of crispness. Avoid sweetened cereals, as the sugar will clash with the savory dill and vinegar.
Dill Pickle Snack Mix
Course: SnackCuisine: AmericanDifficulty: easy12
servings10
minutes45
minutes155
kcal55
MinutesThis recipe solves the problem of soggy snack mixes by using a specific butter-drizzling method and a low-temperature baking process. It combines rice cereal with tangy pickle juice, ranch seasoning, and plenty of dill for a crunchy, savory treat.
Ingredients
9 cups rice cereal squares (Chex-style)
1/2 cup unsalted butter, melted
3 tablespoons dill pickle juice
1/4 cup grated Parmesan cheese (the fine, shaker-style helps the herbs adhere)
1 packet (1 oz) dry ranch seasoning mix
3 tablespoons dried dill weed
1 tablespoon fresh dill, finely chopped (for visual brightness)
1 teaspoon garlic powder
1/2 teaspoon onion powder
1/2 teaspoon smoked paprika (for the golden-orange hue seen in the image)
Whole cornichons or baby gherkins for garnish
Directions
- Preheat your oven to 250°F (120°C). This low temperature is the key to evaporating moisture without scorching the delicate cereal.
- Place the cereal squares in a very large mixing bowl.
- In a small jar or bowl, whisk together the melted butter and the dill pickle juice until fully emulsified.
- Drizzle the butter mixture over the cereal in three separate stages, tossing gently with a large spatula between each addition. This prevents the cereal from over-absorbing liquid in one spot, which is the primary cause of sogginess.
- In a separate small bowl, combine the Parmesan cheese, ranch seasoning, dried dill, garlic powder, onion powder, and smoked paprika.
- Sprinkle the dry seasoning mixture over the damp cereal and toss thoroughly until every piece is evenly coated in the green herbs and golden spices.
- Spread the mix onto two large rimmed baking sheets in a single, thin layer. Do not crowd the pans; airflow is essential to prevent steaming.
- Bake for 45 minutes, stirring the mix every 15 minutes. This stirring schedule is vital to ensure even drying and to lock in the crunch.
- Remove from the oven and immediately toss with the fresh chopped dill while the residual heat helps it stick.
- Let the mix cool completely on the baking sheets. The snack mix will continue to crisp up as it reaches room temperature.
- Serve in a bowl topped with whole cornichons for an extra vinegary punch. Store leftovers in an airtight container to maintain the perfect texture.
Notes
- The secret to the anti-soggy texture is drizzling the butter in stages and ensuring the mix cools completely on the baking sheet to lock in the crunch. Store in an airtight container to maintain texture.