Sweet Glazed Buns: Irresistibly Soft & Simple

There’s nothing quite like a warm, soft bun straight from the oven, but achieving that perfectly tender, melt-in-your-mouth texture can sometimes feel like a baking challenge. I’ve been there, pulling out a batch of ‘Sweet Glazed Buns’ only to find them dry or too dense, which is incredibly disappointing.
After countless experiments, I finally cracked the code to consistently bake the most incredibly soft, moist, and wonderfully sweet glazed buns every single time. This recipe isn’t just another set of steps; it’s a game-changer, guaranteeing a delightful result that will have everyone asking for more.
Why These Sweet Glazed Buns Will Become Your Go-To
This recipe for Sweet Glazed Buns stands out because it tackles the common pitfalls of homemade bread, ensuring success even for less experienced bakers. Its unique approach to kneading and proofing guarantees a texture that’s truly unmatched.
You’ll discover the secret to buns that are not just soft, but profoundly tender and moist, retaining their freshness longer than typical recipes. The balance of sweetness is just right, making them versatile for any time of day.
From the foundational dough to the glistening glaze, every element is designed for optimal flavor and texture, transforming simple ingredients into an irresistible treat that will impress family and friends alike.
Gather Your Essentials: What You’ll Need
Great baking begins with great ingredients. Always opt for fresh, quality components to ensure your Sweet Glazed Buns achieve their full potential in flavor and texture.
Dough Foundation: Wet Ingredients
Warm Milk: This is crucial for activating your yeast, providing the ideal environment for it to bloom and create the airy texture. It also contributes to the bun’s soft, tender crumb.
Active Dry Yeast: The leavening agent responsible for the beautiful rise of your buns. Fresh, active yeast is non-negotiable for a successful bake.
Large Egg, Room Temperature: An egg adds richness, helps with the dough’s structure, and contributes to a lovely golden color. Room temperature eggs emulsify better with other ingredients.
Unsalted Butter, Melted and Cooled Slightly: Butter enriches the dough, making the buns incredibly tender and flavorful. Using unsalted butter gives you control over the overall saltiness.
Structure & Sweetness: Dry Ingredients
Granulated Sugar: Beyond sweetness, sugar feeds the yeast, aiding in the fermentation process and helping the buns brown beautifully. A small amount is also used to kickstart the yeast.
Salt: Essential for balancing the sweetness and enhancing the overall flavor of the buns. It also plays a role in controlling yeast activity and strengthening the gluten structure.
All-Purpose Flour: The primary structural component. Good quality all-purpose flour provides the necessary protein to develop gluten, leading to a chewy yet tender bun.
The Perfect Finish: Glaze Components
Powdered Sugar: This fine sugar dissolves easily to create a smooth, lump-free glaze with a beautiful opaque finish.
Milk or Water: Used to adjust the consistency of the glaze, allowing it to be thick enough to cling to the buns but pourable for even coverage.
Vanilla Extract (optional): Adds a warm, aromatic note to the glaze, complementing the sweet flavor of the buns beautifully.
Essential Tools for Baking Success
Having the right tools can make your baking experience smoother and more enjoyable, leading to perfect results every time.
Large Mixing Bowls: You’ll need at least two – one for the dough and another for the glaze. Ample space allows for easy mixing and proofing.
Having the right mixing bowls and spatula on hand makes it easy to tackle this glazed lemon blueberry loaf next.
Stand Mixer with Dough Hook (Optional, but Recommended): While not strictly necessary, a stand mixer significantly reduces the effort required for kneading and ensures consistent dough development.
Whisk: Essential for thoroughly combining wet ingredients and for whipping up a smooth, lump-free glaze.
Parchment Paper: Lining your baking sheet with parchment paper prevents sticking and ensures easy cleanup, allowing your buns to bake evenly.
Wire Rack: Crucial for cooling the buns and allowing the glaze to set evenly, preventing a soggy bottom.
Your Journey to Fluffy Sweet Glazed Buns: Step-by-Step
- Activate the Yeast:
In a large bowl, combine the warm milk, 1 teaspoon of granulated sugar, and the active dry yeast. Stir gently and let it sit for 5-10 minutes until foamy. This crucial step confirms your yeast is active and ready to make your buns rise beautifully.
- Combine Wet Ingredients:
Add the remaining 1/4 cup granulated sugar, room temperature egg, melted butter (cooled slightly), and salt to the yeast mixture. Whisk until all ingredients are well combined and smooth.
- Form the Dough:
Gradually add the all-purpose flour, about 1 cup at a time, mixing with a wooden spoon or a stand mixer with a dough hook until a shaggy dough forms. Do not add all flour at once; this allows it to incorporate smoothly.
- Knead to Perfection:
Turn the dough out onto a lightly floured surface and knead for 8-10 minutes by hand, or 6-8 minutes with a stand mixer, until it is smooth, elastic, and no longer sticky. It should spring back slowly when you gently poke it.
This thorough kneading is the game-changer for developing gluten, which traps moisture and air, making the buns incredibly tender, not dense. This step is key to avoiding dense, heavy cinnamon sugar pull-apart rolls or any other yeast-based baked good.
- First Rise (Proofing):
Lightly grease a clean large bowl. Place the dough in the bowl, turning once to coat. Cover the bowl with plastic wrap or a clean kitchen towel and let it rise in a warm, draft-free place for 1 to 1 1/2 hours, or until doubled in size.
Proper proofing allows the yeast to create enough gas, which is essential for light and airy buns. A warm environment helps the yeast work efficiently.
- Shape the Buns:
Once the dough has doubled, gently punch it down to release the air. Divide the dough into 12 equal pieces and roll each piece into a smooth, round ball.
- Second Rise for Ultimate Softness:
Arrange the dough balls on a baking sheet lined with parchment paper, leaving some space between them. Cover loosely with plastic wrap or a kitchen towel and let them rise again for another 30-45 minutes, or until visibly puffy and almost doubled in size.
This second rise is absolutely crucial for achieving that signature soft, airy texture, ensuring they don’t come out flat or gummy. It builds on the lightness developed in the first proof.
- Preheat & Bake:
Preheat your oven to 375 degrees F (190 degrees C). Bake the buns for 12-15 minutes, or until golden brown on top and cooked through.
Avoid overbaking, as this can easily dry out the buns. They should be just lightly golden and will continue to firm up slightly as they cool.
- Whip Up the Glaze:
While the buns are baking, prepare the glaze: In a medium bowl, whisk together the powdered sugar, 3 tablespoons of milk or water, and vanilla extract (if using) until smooth. Add more liquid one teaspoon at a time if needed to reach a thick but pourable consistency.
- Glaze and Serve:
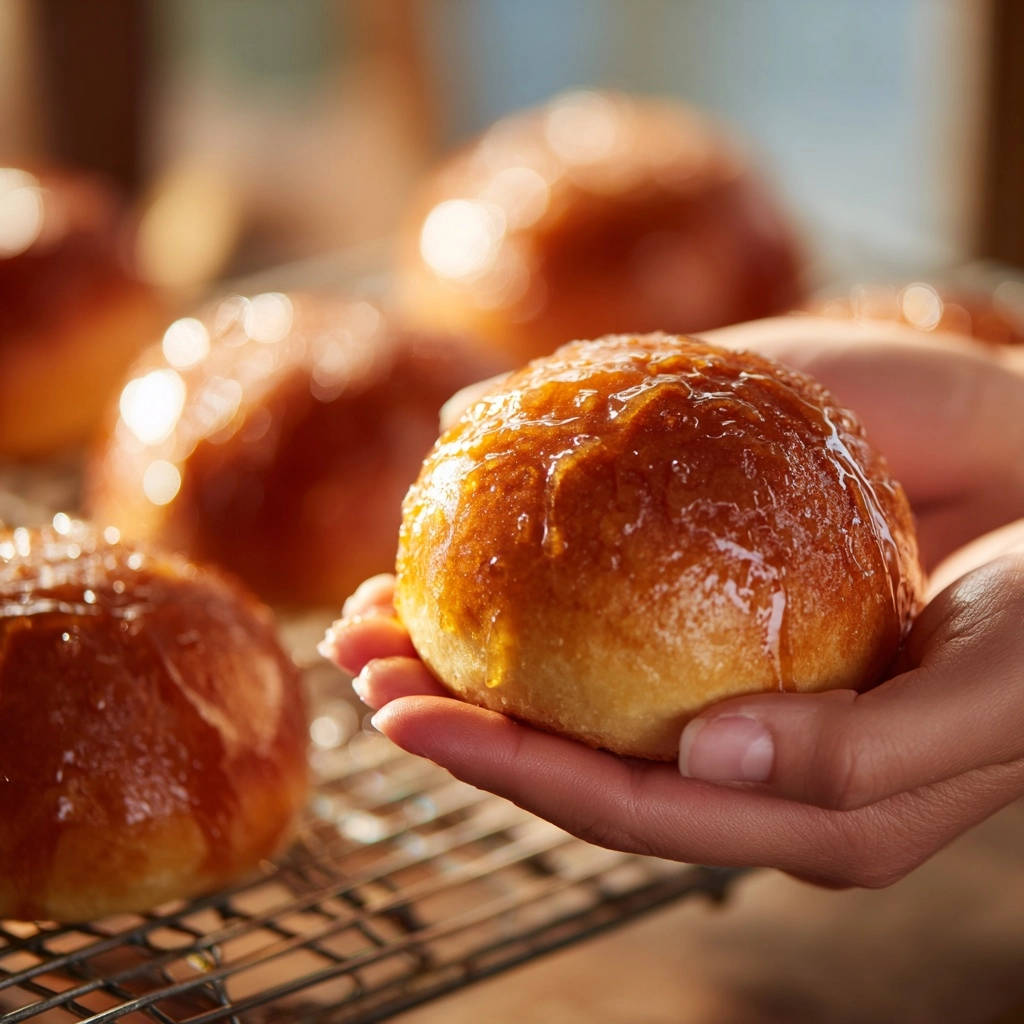
As soon as the buns come out of the oven, transfer them to a wire rack set over a tray. Generously drizzle or brush the warm buns with the prepared glaze.
The warmth of the buns helps the glaze spread evenly and creates that beautiful, shiny finish. Let the glaze set for a few minutes before serving these delectable sweet glazed buns.
Chef’s Secrets: Mastering Your Sweet Glazed Buns
Temperature is Key: The Yeast Activation Sweet Spot. Ensure your milk is truly between 105-115°F (40-46°C). Too cold, and the yeast won’t activate; too hot, and you’ll kill it. A kitchen thermometer is your best friend here, guaranteeing a vibrant yeast start.
The Power of Proper Kneading: Achieving “Not Dense” Buns. Don’t shortcut the kneading time! This is vital for developing gluten, which gives your buns their structure and prevents them from being heavy. Look for a smooth, elastic dough that passes the “windowpane test” (can be stretched thin without tearing) if you want to be extra precise.
Proofing Perfection: Don’t Rush the Rise. A warm, draft-free environment is essential for proper proofing. If your kitchen is cool, try placing the bowl in a slightly warm (but not hot) oven that’s been turned off, or near a sunny window. Patience during both rises pays off in ultimate fluffiness, much like the patience required for decadent pumpkin pie truffles.
Baking Just Right: Avoiding Dryness. Keep a close eye on your buns in the oven. They should be just lightly golden. Overbaking is the quickest way to dry them out, so pull them out as soon as they reach that ideal color. Remember they continue to cook slightly from residual heat once removed from the oven.
Glaze Application: The Warm Bun Advantage. Drizzling the glaze over warm (not hot!) buns allows it to melt slightly and seep into the cracks, creating that irresistible, shiny, and fully flavored exterior. Wait until they’re just cool enough to handle, but still wonderfully warm for optimal absorption.
Troubleshooting Common Sweet Glazed Bun Challenges
Why Are My Buns Dry?
Dry buns are often a sign of overbaking. Ensure you’re pulling them from the oven as soon as they’re lightly golden and cooked through, typically within the 12-15 minute window. Using accurate measurements, especially for flour, also helps maintain crucial moisture within the dough.
My Dough Didn’t Rise!
This usually indicates inactive yeast. Double-check your milk temperature (too hot or too cold kills yeast), or ensure your yeast isn’t expired. Always perform the initial foaming step with sugar and warm milk to confirm yeast viability before proceeding with the recipe.
Buns Are Dense/Gummy
Density can result from insufficient kneading or under-proofing. Knead until the dough is smooth and elastic, developing enough gluten for structure. Ensure both the first and second rises are allowed to fully complete, leading to a light, airy texture and avoiding a gummy interior.
Serving Suggestions & Storage Tips
Enjoying Your Warm Sweet Glazed Buns
These Sweet Glazed Buns are absolutely divine warm, fresh from the oven, perhaps with a steaming cup of coffee or tea. They make for a perfect breakfast pastry, a delightful afternoon treat, or a simple yet impressive dessert to share with loved ones.
Those same principles of using quality ingredients apply when you move from sweet to savory with these golden skillet dinner rolls.
Keeping Them Fresh: Storage Guidelines
Store leftover buns in an airtight container at room temperature for up to 2-3 days to maintain their softness. For that fresh-baked feel, reheat them briefly in the microwave. For longer storage, freeze unglazed or fully glazed buns in an airtight bag for up to 1 month. Thaw at room temperature before serving.
Make-Ahead Magic: Prep for Future Cravings
You can prepare the dough through the first rise, then punch it down, shape the buns, and refrigerate overnight (up to 12 hours). Let them come to room temperature and complete their second rise (this may take longer than usual) before baking. This is perfect for enjoying fresh morning buns with minimal morning effort!
Frequently Asked Questions About Sweet Glazed Buns
Can I use rapid-rise yeast instead?
Yes, you can use rapid-rise (instant) yeast. You won’t need to activate it with sugar and milk first; you can mix it directly with the dry ingredients. However, proofing times may be slightly shorter, so keep a close eye on the dough to prevent over-proofing.
What if I don’t have a stand mixer?
No stand mixer? No problem! Kneading by hand is perfectly fine and quite therapeutic. It will take a bit longer, typically 8-10 minutes of continuous kneading, but the result will be just as delicious and satisfying. Just ensure you develop that smooth, elastic dough.
Can I make these dairy-free?
Yes, you can substitute plant-based milk (like almond or soy milk) for the cow’s milk and a plant-based butter alternative for the unsalted butter. The texture might vary slightly, but they will still be wonderfully sweet and soft, making them accessible for various dietary needs.
How do I know when the buns are perfectly baked?
The buns are done when they are golden brown on top and feel light when gently lifted. An internal temperature of about 200-205°F (93-96°C) is also a good indicator, though visual cues are often sufficient to avoid overbaking and maintain their tender crumb.
Ready to Bake? Share Your Sweet Glazed Buns Success!
Now that you’re armed with the secrets to crafting truly irresistible Sweet Glazed Buns, it’s time to get baking! This recipe promises a delightful experience, yielding buns that are wonderfully soft, perfectly sweet, and incredibly satisfying. We can’t wait for you to experience the joy of biting into your own homemade batch.
What to Serve with Sweet Glazed Buns
If you are in a baking mood, these soft buns pair nicely with other fried or glazed treats for a full spread.
- For a lighter, non-greasy option with the same sugary finish, try these Fluffy Cinnamon Sugar Donuts.
- For bite-sized snacks that share that golden, fluffy texture, make a batch of Glazed Donut Holes to serve alongside.
Don’t forget to share your Sweet Glazed Buns masterpieces with us on social media, or leave a comment below with your favorite baking tips or questions. Happy baking!

Sweet Glazed Buns
Course: BakingCuisine: AmericanDifficulty: medium12
buns30
minutes15
minutes120
kcal180
minutesDiscover the secret to making incredibly soft, moist, and wonderfully sweet buns every single time. This recipe cracks the code to perfect texture and taste, ensuring your homemade glazed buns are never dry or dense. Enjoy a warm, tender treat with a delightful sweet glaze.
Ingredients
1 cup warm milk (about 105-115 degrees F)
2 1/4 teaspoons active dry yeast (one standard packet)
1/4 cup granulated sugar, plus 1 teaspoon
1 large egg, room temperature
1/4 cup unsalted butter, melted and cooled slightly
1 teaspoon salt
3 1/2 cups all-purpose flour, plus more for dusting
For the Glaze:
1 1/2 cups powdered sugar
3-4 tablespoons milk or water
1/2 teaspoon vanilla extract (optional)
Directions
- In a large bowl, combine the warm milk, 1 teaspoon of granulated sugar, and the active dry yeast. Stir gently and let it sit for 5-10 minutes until foamy. This confirms your yeast is active.
- Add the remaining 1/4 cup granulated sugar, egg, melted butter, and salt to the yeast mixture. Whisk until well combined.
- Gradually add the all-purpose flour, about 1 cup at a time, mixing with a wooden spoon or a stand mixer with a dough hook until a shaggy dough forms.
- Turn the dough out onto a lightly floured surface and knead for 8-10 minutes, or use a stand mixer with a dough hook for 6-8 minutes, until the dough is smooth, elastic, and no longer sticky. It should spring back slowly when you gently poke it. (This thorough kneading is key for developing gluten, which traps moisture and air, making the buns tender, not dense.)
- Lightly grease a clean large bowl. Place the dough in the bowl, turning once to coat. Cover the bowl with plastic wrap or a clean kitchen towel and let it rise in a warm, draft-free place for 1 to 1 1/2 hours, or until doubled in size. (Proper proofing allows the yeast to create enough gas to make the buns light and airy.)
- Once the dough has doubled, gently punch it down to release the air. Divide the dough into 12 equal pieces. Roll each piece into a smooth, round ball.
- Arrange the dough balls on a baking sheet lined with parchment paper, leaving some space between them. Cover loosely with plastic wrap or a kitchen towel and let them rise again for another 30-45 minutes, or until visibly puffy and almost doubled in size. (This second rise is crucial for that soft, airy texture, ensuring they don’t come out flat or gummy.)
- Preheat your oven to 375 degrees F (190 degrees C).
- Bake the buns for 12-15 minutes, or until golden brown on top and cooked through. (Avoid overbaking, as this can dry out the buns. They should be just lightly golden.)
- While the buns are baking, prepare the glaze: In a medium bowl, whisk together the powdered sugar, 3 tablespoons of milk or water, and vanilla extract (if using) until smooth. Add more liquid one teaspoon at a time if needed to reach a thick but pourable consistency.
- As soon as the buns come out of the oven, transfer them to a wire rack set over a tray. Generously drizzle or brush the warm buns with the prepared glaze. The warmth of the buns helps the glaze spread evenly and creates that beautiful, shiny finish. Let the glaze set for a few minutes before serving.
Notes
- Key to soft, airy buns: activate yeast, thoroughly knead, and allow two full rises.