Dreamy Chocolate Mousse: The Secret to Irresistible Fluffiness
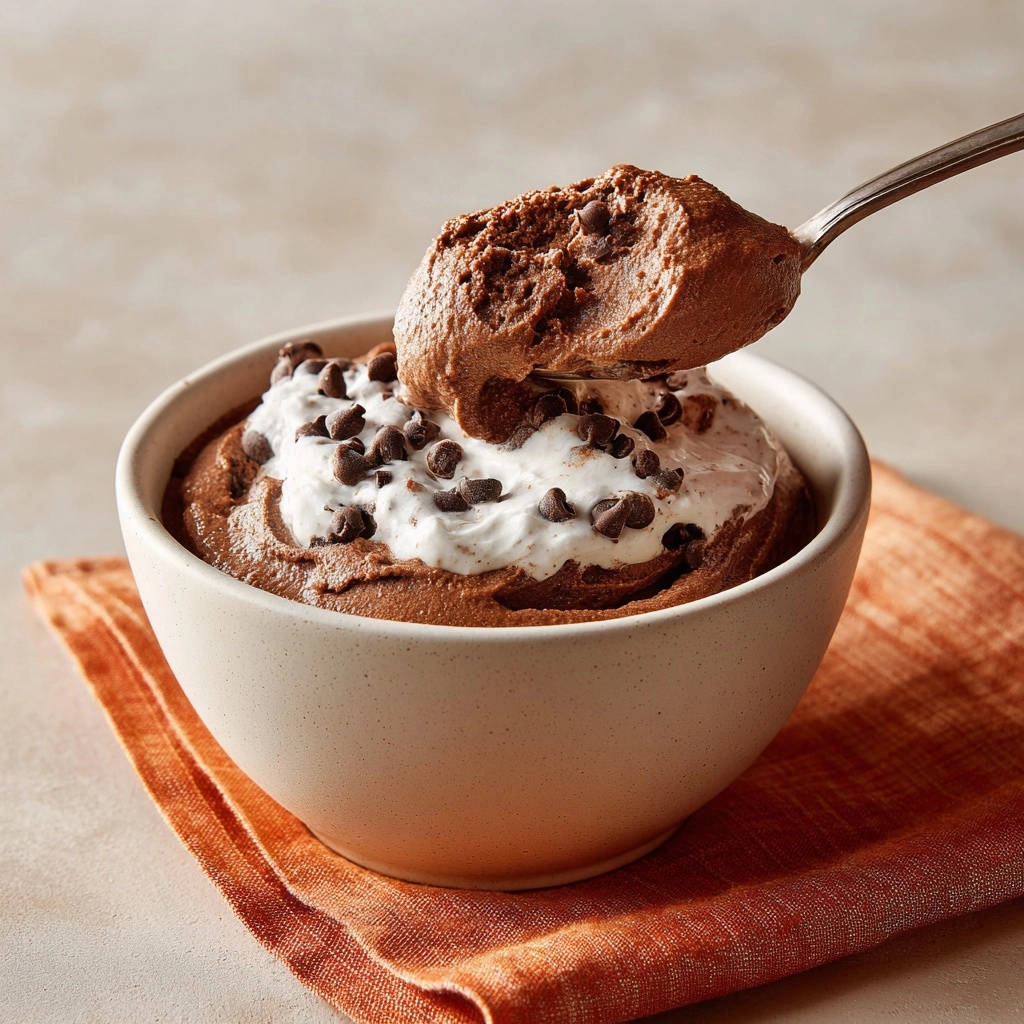
Achieving a truly airy, melt-in-your-mouth chocolate mousse often feels like an elusive dream for home cooks. I’ve personally refined this recipe for Dreamy Chocolate Mousse to overcome those common hurdles, guaranteeing a consistently light and fluffy texture without fail.
Trust me, you’re about to create an effortlessly elegant dessert that truly delights, turning every spoonful into an unforgettable experience.
Beyond Basic: What Makes This Dreamy Chocolate Mousse So Special?
Say Goodbye to Dense Mousse!
This recipe conquers the common challenge of dense mousse, promising a consistently light and airy result every time.
Simple Steps, Guaranteed Success
Designed for home cooks, the clear, detailed steps ensure even beginners can achieve perfect, restaurant-quality mousse without hassle.
The Secret to Fluffy Perfection
Discover the crucial folding technique and temperature control that are key to preventing cream deflation and creating that signature fluffiness.
Gather Your Essentials: Ingredients for Dreamy Chocolate Mousse
Dark Chocolate: The Soul of Your Mousse
Opt for good quality dark chocolate, whether finely chopped from a bar or using chocolate chips, as its flavor forms the core of your dessert.

A higher cocoa percentage will yield a richer, more intense chocolate flavor, while a slightly less intense dark chocolate can be mellowed with the cream.
Heavy Whipping Cream: The Secret to Airy Lift
Cold heavy whipping cream is non-negotiable for achieving the desired volume and light texture, so ensure it’s well-chilled.
The high-fat content is crucial for stable peaks that hold their shape and support the mousse.
Sweetness and Flavor: Powdered Sugar & Vanilla
Powdered sugar (confectioners’ sugar) dissolves easily, preventing graininess and contributing to a smooth mouthfeel.
Vanilla extract enhances the chocolate flavor, adding a warm, aromatic depth that complements the richness.
Garnish: The Final Flourish
Mini chocolate chips are a classic choice for garnish, adding a pleasant textural contrast and visual appeal.
Consider an extra dollop of fresh whipped cream for an even more luxurious presentation.
Essential Tools for Your Mousse-Making Adventure
Mixing Bowls: Multiple Sizes Are Key
You’ll need a microwave-safe bowl for melting chocolate and at least two other mixing bowls-one small for initial cream whipping and one larger for the bulk of the cream.
Electric Mixer: Your Arm Saver
An electric hand mixer or a stand mixer with a whisk attachment is highly recommended for quickly and efficiently whipping the heavy cream to the correct consistency.
Rubber Spatula: The Gentle Folder
A flexible rubber spatula is indispensable for gently folding ingredients, ensuring you don’t deflate the air you’ve painstakingly incorporated.
Your Path to Dreamy Chocolate Mousse Perfection: Step-by-Step
Mastering the Melt: Cooling Your Chocolate
In a microwave-safe bowl, melt the finely chopped dark chocolate or chocolate chips in 30-second bursts, stirring thoroughly after each interval until completely smooth.
Crucially, allow the melted chocolate to cool at room temperature for about 10 minutes; it should still be liquid but no longer hot to the touch, preventing premature melting of the cream.
Initial Whipping: Soft Peaks for Blending
While the chocolate cools, pour 1/4 cup of the very cold heavy whipping cream into a small bowl and beat it with an electric mixer on medium-high speed until soft peaks begin to form.
These soft peaks provide a stable base for incorporating the chocolate without immediately deflating the mixture.
The Gentle Fold: Chocolate and Cream Unite
Add the slightly cooled, melted chocolate to the bowl containing the 1/4 cup of whipped cream.
Using a rubber spatula, gently fold the chocolate and cream together until they are just combined, being careful not to overmix and preserve the lightness.
Set this chocolate mixture aside while you prepare the remaining cream.
Building Firm Peaks: The Base of Fluffiness
In a separate, larger bowl, combine the remaining 1 1/2 cups of cold heavy whipping cream with the powdered sugar and vanilla extract.
Beat on medium-high speed until firm, stiff peaks form, ensuring the cream is thick and holds its shape perfectly.
The Crucial Folding Technique: Achieving Airiness
This is the “key to fluffiness”: add about one-third of the firm-peak whipped cream to the chocolate mixture.
Gently fold it in with a rubber spatula using an upward, circular motion until mostly combined, being careful not to overmix.
In two more additions, fold in the remaining whipped cream, stopping as soon as no white streaks remain to maintain maximum airiness.
Chill Time: Letting Your Mousse Set
Carefully spoon the prepared mousse into individual serving bowls or a larger serving dish, ensuring an even distribution.
Cover the dishes and refrigerate for a minimum of 2 hours, or until the mousse is perfectly set and firm.
Garnish and Serve: The Grand Finale
Before serving, enhance your mousse with an optional extra dollop of fresh whipped cream and a generous sprinkle of mini chocolate chips for visual appeal and textural contrast.
Serve chilled and enjoy your perfectly light and fluffy creation!
If you enjoy working with chocolate, the same high-quality cocoa works beautifully in this dark chocolate mousse as well.
Chef’s Secrets: Elevate Your Chocolate Mousse Game
Temperature is Key: Why Cooling Matters
Ensuring your melted chocolate is cooled to room temperature (but still liquid) before combining with the cream is vital; hot chocolate will instantly melt and deflate the whipped cream.
The Art of Gentle Folding: Don’t Deflate!
Folding is the most crucial step for airy mousse. Always use a rubber spatula and a light hand, gently lifting from the bottom of the bowl and turning over, preserving as much air as possible.
Chill Everything: Boost Your Whipping Power
For best results, chill your mixing bowl and electric mixer whisk attachments for 10-15 minutes before whipping the heavy cream; colder cream whips faster and to a more stable consistency.
Choosing Your Chocolate: Quality Makes a Difference
The flavor of your mousse is only as good as your chocolate. Invest in good quality dark chocolate (around 60-70% cocoa) for a rich, well-balanced taste that isn’t overly bitter or sweet.
Mousse Mishaps Solved: Common Chocolate Mousse Issues
My Mousse is Too Dense!
This usually indicates overmixing during the folding stage, which deflates the air from the whipped cream. Ensure you fold gently and stop as soon as no white streaks remain.
Another culprit could be adding warm chocolate to the whipped cream, causing it to melt and lose its volume. Always cool your melted chocolate sufficiently.
My Mousse Won’t Set!
Insufficient whipping of the heavy cream is a common cause; ensure your cream reaches firm peaks, holding its shape before folding.
Also, ensure you’ve chilled the mousse for the recommended time (at least 2 hours) or longer, as proper chilling is essential for it to firm up.
Chocolate is Clumpy in My Mousse
This typically happens if your melted chocolate was too cold or began to seize before being incorporated. Ensure it’s still liquid and smooth when you begin folding it with the initial whipped cream.
Making the Most of Your Dreamy Chocolate Mousse
Elegant Serving Suggestions
Serve individual portions in clear glass cups or delicate ramekins to showcase the beautiful layers and texture.
Consider garnishing with fresh berries like raspberries or strawberries, a dusting of cocoa powder, or a sprig of fresh mint for extra flair.
This folding method is the same one used to keep the airy texture in these mason jar chocolate mousse parfaits.
Storage Solutions for Freshness
Cover any leftover mousse tightly with plastic wrap directly touching the surface to prevent a skin from forming and keep it fresh.
Store your chocolate mousse in the refrigerator for up to 3-4 days, enjoying it chilled for the best texture and flavor.
Can I Make This Mousse Ahead?
Absolutely! This chocolate mousse is an ideal make-ahead dessert. Prepare it up to 1-2 days in advance and keep it covered in the refrigerator.
In fact, a longer chill time often allows the flavors to meld and the texture to firm up even more beautifully, making it perfect for entertaining.
Dreamy Chocolate Mousse FAQs: Your Questions Answered
What’s the best type of chocolate to use for this recipe?
For the best flavor, a high-quality dark chocolate with 60-70% cocoa solids is recommended. This provides a rich chocolate taste that balances well with the sweetness of the cream.
You can use a semi-sweet chocolate if you prefer a less intense flavor, but avoid milk chocolate as it may be too sweet and less stable.
Can I use a stand mixer instead of a hand mixer?
Yes, absolutely! A stand mixer with a whisk attachment works wonderfully for whipping the heavy cream. Just be sure to monitor it closely as stand mixers can whip cream very quickly to avoid over-whipping.
How long does chocolate mousse last in the refrigerator?
When properly covered and stored in the refrigerator, this chocolate mousse will stay fresh and delicious for about 3 to 4 days.
Beyond that, the texture and freshness may start to diminish, especially if it’s not well-sealed.
Can I make this recipe dairy-free or vegan?
While this specific recipe relies on dairy heavy whipping cream, you can adapt it. Look for solid recipes that use full-fat canned coconut cream (chilled overnight) as a substitute for the heavy cream, and ensure your dark chocolate is dairy-free.
Ready to Indulge? Your Dreamy Chocolate Mousse Awaits!
You’ve now unlocked the secrets to creating a truly dreamy chocolate mousse – one that’s light, airy, intensely flavorful, and never disappoints. This recipe is more than just a dessert; it’s an experience that promises to impress, whether you’re treating yourself or delighting guests.
What to Serve with Your Chocolate Mousse
If you’re looking for ways to round out a dessert spread built around that fluffy chocolate mousse, these two recipes bring contrasting textures and flavors that work well together.
- For a warm, crunchy contrast to the cold mousse, try a S’mores French Toast Stack with its crispy edges and melty marshmallow center.
- Bright citrus cuts through the richness of the chocolate, so a Glazed Orange Almond Muffin adds a fruity, nutty note that keeps the meal from feeling too heavy.
Don’t let the allure of perfectly fluffy mousse remain a dream. Gather your ingredients, follow these expert tips, and prepare to create a culinary masterpiece. We can’t wait to see your delightful creations!
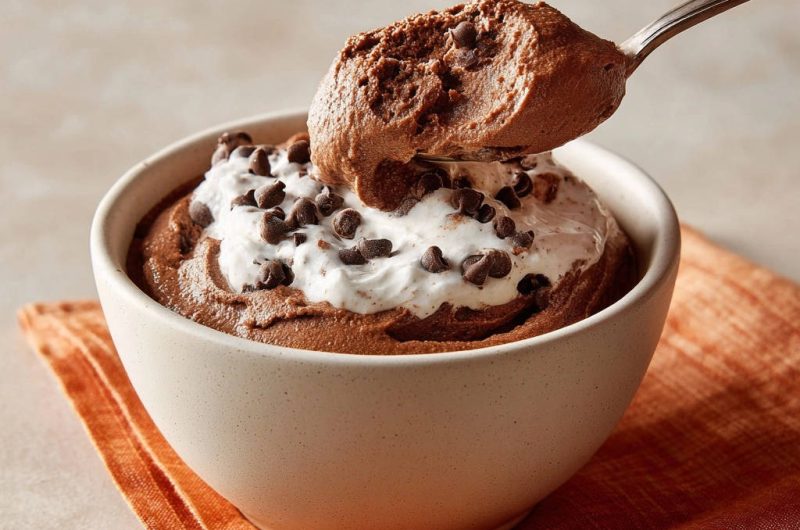
Chocolate Mousse
Course: DessertCuisine: AmericanDifficulty: easy4
servings25
minutes450
kcal120
minutesDiscover the secret to perfectly light and fluffy chocolate mousse that holds its shape. This foolproof recipe guarantees an airy texture every time, avoiding common pitfalls. Prepare for a truly dreamy dessert!
Ingredients
6 ounces dark chocolate, finely chopped or chocolate chips
1 3/4 cups cold heavy whipping cream, divided
1/4 cup powdered sugar (confectioners’ sugar)
1 teaspoon vanilla extract
2 tablespoons mini chocolate chips, for garnish
Directions
- In a microwave-safe bowl, melt the chopped dark chocolate in 30-second intervals, stirring after each, until smooth. This usually takes about 1 to 2 minutes. Let the melted chocolate cool slightly at room temperature for 10 minutes. It should still be liquid but not hot to the touch. This step is crucial for preventing the cream from deflating.
- While the chocolate cools, pour 1/4 cup of the cold heavy whipping cream into a small bowl. Using an electric mixer, beat on medium-high speed until soft peaks form.
- Add the slightly cooled melted chocolate to the bowl with the 1/4 cup of whipped cream. Gently fold them together with a spatula until just combined. Do not overmix; we want to preserve the air in the cream. Set this chocolate mixture aside.
- In a separate, larger bowl, pour the remaining 1 1/2 cups of cold heavy whipping cream. Add the powdered sugar and vanilla extract. Beat on medium-high speed until firm peaks form. The cream should be thick and hold its shape.
- Now for the key to fluffiness: Add about one third of the firm-peak whipped cream to the chocolate mixture. Gently fold it in using a rubber spatula, moving from the bottom up and over, until mostly combined. Then, add the remaining whipped cream in two more additions, folding very gently after each. The goal is to incorporate the chocolate without deflating the airy whipped cream. Stop folding as soon as no white streaks remain. Overmixing will make your mousse dense.
- Spoon the mousse into individual serving bowls or a larger serving dish. Cover and chill in the refrigerator for at least 2 hours, or until set.
- Before serving, garnish with an extra dollop of whipped cream (if desired) and sprinkle generously with mini chocolate chips. Enjoy your perfectly light and fluffy chocolate mousse!
Notes
- Ensure melted chocolate is cool but liquid before folding to prevent deflating the cream. Gentle folding is crucial for an airy texture.