Classic Snickerdoodles: Your Guide to Fluffy, Never-Dry Bites
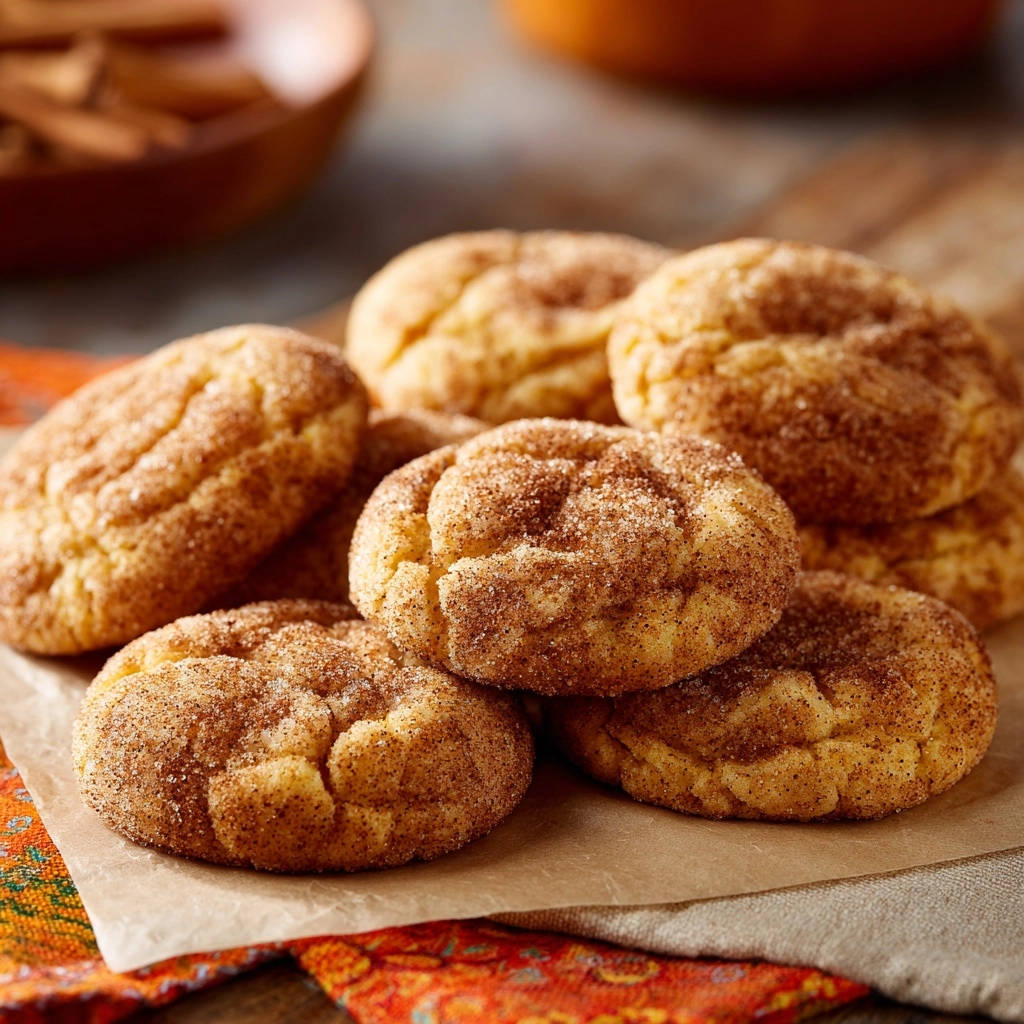
For years, I faced the same challenge many home bakers do: my Classic Snickerdoodles would often turn out disappointingly flat or even dry, missing that signature soft, chewy texture. After countless batches and careful adjustments, I finally unlocked the secret to consistently perfect snickerdoodles every single time, and this recipe shares that simple, game-changing trick.
Get ready to bake the most irresistible, pillowy cinnamon-sugar cookies that truly embody the comforting spirit of these beloved treats.
What Makes These Classic Snickerdoodles Unforgettable?
This recipe for Classic Snickerdoodles isn’t just another cookie recipe; it’s a meticulously crafted guide to perfection. We eliminate common baking blunders that lead to sad, flat, or crumbly results.
Our focus is on delivering a cookie with an exquisitely soft and chewy interior, complemented by a delightfully crackled, cinnamon-sugar exterior. The key lies in a simple, yet often overlooked, dough-chilling technique that prevents spreading and locks in moisture.
You’ll also discover the precise role of cream of tartar, lending that distinctive tangy flavor and contributing significantly to the tender crumb of these chewy snickerdoodles.
Essential Tools for Snickerdoodle Success
Having the right equipment ensures a smoother baking process and more consistent results. Here’s what you’ll need to master this snickerdoodle recipe.
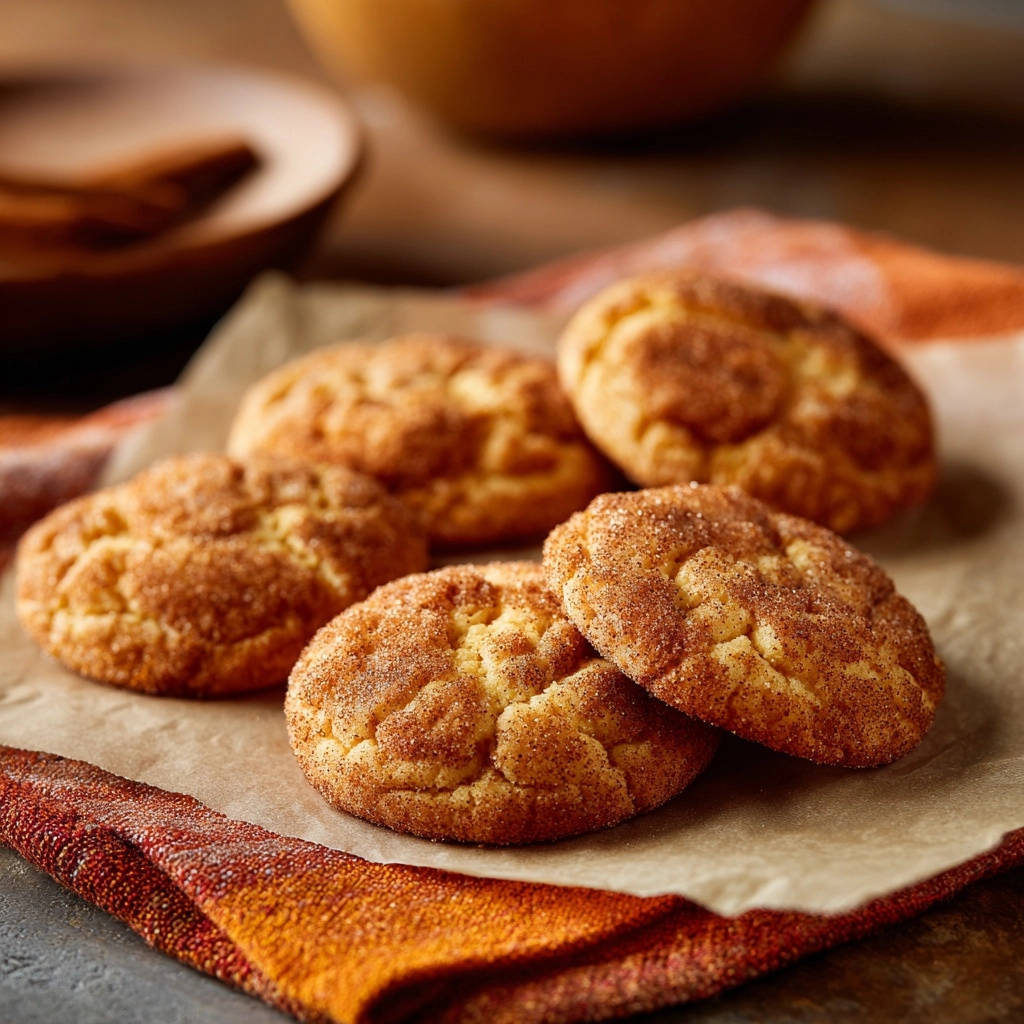
Your Baking Arsenal: Must-Have Gear
Large Mixing Bowls: Essential for combining wet and dry ingredients without overflow.
Electric Mixer: A handheld or stand mixer is crucial for creaming butter and sugar until light and fluffy.
Baking Sheets: Sturdy sheets that distribute heat evenly are vital for consistent baking.
Parchment Paper: Prevents sticking, ensures easy cleanup, and promotes even browning.
Cookie Scoop: (Optional but highly recommended) Ensures uniform cookie size for even baking.
The Star Ingredients: Crafting Your Perfect Snickerdoodles
Each ingredient plays a vital role in achieving the perfect texture and flavor of our Classic Snickerdoodles.
Flour & Leavening: The Structural Foundation
All-Purpose Flour: Provides the fundamental structure for these cookies. Measure it correctly by spooning it into your measuring cup and leveling it off.
Cream of Tartar: This acidic leavening agent is the secret to the unique tangy flavor and contributes significantly to the characteristic chewy texture of snickerdoodles. It also reacts with baking soda to create that signature soft rise.
Baking Soda: Works in conjunction with cream of tartar to leaven the cookies, giving them their soft, airy lift.
Salt: A small but mighty ingredient, salt balances the sweetness and enhances all the other flavors.
Butter & Sugar: The Creamy Heart
Unsalted Butter, Softened: Using unsalted butter allows you to control the salt content precisely. Softened butter is critical for proper creaming, incorporating air, and creating a tender crumb.
Granulated Sugar: Divided between the dough and the iconic cinnamon-sugar coating, it provides sweetness and helps with browning and texture.
Eggs & Vanilla: Binding and Aroma
Large Eggs: Act as a binder, adding richness, moisture, and contributing to the cookie’s structure and chewiness. Ensure they are at room temperature for better emulsion.
Vanilla Extract: A crucial flavor enhancer, vanilla deepens the warmth and sweetness of the cookies.
That Iconic Cinnamon-Sugar Swirl
Ground Cinnamon: The star of the coating! A generous amount creates the aromatic, spicy-sweet crust that defines snickerdoodles.
Granulated Sugar (for coating): Mixed with cinnamon, this creates the irresistible, crackled exterior.
From Dough to Delight: Your Step-by-Step Baking Journey
Follow these detailed steps to create perfectly soft and chewy snickerdoodles every time.
- Whisk Dry Ingredients:
In a medium bowl, whisk together the 2 and 3/4 cups all-purpose flour, 2 teaspoons cream of tartar, 1 teaspoon baking soda, and 1/2 teaspoon salt. Whisking ensures these dry ingredients are thoroughly combined and evenly distributed, which is essential for consistent texture and flavor throughout your Classic Snickerdoodles.
- Cream Butter and Sugar:
In a large bowl, use an electric mixer to cream together the 1 cup softened unsalted butter and 1 and 1/4 cups of the granulated sugar. Beat this mixture until it’s noticeably light and fluffy, which usually takes about 3-5 minutes.
This creaming step is foundational: it incorporates essential air into the butter and sugar, creating pockets that will expand during baking. This process is absolutely crucial for achieving a soft, airy cookie that holds its shape and doesn’t spread too thin.
- Incorporate Eggs & Vanilla:
Beat in the 2 large eggs one at a time, mixing well after each addition to fully incorporate them into the butter mixture. Then, stir in the 1 teaspoon vanilla extract. This ensures the eggs are evenly distributed, adding richness and moisture.
- Combine Wet and Dry:
Gradually add the whisked dry ingredients to the wet mixture, mixing on low speed with your electric mixer until just combined. It’s vital not to overmix at this stage.
Overmixing can develop the gluten in the flour too much, leading to a tough, dense cookie rather than the desired soft and chewy texture of Classic Snickerdoodles.
- The Secret Chill: Refrigerate Dough:
This is the most crucial step for perfect Classic Snickerdoodles! Cover the dough tightly with plastic wrap and refrigerate it for at least 30 minutes, or up to 2 hours.
This chilling process allows the butter to firm up within the dough, which significantly reduces spreading in the oven. The result is a thicker, softer, and chewier cookie, preventing those common flat, dry snickerdoodle disappointments.
- Prepare for Baking:
While the dough chills, preheat your oven to 375 degrees F (190 degrees C). Line your baking sheets with parchment paper; this prevents sticking and makes cleanup a breeze.
- Craft the Cinnamon-Sugar Coating:
In a small, shallow dish, combine the remaining 1/4 cup granulated sugar and 2 tablespoons of ground cinnamon. Stir well to ensure the cinnamon is evenly distributed throughout the sugar.
- Scoop and Roll:
Once chilled, scoop the dough into uniform 1-inch balls. For consistent size, a cookie scoop is ideal. Roll each dough ball generously in the cinnamon-sugar mixture until it’s fully coated on all sides. This generous coating ensures that iconic, crackled snickerdoodle crust.
- Arrange on Sheets:
Place the coated dough balls about 2 inches apart on the prepared baking sheets. This spacing allows the cookies to spread slightly without merging into one another.
- Bake to Perfection:
Bake for 8 to 10 minutes, or until the edges of the cookies are set and lightly golden, but the centers still look slightly soft and puffy. Do not overbake! This is another key to avoiding dry cookies.
The cookies will continue to set and firm up as they cool on the baking sheet, so pulling them out when the centers are still a bit soft ensures ultimate chewiness.
- Cool and Enjoy:
Let the Classic Snickerdoodles cool on the baking sheets for a few minutes. This allows them to firm up enough to be transferred without breaking.
Then, carefully transfer them to a wire rack to cool completely. Enjoy these warm, soft snickerdoodles with a glass of milk!
If you enjoy working with warm spices, you might also like these soft ginger molasses cookies.
Chef’s Secrets: Elevating Your Snickerdoodle Game
Beyond the steps, these insights will truly perfect your Classic Snickerdoodles.
The Magic of Chilling: Why You Can’t Skip It
Dough chilling is not an optional step; it’s a game-changer for these chewy snickerdoodles. Cold butter melts slower in the oven, meaning your cookies spread less and retain a thicker, chewier texture.
Chilling also allows the flour to fully hydrate, resulting in a more tender crumb and a richer, more developed flavor. This simple wait transforms good cookies into unforgettable ones.
Perfectly Creamed: The Key to Airiness and Softness
The initial creaming of butter and sugar is more than just mixing; it’s about aeration. Beating them until “light and fluffy” incorporates tiny air pockets that create a light, soft structure.
Skimping on this step can lead to denser, flatter cookies. Take your time here; it’s the foundation for a truly airy snickerdoodle.
Resist the Urge: Avoid Overmixing and Overbaking
Two common pitfalls can ruin your Classic Snickerdoodles. Overmixing the flour develops gluten, which toughens the cookies. Mix only until the ingredients are just combined.
Overbaking, even by a minute or two, will dry out your snickerdoodles and make them crumbly. Look for set edges and slightly soft centers, knowing they will firm up as they cool.
Uniform Scooping for Even Baking
Using a cookie scoop ensures all your dough balls are the same size. This consistency is crucial for uniform baking, guaranteeing every snickerdoodle bakes perfectly in the same amount of time.
Generous Cinnamon-Sugar Coating for Maximum Flavor
Don’t be shy with the cinnamon-sugar coating! A thick, even layer is what gives these classic snickerdoodles their iconic crackled appearance and burst of spiced sweetness.
Ensure the dough balls are well-coated on all sides for the best flavor and texture contrast.
Snickerdoodle SOS: Solving Common Baking Blunders
Even seasoned bakers encounter issues. Here’s how to troubleshoot common snickerdoodle problems.
Why Are My Snickerdoodles Flat?
Flat cookies are often caused by butter that’s too soft, dough that wasn’t sufficiently chilled, or an imbalance in leavening agents. Always ensure your butter is softened but still cool, and strictly adhere to the dough chilling time.
If your baking soda or cream of tartar is old, they might not be active enough; check their expiration dates.
My Cookies Are Too Dry or Crumbly!
The main culprits for dry or crumbly snickerdoodles are overbaking or overmixing the dough. Remember to pull the cookies from the oven when their centers are still slightly soft.
Also, ensure you’re accurately measuring flour; too much dry ingredient can lead to a crumbly texture.
Why Aren’t They Tangy Enough?
The distinctive tang of Classic Snickerdoodles comes from cream of tartar. If your cookies lack this signature flavor, check the freshness of your cream of tartar.
An expired or old batch may have lost its potency, failing to deliver the desired bright note.
The Cinnamon-Sugar Coating Keeps Falling Off
If the coating isn’t sticking, your dough might be too dry or too warm. Ensure your dough is properly chilled, as colder dough provides a better surface for the cinnamon-sugar to adhere to.
Gently but firmly roll each ball to embed the coating securely.
Beyond the Bake: Serving, Storing, and Sharing
Extend the enjoyment of your perfectly baked Classic Snickerdoodles with these tips.
Best Ways to Enjoy Your Classic Snickerdoodles
These soft snickerdoodles are divine simply warm from the oven with a tall glass of cold milk. They also pair wonderfully with a hot cup of coffee or tea for a cozy treat.
For an extra indulgent dessert, serve them alongside a scoop of vanilla bean ice cream, allowing the cookie’s warmth to slightly melt the ice cream.
Keeping Them Fresh: Storage Tips
Once completely cooled, store your Classic Snickerdoodles in an airtight container at room temperature. They will retain their freshness and soft texture for up to 3-4 days.
If you love how the cream of tartar keeps these cookies soft, you’ll enjoy the fudgy texture of these triple chocolate chunk brownie cookies.
To keep them even softer, you can add half a slice of bread to the container; the cookies will absorb moisture from the bread.
Make-Ahead Magic: Preparing Dough in Advance
The snickerdoodle dough can be prepared ahead of time and refrigerated for up to 2-3 days. This actually enhances the flavors and further firms up the butter, often resulting in an even better texture.
You can also freeze pre-scooped, unbaked dough balls (without the cinnamon-sugar coating) for up to 3 months. When ready to bake, roll them in the coating while frozen and bake as directed, adding a few extra minutes to the baking time.
Your Burning Questions Answered: Classic Snickerdoodle FAQs
Can I Substitute Cream of Tartar?
While cream of tartar is key for the unique snickerdoodle tang and chew, you can try substitutes if absolutely necessary. A common alternative is 2 teaspoons of baking powder for every 1 teaspoon of cream of tartar and 1 teaspoon of baking soda.
Another option is to replace 1 teaspoon of cream of tartar with 1 teaspoon white vinegar or lemon juice, adding it to the wet ingredients. Be aware that these substitutions may slightly alter the signature flavor and texture.
How Do I Know When Snickerdoodles Are Done?
Look for cookies with edges that are set and lightly golden, while the centers still appear slightly soft and puffy. If they look completely firm and golden all over, they’ve likely been overbaked.
Remember, snickerdoodles continue to set and firm up significantly as they cool on the baking sheet.
Can I Make These Gluten-Free?
Yes, you can adapt this snickerdoodle recipe to be gluten-free. Substitute the all-purpose flour with a 1:1 gluten-free baking flour blend that contains xanthan gum.
Follow the rest of the recipe as written, but be mindful that gluten-free dough can sometimes be a bit more delicate or absorb moisture differently. Chilling the dough may be even more beneficial.
What’s the Best Way to Get Perfectly Round Cookies?
For consistently round Classic Snickerdoodles, use a cookie scoop to portion the dough. After rolling them in cinnamon-sugar, if any cookies spread unevenly during baking, you can gently reshape them using the back of a spoon or a round cookie cutter immediately after removing them from the oven while they are still warm and pliable.
Ready to Bake? Your Perfect Snickerdoodle Awaits!
You now have all the knowledge and expert tips to bake the most incredible Classic Snickerdoodles. This recipe isn’t just about ingredients and steps; it’s about understanding the ‘why’ behind each action, empowering you to create cookies that are truly perfect.
More Sweet Ways with Cinnamon
If you have snickerdoodle dough on your mind, here are two other cinnamon-forward treats that use similar pantry staples and baking methods.
- For a richer, more indulgent take on a cinnamon dough, these Ultra-Gooey Chocolate Cinnamon Rolls share the same cream of tartar tang but add a dark chocolate swirl.
- When you want the same soft, buttery crumb in a different shape, these Cinnamon Sugar Mini Loaves bake up with that classic cinnamon-sugar crust and a tender interior.
Go forth and bake with confidence! Share these delightful, soft, and chewy snickerdoodles with loved ones, and savor the comforting joy they bring. I can’t wait to hear how your baking journey unfolds!
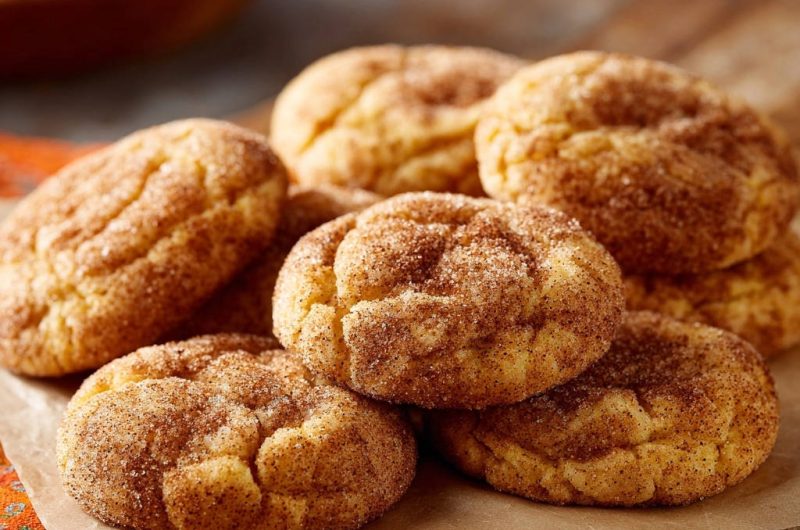
Snickerdoodles
Course: DessertCuisine: AmericanDifficulty: easy3
dozen cookies30
minutes10
minutes320
kcal60
minutesUnlock the secret to perfectly soft and chewy Snickerdoodles with this tried-and-true recipe. Say goodbye to flat, dry cookies and hello to a comforting classic that’s a delight every time. A simple trick ensures a beautiful texture you won’t believe!
Ingredients
2 and 3/4 cups all-purpose flour
2 teaspoons cream of tartar
1 teaspoon baking soda
1/2 teaspoon salt
1 cup unsalted butter, softened
1 and 1/2 cups granulated sugar, divided
2 large eggs
1 teaspoon vanilla extract
2 tablespoons ground cinnamon
Directions
- In a medium bowl, whisk together the flour, cream of tartar, baking soda, and salt. Set aside.
- In a large bowl, using an electric mixer, cream together the softened butter and 1 and 1/4 cups of the granulated sugar until light and fluffy, about 3-5 minutes. This important step incorporates air, which is essential for a soft cookie that doesn’t spread too thin.
- Beat in the eggs one at a time, then stir in the vanilla extract.
- Gradually add the dry ingredients to the wet ingredients, mixing on low speed until just combined. Do not overmix, as this can develop gluten and lead to a tough cookie.
- Crucial Step for Perfect Texture: Cover the dough and refrigerate for at least 30 minutes, or up to 2 hours. This chilling process is the secret to preventing flat, dry cookies. It allows the butter to firm up, which means the cookies will spread less in the oven, staying thicker, softer, and chewier.
- While the dough chills, preheat your oven to 375 degrees F (190 degrees C). Line baking sheets with parchment paper.
- In a small shallow dish, combine the remaining 1/4 cup granulated sugar and 2 tablespoons of ground cinnamon.
- Scoop the chilled dough into 1-inch balls. Roll each ball generously in the cinnamon sugar mixture until fully coated.
- Place the coated dough balls about 2 inches apart on the prepared baking sheets.
- Bake for 8 to 10 minutes, or until the edges are set but the centers still look slightly soft. Do not overbake! This is another key to avoiding dry cookies. They will continue to set as they cool.
- Let the cookies cool on the baking sheets for a few minutes before transferring them to a wire rack to cool completely.
Notes
- Chilling the dough for at least 30 minutes is crucial for soft, chewy cookies. Do not overbake; centers should look slightly soft.